
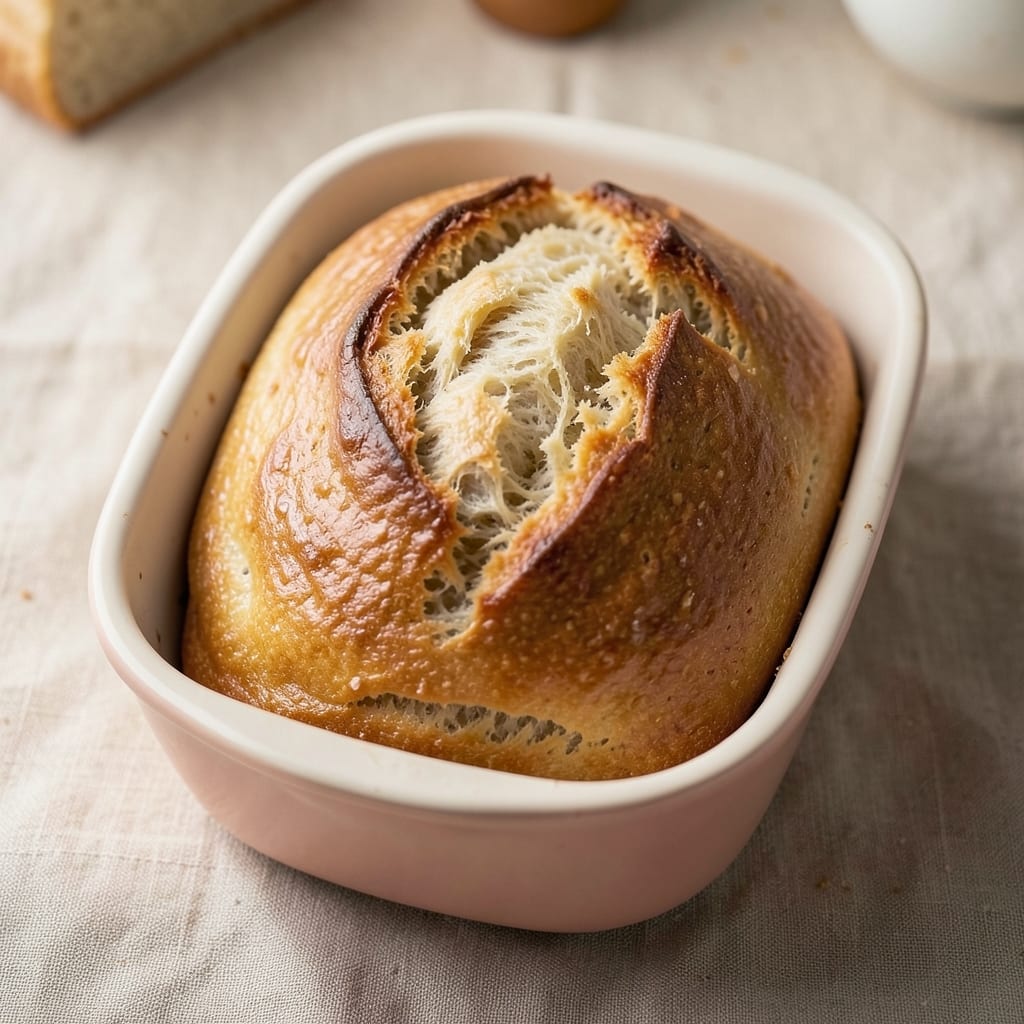
A 1lb white bread loaf with a crisp artisan crust and tender crumb is simpler to achieve than you’d think—no kneading required. This recipe transforms basic pantry staples into a loaf that rivals store-bought, with a method that respects both time and technique.
The secret lies in precise ingredient ratios and a relaxed proofing process that develops flavor without stressing your schedule.
What sets this recipe apart is the no-knead method, which eliminates guesswork while delivering professional results. You’ll work with warm water and instant yeast for quick activation, then let the dough rest while you handle other tasks.
The dough develops its own structure through natural gluten formation, yielding a loaf with an open crumb and satisfying chew.
By the time you pull it from the oven, you’ll have a golden-brown crust with a crisp exterior and a soft, even crumb inside—no dense center or gummy texture in sight.
The butter-infused dough adds subtle richness without overpowering the clean, mild flavor of white bread. This loaf is perfect for sandwiches, toast, or simply enjoying fresh from the oven.
Whether you’re a beginner or an experienced baker, this recipe delivers consistent results with minimal effort. The instructions are straightforward, and the process is forgiving enough to accommodate minor variations. Let’s get started on your first perfect loaf.
Ingredients for 1lb white bread loaf
Nine simple ingredients transform into a 1lb artisan loaf with crisp crust and tender crumb.
| Ingredient | Amount | Notes |
|---|---|---|
| All-Purpose Flour 🌾 | 3 ½ cups | Unbleached, spooned and leveled |
| Instant Yeast 🍞 | ¼ tsp | Single-use packet preferred |
| Granulated Sugar 🍚 | ¼ cup | White or light brown |
| Unsalted Butter 🧈 | ¼ cup | Cold, cubed, full-fat preferred |
| Large Eggs 🥚 | 1 whole | Room temperature |
| Warm Water 💧 | 1 ¼ cups | 110°F, not boiling |
| Diamond Crystal Kosher Salt 🧂 | 1 ½ tsp | Adjust to taste |
| Cornmeal 🌽 | 1 tbsp | For dusting loaf pan |
| Extra-Virgin Olive Oil 🫒 | 1 tbsp | For brushing crust |
The flour is your foundation—King Arthur or Gold Medal work best for that tender crumb, but any all-purpose will do. Instant yeast (not active dry) activates faster in warm water, cutting prep time. I always grab mine from Whole Foods or bulk bins at natural markets—freshness matters. The butter should be cold when you mix it in, or the dough gets too soft. For the water, 110°F is ideal—if it’s too hot, you’ll kill the yeast. Use a thermometer if you’re unsure, or just dip your finger in—should feel warm but not hot to the touch.
No instant yeast? Active dry yeast works at double the amount, but you’ll need to dissolve it in warm water first and let it foam for 5 minutes. Butter too warm? Chill it 10 minutes in the fridge. The sugar can be swapped for honey or maple syrup at half the amount, but white sugar gives that classic mild flavor. Short on olive oil? Melted butter works too—just brush it on lightly. The salt is crucial—Diamond Crystal is lighter than table salt, so use it as directed. If you only have table salt, cut it to half the amount.
This dough is forgiving—it can rest at room temp for up to 12 hours if you’re short on time. Shape it gently, don’t overwork it. For the loaf pan, cornmeal creates a crisp bottom crust—flour works too. Brush the crust with olive oil right before baking for that golden sheen. Leftovers? Toast within 3 days—fresh bread freezes poorly. Store wrapped at room temp for 2-3 days max.
Why You’ll Love This Recipe
- This loaf does it all: toast for breakfast, grilled cheese at lunch, sandwiches for dinner. Between us, I’ve even used it for French toast when I forgot to buy brioche. (Yes, even on a Tuesday night.)
- No-Knead Magic: I swear by this—just mix the flour, yeast, sugar, and butter, let it rise once, then bake. No standing at the counter, no aching arms. That little egg in the dough? It keeps it tender without overworking it.
- Buttery Soft Payoff: The cold butter cubes melt into fluffy pockets while baking. Honestly, the first slice out of the pan is worth the whole batch—crust just crisp enough to hold a sandwich, inside so pillowy it begs for peanut butter.
- Weeknight Swiss Army Knife: This loaf does it all: toast for breakfast, grilled cheese at lunch, sandwiches for dinner. Between us, I’ve even used it for French toast when I forgot to buy brioche. (Yes, even on a Tuesday night.)
Step-by-step instructions for artisan white bread without kneading
Here’s how to create a beautifully textured loaf with minimal effort—no kneading required.
Mix the Dough with Wet and Dry Ingredients
In a large mixing bowl, combine the 3.5 cups all-purpose flour, 0.25 tsp instant yeast, 0.25 cup granulated sugar, and 1.5 tsp diamond crystal kosher salt. Use a whisk to break up any flour clumps and create a uniform base. This dry mixture forms the structural foundation of your bread.
In a separate bowl, melt the 0.25 cup unsalted butter until fully liquid (microwave in 10-second bursts or melt over a double boiler). Let it cool slightly to 110°F—too hot and it will kill the yeast. Add the 1 whole large egg and whisk until smooth. Pour in the 1.25 cups warm water (test with your finger—should feel warm but not hot). Slowly pour this wet mixture into the dry ingredients while stirring with a wooden spoon.
Stir vigorously for 2-3 minutes until a shaggy, sticky dough forms. The dough will be thicker than traditional bread dough but still cohesive. This no-knead method relies on proper hydration and yeast activation rather than mechanical development. Let the dough rest for 10 minutes while you prepare your pan.
Shape and Proof the Dough
Lightly grease a 4×8-inch loaf pan with 1 tbsp extra-virgin olive oil (or use nonstick spray). Sprinkle 1 tbsp cornmeal evenly across the bottom—this prevents sticking and adds subtle texture. Transfer the dough to the prepared pan using a wet spatula, pressing gently to fill the pan completely. The dough will be soft and sticky, but resist the urge to overwork it.
Cover the pan tightly with plastic wrap and let it proof in a warm spot (75-80°F) for 1.5-2 hours. You’re looking for the dough to rise until it reaches the top of the pan and springs back slowly when gently pressed. A toothpick inserted into the center should come out clean. If your kitchen is cooler, extend the proofing time by 30 minutes. Overproofing here leads to dense bread, so keep an eye on it.
Bake for a Crispy Crust and Even Texture
Preheat your oven to 375°F and place a baking sheet on the lower rack. This creates steam during baking, which develops that coveted artisan crust. When the oven is fully heated, carefully transfer the dough-filled pan to the upper rack. Bake for 30-35 minutes until the top is deep golden brown and sounds hollow when tapped.
Here’s the pro tip: After 20 minutes, tent the loaf with aluminum foil to prevent over-browning if your oven runs hot. The internal temperature should reach 190-195°F at the center. If unsure, use an instant-read thermometer—this is more reliable than visual cues alone. The bread is done when the crust is crisp and the internal structure feels springy.
Cool and Slice for Maximum Freshness
Remove the bread from the oven and let it cool in the pan for 5 minutes before transferring to a wire rack. This brief rest prevents the loaf from collapsing as it sets. The bread will continue to firm up as it cools, developing its final texture. Resist the temptation to slice immediately—wait at least 1 hour for the crumb to fully develop. Cutting too soon results in a gummy interior.
For the best results, store any leftovers wrapped in a clean kitchen towel to maintain moisture. This bread tastes best within 2-3 days of baking, though it freezes beautifully for up to 3 months. The no-knead method yields a tender crumb with a satisfying chew, perfect for sandwiches or toasted slices. Each bite should reveal an even texture with a crisp exterior and soft, airy interior.
Pro Tips For Making 1lb White Bread Loaf
- Measure Butter Cold: Take that unsalted butter straight from the fridge—no softening needed—then grate or cube it directly into the flour. This keeps the dough from overworking and ensures even distribution of fat, which means a lighter crumb and better rise. (Yes, even if you’re impatient like me, resist the urge to speed this up.)
- Skip the Over-Kneading: Once the dough comes together, knead just until it’s smooth—about 5-6 minutes by hand or 3-4 minutes with a mixer. Overwork it, and the gluten tightens up, giving you a dense, chewy loaf instead of that soft, pillowy texture you’re after. Think “just combined,” not “perfectly elastic.”
- Proof at Room Temp: Let the dough rise in a warm spot (like a turned-off oven with a bowl of hot water inside) until it’s almost doubled—about 1-1.5 hours. Cold dough rises slower, and skipping this step guarantees a flat, sad loaf. Trust me, the extra time pays off.
- Brush with Butter: After baking, while the loaf is still hot, brush the top with melted unsalted butter. It’s not just for looks—this adds moisture and a subtle richness that dry bread lacks. (Bonus: Do this right out of the oven, or you’ll regret it later.)
Serving suggestions for this dish
Classic Sandwich Perfection
This bread shines in grilled cheese sandwiches—its crisp crust holds up beautifully to melted sharp cheddar or Gruyère when toasted in butter over medium heat.
For extra decadence, add thin slices of applewood-smoked bacon or caramelized onions. I always use a Lodge cast iron skillet for that perfect golden-brown sear. 🧀
For PB&J sandwiches, the soft interior contrasts perfectly with crunchy peanut butter (I recommend Skippy Natural) and strawberry jam. Toast lightly to enhance the flavors without overpowering the bread’s delicate texture. Pack these for lunches—they keep well for 4-5 hours in an insulated lunch bag.
Breakfast Toast Variations
Toast slices until golden brown and crisp—about 2-3 minutes per side in a toaster oven or toaster. Top with avocado mash and everything bagel seasoning, or spread with garlic-herb butter (mix softened butter with minced garlic, chives, and salt).
For a sweet treat, drizzle with honey and sprinkle with cinnamon. 🍯
For French toast, slice the bread ½-inch thick, soak in a mix of 2 eggs, ¼ cup milk, 1 tsp vanilla, and 1 tsp cinnamon, then pan-fry in butter until caramelized. The bread’s structure holds up beautifully without falling apart.
Garnish and Serve
Brush the warm loaf with melted butter or olive oil for extra richness. Sprinkle with flaky sea salt (like Maldon) and coarse black pepper right after baking for a restaurant-worthy finish.
Serve with warm honey butter (mix ½ cup softened butter with 2 tbsp honey and 1 tsp lemon juice) on the side. 🧂
Pair with soups like tomato basil or creamy potato leek—the bread’s texture soaks up broth beautifully. For a hearty meal, serve with roasted vegetables and a sharp cheddar cheese platter. Leftovers? Toast within 3 days for best texture.
Meal Prep Ideas
Slice the loaf and store in an airtight container with a paper towel to maintain freshness for 3-4 days. Freeze individual slices wrapped in plastic wrap for up to 3 months—perfect for quick toast or sandwiches later.
I often prep 2 loaves at once and freeze half for future meals. 🥖
Use as a base for crostini—top with whipped feta, sun-dried tomatoes, and balsamic glaze for an elegant appetizer. The bread’s neutral flavor lets toppings shine while providing structure. For kids, cut into fun shapes with cookie cutters before serving with peanut butter or cream cheese.
Nutrition facts
Frequently asked questions
Can I substitute all-purpose flour with bread flour?
While bread flour has more protein for chewier bread, this recipe is specifically designed for all-purpose flour to achieve that tender, soft texture. Using bread flour will make the loaf denser and less tender. If you must substitute, reduce it by 1-2 tablespoons to compensate for the extra protein. The no-knead method relies on the lower protein content for its signature soft crumb.
Why did my bread turn out dense instead of light?
Dense bread usually means one of three things: overproofing (dough rose too long), underproofing (not enough rise time), or using water that was too hot (killed the yeast). For this recipe, proof until the dough reaches the top of the pan and springs back slowly when pressed. If your kitchen is cool (below 70°F), extend proofing by 30-60 minutes. Always use 110°F water—never hot.
How do I adjust this recipe for a Dutch oven?
For a rustic loaf, shape the dough into a ball, place it in a greased Dutch oven, and bake at 450°F for 30-35 minutes with the lid on, then remove the lid and bake 10-15 minutes more. The steam creates a crisp crust and open crumb. Reduce the butter to 2 tablespoons since Dutch oven bread doesn’t need extra fat for moisture.
Can I make this bread without butter?
Yes! Replace the butter with 2 tablespoons olive oil or 2 tablespoons melted coconut oil (cooled to room temperature). The bread will still be tender but slightly less rich. For extra flavor, add 1 teaspoon garlic powder or 1 teaspoon dried herbs to the dough. The no-knead method works perfectly with oil-based substitutions.
How do I store leftovers to keep them fresh?
Wrap the loaf in a clean kitchen towel or beeswax wrap, then place it in a paper bag at room temperature for up to 3 days. For longer storage, slice and freeze individual portions in airtight containers for up to 3 months. Toast frozen slices directly from the freezer—no thawing needed! Never refrigerate; cold temperatures make bread stale faster.

- Baked Potatoes in Crock Pot Recipe: Buttery Interiors and Crispy Top Magic - November 1, 2026
- Braised Beef Short Ribs Recipe: Crock Pot Fall-Off-Bone Magic in 6 Hours - November 1, 2026
- Crock Pot Cocoa Recipe: Velvety Warmth With Hidden Spice Magic - November 1, 2026