
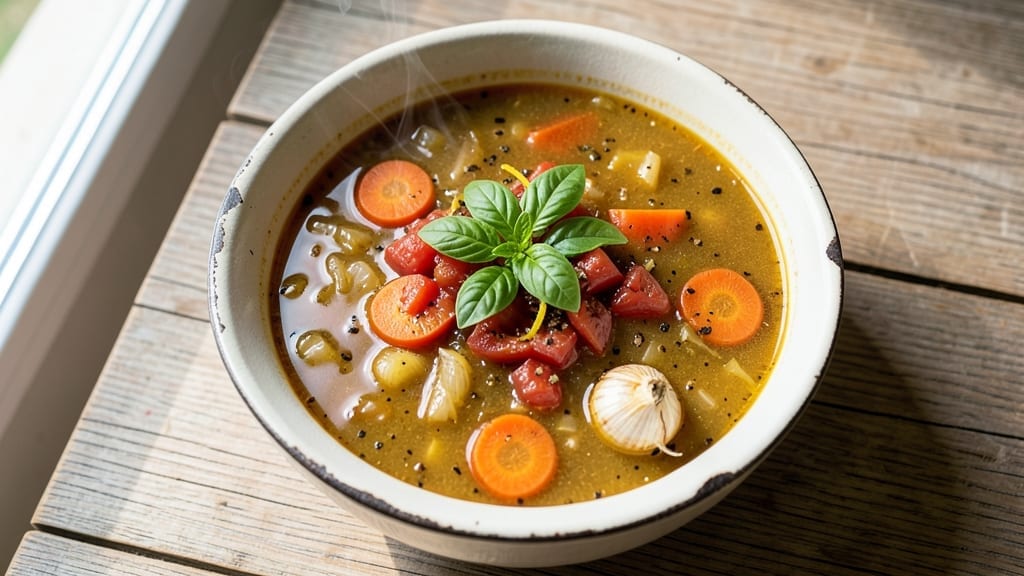
Transforming your weeknight meals into effortless, flavorful soups has never been simpler with this 7-day soup recipe plan designed to evolve daily while keeping prep under control.
The genius lies in a flexible base recipe that adapts to seasonal produce and dietary preferences, ensuring every bowl delivers satisfaction without the daily hassle. Each variation builds on the last, creating a week-long culinary journey that feels both structured and spontaneous.
This system eliminates guesswork by providing a foolproof framework—identical foundational techniques across all seven soups mean you’ll master one method and apply it effortlessly. Whether you’re stocking your freezer for busy weeks or simply craving variety, the prep strategy minimizes active time while maximizing flavor development.
The result? Soups that transition seamlessly from lunch to dinner, adapt to vegetarian or protein-rich preferences, and always taste like they simmered all day.
What sets this apart is the progressive flavor evolution: Day 1’s hearty tomato base transforms into Day 4’s creamy coconut curry, all while sharing the same efficient prep principles. Storage tips ensure minimal reheating effort, and serving suggestions—from crusty bread to garnishes—keep every bowl inviting.
The nutritional balance is built in, with options to boost protein or keep meals plant-forward.
Ready to reclaim your week with soups that feel like a five-star meal every day? The first recipe alone will change how you approach meal prep—restaurant-quality results with zero daily stress. Let’s begin with Day 1’s foundational tomato soup, where simplicity meets depth.
Ingredients for 7 day soup
Pantry staples meet fresh produce for soups that evolve daily with minimal effort.
| Ingredient | Amount | Notes |
|---|---|---|
| Yellow Onion 🧅 | 1 whole | Diced, medium size preferred |
| Carrots 🥕 | 3 medium | Peeled, sliced into 1/4-inch rounds |
| Garlic Cloves 🧄 | 4 cloves | Minced, fresh preferred |
| Canned Crushed Tomatoes 🍅 | 2 cups | San Marzano preferred, no salt added |
| Chicken Broth 💧 | 4 cups | Low-sodium, homemade or store-bought |
| Extra-Virgin Olive Oil 🫒 | 2 tbsp | For sautéing, fruity variety |
| Fresh Basil Leaves 🌿 | ¼ cup | Chopped, stems removed |
| Fresh Thyme 🌿 | 1 tbsp | Leaves only, or 1 tsp dried |
| Salt 🧂 | 1 tsp | Diamond Crystal kosher preferred |
| Black Pepper 🌶️ | ½ tsp | Freshly ground for best flavor |
| Whole-Grain Bread 🍞 | 4 slices | For serving, crusty preferred |
| Grated Parmesan Cheese 🧀 | ¼ cup | Freshly grated from block |
| Heavy Cream 🥛 | ¼ cup | For optional creaminess (Day 4) |
| Coconut Milk 🥥 | 1 cup | Full-fat, for Day 4 curry |
| Curry Powder 🌶️ | 1 tbsp | For Day 4 transformation |
The tomatoes and broth form the heart of this system—San Marzano cans from Trader Joe’s or Whole Foods deliver the best flavor, but any no-salt-added brand works. Fresh thyme and basil? Grab them from the grocery store’s refrigerated section—they keep for days if wrapped in damp paper towels. The carrots can be baby carrots if that’s what’s in your fridge, but whole carrots give you more control over the size. For the broth, homemade is ideal, but even the cheapest low-sodium store-bought version will work. I always double the broth recipe when I make these soups—it’s the base for Days 2 through 5.
No fresh herbs? Dried thyme at one-third the amount gets you close, but the flavor won’t be as bright. Running low on tomatoes? Fresh tomatoes blended with a splash of broth works in a pinch, though canned is more consistent. The coconut milk and curry powder for Day 4? Full-fat coconut milk is key—light versions won’t give you that creamy texture. If you’re avoiding dairy, swap the heavy cream for more coconut milk. The whole-grain bread is just for serving—any crusty bread works, but it’s worth grabbing a baguette from the bakery section if you want that authentic touch.
This soup base keeps beautifully—5 days in the fridge or 3 months in the freezer. I portion it into individual containers before freezing so I can grab exactly what I need. The fresh herbs? Only add them when reheating, or they’ll turn to mush. The Parmesan and bread are for serving, so keep those separate until you’re ready to eat. Pro tip: Label your containers with the day number—it makes the weekly progression so much easier to follow. The coconut curry version (Day 4) reheats best with a splash of water or broth to loosen it up.
Why You’ll Love This Recipe
- No-Chop Nightmare: I swear, the only knife work here is dicing one onion and chopping carrots—no fancy techniques, no stress. Toss in garlic and tomatoes, and you’re done. Honestly, I’ve made this after a 10-hour shift with zero cleanup.
- Tomato-Garlic Magic: That canned crushed tomato base? It’s the secret. Simmered with garlic and broth, it develops this deep, savory richness that tastes like it’s been slow-cooked for hours—not just 20 minutes. My picky-eater husband actually licks the spoon.
- Meal-Prep MVP: This soup tastes better the next day, which means I can make a giant batch on Sunday and have lunch sorted for the week. Freezer-friendly too—just reheat and serve. Between us, it’s my go-to when I forget to meal prep.
- Pocketbook Hero: Onion, carrots, garlic, tomatoes, broth—all pantry staples that won’t break the bank. I’ve fed four people for under $5 with this. Plus, leftovers stretch into lunches, so it’s basically free food after day one.
Step-by-step instructions for a 7-Day soup that transforms daily
Here’s how to build a versatile base that evolves into completely different soups each day.
Sauté the Aromatic Base
Heat the 2 tablespoons extra-virgin olive oil in a large pot over medium heat. Add the 1 whole diced yellow onion and 3 medium sliced carrots, cooking for 5-6 minutes until they soften and begin to caramelize at the edges. This develops deep, sweet flavors that form the foundation for every day’s soup.
Add the 4 minced garlic cloves and cook for 30 seconds until fragrant—don’t let it brown or it’ll turn bitter. Here’s the thing: these aromatics should be tender but not mushy. If they stick, stir in a splash of chicken broth to loosen them while keeping the pot hot.
Build the Classic Tomato-Broth Base
Pour in the 2 cups canned crushed tomatoes and stir to combine with the vegetables. Cook for 3-4 minutes until the tomatoes break down slightly and their acidity mellows. Add the 4 cups chicken broth, 1 teaspoon salt, and ½ teaspoon black pepper, then bring to a gentle simmer.
Add the 1 tablespoon fresh thyme leaves and ¼ cup chopped fresh basil leaves, stirring to distribute. This is Day 1’s classic tomato-basil soup—simple but packed with flavor. Let it simmer uncovered for 15 minutes to meld all the flavors before proceeding with your daily transformations.
Divide and Transform for Days 2-7
For Days 2-7, divide the base among containers or reheat portions as needed. Here’s how each day transforms it: Day 2 adds grated parmesan cheese for a creamy Italian-style soup; Day 4 incorporates ½ cup heavy cream and 1 tablespoon curry powder for a rich coconut curry (using 1 cup coconut milk); Day 5 turns it into a hearty bread bowl soup using whole-grain bread slices.
The key is flexibility. Each day’s transformation uses ingredients you already have on hand—no shopping required. For example, Day 3 might call for extra garlic and a splash of lemon juice, while Day 6 could become a spicy tomato-chili by adding cayenne. The base remains consistent while the flavors evolve dramatically.
Master the Daily Transformations
Day 1: Serve as-is with crusty bread. Day 2: Stir in ¼ cup grated parmesan cheese and simmer for 5 minutes until creamy. Day 3: Add 1 extra minced garlic clove and 1 tablespoon lemon juice, simmering for 10 minutes to brighten the flavors. Day 4: Heat 1 cup coconut milk separately, then whisk it into the soup along with ½ cup heavy cream and 1 tablespoon curry powder, simmering for 10 minutes to create a rich curry.
Each transformation builds on the previous day’s flavors while introducing something new. The beauty is that you’re not making seven separate soups—just one base that becomes something different each day. This saves time, reduces waste, and keeps your meals exciting without extra effort.
Pro Tips For Making 7 Day Soup
- SOFTEN THE ONIONS FIRST: I learned this the hard way—tossing raw onions into simmering broth makes your soup taste bitter. Sauté them in oil over medium heat for 8-10 minutes until they’re translucent and just starting to caramelize. The extra effort pays off with deeper flavor.
- PEEL GARLIC WRONG: Skip the knife and smash those cloves flat with the side of your knife first. Then peel them—it’s faster and keeps them intact while cooking. Trust me, your soup won’t turn into garlic sludge.
- DON’T BOIL THE TOMATOES: High heat turns crushed tomatoes into a sad, watery mess. Simmer them gently with the broth—just below a rolling boil—so they meld into the soup instead of separating. Your future self will notice the difference.
- SALT THE BROTH EARLY: Taste the broth after 20 minutes, not at the end. If it’s bland, add salt now—it’ll distribute evenly. Waiting until the last minute means you’ll either under-season or have to fix it with extra salt, which changes the balance.
Make-ahead tips for this recipe
Sunday Prep Strategy
Dedicate 1 hour on Sunday to prep the entire week’s soup base. Start by sautéing all 1 whole yellow onion and 3 medium carrots in 2 tablespoons extra-virgin olive oil—this step forms the flavor foundation for every bowl.
While they cook, measure out 4 cups chicken broth and 2 cups crushed tomatoes in separate containers. This keeps your workspace organized and minimizes cleanup later. 💡
After simmering the base for 15 minutes, divide it into 7 airtight containers (I use 4-cup glass Pyrex for even reheating). Label each with the day number—this visual cue prevents mix-ups when you’re grabbing meals midweek.
Store 5 containers in the fridge and freeze the remaining 2 for later in the week. Trust me, this small step saves 10 minutes daily during the week.
Freezer-Friendly Containers
Use quart-sized freezer bags or glass containers with tight-sealing lids for freezing. Leave 1-inch headspace to prevent expansion cracks. I like Stasher bags because they’re reusable and stack neatly in the freezer.
When reheating frozen portions, add 2 tablespoons water or broth to prevent scorching. The soup will thaw overnight in the fridge—no microwave required. ❄️
For the coconut curry version (Day 4), store the coconut milk and curry powder separately in small containers. Add them fresh when reheating to maintain texture and prevent curdling.
The heavy cream can be added directly to the frozen soup—just stir it in during the last 2 minutes of reheating to avoid separation.
Daily Reheating Routine
Reheat soup on the stovetop over medium-low heat for 8-10 minutes, stirring occasionally. If using the microwave, heat on 50% power for 3-4 minutes, then stir and heat another 1-2 minutes.
Always add fresh herbs (like ¼ cup chopped basil) during the final minute to preserve their brightness. For the bread bowl version (Day 5), hollow out whole-grain bread slices, toast them lightly, and fill with reheated soup. 🍞
Pro tip: Keep a small pot of broth simmering on the stove all week. If your soup looks too thick after reheating, stir in 1-2 tablespoons of the hot broth to restore consistency. This works like a magic trick for texture every time.
Garnish Station
Set up a garnish station with pre-portioned toppings: grated Parmesan cheese, fresh basil, red pepper flakes, and crusty bread. Store these in small containers on your counter or fridge shelf.
When serving, let everyone customize their bowl—this makes the meal feel special without extra effort. I keep a small bowl of olive oil nearby too; a drizzle adds richness instantly. ✨
For the spicy tomato-chili version (Day 6), keep ½ teaspoon cayenne pepper and 1 tablespoon hot sauce in a tiny jar. Add it to the reheated soup and let it sit for 2 minutes before serving to let the heat develop fully.
This small adjustment transforms the soup completely with zero prep.
Nutrition facts
Frequently asked questions
Can I make this 7-day soup plan vegetarian or vegan?
For a vegetarian version, simply swap the chicken broth for vegetable broth and use vegetarian Parmesan or nutritional yeast for the creamy elements. For vegan, replace the heavy cream with coconut cream and ensure all cheeses are plant-based. The base recipe remains identical—just adjust the add-ins for each day’s transformation.
How do I adjust portion sizes for a family of four?
Double all ingredients for the base recipe, then divide into 14 containers (2 per day). For the coconut curry version (Day 4), use 2 cups coconut milk and 1 cup heavy cream. The same transformations apply—just scale up the garnishes (like grated cheese or bread slices) to match. This keeps the prep efficient while feeding more people.
Can I freeze the transformed soups (like the curry or creamy versions)?
Yes, but with a few key adjustments. For creamy soups (like Day 2 or 4), freeze them before adding dairy to prevent separation. Thaw overnight in the fridge, then stir in cream or coconut milk when reheating. For spicy versions (like Day 6), freeze the base first, then add heat spices fresh when reheating. Always leave 1-inch headspace in containers to avoid ice crystals.
What if I don’t have fresh herbs like basil or thyme?
No problem! Use dried herbs at one-third the amount (e.g., 1 teaspoon dried basil instead of ¼ cup fresh). For a brighter flavor, add a pinch of citric acid or a splash of lemon juice when reheating. If you’re missing herbs entirely, a ¼ teaspoon red pepper flakes adds depth. The base will still taste delicious—it just won’t be as aromatic.
How do I make this work with limited fridge space?
Focus on the freezer-first strategy: Prep all 7 days’ worth of base and freeze 5 containers immediately. Thaw one container overnight in the fridge each morning, then reheat for the day’s meal. This keeps only 1-2 containers in the fridge at a time. For the creamy or dairy-heavy versions (like Day 4), store those ingredients separately and add them fresh when reheating.

- Pea Soup Instant Pot Recipe: Velvety Green Smoothness in 20 Minutes - November 1, 2026
- Pork Loin Pulled Pork Crock Pot Recipe: Slow-Smoked Tenderness With Zero Dryness - November 1, 2026
- Baked Potatoes in Crock Pot Recipe: Buttery Interiors and Crispy Top Magic - November 1, 2026