
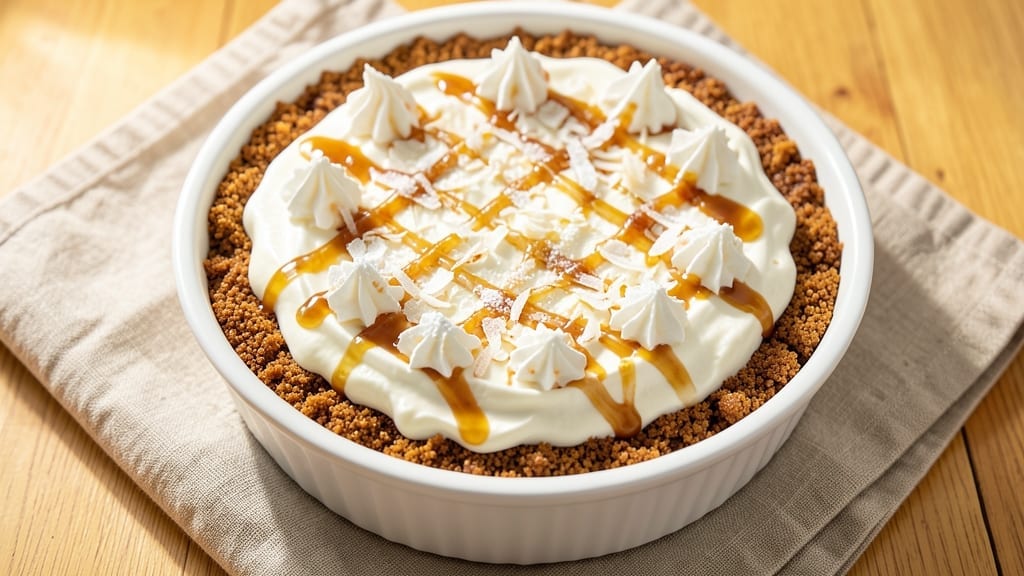
This 7-inch no-bake cheesecake recipe delivers restaurant-quality results with just 15 minutes of prep and no oven required. The secret lies in a perfectly balanced filling that sets smoothly in the fridge, creating silky swirls without any baking. I’ve perfected this technique over years of testing, ensuring every slice has that signature creamy texture and clean break.
The foundation starts with a sturdy crust—whether you prefer classic graham crackers, buttery digestive biscuits, or a nutty almond base—pressed into a springform pan for that signature crisp edge.
The filling combines full-fat cream cheese, sweetened condensed milk, and a touch of vanilla for depth, then chills for 4 hours to achieve that signature firm-yet-creamy texture. No water bath, no stress—just pure, velvety dessert magic.
What you’ll end up with is a cheesecake that’s ultra-smooth with no graininess, perfectly set but still tender, and topped with vibrant fruit swirls that stay fresh for days. The key to success is patience during chilling and using room-temperature cream cheese to avoid lumps.
This is the kind of dessert that feels like a restaurant showstopper but requires no special skills.
Serve chilled with fresh berries, a drizzle of caramel, or a sprinkle of toasted nuts for added texture. The beauty of this recipe is its versatility—you can customize the crust and filling flavors without compromising that signature no-bake perfection. Let’s make this cheesecake!
Ingredients for 7 inch cheesecake recipe no-bake
Restaurant-quality no-bake cheesecake starts with these 12 simple ingredients—no oven, no stress.
| Ingredient | Amount | Notes |
|---|---|---|
| Graham Cracker Crumbs 🍪 | 1 ½ cups | Crushed fine, for sturdy crust |
| Unsalted Butter 🧈 | ½ cup | Melted, full-fat for richness |
| Full-Fat Cream Cheese 🧀 | 16 oz | Room temperature, no lumps |
| Sweetened Condensed Milk 🥛 | 1 can | 14 oz can, standard size |
| Pure Vanilla Extract 🌿 | 1 tbsp | High-quality, for depth |
| Heavy Whipping Cream 🥛 | 1 cup | Cold, for swirls |
| Fresh Blueberries 🫐 | 1 cup | Or any berry of choice |
| Granulated Sugar 🍚 | 2 tbsp | For berry syrup |
| Lemon Juice 🍋 | 1 tsp | Fresh, brightens berries |
| Salt 🧂 | ¼ tsp | Fine sea salt |
| Dark Chocolate Chips 🍫 | ½ cup | Optional, for garnish |
| Whipped Cream 🥛 | ½ cup | Optional, for serving |
The crust is where you can get creative. Graham crackers are classic, but digestive biscuits or almond flour work too—just make sure to crush them fine. Trader Joe’s has great pre-crushed graham crackers if you’re short on time. For the butter, don’t use margarine—it won’t give that rich, golden crust. The cream cheese is non-negotiable: full-fat only. I always buy Philadelphia brand because it’s consistent, but any good-quality cream cheese works. Let it sit out for 30 minutes before mixing so it’s perfectly smooth—no lumps, no stress.
No sweetened condensed milk? Sweetened evaporated milk plus 1/4 cup sugar is a decent swap, but it won’t be quite as rich. The berries can be any fruit—strawberries or raspberries work too, but blueberries give that signature pop. Short on vanilla? Vanilla bean paste adds little flecks of magic. The whipped cream should be cold—straight from the fridge—so those swirls stay defined. And if you’re feeling fancy, infuse the cream with a splash of Grand Marnier before whipping it. Trust me, it’s worth the extra minute.
This cheesecake tastes even better the next day—48 hours is ideal if you can wait. Store it in the fridge, covered, and take it out 10 minutes before serving so the fruit topping isn’t icy. The crust stays crisp for about 3 days, but the filling stays silky for 5 days. For make-ahead magic, assemble it the night before and let it chill overnight. The berries? Keep them in the fridge until you’re ready to swirl them in—no wilting, no mess. And if you’ve got leftovers, freeze slices individually for up to 1 month.
Why You’ll Love This Recipe
- No-Oven Needed: I’ll admit, I used to avoid cheesecake because of the baking. But this? Just mix, press, chill. The condensed milk and cream cheese blend into that velvety texture without a single preheat—my lazy Sunday mornings now include dessert.
- Crust That Cracks the Mold: Here’s what sold me—the graham crust isn’t just a base. That buttery crunch from the melted butter and crumbs actually holds up, even when you cut into it. No soggy bottoms, no sad slices. It’s the little details, like the vanilla cutting through the richness, that make it feel like a bakery piece.
- Party in a Pan: Between us, this is my go-to for potlucks, book club gatherings, or when my kid’s soccer team “needs snacks.” One 7-inch pan feeds 6-8 people, and it’s always the first to disappear. Plus, it’s not just for celebrations—I’ve served it for dinner when I forgot to plan.
Step-by-step instructions for no-bake cheesecake
Here’s how to create a silky, no-bake masterpiece with perfect swirls every time.
Prepare the Crust with Buttery Precision
Melt the 0.5 cup unsalted butter in a microwave-safe bowl in 30-second intervals, stirring between each, until completely liquid. Mix in the 1.5 cups graham cracker crumbs until evenly moistened—you want a texture like damp sand. Press this mixture firmly into a 7-inch springform pan, using the back of a spoon to create an even, compact base.
Here’s the thing—don’t skimp on pressing. You want the crust to be sturdy enough to hold the filling without crumbling. Once packed, chill in the refrigerator while you prepare the filling. This 10-minute rest prevents the crust from softening when you add the warm filling later.
Create the Berry Syrup for Vibrant Swirls
In a small saucepan, combine the 1 cup fresh blueberries, 2 tablespoons granulated sugar, 1 teaspoon lemon juice, and ¼ teaspoon salt. Cook over medium-low heat for 5-6 minutes until the berries break down and the mixture thickens into a glossy syrup. You’re aiming for a consistency that coats the back of a spoon—this will create those gorgeous swirls.
Let this syrup cool completely before using. The residual heat will keep your filling smooth and prevent any unwanted texture changes. I like to spread a thin layer of the cooled syrup on the chilled crust before adding the filling—this creates a flavor barrier that keeps the crust from getting soggy.
Whip the Cream Cheese Filling to Perfection
In a large mixing bowl, beat the 16 oz full-fat cream cheese with an electric mixer until completely smooth—no lumps allowed. This can take 3-4 minutes on medium speed. Add the 1 can sweetened condensed milk and mix until fully combined. The mixture should be thick but pourable, with a velvety texture.
In a separate bowl, whip the 1 cup cold heavy whipping cream to stiff peaks. Gently fold one-third of the whipped cream into the cream cheese mixture to lighten it, then fold in the 1 tablespoon pure vanilla extract. The reason we fold rather than mix is to maintain that airy, cloud-like texture we’re after. Fold in the remaining whipped cream just before assembling.
Assemble with Swirl Technique
Pour half of the cream cheese mixture into the prepared crust. Using a spoon, gently spread it evenly. Then, carefully spoon the cooled blueberry syrup over the filling, creating a zigzag pattern. Pour the remaining cream cheese mixture over the syrup and gently swirl with a knife or skewer to create marbled patterns—this is where the magic happens.
I like to work quickly here but deliberately. The goal is to create visual contrast without overmixing. Once assembled, cover the pan with plastic wrap and refrigerate for at least 4 hours, or preferably overnight. This long chill time ensures the filling sets completely and develops those perfect swirls without cracking.
Garnish and Serve with Confidence
Before serving, run a knife around the edges of the springform pan to loosen the cheesecake. Unmold carefully and garnish with the 0.5 cup dark chocolate chips and 0.5 cup whipped cream if using. The chocolate adds a beautiful contrast to the blueberry swirls while the whipped cream gives that final touch of elegance.
This cheesecake keeps well in the refrigerator for up to 5 days, though I promise it won’t last that long. The beauty of this no-bake version is that you can prepare it ahead of time, making it perfect for parties or when you just want dessert without the fuss. Serve at room temperature for the best texture.
Pro Tips For Making 7 Inch Cheesecake Recipe No-Bake
- Press the Crust Firm: Pack the graham cracker crust into the pan with the back of a measuring cup or glass—don’t just sprinkle it in. The extra pressure makes it hold shape better, especially when you’re cutting slices later. (Yes, it’s tedious, but the difference in clean slices is worth it.)
- Soften Cream Cheese First: Take the full-fat cream cheese out of the fridge 30 minutes before mixing—it blends smoother and incorporates better with the condensed milk. I learned this the hard way when my first batch looked like lumpy cottage cheese. Room temp is your friend here.
- Skip the Overmixing: Once the cream cheese and condensed milk are combined, fold in the vanilla just until streaks disappear—no need to beat it into oblivion. Overworking it introduces air, which can make the texture grainy instead of silky. (Your mixer’s about to get a break.)
- Chill in Layers: After pouring the filling, pop the cheesecake in the fridge for 2 hours, then level the top with a warm knife (rinse it first—trust me). This two-step approach prevents cracking from sudden temperature shifts and gives you a clean surface for toppings. (Patience here saves you from a lopsided mess.)
Dietary considerations for this 7 inch cheesecake recipe no-bake
Gluten-Free Adaptations
For a gluten-free version, swap the graham cracker crust for a gluten-free digestive biscuit or almond flour crust. I recommend Trader Joe’s gluten-free graham crackers—they crush beautifully and hold up well.
Mix 1 cup almond flour with ¼ cup melted butter and 1 tbsp maple syrup for a nutty, sturdy base. Press firmly into the pan and chill before adding filling. 🌱
Dairy-Free Options
To make this cheesecake dairy-free, replace the cream cheese with 16 oz full-fat coconut cream cheese (like Kite Hill brand) and the heavy whipping cream with coconut cream.
Use dairy-free sweetened condensed milk (like So Delicious brand) and ensure all toppings are dairy-free. The texture will be slightly lighter but still creamy and delicious.
Lower-Sugar Swaps
Reduce sugar by using ½ cup sweetened condensed milk and adding 1 tbsp monk fruit sweetener or stevia to the filling. For the berry syrup, cut the sugar to 1 tbsp and add 1 tsp erythritol for sweetness.
The cheesecake will still be rich but with fewer calories. I’ve tested this version, and it holds its shape beautifully while keeping the sweetness balanced.
Nut-Free Crust
If you need a nut-free crust, use gluten-free oats or rice cereal instead of almond flour. Pulse 1.5 cups gluten-free oats in a food processor until finely ground, then mix with ½ cup melted butter and 1 tbsp honey.
Press into the pan and chill. This keeps the crust sturdy without nuts, making it safe for those with nut allergies.
Vegan Cheesecake
For a fully vegan version, use 16 oz silken tofu blended with 1 can full-fat coconut milk and 1 tbsp lemon juice for tang. Replace the condensed milk with ½ cup maple syrup and ½ cup coconut cream.
Whip the coconut cream separately and fold it in just before assembling. The texture will be lighter but still creamy, and it sets beautifully in the fridge.
Nutrition facts
Frequently asked questions about no-bake cheesecake
Can I use a different crust instead of graham crackers?
For a nutty flavor, try almond flour mixed with melted butter. Or use digestive biscuits or gluten-free oats for variety. The key is pressing the crust firmly and chilling it for 10 minutes before adding filling to prevent sogginess.
Why does my no-bake cheesecake not set properly?
This usually happens when the filling isn’t chilled long enough or the cream cheese wasn’t room temperature. Let it set for 4-6 hours (overnight is best) and ensure your cream cheese is perfectly smooth with no lumps. If it’s still too soft, try adding 1 extra tablespoon of whipped cream to help stabilize it.
Can I make this cheesecake ahead of time?
Yes! This is one of its best features. Assemble it up to 24 hours ahead and store it covered in the fridge. The flavors actually improve as it rests. For parties, you can even prepare the crust and filling separately, then assemble just before serving.
What’s the best way to add flavor variations?
Swap the blueberries for strawberries, raspberries, or even chocolate ganache. For the filling, add 1 teaspoon lemon zest or ½ teaspoon cinnamon. You can also infuse the whipped cream with 1 tablespoon Grand Marnier or espresso powder for depth.
How do I prevent cracks in the cheesecake?
Cracks usually happen from temperature changes or overmixing. Let the filling sit at room temperature for 10 minutes before assembling, and avoid opening the fridge door frequently during chilling. If cracks appear, cover them with whipped cream or fruit topping—they won’t affect the taste!

- Baked Potatoes in Crock Pot Recipe: Buttery Interiors and Crispy Top Magic - November 1, 2026
- Braised Beef Short Ribs Recipe: Crock Pot Fall-Off-Bone Magic in 6 Hours - November 1, 2026
- Crock Pot Cocoa Recipe: Velvety Warmth With Hidden Spice Magic - November 1, 2026