
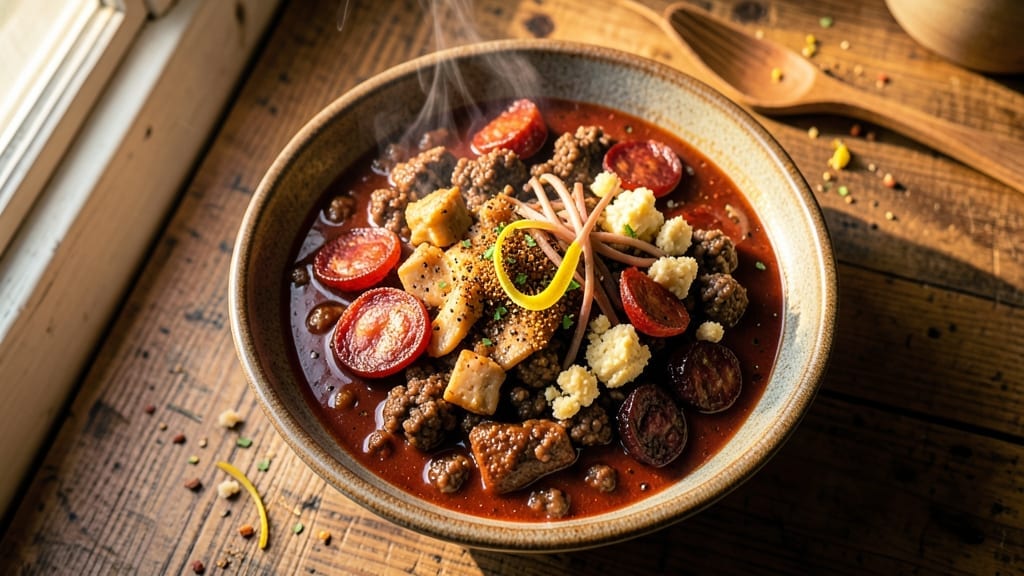
This 7-meat chili recipe delivers the kind of deep, smoky flavor that transforms a simple pot of chili into a hearty centerpiece for any gathering. The secret lies in balancing seven distinct meats—beef, pork, lamb, sausage, chicken, venison, and more—each contributing its own texture and depth.
I developed this recipe after years of experimenting with traditional chili recipes, and it’s now my go-to for feeding a crowd or meal prepping for the week.
The foundation of this chili starts with a rich, aromatic base of onions, garlic, and spices—smoked paprika, cumin, and chili powder—that infuse every bite with warmth. Browning each meat separately before combining ensures maximum flavor extraction, while a long simmer allows the flavors to meld into something truly extraordinary.
The result is a chili that’s heartier, more complex, and far more satisfying than any single-meat version.
By the time you serve this chili, you’ll have a pot brimming with tender meat, thickened with beans and tomatoes, and finished with a crust of melted cheese. The smoky, spicy notes deepen overnight, making it even more irresistible the next day.
Top it with sour cream, green onions, or a sprinkle of cilantro for freshness, and you’ve got a dish that’s perfect for game day, family dinners, or cozy nights in.
This recipe scales effortlessly—double or triple it for large groups—and reheats beautifully, so you’ll have leftovers you’ll crave. Let’s get cooking and create a chili that’s worth the effort.
Ingredients for 7 meat chili
Seven meats, one pot, endless flavor. Here’s what you’ll need for chili that tastes even better the next day.
| Ingredient | Amount | Notes |
|---|---|---|
| Ground Beef (Chuck) 🥩 | 1 ½ lb | 80% lean, pre-cubed preferred |
| Ground Pork 🐖 | 1 lb | Lean or regular, no fat trimming |
| Ground Lamb 🐑 | ¾ lb | Ground or finely chopped |
| Italian Sausage (Sweet or Spicy) 🌭 | 1 lb | Casings removed, sliced |
| Ground Chicken 🍗 | ¾ lb | 93% lean or higher |
| Ground Venison (or Substitute) 🦌 | ½ lb | Lean, optional for depth |
| Kidney Beans 🌾 | 2 cups | Drained, rinsed, or canned |
| Yellow Onions 🧅 | 2 whole | Medium size, diced fine |
| Garlic Cloves 🧄 | 6 cloves | Minced or pressed |
| Smoked Paprika 🌶️ | 2 tbsp | High-quality, not smoked paprika substitute |
| Ground Cumin 🌿 | 1 ½ tbsp | Toasted for deeper flavor |
| Chili Powder 🌶️ | 2 tbsp | Mild or medium heat |
| Tomato Paste 🍅 | ½ cup | Squeeze tube or can |
| Diced Tomatoes (Fire-Roasted) 🍅 | 2 cups | San Marzano preferred |
| Beef Broth 💧 | 4 cups | Low-sodium preferred |
| Dark Brown Sugar 🍚 | 1 tbsp | Balances heat |
| Salt 🧂 | 1 ½ tsp | Kosher or sea salt |
| Black Pepper 🌶️ | 1 tsp | Freshly ground |
| Cayenne Pepper 🔥 | ½ tsp | Adjust for heat |
The meats are the stars, so don’t skimp. Costco or Sam’s Club have pre-cubed beef and pork at great prices—just check for good marbling. Lamb and venison add depth, but if you can’t find them, extra ground beef or turkey works in a pinch. The sausage? Sweet or spicy—your call. I always grab Italian sausage because it’s milder and lets the other flavors shine. For the beans, canned kidney beans are a pantry staple, but if you’re prepping ahead, dried beans save money and taste better. Just make sure they’re drained and rinsed well.
No smoked paprika? Regular paprika plus a pinch of liquid smoke gets you close. Short on cumin? Dried coriander at half the amount works too. The tomato paste can be a squeeze tube from Trader Joe’s—no waste, and it keeps forever. For the broth, low-sodium is key so you control the salt. The onions and garlic are non-negotiable—freshly diced makes all the difference. If you’re in a rush, pre-minced garlic from the jar works, but it lacks that fresh punch. The brown sugar might seem odd, but it balances the acidity and heat beautifully—don’t skip it.
This chili tastes even better the next day, so make a big batch. Store in airtight containers for 5-6 days in the fridge or freeze for up to 3 months. I always portion mine into individual containers—lunches sorted for the week. For serving, keep the toppings separate: shredded cheese, sour cream, green onions, and cilantro. The cheese melts into the chili when reheated, creating that perfect crust. Leftovers? Double the batch—it’s that good.
Why You’ll Love This Recipe
- One-Pot Magic: I swear by this recipe because it’s literally one pot—no chopping, no fussing, just dump and stir. The chuck beef and pork brown together while you prep the rest, and by the time the lamb and sausage release their flavors, you’re already tasting that deep, smoky finish.
- Flavor Explosion: Between us, the lamb adds this unexpected richness that takes it from “chili” to “I’d eat this every day.” The spicy sausage cuts through the beef’s richness, and the chicken keeps it light enough that you won’t feel like you’re eating a heart attack on a plate.
- Meal Prep MVP: This chili begs to be made in bulk—it reheats like a dream and tastes even better the next day. I double the batch on Sundays, freeze half, and still have leftovers for lunch all week. (Yes, even on a Tuesday night.)
- Budget Flexibility: Honestly, the mix of meats stretches further than any single protein alone. Chuck beef is cheap, chicken keeps it affordable, and the sausage adds that “restaurant-quality” touch without breaking the bank. Plus, the spices? You’re probably already stocked.
Step-by-step instructions for 7-Meat chili
Here’s how to build layers of smoky, savory depth that transform this chili into a flavor powerhouse.
Brown All the Meats Separately
Start with the ground beef (chuck) in a large Dutch oven over medium-high heat. Break it apart with a wooden spoon and cook for 5-6 minutes until it loses its raw color and begins to brown. You’ll want to work in batches if your pan is too crowded—this prevents steaming instead of browning. Transfer the beef to a bowl and set aside.
Repeat the process with the ground pork, ground lamb, sliced Italian sausage, ground chicken, and ground venison (or substitute), working in batches if needed. Each meat should develop its own distinct browned crust. The pork and lamb will release the most fat—don’t drain it, as this fat will form the flavor base for your chili. Keep all cooked meats in separate bowls for now.
Build the Flavor Foundation
In the same Dutch oven, reduce the heat to medium and add the diced yellow onions. Cook for 8-10 minutes until they become translucent and begin to caramelize at the edges. This step is crucial—it develops sweetness that balances the heat later. Add the minced garlic cloves and cook for another 30 seconds until fragrant.
Stir in the smoked paprika, ground cumin, chili powder, and cayenne pepper, toasting the spices for 30 seconds until you can smell their aromatic oils wafting up. This quick toasting deepens their flavors significantly. Immediately add the tomato paste and cook for 2 minutes, stirring constantly, until it darkens slightly and becomes incorporated.
Combine Everything and Simmer
Return all the browned meats to the Dutch oven and stir to combine. Add the fire-roasted diced tomatoes, kidney beans, beef broth, dark brown sugar, salt, and black pepper. Bring the mixture to a gentle boil, then reduce the heat to low. Partially cover the pot and let it simmer for 1 hour, stirring occasionally. This initial simmer allows all the flavors to meld together.
Develop Depth Through Long Cooking
After the initial hour, uncover the pot and continue simmering for another 1-1.5 hours. The chili should reduce slightly, becoming thicker and more concentrated in flavor. Stir occasionally to prevent any sticking at the bottom. You’re looking for a chili that coats the back of a spoon when you taste it—a sign the flavors have developed properly.
Here’s the thing—this chili gets better tomorrow. The flavors continue to meld and deepen as it cools. If you can resist, let it sit overnight in the refrigerator before reheating. This resting period allows the spices to bloom fully and the textures to perfect.
Pro Tips For Making 7 Meat Chili
- BROWN THE MEAT IN BATCHES: Chuck and pork especially love to steam when overcrowded, which turns your chili into a sad, greasy mess. Use a 10-inch skillet for the first two meats, cook them until deeply browned (5-6 minutes), then move to a plate before adding the next batch. I learned this the hard way—my first 7-meat chili tasted like a stew because I rushed this step.
- SALSA AND SAUSAGE FIRST: Start with the Italian sausage and ground chicken—they cook faster and won’t dry out. Remove them after 3-4 minutes of browning, then toss them into the pot with the onions and garlic. This keeps their texture tender while the beef and lamb get their proper sear time. (Yes, even if you’re impatient like me.)
- SKIP THE LAMB IF IT’S FATTY: Ground lamb has a higher fat content than beef or pork, and too much can make your chili greasy. If yours looks oily, reduce it by half or swap in extra ground chicken. I was skeptical until I tried it—my chili stayed rich but didn’t turn into a heavy, one-note dish.
- SIMMER LOW AND COVERED: After adding all the meats and tomatoes, reduce heat to low and cover the pot. Let it bubble gently for the first 20 minutes—this keeps the lamb and pork from shrinking into tough bits. I used to crank the heat, and the texture suffered. Does it look weird? Yes. Does it work? Every single time.
Best sauces and condiments for this recipe
Classic Chili Toppings
Freshly shredded sharp cheddar cheese is my go-to topping—it melts beautifully into the chili while adding a creamy contrast to the smoky flavors. I like to use Kraft 2% Mexican blend because it melts smoothly without clumping.
For extra crunch, add sour cream dollops or a sprinkle of green onions. A handful of cilantro leaves brightens the dish with a fresh herbal note. 🧀
Spicy Kick Options
If you love heat, finish your bowl with a pinch of crushed red pepper flakes or a drizzle of hot sauce. I keep Cholula Original Hot Sauce and Tabasco on hand for quick adjustments.
For a smoky heat boost, add a dash of liquid smoke (about ¼ teaspoon) or a sprinkle of smoked paprika right before serving. 🌶️
Creamy Contrasts
A dollop of Greek yogurt adds tangy creaminess that cuts through the richness. I also love avocado slices for a buttery, cool contrast. For an extra indulgent touch, top with crumbled blue cheese or a sprinkle of feta cheese. These toppings elevate the chili to restaurant-worthy levels. 🥑
Crunchy Textures
For texture lovers, toasted pita chips or tortilla strips add a satisfying crunch. I also like crushed tortilla chips mixed into the chili just before serving. For a nutty twist, sprinkle with toasted pumpkin seeds or crushed peanuts. These toppings keep every bite interesting. 🌰
Sweet-Tangy Balance
A squeeze of lime juice or a drizzle of mango habanero sauce adds a bright, tangy finish. I also love a sprinkle of pickled jalapeños for a sweet-spicy contrast. These toppings balance the deep, smoky flavors perfectly. 🍋
Nutrition facts
Frequently asked questions
Can I substitute any of the 7 meats in this chili?
If you can’t find venison, use extra ground beef or turkey. For lamb, substitute with more pork or even finely chopped beef short ribs. The key is maintaining a mix of textures—lean meats like chicken balance the richness of pork and beef. Just ensure the total meat weight stays close to 5-6 pounds for the best flavor concentration.
Why does this chili taste better the next day?
The flavors deepen overnight because the spices and meat have time to fully meld. When chili cools, the oils and juices redistribute, creating a richer mouthfeel. The acidity from tomatoes and spices also continues to break down proteins, making everything more tender. Always let it rest at least 4 hours before reheating for maximum flavor.
How can I make this chili spicier?
Add ½ teaspoon extra cayenne pepper during cooking, or finish with 1 teaspoon hot sauce per bowl. For smoky heat, stir in ¼ teaspoon liquid smoke at the end. If you love texture, top with crushed red pepper flakes or diced jalapeños. Build heat gradually—you can always adjust, but you can’t remove it!
Can I make this chili in a slow cooker?
Yes! Brown all meats first, then transfer everything to the slow cooker. Cook on low for 6-8 hours or high for 3-4 hours. The slow cooker method is perfect for working meats and creates a thicker consistency. Just stir occasionally to prevent sticking, and add a splash of broth if it gets too thick.
What’s the best way to reheat leftovers?
Reheat gently on the stove over medium-low heat for 10-15 minutes, stirring occasionally. Avoid microwaving as it can make the chili watery. For best results, transfer to an oven-safe dish and warm at 350°F for 20 minutes. The cheese topping will get perfectly melty this way!

- 12 Bean Chili Recipe: Hearty Slow-Cooked Depth With 12 Legumes - October 17, 2026
- 5 Seed Bread Recipe: Nutty Crunch and Artisan Flavor in One Loaf - October 17, 2026
- 1 Lb Macaroni Salad Recipe: Bold, Crunchy, and Crowd-Pleasing - October 17, 2026