
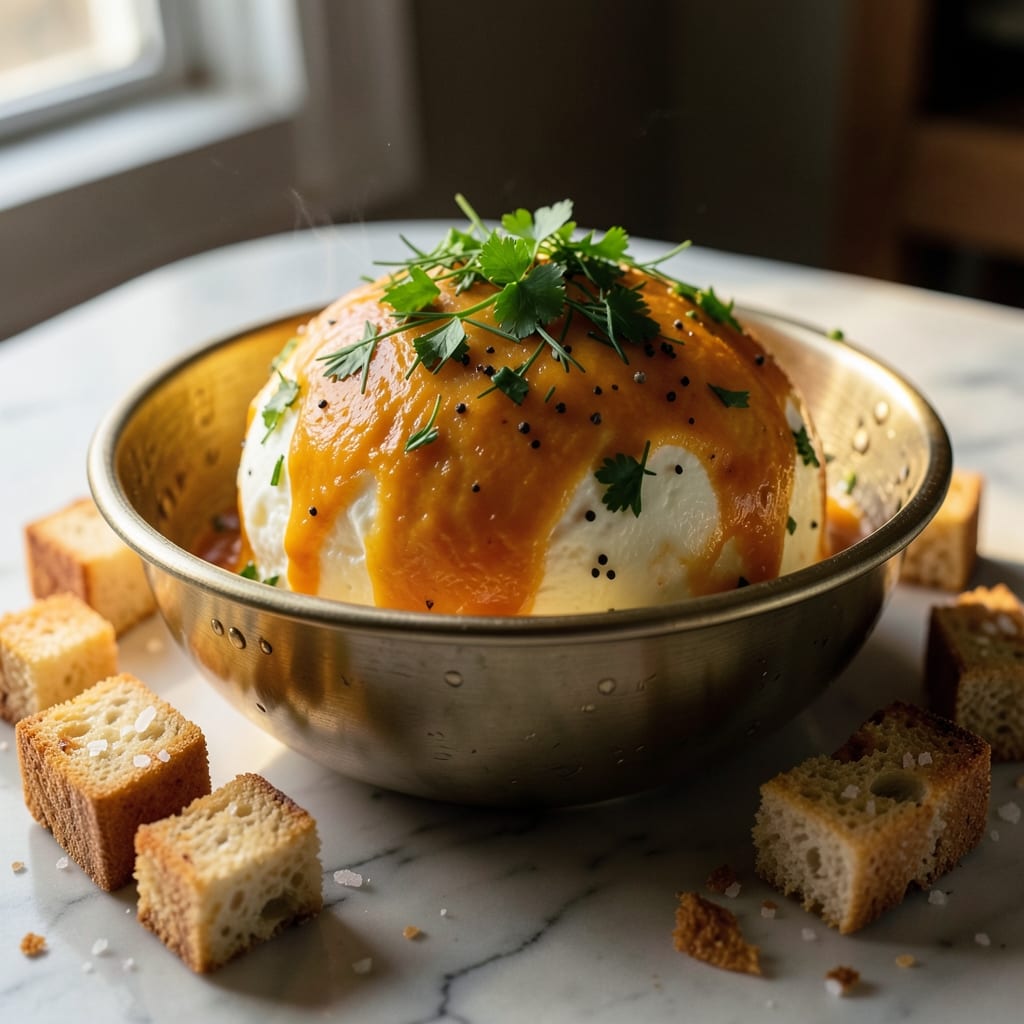
This 70s cheese ball recipe brings back the nostalgic charm of retro parties while delivering a sharp, herby flavor that still impresses today. 💛 The secret lies in blending sharp cheddar with cream cheese for a creamy yet firm texture, then rolling it in crushed nuts and herbs for that signature crunch and aroma.
I’ve perfected this recipe over years of hosting gatherings, and it never fails to disappear quickly.
The beauty of this cheese ball is its versatility—easy to make ahead, perfect for parties, and customizable with your favorite seasonings. Whether you’re recreating a classic 70s spread or adding a retro touch to modern appetizers, this recipe delivers.
The sharp cheddar provides bold flavor, while the cream cheese keeps it smooth and spreadable, making it ideal for shaping and coating.
What you’ll end up with is a golden, herby cheese ball with crispy nuts clinging to every bite, ready to be sliced and served with crackers or veggies. The combination of sharp cheddar, fresh herbs, and toasted nuts creates a flavor profile that’s both nostalgic and satisfying.
This is the kind of appetizer that gets rave reviews and keeps guests coming back for more.
Serve it at your next gathering, holiday party, or game day for a snack that’s as fun to make as it is to eat. The retro appeal pairs perfectly with modern tastes, making it a crowd-pleaser for any occasion. Let’s get started on this timeless classic!
Ingredients for 70s cheese ball
Pantry staples meet retro party magic—just 12 ingredients for this nostalgic crowd-pleaser.
| Ingredient | Amount | Notes |
|---|---|---|
| Sharp Cheddar Cheese 🧀 | 16 oz | Extra sharp for bold flavor |
| Cream Cheese 🧈 | 8 oz | Full-fat for creaminess |
| Fresh Parsley 🌿 | ½ cup | Finely chopped, stems removed |
| Fresh Dill 🌿 | ¼ cup | Finely chopped, for herby punch |
| Worcestershire Sauce 🍶 | 1 tbsp | For umami depth |
| Black Pepper 🌶️ | ½ tsp | Freshly cracked for heat |
| Garlic Powder 🧄 | ½ tsp | For subtle garlic note |
| Almonds 🥜 | 1 cup | Toasted, roughly chopped |
| Pecans 🥜 | ½ cup | Toasted, roughly chopped |
| Salted Peanuts 🥜 | ½ cup | Crushed for extra crunch |
| Wesson Oil 🫒 | 2 tbsp | For coating nuts |
| Crackers 🍞 | 1 package | For serving, like Ritz |
| Plastic Wrap 🎀 | 1 sheet | For shaping ball |
The cheddar is non-negotiable—sharp, not mild. Grab the block and grate it yourself (pre-shredded gets gummy). Kraft 2% Milk Sharp is my go-to, but any aged cheddar works. The cream cheese? Philadelphia full-fat gives the best texture—none of that low-fat nonsense. Fresh herbs are key here, so skip the dried stuff. Trader Joe’s has pre-washed parsley and dill bundles that save time. Toast your nuts in a dry pan for 3-4 minutes until fragrant—don’t skip this step, it makes all the difference.
No Worcestershire? Soy sauce plus a pinch of sugar mimics the umami. Out of fresh herbs? Dried parsley at one-quarter the amount works in a pinch, but you’ll miss that bright flavor. For nuts, walnuts or cashews swap in nicely if you’re not a fan of almonds/pecans. The crackers? Ritz or water crackers are classic, but anything sturdy works. Pro tip: if your cheese ball feels too soft, chill it 30 minutes before rolling in nuts—trust me on this. Need extra crunch? Add a sprinkle of crushed potato chips to the nut mix.
This keeps beautifully—5-7 days wrapped in plastic in the fridge, or 3 months frozen. I always make two: one for the party, one to freeze for lazy weeknights. To serve, slice with a hot knife for clean pieces. The cheese ball actually tastes better the next day as flavors meld. Store leftovers in an airtight container with a paper towel to absorb moisture. Need to transport? Wrap tightly in foil and it’ll hold up for hours. Leftovers? Toss in a pan with a splash of water to make a quick ‘cheese ball scramble’ breakfast—game-changer for brunch.
Why You’ll Love This Recipe
- No Mixer Needed: I just toss everything in a bowl—no fancy equipment, no stress. The sharp cheddar and cream cheese blend together like butter when you pulse them a few times (or even chop them finely by hand if you’re feeling old-school). Honestly, my food processor’s seen better days, but this still comes out perfect.
- Umami Bomb: That Worcestershire sauce? It’s the secret weapon. The sharp cheddar gives it a bold bite, while the parsley and dill add a bright, herby freshness that cuts through the richness. Between us, I’ve tried skipping it—don’t.
- Party-Proof Snack: This isn’t just for holidays. I’ve served it at game nights, book club meetups, and even as a last-minute office potluck (yes, even on a Tuesday). Wrap it in foil, stick it in the fridge, and it stays fresh for days—no one will guess it’s been sitting there.
- Cheap & Crowd-Pleasing: Sharp cheddar and cream cheese are pantry staples, and a handful of fresh herbs stretch a long way. I’ve made this for 12 people for under $10—everyone grabs a piece, and no one fights over the last bite. My secret weapon for budget-friendly hosting.
Step-by-step instructions for 70s cheese ball recipe
Here’s how to craft this nostalgic party favorite with perfect texture and bold flavor.
👨🍳 Step 1: Toast and Coat the Nuts
Preheat your oven to 350°F. Spread the 1 cup almonds, ½ cup pecans, and ½ cup salted peanuts on a baking sheet. Toast for 8-10 minutes until fragrant and just beginning to turn golden. Watch closely—they’ll burn quickly once they start browning.
Remove from oven and let cool for 2 minutes. While still warm, pour the 2 tablespoons Wesson Oil over the nuts and toss gently to coat. Let them cool completely before using—this prevents the cheese mixture from getting greasy. The toasted nuts will add that perfect crunch we all love in a classic cheese ball.
👨🍳 Step 2: Mix the Cheese and Herb Filling
In a large mixing bowl, combine the 16 oz sharp cheddar cheese and 8 oz cream cheese. Use a hand mixer or strong wooden spoon to beat on medium speed for 2-3 minutes until completely smooth and creamy. This step is crucial—any lumps will make your cheese ball crumbly instead of cohesive.
Once smooth, add the ½ cup finely chopped fresh parsley, ¼ cup finely chopped fresh dill, 1 tablespoon Worcestershire sauce, ½ teaspoon black pepper, and ½ teaspoon garlic powder. Mix on low speed just until combined—you don’t want to overwork the herbs or they’ll turn bitter. The mixture should look like a vibrant green cheese blend with a slightly grainy texture from the herbs.
🥘 Step 3: Combine and Shape the Cheese Ball
Add the cooled, oiled nuts to the cheese mixture and stir gently with a rubber spatula until evenly distributed. The nuts should be dispersed throughout but still visible—this creates those delicious pockets of crunch in every bite. If the mixture feels too dry, add 1 teaspoon of water to help bind it together.
Line your hands with the plastic wrap and scoop about ⅓ of the mixture into your palms. Press firmly but gently to form a ball shape, rolling it between your hands until smooth. Here’s the trick: keep the ball slightly smaller than you think you need—it will expand as it chills. Place the shaped ball on a parchment-lined plate and repeat with the remaining mixture until you have one large cheese ball.
⏰ Step 4: Chill and Set Properly
Cover the cheese ball loosely with plastic wrap and refrigerate for at least 4 hours—overnight is even better. This chilling time allows the flavors to meld and the cheese to firm up. Don’t be tempted to serve it sooner, even if it looks set—proper chilling is what creates that perfect firm-yet-creamy texture we all love.
After chilling, remove the cheese ball from the refrigerator and let it sit at room temperature for 10-15 minutes before serving. This brief warm-up makes it easier to slice and adds to the creamy texture. The cheese ball should hold its shape when sliced but still be tender enough to spread nicely on crackers. Serve with the crackers for that authentic 70s party vibe!
Pro Tips For Making 70s Cheese Ball
- CHILL THE CHEESE FIRST: Take both cheddar and cream cheese out of the fridge 30 minutes before mixing—room temperature blends smoother and sticks together better. I used to rush this and ended up with a lumpy mess that fell apart when rolling.
- GRATE THE CHEESE FINE: Use a box grater for the cheddar, not a food processor—it keeps the texture consistent and prevents a pasty center. Sharp cheddar loses its bite when over-processed, so resist the urge to pulse it into oblivion.
- SALT THE WORCESTERSHIRE: Add a pinch of salt to the Worcestershire sauce before mixing it in—it balances the sharpness of the cheddar and cuts through the creaminess. I learned this after a batch tasted flat, and now it’s non-negotiable.
- WRAP IN PARCHMENT: Roll the cheese ball in parchment paper before coating it in herbs—it keeps your hands clean and prevents the filling from sticking to the bowl. Also, it makes rolling easier, especially if you’re wrapping it tightly like a burrito.
Regional styles of this recipe
Midwest Classic
The original 70s cheese ball was born in Midwest potlucks and school fundraisers, where sharp cheddar and cream cheese created the perfect balance of tangy and creamy.
In Ohio and Indiana, families would make this for holiday parties, often using Blue Bonnet cream cheese and Kraft sharp cheddar—the combo that became iconic. The herb mix was simple: just parsley and a pinch of garlic powder, with crushed Planters peanuts for crunch.
This version stays true to those roots while keeping the flavors vibrant. 💛
Southern Twist
Down South, they took the cheese ball to new levels by adding a kick of hot sauce or Cajun seasoning to the mix.
In Texas, it’s common to see cheese balls rolled in pecans and crushed tortilla chips for extra texture, while Louisiana versions incorporate Andouille sausage bits for a meaty surprise.
I love making a Southern-style version with 1 tsp smoked paprika and ½ tsp cayenne mixed into the cheese—it gives that warm, spicy depth that pairs perfectly with sweet tea.
West Coast Fusion
On the West Coast, especially in California, cheese balls got a gourmet makeover in the 90s and 2000s. Chefs started adding goat cheese or feta to the mix for tangy complexity, and rolling them in toasted sesame seeds or crushed wasabi peas.
For a modern twist, try swapping half the sharp cheddar for aged Gouda and adding 1 tbsp soy sauce to the mix—it adds umami depth that West Coasters love. Serve with water crackers or rice crackers for that crisp contrast.
Northeast Herb Garden
In New England and the Northeast, fresh herbs take center stage. Instead of just parsley and dill, they often add chives and thyme for a more complex flavor profile. The nuts? Walnuts and candied pecans are popular choices, and some versions even include crushed pretzels for a salty crunch.
For a true New England touch, add 1 tsp lemon zest to the cheese mixture—it brightens the flavors and pairs beautifully with the sharp cheddar. This version is perfect for garden parties or summer picnics.
Mid-Atlantic Spicy Kick
In Maryland and Virginia, the cheese ball gets a spicy upgrade with hot honey drizzle or a sprinkle of crushed red pepper flakes on top. Some versions even include crumbled bacon mixed into the cheese for a smoky depth.
For a true Mid-Atlantic twist, try adding 1 tbsp sriracha to the cheese mixture and rolling the ball in crushed potato chips—it’s a flavor combo that’s become a regional favorite. Serve with sourdough crackers for that rustic touch.
Modern Party Hack
If you’re short on time, try this modern shortcut: blend ½ cup chopped nuts with 1 tbsp oil in a food processor for 30 seconds to create a nut “butter” that sticks better to the cheese ball.
For a fun presentation, shape the cheese ball into a loaf pan and chill—it makes for easy slicing and a retro look. I also love adding edible flowers or dried cranberries to the nut coating for a pop of color that makes it Instagram-worthy. 🌟
Nutrition facts
Frequently asked questions
Can I make this cheese ball ahead of time?
This recipe actually tastes better when made ahead. Shape the cheese ball and refrigerate it for at least 4 hours, but overnight is ideal. The flavors meld beautifully during chilling, and it’s much easier to slice after resting. For parties, make it 2 days ahead—just bring it to room temperature before serving.
What if my cheese ball is too soft or crumbly?
Too soft? Chill it longer—sometimes 6-8 hours is needed. Too crumbly? The issue is usually overmixed cheese or not enough cream cheese. Next time, reduce mixing time and add 1-2 extra ounces of cream cheese to bind it better. Also ensure your cheddar is at room temperature before mixing.
Can I substitute any of the nuts?
Yes! The nut combo is flexible—try walnuts, cashews, or even crushed potato chips for a salty crunch. For a sweeter twist, add chopped dried cranberries or candied pecans. Just toast them first (except chips) to enhance flavor. The key is to keep the total nut amount at 1.5 cups for proper texture.
How do I make this recipe vegetarian?
This recipe is already vegetarian, but if you want to emphasize it: use vegan cream cheese (like Kite Hill) and vegan sharp cheddar (like Violife). For extra richness, add 1 tbsp nutritional yeast to the mix—it adds a cheesy depth. Just note vegan cheeses may alter the texture slightly, so you might need 1 extra ounce of cream cheese for binding.
What’s the best way to serve this cheese ball?
Classic 70s style means serving with Ritz crackers or water crackers, but it’s also great with pretzels, veggie sticks, or even sliced baguette. For a modern twist, arrange it on a platter with olives, pickles, and mustard for a retro charcuterie vibe. Slice with a hot knife for clean pieces that hold their shape.

- Baked Potatoes in Crock Pot Recipe: Buttery Interiors and Crispy Top Magic - November 1, 2026
- Braised Beef Short Ribs Recipe: Crock Pot Fall-Off-Bone Magic in 6 Hours - November 1, 2026
- Crock Pot Cocoa Recipe: Velvety Warmth With Hidden Spice Magic - November 1, 2026