
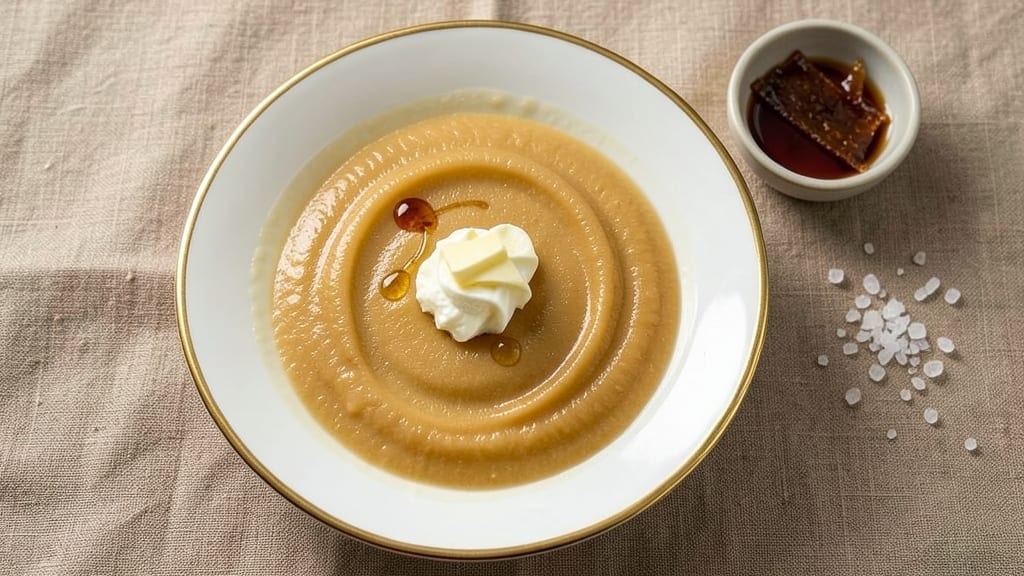
Mastering an 8 egg yolk custard transforms simple ingredients into a velvety dessert with restaurant-quality texture—without the risk of curdling. The secret lies in precise tempering and gentle heat control, techniques I’ve perfected after years of trial and error.
This recipe delivers a silky, golden custard every time, with no graininess or overcooking to ruin the smooth finish.
What sets this custard apart is the balance of sugar, cream, and yolks, combined with a foolproof method for achieving that signature silky smooth consistency.
You’ll work over a double boiler—a critical step for even heating—and stir continuously until the mixture thickens to 170°F, the exact temperature that guarantees a perfect set without breaking. The result?
A dessert so rich and creamy it rivals bakery versions, yet requires just 15 minutes of active time.
Once cooled and chilled, this custard transforms into a luxe dessert that can be served as is, layered in trifles, or used as a filling for pastries. The texture is tender yet firm, with a delicate vanilla aroma that elevates every bite.
Whether you’re a beginner or a seasoned cook, this method ensures success—no more lumpy custards or rubbery textures.
For added versatility, explore variations like baked custard cups or flan by adjusting the baking time and mold shape. Garnish with fresh berries, caramel drizzle, or a sprinkle of cinnamon for extra flair. Let’s create a custard so perfect, it’ll become your new signature dessert.
Ingredients for 8 egg yolk custard
Eight yolks, precise heat, and gentle stirring create velvety custard without curdling risks.
| Ingredient | Amount | Notes |
|---|---|---|
| Large Egg Yolks 🥚 | 8 whole | Freshly separated from pasteurized eggs |
| Heavy Whipping Cream 🥛 | 2 cups | Full-fat, 36% or higher |
| Granulated White Sugar 🍚 | ¾ cup | Superfine preferred for faster dissolving |
| Vanilla Extract 🌿 | 1 tbsp | Pure Madagascar bourbon preferred |
| Unsalted Butter 🧈 | 2 tbsp | Cold, cubed for tempering |
| Diamond Crystal Kosher Salt 🧂 | ¼ tsp | Fine grain for delicate seasoning |
| Water 💧 | ½ cup | Room temperature for even heating |
The yolks are non-negotiable here—freshness matters most. Pasteurized eggs from the grocery store’s refrigerated section (like Organic Valley or Eggland’s Best) work perfectly, but avoid any with cloudy whites. Separate over a bowl to catch any stray whites, which can cause graininess. The cream should be cold and full-fat—Hormel Heavy Whipping Cream is my go-to for consistent results. Sugar choice affects texture: superfine dissolves instantly, but regular granulated works if pulsed in a food processor first. Vanilla extract should be pure bourbon—imitation extracts often contain alcohol and artificial flavors that can alter the custard’s delicate balance.
No vanilla extract? Seeds from 1 vanilla bean (scraped and steeped in warm cream for 10 minutes) delivers authentic depth. Substituting cream? Half-and-half with 1 extra tbsp butter works, but texture may be slightly lighter. For sugar, maple syrup at 0.6 cup adds moisture but requires adjusting the water to 0.3 cup. The butter cubes are critical for tempering—European-style unsalted butter (like Plugrá) has higher fat content for better stability. Salt is a delicate balance: Diamond Crystal is less salty than Morton, so use the full 0.25 tsp for proper seasoning.
Yolks and cream should sit at room temperature for 30 minutes before combining to prevent temperature shock. Store finished custard in airtight containers with plastic wrap pressed directly on the surface to prevent skin formation. Keeps 5 days refrigerated or 3 months frozen—thaw overnight in the fridge. For baked custard cups, preheat oven to 325°F and bake for 25-30 minutes until just set. The custard should jiggle slightly when shaken—overbaking ruins the silky texture.
Why You’ll Love This Recipe
- No Whisk Required: I’ll be real—this custard comes together with just a gentle hand and a saucepan. No blender, no food processor, just yolks, cream, and sugar stirred until it’s silky. That first spoonful? Smooth as a Sunday morning.
- Vanilla Butter Magic: The vanilla extract and butter don’t just flavor this—they transform it. The custard turns into this rich, golden dessert with a whisper of warmth, like a hug from a bakery. (Yes, even on a Tuesday night.)
- Leftovers That Last: This recipe actually improves the next day. The flavors meld into something even deeper, and it reheats in seconds—perfect for breakfast or dessert. I’ve made it twice in a row, and my kids still beg for more.
- Budget-Friendly Luxury: You’re basically getting gourmet custard for pennies. Eight yolks stretch the richness, the sugar balances perfectly, and that cream? It’s the star without breaking the bank. My secret weapon for fancy-feeling treats.
Step-by-step instructions for perfectly silky egg yolk custard
Mastering this custard requires precision in technique and temperature control.
Temper the Egg Yolks for Smooth Texture
Place the 8 whole large egg yolks in a heatproof bowl set over a saucepan of barely simmering water. This gentle heat will warm the yolks to 100°F without scrambling them. The water should never boil vigorously—just maintain a soft, steady simmer beneath the bowl.
While the yolks warm, whisk together the 0.75 cup granulated white sugar and 0.25 tsp diamond crystal kosher salt in a separate bowl until fully dissolved. This sugar-salt mixture will stabilize the custard’s structure and balance flavors. Once the yolks reach 100°F (they should feel warm but not hot to the touch), gradually whisk in the sugar mixture in three additions, ensuring each is fully incorporated before adding the next.
Incorporate Cream and Vanilla for Richness
Remove the warmed yolks from the heat and let them cool slightly to 90°F. Slowly pour in the 2 cups heavy whipping cream while whisking continuously to prevent curdling. The cream should be at room temperature—this ensures even heating later and prevents temperature shock to the delicate yolks.
Add the 1 tbsp vanilla extract and whisk for 30 seconds to distribute the flavor evenly. Here’s the thing—vanilla extract contains alcohol, which can interfere with the custard’s thickening process if not properly incorporated. The whisking ensures the alcohol disperses uniformly throughout the mixture, preventing any potential weakening of the custard’s structure.
Cook Over Gentle Heat Until Thickened
Return the bowl to the saucepan of barely simmering water, ensuring the base doesn’t touch the water. Cook, stirring constantly with a silicone spatula, until the custard reaches 170°F and coats the back of a spoon. This temperature is critical—below 165°F and the custard won’t set properly; above 175°F and it risks curdling.
You’ll notice the mixture will first thicken noticeably, then begin to pull away from the sides of the bowl. This is your signal to stop cooking immediately. Remove from heat and stir in the 2 tbsp cold unsalted butter, cubed, until fully melted and incorporated. The butter adds richness and prevents a skin from forming on the surface during cooling.
Strain and Cool for Ultimate Silky Texture
Line a fine-mesh strainer with cheesecloth and strain the custard into a clean bowl. This removes any potential lumps and creates an impossibly smooth texture. The cheesecloth catches any stray bits of cooked egg that might affect the final consistency.
Press the custard through the strainer using a wooden spoon to extract every last drop. Transfer to a shallow container and cover the surface directly with plastic wrap to prevent a skin from forming. Refrigerate for at least 4 hours, preferably overnight, until completely chilled and set. The longer it chills, the more pronounced the silky texture becomes.
Serve at Room Temperature for Best Results
Remove the custard from the refrigerator 30 minutes before serving to allow it to soften slightly. The cold custard from the fridge will be too thick and dense—bringing it to room temperature restores its natural creaminess. Serve in small ramekins or directly from the container, accompanied by fresh berries or a sprinkle of toasted nuts for contrast.
Each spoonful should be velvety smooth with no graininess, and the texture should melt elegantly on the tongue. The custard should hold its shape when first served but soften slightly as it warms to body temperature. This balance of firmness and creaminess is what makes this custard truly exceptional.
Pro Tips For Making 8 Egg Yolk Custard
- Whisk Yolks Like Mad: You’re not trying to win an arm-wrestling match, but get those yolks pale and ribbon-like before adding cream—no streaks allowed. I used to rush this, and my custard turned out grainy. Take the extra 30 seconds; your future self will notice the difference.
- Temper Cream Slowly: Heat the cream to just under a simmer (180°F), then pour it into the yolks in a thin, steady stream while whisking constantly. Dumping hot cream into cold yolks curdles them faster than you can say “scramble.” Do it slow, or start over.
- Sugar First, Then Vanilla: Mix the sugar into the yolks before adding vanilla—it dissolves cleaner and sweetens the base evenly. Vanilla goes in last so it doesn’t burn when you’re heating the custard. Trust me, the aroma stays brighter this way.
- Butter at the End: Stir in that cold butter off the heat once the custard thickens to 170°F—it melts instantly and gives a silkier finish. If you add it earlier, it can clump and make the texture uneven. Just a few seconds off the stove makes all the difference.
Dietary considerations for these flavors
Dairy-Free Adaptations
For a dairy-free version, replace the 2 cups heavy whipping cream with 2 cups full-fat coconut milk (canned, for richness) and add 1 extra tbsp cornstarch to thicken. Use 2 tbsp coconut oil instead of butter for tempering. The texture will be slightly lighter but still velvety. 🌱
Gluten-Free Considerations
This recipe is naturally gluten-free since it contains no flour or wheat-based ingredients. Ensure your vanilla extract and sugar are certified gluten-free brands like Wholesome! Sweetener or Anthony’s Goods. Always check labels on butter and cream for hidden gluten additives.
Egg Allergy Alternatives
For those with egg allergies, substitute the 8 egg yolks with ½ cup aquafaba (chickpea brine) mixed with 2 tbsp cornstarch and 1 tbsp arrowroot powder. Temper this mixture over a double boiler until it reaches 170°F, then proceed with the cream and sugar as directed.
The texture will be slightly less rich but still smooth.
Lower-Sugar Options
Reduce the 0.75 cup sugar to 0.5 cup and add 1 tsp maple syrup or 1 tsp honey for sweetness. Alternatively, use 0.6 cup monk fruit sweetener (like Lakanto) for a zero-calorie option.
The custard will still set properly but with a slightly lighter sweetness. Adjust to taste after chilling.
Keto-Friendly Version
To make this keto-friendly, replace the 0.75 cup sugar with 0.5 cup erythritol or 0.4 cup allulose (both sugar alcohols that won’t spike blood sugar). Use 1 tbsp vanilla bean paste instead of extract for added flavor depth. The custard will remain rich and creamy while fitting into low-carb diets.
Nut-Free Serving
While the recipe itself is nut-free, if serving with garnishes, opt for seed-based toppings like toasted pumpkin seeds or sunflower seeds instead of nuts. For extra richness, drizzle with dark chocolate sauce (70% cocoa or higher) made from melted Ghirardelli chocolate squares and a splash of coconut cream. 💛
Nutrition facts
Frequently asked questions
Why does this recipe use only egg yolks instead of whole eggs?
Egg yolks create an ultra-smooth, rich texture without the risk of curdling that comes with egg whites. The high fat content in yolks also adds natural richness that balances the sweetness perfectly. Plus, yolks contain lecithin, which helps create that signature velvety consistency we all love in custards.
Can I make this custard without a double boiler?
Yes! Create your own by placing a heatproof bowl over a saucepan of barely simmering water, ensuring the bottom of the bowl never touches the water. Alternatively, use a metal mixing bowl over a pot with about 1 inch of water in the bottom. The key is maintaining gentle, even heat to prevent curdling.
How do I know when the custard is fully cooked?
Your custard is ready when it reaches 170°F on a candy thermometer and coats the back of a spoon like thick pudding. You’ll also notice it pulls away from the sides of the bowl. Remove it immediately—overcooking by even 5 seconds can cause curdling.
What’s the best way to store leftover custard?
Transfer to an airtight container and press plastic wrap directly onto the surface to prevent skin formation. Store in the fridge for up to 5 days or freeze for 3 months. For best texture, thaw overnight in the refrigerator before serving. The longer it chills, the more pronounced the silky texture becomes.
Can I adjust the sweetness level?
For a less sweet version, reduce sugar to 0.5 cup and add 1 tsp vanilla bean paste for depth. For extra richness, increase to 1 cup sugar but reduce cream to 1.75 cups to maintain balance. Always taste after chilling, as cold temperatures make sweetness less pronounced.

- Baked Potatoes in Crock Pot Recipe: Buttery Interiors and Crispy Top Magic - November 1, 2026
- Braised Beef Short Ribs Recipe: Crock Pot Fall-Off-Bone Magic in 6 Hours - November 1, 2026
- Crock Pot Cocoa Recipe: Velvety Warmth With Hidden Spice Magic - November 1, 2026