
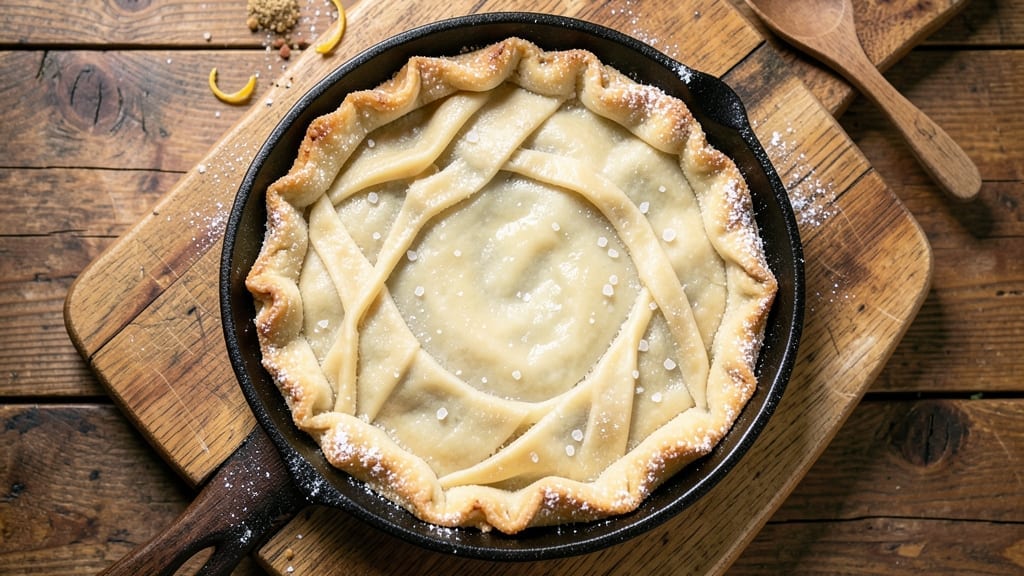
An 8-inch pie crust recipe that delivers flaky layers and stays perfectly crisp is the secret weapon behind every showstopping dessert. This foundational technique transforms simple ingredients into a golden, tender shell that holds its shape—no more soggy bottoms or tough edges.
I’ve perfected it over years of baking, ensuring it’s foolproof for beginners while delivering restaurant-quality results.
The key lies in cold butter and precise handling: chilled dough prevents spreading, while gentle rolling creates those signature layers. No food processor? No problem—this method works by hand for a more traditional touch.
The crust bakes up golden brown with just a hint of crispness, ready to hold fillings like fruit, custard, or savory quiche without losing its structure.
What sets this apart is the balance of texture—tender yet sturdy, with edges that stay crisp even after filling. Whether you’re making a classic apple pie, a rich chocolate tart, or a savory galette, this crust is your reliable base.
The secret? Patience in the chilling and baking stages, where timing makes all the difference.
Once mastered, this crust becomes a versatile foundation for endless desserts. Use it for single-crust pies, double-crust hand pies, or even as a tart shell. The instructions below break down every step, from mixing to baking, so you can achieve perfectly flaky results every time—no shortcuts needed.
Ingredients for 8 inch pie crust
Six ingredients. One chilled dough. The foundation for every perfect pie.
| Ingredient | Amount | Notes |
|---|---|---|
| All-Purpose Flour 🌾 | 2 ½ cups | Sifted for optimal texture |
| Unsalted Butter 🧈 | 1 cup | Cold, cubed into 1/2-inch pieces |
| Ice Water 💧 | ½ cup | Chilled thoroughly for precision |
| Diamond Crystal Kosher Salt 🧂 | ½ tsp | Fine grain preferred |
| Granulated Sugar 🍚 | 1 tbsp | Enhances flakiness |
| White Vinegar 🍶 | 1 tbsp | Brightens flavor subtly |
The butter is non-negotiable—European-style unsalted butter like Plugrá or President delivers the most tender layers. Grab it from Whole Foods or specialty markets if your grocery store doesn’t carry it. The flour should be all-purpose, not self-rising, and stored in a cool, dry place—flour absorbs moisture over time, which can affect texture. For the best results, use flour within 6 months of milling. The ice water is critical: if it’s not cold enough, the butter won’t create proper layers.
No ice water? Freeze a small ice cube tray for 10 minutes before using. Running short on butter? Vegetable shortening works in a pinch, though it won’t be as flavorful. The vinegar can be swapped for lemon juice at the same amount—just don’t skip it entirely. For a gluten-free version, use a 1:1 flour blend like Bob’s Red Mill, but expect slightly less flakiness. The sugar isn’t just for sweetness—it tenderizes the gluten, creating those signature layers. If your recipe calls for salted butter, omit the additional salt entirely.
The dough must rest at least 1 hour before rolling—this is where the magic happens. Wrap it tightly in plastic and refrigerate. For longer storage, freeze the dough ball for up to 3 months—thaw overnight in the fridge before using. Once baked, store the crust at room temperature in an airtight container for 3 days or freeze for 2 months. The secret to reheating? A quick 5-minute bake at 350°F (175°C) restores crispness perfectly.
Why You’ll Love This Recipe
- Foolproof First Try: I’ll never forget the time I burned my first pie crust—this method actually works the first time. Cold butter and ice water keep things stable, so no more soggy bottoms or greasy messes.
- Buttery Crisp Magic: That flaky, golden edge? It’s all in the cold butter cut into the flour—tiny pockets of fat melt into pure flavor. Honestly, the first bite makes me question why I ever bought store-bought crusts.
- Pantry Staple Power: Five ingredients, all things you already own (or can grab cheap). No weird substitutions or last-minute store runs—just flour, butter, and a splash of ice water. My go-to for pies, tarts, or even savory galettes.
- Leftovers? More Like Leftovers: Make two crusts in the same time it takes to bake one—extra for hand pies, pot pies, or even a quick quiche. I freeze them flat, then thaw between parchment for zero fuss. (Yes, even on a Tuesday night.)
Step-by-step instructions for flaky 8-Inch pie crust
Mastering this technique guarantees layers that shatter with each bite—here’s how to achieve it every time.
Combine Dry Ingredients and Cut in the Butter
In a large bowl, whisk together the 2.5 cups All-Purpose Flour, 0.5 tsp Diamond Crystal Kosher Salt, 1 tbsp Granulated Sugar, and 1 tbsp White Vinegar. The vinegar brightens the crust subtly while enhancing tenderness. Sift the flour if needed to eliminate any lumps that could disrupt the delicate layers.
Add the 1 cup Unsalted Butter, cut into ½-inch cubes, and let it sit at room temperature for 10 minutes before working with it. This ensures the butter is pliable but not melted. Using a pastry cutter or two forks, cut the butter into the flour mixture until you reach pea-sized crumbs with some flour-coated butter pieces remaining. This texture is crucial—it creates pockets of fat that will melt during baking, producing flaky layers. Avoid overworking the mixture, as this develops gluten and makes the crust tough.
Gradually Add Ice Water for Perfect Dough
Sprinkle the 0.5 cup Ice Water over the flour-butter mixture, 1 tablespoon at a time, using a fine-mesh strainer or spoon. Gently stir with a fork or rubber spatula after each addition. The ice water is essential—it hydrates the dough just enough to bind it without making it sticky. You’ll know you’ve added enough when the dough clumps together when pressed lightly but doesn’t stick to your fingers.
Once the dough comes together, turn it out onto a lightly floured surface and gently knead it 3-4 times just to combine. Avoid over-kneading, as this will toughen the crust. Divide the dough into two equal discs, flatten slightly, wrap each in plastic wrap, and refrigerate for at least 1 hour or up to 2 days. Chilling relaxes the gluten and firms up the butter, making it easier to roll out and preventing shrinking during baking.
Roll Out the Dough for an Even Crust
On a lightly floured surface, roll out one disc of dough into an 8-inch circle, about ⅛-inch thick. To achieve even thickness, rotate the dough ¼ turn after every few strokes. If the dough resists rolling or cracks, let it rest for 5 minutes at room temperature before continuing. The goal is to create a smooth, uniform circle that will fit perfectly into your pie dish.
Carefully transfer the rolled-out crust to an 8-inch pie dish, gently shaping it to conform to the bottom and sides. Trim any excess dough hanging over the edge with kitchen shears or a sharp knife. For a classic double-crust pie, repeat the rolling process with the second disc of dough, then fold and crimp the edges to seal. If making a single crust, proceed directly to blind-baking.
Blind-Bake for a Perfectly Crisp Base
Preheat your oven to 375°F. Line the chilled crust with parchment paper or aluminum foil, then fill it with pie weights or dried beans to prevent puffing. Bake for 15 minutes to set the shape and remove the weights. Increase the oven temperature to 400°F and bake for an additional 10-12 minutes until the edges are golden brown and the crust is fully set. The base should be crisp but not dark brown—this ensures it stays flaky rather than becoming tough.
Remove the crust from the oven and carefully remove the parchment paper. If making a double-crust pie, brush the bottom crust with a thin layer of egg wash (1 egg yolk beaten with 1 tablespoon water) before adding the filling. This creates a golden finish and helps seal the edges. For a single crust, proceed directly to filling and baking as directed for your specific pie recipe.
Pro Tips For Making 8 Inch Pie Crust
- Cut Butter Cold: DESCRIPTION: Take your unsalted butter straight from the fridge—no thawing, no softening—then grate it into tiny pea-sized pieces. This keeps the fat cold longer, which means flakier layers when it melts in the oven. I used to slice it, and the crust always came out tougher.
- Measure Salt Right: DESCRIPTION: Diamond Crystal kosher salt is lighter than table salt, so don’t eyeball it. Use the exact amount called for—too little and your crust tastes bland, too much and it’ll dry out. If you’re unsure, weigh it: 1 teaspoon equals about 5 grams.
- Press, Don’t Roll: DESCRIPTION: Skip the rolling pin for the first chilling. Instead, press the dough into the pie dish with your fingertips, then chill it. This prevents shrinking and makes docking easier later. I learned this after my first crust puckered like a sad balloon.
- Chill Twice: DESCRIPTION: After rolling, wrap the dough tightly and refrigerate for at least 30 minutes before baking—even if the recipe says otherwise. The second rest locks in shape and prevents the butter from melting too fast. Yes, it’s an extra step, but it’s the thing that matters most for a crisp crust.
Dietary considerations for this 8 inch pie crust
Gluten-Free Adaptations
For a gluten-free version, swap the all-purpose flour for a 1:1 gluten-free flour blend like Bob’s Red Mill or King Arthur. These blends mimic the structure of wheat flour, though you may need to add 1 extra tablespoon of ice water—gluten-free flours absorb moisture differently.
Chill the dough an extra 30 minutes before rolling to prevent cracking. 🌾
Vegan Butter Swap
Replace the unsalted butter with vegan butter like Miyoko’s or Earth Balance, but expect slightly less flakiness. Use 1 cup plus 1 tablespoon to compensate for lower fat content. For extra richness, fold in 2 tablespoons of coconut oil (solid at room temperature) into the dry ingredients.
The vinegar remains key—it brightens the crust and balances any coconut flavor. 🧈
Low-Carb Options
Cut 1 tablespoon of sugar and replace ½ cup of flour with almond flour for a lower-carb crust. The texture will be denser but still sturdy. Use 1 extra tablespoon of ice water to bind the dough.
For a crispier edge, brush the baked crust with 1 tablespoon melted vegan butter before adding fillings. 🍚
Nut-Free Allergies
If almond flour isn’t an option, try a tapioca starch blend like Cup4Cup for gluten-free binding. Skip the almond flour entirely and stick to the original recipe but with a gluten-free flour blend.
Always check labels—some blends contain trace nuts. Store-bought gluten-free crusts (like Bob’s Red Mill) can also be a backup, though homemade tastes far superior. 🌱
Dairy-Free Clarifications
Vegan butter works, but never substitute margarine—it lacks the fat content needed for flakiness. For extra crispness, add 1 tablespoon of aquafaba (chickpea brine) to the dough.
It mimics egg wash for sealing edges without dairy. Brush the baked crust with 1 tablespoon melted coconut oil for a golden finish. 💧
Nutrition facts
Frequently asked questions
Why is ice water important in pie crust?
Ice water is crucial because it hydrates the dough just enough to bind it without making it sticky or tough. The cold temperature helps maintain the butter’s firmness, which creates those signature flaky layers when it melts during baking. Using room-temperature water can lead to a dense, chewy crust.
Can I make this crust without a food processor?
Use two forks or a pastry cutter to cut the cold butter into the flour until you get pea-sized crumbs with some flour-coated butter pieces remaining. This manual method creates the same texture needed for flaky layers—just work quickly to avoid warming the butter.
What’s the best way to prevent a soggy bottom?
Always blind-bake your crust for 10-12 minutes at 400°F before adding filling. This creates a sturdy base that won’t absorb moisture from fruit juices or custards. For extra insurance, brush the baked crust with a thin layer of egg wash before adding fillings.
How do I fix a cracked crust during rolling?
If your dough cracks while rolling, let it rest for 5 minutes at room temperature to relax. Gently press the cracks together with your fingers and continue rolling. Avoid stretching the dough—this causes tears. For stubborn cracks, chill the dough for 10 minutes before trying again.
Can I use this crust for savory dishes like quiche?
Yes! This crust works perfectly for savory applications. Just reduce the sugar to ½ tablespoon and add ½ teaspoon dried herbs (like thyme or rosemary) to the dry ingredients. The vinegar can be omitted entirely for a neutral flavor. The same blind-baking technique ensures a crisp base for your quiche filling.

- Baked Potatoes in Crock Pot Recipe: Buttery Interiors and Crispy Top Magic - November 1, 2026
- Braised Beef Short Ribs Recipe: Crock Pot Fall-Off-Bone Magic in 6 Hours - November 1, 2026
- Crock Pot Cocoa Recipe: Velvety Warmth With Hidden Spice Magic - November 1, 2026