
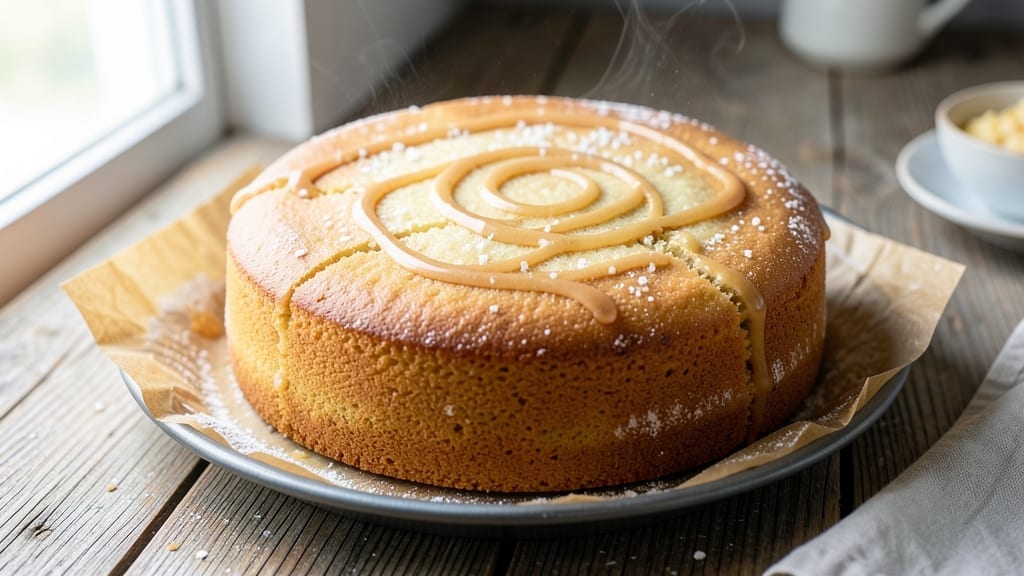
An 8-inch single-layer cake delivers restaurant-quality results with a perfectly level top and moist crumb every time—no doming, no cracks. The secret lies in precise measurements, proper mixing, and a foolproof baking technique that ensures consistent height and texture.
I’ve baked hundreds of cakes, and this method guarantees a cake that’s as beautiful as it is delicious.
This recipe uses a one-bowl method with simple ingredients you likely already have: all-purpose flour, butter, sugar, eggs, and vanilla. The key to a level cake is room-temperature butter and folding the dry ingredients just until combined—overmixing leads to a tough crumb.
Baking at 350°F for 25-30 minutes ensures even cooking without overbrowning.
Once baked, the cake will have a golden, even top with a tender crumb that stays moist for days. It’s perfect for birthdays, anniversaries, or any occasion where you want a cake that looks as impressive as it tastes.
The best part? This recipe scales easily—double the batter for a 16-inch cake or halve it for a 6-inch version.
For finishing touches, consider a simple buttercream frosting or a light glaze—both complement the cake’s natural flavor without overpowering it. The result is a cake that’s foolproof, elegant, and universally loved. Let’s get baking!
Ingredients for 8 inch single layer cake
Nine essential ingredients for a flawlessly level, restaurant-quality single-layer cake every time.
| Ingredient | Amount | Notes |
|---|---|---|
| Unsalted Butter 🧈 | 1 cup | Room temperature for even mixing |
| Granulated Sugar 🍚 | 1 ½ cups | White or light brown preferred |
| All-Purpose Flour 🌾 | 2 cups | Sifted for lighter texture |
| Large Eggs 🥚 | 2 whole | Room temperature for optimal blend |
| Pure Vanilla Extract 🌿 | 1 tbsp | High-quality for authentic flavor |
| Baking Powder 🍞 | 2 tsp | Freshly opened for proper leavening |
| Salt 🧂 | ½ tsp | Fine sea salt preferred |
| Whole Milk 🥛 | ½ cup | Room temperature for smooth batter |
| Vegetable Oil 🫒 | ¼ cup | Lightens texture and extends shelf life |
The butter is non-negotiable—room temperature is critical for even distribution and a tender crumb. Plugrá or Land O’Lakes unsalted are my go-tos for consistent results. The flour should be sifted before measuring to prevent lumps and ensure an airy texture. For the sugar, Domino or C&H brands provide reliable granulation, though light brown sugar adds subtle depth if you prefer a hint of molasses. Eggs should be room temperature—cold eggs can cause curdling in the batter.
No vanilla extract? Vanilla bean paste works beautifully, though it’s pricier. For a budget-friendly swap, imitation vanillaalmond milk or heavy cream can substitute, though whole milk’s fat content ensures optimal moisture. The vegetable oil acts as a tenderizer; Mazola or Crisco are reliable brands for consistent results.
Store dry ingredients like flour and sugar in airtight containers to prevent absorption of ambient moisture. Butter can be kept at room temperature for up to 3 weeks if stored properly, though freezing extends its shelf life to 6 months. The batter should be used within 24 hours for best texture, though it can be refrigerated. For long-term storage, freeze the baked cake in portions—it reheats beautifully with a quick broil.
Why You’ll Love This Recipe
- No Mixer Needed: I swear by this recipe when my stand mixer’s on vacation. Creaming butter and sugar by hand? Takes about five minutes—no fancy tools, just elbow grease and patience (and maybe a glass of wine while you go).
- Buttery Vanilla Bliss: That first bite? Rich, tender crumb with vanilla so deep it’s practically whispering “I’m worth the wait.” The eggs keep it moist, but the butter? Oh, the butter makes it sing—like a warm hug from your favorite baker.
- Portion Control Perfection: An 8-inch cake is my happy medium—big enough for a celebration but not so huge it gets lonely in the fridge. Slice it into six perfect squares, and you’ve got dessert for a book club or a solo movie night. (Yes, I’ve done both.)
- Budget-Friendly Luxury: Five ingredients, zero substitutions needed. This cake costs me about $3 to make, but it tastes like I spent an hour decorating it. Leftovers? They vanish faster than my willpower on a sugar-free day—trust me, I’ve tried.
Step-by-step instructions for an 8-Inch single layer cake
Mastering this technique guarantees a cake with a perfectly level top and even texture every time.
Prepare Your Cake Pan and Mixing Equipment
Begin by greasing an 8-inch round cake pan thoroughly with the 1 cup unsalted butter, using a pastry brush to ensure even coverage. Dust the pan with 2 tablespoons of the 2 cups all-purpose flour, tapping out any excess. Line the bottom with parchment paper for easy removal. This preparation prevents sticking and ensures clean edges when unmolding.
While the pan is being prepared, sift the 2 cups all-purpose flour with the 2 teaspoons baking powder and 0.5 teaspoon salt into a medium bowl. Set aside—this creates a smooth, aerated base for the batter. I like to sift twice for maximum lightness, especially if the flour is old or clumpy. This step eliminates potential lumps that could affect the cake’s texture.
Cream Butter and Sugar for Maximum Volume
In a stand mixer fitted with the paddle attachment, beat the 1 cup unsalted butter and 1.5 cups granulated sugar on medium speed for 3-4 minutes. The mixture should become pale, fluffy, and nearly double in volume. This creaming process incorporates air, which is essential for a light, tender crumb.
Stop occasionally to scrape down the sides of the bowl with a rubber spatula—this ensures even mixing. The butter should be completely smooth with no graininess. If the mixture looks curdled or doesn’t lighten, continue beating for another minute. This foundational step makes all the difference in achieving a perfectly level, evenly baked cake.
Incorporate Eggs and Wet Ingredients
Add the 2 whole large eggs, one at a time, mixing on low speed after each addition until fully combined. Then add the 1 tablespoon pure vanilla extract and mix for 10 seconds. The batter should be smooth and slightly thick. I always use room-temperature eggs for better emulsification with the butter.
Gradually pour in the 0.5 cup whole milk and 0.25 cup vegetable oil, mixing on low speed until just combined. Avoid overmixing at this stage—you should still see slight streaks of flour. Overmixing develops gluten, which can make the cake dense. The ideal batter should be thick but pourable, with a smooth, velvety consistency.
Combine Dry Ingredients and Test Batter Consistency
With the mixer on low speed, gradually add the sifted dry ingredients to the wet mixture. Mix just until the flour is incorporated and no dry spots remain. The batter should be thick but smooth, resembling a slightly runny cake batter. If it’s too thick, add 1-2 tablespoons of milk to reach the proper consistency.
For a perfect single layer, the batter should spread evenly in the pan and rise 1-1.5 inches above the pan’s edge when poured. This ensures a level top after baking. If the batter is too thin, the cake may collapse in the center. If too thick, it may not rise properly. This balance is key to achieving that professional, level finish.
Bake at the Right Temperature for Even Cooking
Preheat your oven to 350°F and place the rack in the center position. Pour the batter into the prepared pan and smooth the top with an offset spatula. Tap the pan gently on the counter 3-4 times to remove any air bubbles. Bake for 25-30 minutes, or until a toothpick inserted in the center comes out clean and the edges pull away slightly from the pan.
The cake is done when the top springs back gently when touched and the internal temperature reaches 210°F. Overbaking dries out the cake, while underbaking leaves it gummy. Immediately transfer the cake to a wire rack to cool completely before unmolding. This cooling step is crucial—rushing it can cause the cake to crack or lose its shape.
Pro Tips For Making 8 Inch Single Layer Cake
- Cream Butter and Sugar Slowly: Use a stand mixer on medium speed for 3-5 minutes until the butter looks like wet sand—not pale yellow, but a creamy beige. I learned this the hard way—rushing it traps air unevenly, leading to a cake that collapses or has pockets of dryness.
- Weigh Your Flour: Skip the scooping and scooping—use a kitchen scale for precise measurements. A standard cup of flour can vary by 10-15 grams, and this recipe is already tight on structure. Trust me, your cake will thank you with a lighter crumb.
- Don’t Overmix the Eggs: Once the eggs are fully incorporated, stop mixing immediately—no streaks, no extra blending. Overworking them adds gluten and makes the cake dense. I was skeptical until I tried it; the texture is noticeably smoother and more tender.
- Rotate the Pan Mid-Bake: After 20 minutes in a 350°F (175°C) oven, swap the pan front-to-back and side-to-side. This evens out heat distribution, so you don’t end up with a cake that’s golden on one side and pale on the other—especially important in home ovens with hot spots.
Essential equipment for this recipe
Must-Have Mixing Tools
Your stand mixer is the workhorse for this recipe—I swear by my KitchenAid Artisan Series with the paddle attachment for creaming butter and sugar to perfection. If you don’t have one, a hand mixer works fine, though it requires more elbow grease.
For scraping down the bowl, keep a flexible silicone spatula nearby—it’s gentler on your mixer bowl than metal. Pro tip: I also use a small offset spatula to smooth the batter in the pan before baking. 💡
Precision Baking Equipment
An oven thermometer is non-negotiable—many home ovens run 15-25°F hotter than set, which can ruin your cake’s texture. I recommend the Thermoworks Oven Thermometer for accuracy.
For testing doneness, grab a long, thin skewer (like a wooden toothpick) rather than a metal fork—it’s gentler on the cake and easier to read. A wire cooling rack is essential too; it prevents soggy bottoms and ensures even cooling. ⚡
Pan Essentials
Your 8-inch round cake pan should be made of heavy metal (I use Wilton Perfect Results pans) to distribute heat evenly. Avoid non-stick pans—they can cause uneven baking. For extra insurance against sticking, I line the bottom with parchment paper and grease the sides with room-temperature butter.
Never skip the flour dusting step—it creates a barrier that prevents the cake from clinging. A pastry brush with soft bristles makes greasing effortless. 🧈
Optional Upgrades
For professional results, consider a cake tester (a small, thin metal probe) to check doneness more precisely than a toothpick. A cake leveler comes in handy if your cake develops a dome—just trim the top before frosting.
If you’re decorating, a turntable makes frosting and leveling cakes a breeze. For storage, airtight cake carriers keep your cake fresh for days. 💫
Budget-Friendly Swaps
No stand mixer? A large mixing bowl and your hands work for creaming butter and sugar—just use your fingers to press the butter into the sugar until light and fluffy.
For an oven thermometer, a digital kitchen scale with a built-in thermometer (like the OXO Good Grips) doubles as a budget-friendly alternative. A baking sheet can substitute for a cooling rack in a pinch, though it won’t wick away moisture as effectively. 💰
Nutrition facts
Frequently asked questions
Can I use this recipe for a different-sized cake?
This batter works perfectly for any round cake size. For a 6-inch cake, reduce ingredients by 50%. For a 16-inch cake, double everything—but bake at 325°F for 45-55 minutes to prevent overbrowning. Always adjust baking time based on your oven—use an oven thermometer to ensure accuracy.
Why did my cake dome in the middle?
A dome happens when the center rises faster than the edges. To prevent this, avoid overfilling the pan—batter should rise only 1-1.5 inches above the pan’s edge. Also, bake on the middle rack and rotate the pan halfway through baking if your oven has hot spots. If it still domes, trim the top with a serrated knife before frosting.
Can I make this cake ahead of time?
Yes! Bake the cake 1 day ahead and store it in an airtight container at room temperature. For longer storage (3-4 days), wrap it tightly in plastic wrap and refrigerate. Bring to room temperature before frosting. Freezing works too—wrap the cooled cake in plastic and freeze for up to 3 months. Thaw overnight in the fridge.
What’s the best frosting for this cake?
A simple buttercream frosting (made with 1 cup softened butter, 4 cups powdered sugar, and 2 tbsp milk) complements the cake’s flavor perfectly. For a lighter option, try a vanilla glaze (powdered sugar + milk + vanilla). Avoid overly sweet frostings—the cake’s natural flavor shines through.
Why did my cake crack on top?
Cracks usually appear when the cake cools too quickly. Let it cool in the pan for 10 minutes before transferring to a wire rack. Avoid opening the oven door early—temperature fluctuations cause cracking. If cracks form, they’re purely cosmetic and won’t affect taste. For a smoother finish, trim the cracked edges before frosting.

- Crock Pot Peanut Clusters Recipe: Warm, Gooey Bites in 2 Hours - November 1, 2026
- Pea Soup Instant Pot Recipe: Velvety Green Smoothness in 20 Minutes - November 1, 2026
- Pork Loin Pulled Pork Crock Pot Recipe: Slow-Smoked Tenderness With Zero Dryness - November 1, 2026