
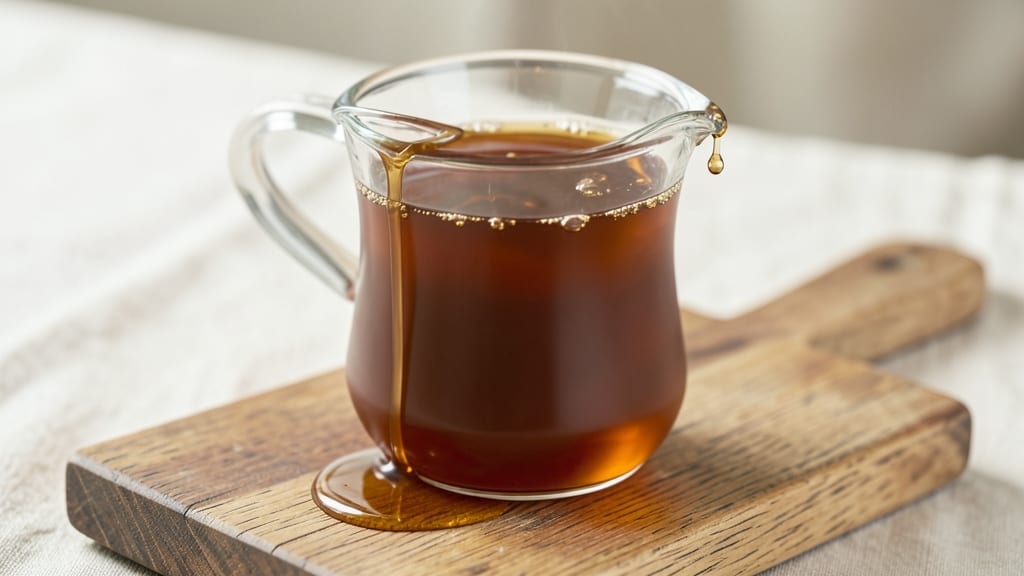
This 8-ounce simple syrup recipe is the foundation of countless cocktails, coffee drinks, and desserts—because a perfectly balanced sweetener makes all the difference. 💛 The beauty of this recipe lies in its simplicity: just two ingredients, precise measurements, and a foolproof method that ensures smooth, fully dissolved sugar every time.
I’ve been using this exact ratio for years in everything from classic Old Fashioneds to iced lattes, and it never fails to deliver that perfect sweetness without overpowering flavors.
The process is straightforward but critical: combine equal parts sugar and water, heat gently until the sugar dissolves completely, then cool before using. This method guarantees a smooth, glossy syrup that won’t crystallize or clump, no matter how you use it.
The 1:1 ratio (8 ounces sugar to 8 ounces water) creates a neutral sweetness that enhances rather than dominates, making it ideal for both sweet and savory applications.
What sets this syrup apart is its versatility—it elevates cocktails like margaritas and mojitos, enhances coffee drinks from lattes to cold brew, and even adds depth to fruit salads or marinades.
The key is storing it properly: keep it refrigerated in an airtight container for up to 2 weeks, or extend its shelf life to 3 months by sterilizing the jar and storing it in the freezer. No guesswork, no wasted ingredients—just pure, reliable sweetness whenever you need it.
Whether you’re a home bartender, coffee enthusiast, or dessert lover, this syrup is a game-changer. It’s the kind of simple tool that transforms ordinary drinks into something extraordinary with minimal effort. Ready to make it? Here’s how to get started—no special equipment required.
Ingredients for 8 oz simple syrup
Two ingredients, precise measurements, and a foolproof method for perfect syrup every time.
| Ingredient | Amount | Notes |
|---|---|---|
| Granulated White Sugar 🍚 | 8 oz | Superfine sugar dissolves faster |
| Water 💧 | 8 oz | Filtered or distilled preferred |
The quality of your sugar matters here. Domino or C&H granulated sugar are reliable choices, but superfine sugar dissolves faster if you’re impatient. I prefer filtered water for clarity, though tap water works fine in most cases. The 1:1 ratio is critical—any deviation risks crystallization. For large batches, consider using a candy thermometer to ensure the sugar fully dissolves at 212°F. If you’re making this frequently, investing in a stainless steel saucepan prevents discoloration from reactive metals.
No granulated sugar? Brown sugar or turbinado will work, though the flavor profile changes slightly. The syrup will have subtle caramel notes with brown sugar. Running short on water? White vinegar or lemon juice at half the amount can help dissolve stubborn sugar crystals if you’ve accidentally overcooked it. For flavored variations, add citrus zest or spices to the hot syrup before cooling—just remember to account for the extra volume. If you encounter graininess, simply reheat the syrup until fully dissolved, then strain through a fine-mesh sieve.
Store the syrup in an airtight glass container in the refrigerator for up to 2 weeks—the cold temperature preserves its clarity. For longer storage, sterilize the container and freeze for 3 months. I like to portion mine into 2-ounce shot glasses for easy cocktail measurements. Always cool the syrup completely before sealing to prevent condensation, which can dilute the concentration. The syrup will thicken slightly when refrigerated, but it returns to its original consistency once brought to room temperature.
Why You’ll Love This Recipe
- Two-Ingredient Magic: I swear by this—just sugar and water, simmered until dissolved. No fancy tools, no measuring headaches, just a pot and 10 minutes of my time. Honestly, it’s the kind of thing I make when I’m too tired to overthink dinner.
- Sweet Flexibility: This syrup is my secret weapon for cocktails, iced tea, or even drizzled over pancakes. The clean, bright sweetness cuts through bitterness or richness without overpowering—like the perfect sidekick in any dish.
- Pantry Staple: I keep a batch in my fridge at all times. It’s cheap, lasts forever, and saves me from buying overpriced bottled syrups. Plus, I can adjust the ratio later if I need it thicker or thinner—no waste, just adaptability.
- Weeknight Hero: Between us, this is how I keep my sanity. Need to jazz up a sad lemonade? Fix a flat soda? Done. It’s the kind of thing I grab when I’m scrambling, and it never lets me down. (Yes, even on a Tuesday night.)
Step-by-step instructions for homemade simple syrup
Master this easy technique for a clean, flavorful sweetener that elevates drinks and desserts.
🍳 Step 1: Combine Sugar and Water in a Saucepan
In a medium saucepan, combine the 8 oz granulated white sugar and 8 oz water. I use a heavy-bottomed pan to prevent scorching—this is especially important since we’re working with equal parts sugar and water, which creates a higher concentration than most syrups.
Stir gently with a wooden spoon to dissolve the sugar completely. You’ll notice the mixture becomes cloudy at first, but keep stirring until it clears. This ensures even dissolution and prevents grainy texture in your final syrup. If you’re using superfine sugar, it dissolves even faster—just 2-3 minutes of gentle heat.
🔥 Step 2: Heat on Medium-Low Until Fully Dissolved
Place the saucepan over medium-low heat and bring to a gentle simmer. I’ve found that medium-low prevents scorching while still dissolving the sugar efficiently. You’ll know it’s ready when all sugar crystals disappear and the mixture becomes completely clear.
Watch closely as it heats—you want to maintain a gentle simmer, not a rolling boil. If you see any sugar sticking to the bottom, add a splash of water and stir until it dissolves completely. This step typically takes 5-7 minutes from cold, but timing varies based on your stove’s heat output.
⏰ Step 3: Remove from Heat and Cool Completely
Once fully dissolved, remove the pan from heat immediately. Let the syrup cool to room temperature before transferring to a clean glass jar. I always use a heatproof spatula to scrape any residual syrup from the pan—every drop counts when you’re making small batches.
This cooling step is crucial. Rushing the process can cause the syrup to crystallize during storage. If you need to use it immediately, let it cool for at least 10 minutes before pouring. For best results, I recommend storing it in the refrigerator for up to 2 weeks or freezing for longer shelf life.
🥄 Step 4: Store Properly for Maximum Shelf Life
Transfer the cooled syrup to a clean, airtight glass jar or bottle. I like to use a 4-ounce bottle for portion control when making cocktails. The glass preserves the syrup’s quality better than plastic and makes it easy to see the color and clarity.
Store in the refrigerator if you plan to use it within 2 weeks. For longer storage, freeze in ice cube trays—each cube makes 1 ounce of syrup perfect for individual cocktails. The syrup should maintain its clear, golden color and smooth texture when properly stored.
Pro Tips For Making 8 Oz Simple Syrup
- USE A MEDIUM HEAVY POT: I learned this the hard way—thin pots boil over like crazy. A 1-2 quart saucepan with sloped sides keeps the syrup contained while still giving enough surface area for even heating. No need for fancy gear, just something sturdy.
- STIR ONCE, NOT CONSTANTLY: After burning three batches, I finally figured out: stir just once when the sugar fully dissolves (about 3-5 minutes), then let it bubble gently. Constant stirring turns your kitchen into a sticky mess and doesn’t actually help the syrup.
- WEIGH YOUR SUGAR: That “8 oz” label on your bag is often wrong. Use a kitchen scale for precise 1:1 sugar-to-water ratio—no guessing. I was skeptical until I tried it; the syrup tastes consistently perfect every time.
- COOL IT FAST: Pour the hot syrup into a heatproof bowl set over ice water for 5 minutes. This stops crystallization and makes it ready for cocktails or desserts immediately. Yes, it’s an extra step, but your future self will thank you.
Dietary considerations for this recipe
Diabetic-Friendly Adjustments
For those managing blood sugar, this simple syrup can be adapted by using monk fruit sweetener or erythritol instead of sugar. Replace the 8 oz granulated sugar with 6 oz monk fruit blend (like Lakanto) or 6 oz erythritol, then follow the same 1:1 ratio with water.
These alternatives have minimal impact on blood glucose levels while still providing sweetness. Always check labels for added fillers or sugar content. 💡
Low-Calorie Options
Cut calories by swapping sugar for sugar-free maple syrup or liquid stevia drops. Use 4 oz sugar-free maple syrup (like Logos) with 8 oz water for a 1:2 ratio.
For stevia, mix 10-15 drops (like Truvia) with 8 oz water—start with less and adjust to taste. These versions reduce calories by 90% while keeping the same application flexibility.
Gluten-Free Confirmation
This recipe is naturally gluten-free since it contains only sugar and water. However, always verify sugar brands—some granulated sugars are processed in facilities that handle gluten-containing ingredients. I recommend Wholesome! Sweeteners or Trader Joe’s Organic Sugar for certified gluten-free options. No cross-contamination risks exist with pure sugar and water.
Keto Adaptations
For keto dieters, replace sugar with sucralose or allulose. Use 6 oz sucralose (like Splenda) or 8 oz allulose (like Wholesome! Sweetener) with 8 oz water.
Allulose has a 1:1 substitution ratio and minimal calorie impact, while sucralose requires careful measurement—start with ½ the volume of sugar called for in recipes. Both options maintain the syrup’s smooth texture.
Nut-Free Allergy Note
This recipe is nut-free by default, but always check sugar brands for cross-contamination warnings. Some commercial sugars are processed in facilities that handle tree nuts. For extra safety, use organic cane sugar (like Wholesome!
Sweeteners) or raw sugar, which are less likely to contain hidden allergens. The water component is inherently nut-free, so no additional precautions are needed.
Nutrition facts
Frequently asked questions
Can I use brown sugar instead of white sugar for this syrup?
Yes, but expect a slightly different flavor profile! Brown sugar will give your syrup subtle caramel notes, which works beautifully in spiced cocktails or desserts. Use the same 8 oz measurement—just stir more vigorously to dissolve the molasses completely. The syrup may darken slightly but will still work perfectly for sweetening.
Why did my syrup crystallize after storing?
Crystallization happens when the syrup cools too quickly or isn’t fully dissolved before cooling. To fix it, gently reheat the syrup until clear (about 1-2 minutes on low heat), then strain through a fine-mesh sieve. For prevention, always cool the syrup completely at room temperature before refrigerating, and use an airtight container to maintain moisture.
How much of this syrup should I use in a cocktail?
Start with ½ to 1 ounce per drink and adjust to taste. For example, a classic margarita uses about ¾ oz, while an iced coffee might need 1-2 teaspoons. Remember, this syrup is concentrated—less is often more! If you’re scaling up, measure by weight (1 oz = 30ml) for consistency, especially in professional settings.
Can I make flavored syrups with this same method?
After dissolving the sugar, remove the pan from heat and stir in 1 teaspoon of your chosen flavor (like vanilla extract, citrus zest, or cinnamon sticks). Let it steep for 10 minutes before straining. For stronger flavors, use 2 teaspoons or infuse longer. Just account for the extra volume when measuring—each teaspoon adds about ½ oz of liquid.
Is this syrup safe for canning or long-term storage?
This recipe isn’t designed for canning due to its high sugar concentration, which can promote bacterial growth if improperly stored. For best results, refrigerate for up to 2 weeks or freeze for 3 months. If you need longer shelf life, consider reducing the syrup first (boiling until it reaches 220°F) to create a shelf-stable version, but this changes the texture and sweetness.

- Baked Potatoes in Crock Pot Recipe: Buttery Interiors and Crispy Top Magic - November 1, 2026
- Braised Beef Short Ribs Recipe: Crock Pot Fall-Off-Bone Magic in 6 Hours - November 1, 2026
- Crock Pot Cocoa Recipe: Velvety Warmth With Hidden Spice Magic - November 1, 2026