
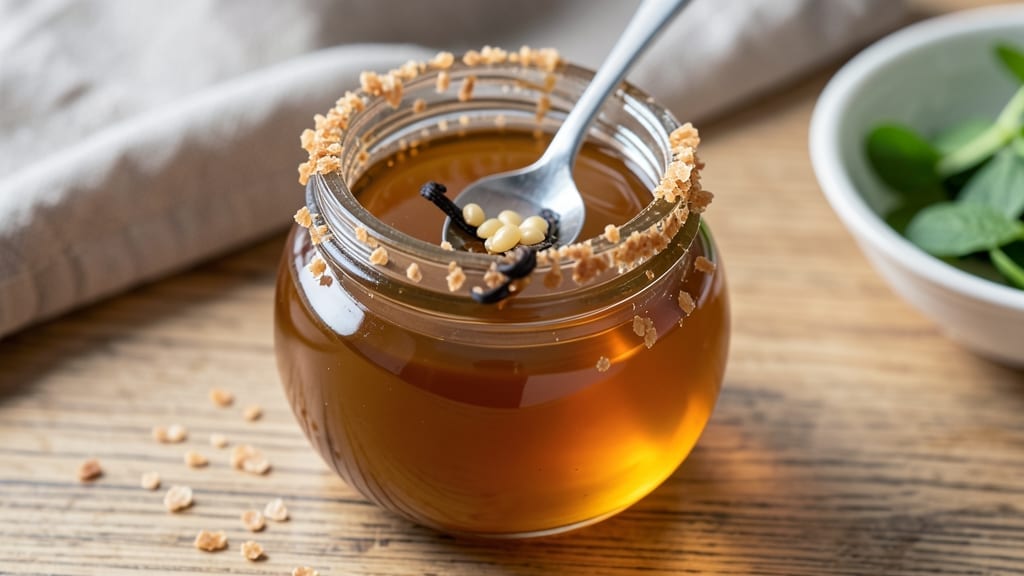
This 12-ounce simple syrup recipe delivers the perfect balance of sweetness for cocktails, coffee, and desserts—every time. The 1:1 sugar-to-water ratio ensures smooth dissolution and consistent flavor, whether you’re stirring it into a classic margarita or drizzling it over vanilla bean ice cream.
Precision matters here, and this method guarantees a clear, flavorful syrup without graininess or crystallization.
The process couldn’t be simpler: combine equal parts granulated sugar and water, heat gently until dissolved, then cool completely before storing. No special equipment is needed—just a saucepan, a whisk, and patience for the sugar to fully integrate.
This foolproof technique works for both light and dark syrups, depending on your sugar choice, and keeps beautifully in the fridge for up to two weeks.
What you’ll end up with is a versatile, restaurant-quality syrup that elevates drinks and desserts with effortless sweetness. The clarity and smooth texture make it ideal for layered cocktails, while its neutral sweetness lets other flavors shine.
Whether you’re mixing a batch for summer cocktails or prepping for holiday desserts, this syrup is your secret weapon.
Use it to sweeten iced tea, glaze donuts, or balance the acidity in your favorite cocktail—just adjust the amount to taste. The key is starting with a precise ratio, then letting the syrup cool completely before bottling. This ensures it stays smooth and ready to use whenever inspiration strikes.
Ingredients for 12 oz simple syrup
Two ingredients, endless possibilities—this syrup transforms drinks and desserts instantly.
| Ingredient | Amount | Notes |
|---|---|---|
| Granulated White Sugar 🍚 | 12 oz | Use fine granulated for smooth dissolution |
| Water 💧 | 12 oz | Filtered or distilled preferred |
| Lemon Juice 🍋 | 1 tbsp | Optional, for subtle brightness |
| Vanilla Bean 🌿 | 1 whole | Split lengthwise for infusion (optional) |
| Light Brown Sugar 🍚 | 12 oz | For caramel notes (substitute for white) |
| Turbinado Sugar 🍚 | 12 oz | For raw, textured syrup (optional) |
The sugar choice makes all the difference. Domino or C&H granulated dissolves perfectly for a clean finish, while light brown sugar adds subtle caramel depth. Trader Joe’s has great options for specialty sugars like turbinado, which creates a textured, raw-sugar syrup perfect for rim garnishes. If you’re making vanilla syrup, grab a high-quality vanilla bean from Penzeys—it’s worth the splurge for that authentic aroma. Store your sugar in an airtight container away from heat to prevent clumping, which can ruin your syrup’s smooth texture.
No lemon juice? Skip it—this isn’t mandatory. Want extra flavor? Citrus zest or a cinnamon stick infuses beautifully during heating. If you’re using brown sugar, strain the syrup through a fine-mesh sieve to remove any grit. For turbinado, let it steep for 10 minutes before straining—those crystals add a lovely crunch. Short on time? Pre-dissolve the sugar in warm water before heating to speed things up. The key is patience: rushing the dissolution leads to grainy syrup, and nobody wants that in their margarita.
This syrup stays fresh for 2 weeks refrigerated or 6 months frozen. Store it in a clean glass jar with a tight lid, and label it with the date. For freezing, use ice cube trays—perfect for single servings. Reheat gently in the microwave or stovetop, stirring until smooth. If your syrup crystallizes, just reheat it until fully dissolved again. Pro tip: Keep a small bottle in your bar cart for instant access—it’s the ultimate cocktail shortcut.
Why You’ll Love This Recipe
- Pantry Staple Magic: I swear by this recipe because it uses exactly what’s already in my cabinets—no specialty trips, no overcomplicating. Just sugar, water, and a splash of lemon juice to cut the sweetness, plus a scraped vanilla bean for that little luxury touch. Honestly, it’s the kind of thing I make when I realize I forgot to buy syrup for my iced tea.
- Vanilla-Lemon Flex: That bright citrus kiss from the lemon juice and the warm, creamy depth of vanilla bean? It’s the perfect balance—bright enough for cocktails, rich enough for desserts. I’ll be real: I’ve drizzled it over grilled peaches, stirred it into coffee, and even used it to glaze ham. The brown sugar twist makes it taste different every time.
- Weeknight Hero: This syrup is my go-to for last-minute drinks or desserts when I’m too tired to measure fancy ratios. A quick simmer, a 10-minute cool-down, and boom—ready to pour. Between us, I’ve saved myself from takeout more times than I can count by keeping a jar in the fridge for those “I just need something sweet” moments.
- Budget-Friendly Luxury: Twelve ounces costs me pennies but feels like a splurge. The brown sugar adds caramel notes that make it taste gourmet, and it keeps for weeks in the fridge. I’ll make a big batch, freeze half, and still have syrup left when summer rolls around. Plus, the vanilla bean? I use the pod again and again until it’s bone dry. Zero waste, all flavor.
Step-by-step instructions for crafting perfect simple syrup
Here’s how to make versatile, professional-grade syrups with exact ratios.
Prepare Your Equipment and Ingredients
Combine the 12 oz granulated white sugar and 12 oz water in a medium saucepan. I always use a heavy-bottomed pan to prevent scorching—this is especially important when working with high sugar concentrations. If using the optional 1 tbsp lemon juice or 1 whole vanilla bean (split lengthwise), add them now to the pan along with the sugar and water.
For the vanilla-infused version, scrape the seeds from the vanilla bean into the mixture. The bean itself can be tied with kitchen twine and added to the simmering syrup for deeper flavor extraction. If you’re making the light brown sugar or turbinado variations, simply replace the 12 oz granulated white sugar with either 12 oz light brown sugar or 12 oz turbinado sugar in this initial step.
Heat and Dissolve the Sugar
Place the saucepan over medium heat and bring to a gentle boil, stirring occasionally with a wooden spoon. You’ll notice the sugar begins to dissolve almost immediately, but continue stirring until all crystals disappear and the mixture becomes completely clear. This typically takes about 5-7 minutes of steady simmering.
Here’s the thing—don’t walk away. Sugar burns easily, and you’ll know it’s happening when you see dark streaks forming on the bottom of the pan. If this occurs, immediately reduce the heat to low and stir constantly until it dissolves. The syrup should be clear with a gentle rolling boil, not a vigorous one that causes splattering.
Simmer for Homogeneous Texture
Once fully dissolved, reduce the heat to low and let the syrup simmer gently for 10-15 minutes. This additional simmering time ensures complete dissolution and develops a more cohesive texture. You’ll notice the syrup becomes slightly thicker and more viscous as it cooks down.
For the vanilla version, let the tied vanilla bean steep in the syrup during this simmering time. The longer it steeps, the more pronounced the vanilla flavor will be. If you’re making the lemon-infused syrup, this is when the citrus notes will fully integrate into the mixture. Stir occasionally to prevent any sugar from settling at the bottom.
Cool and Store Properly
Remove the saucepan from heat and let the syrup cool to room temperature. I always transfer it to a clean, sterilized glass jar or bottle while still warm—this helps prevent any potential mold growth during storage. If you added a vanilla bean, remove it at this stage and either compost it or save it for another use.
The syrup will thicken slightly as it cools, but it should still be pourable at room temperature. For the best results, store in the refrigerator where it will keep for up to 3 months. The light brown sugar and turbinado variations may develop a slightly grainy texture over time, which is normal and doesn’t affect quality. These variations are particularly well-suited for cocktails and coffee where their unique flavors can shine.
Pro Tips For Making 12 Oz Simple Syrup
- STIR CONSTANTLY FOR 2 MINUTES: I learned this the hard way—skipping the stir at the start means you’ll end up with grainy syrup. Once the sugar and water hit the pot, keep that spoon moving until everything dissolves completely. No exceptions, even if it feels like overkill.
- SCRUB THE VANILLA BEAN: Don’t just split it open and drop it in. Scrape the seeds with the back of a knife first—you’re losing flavor if you don’t. The bean’s insides hold more aroma than the pod itself, and that’s what makes the difference in a 12 oz batch.
- USE COLD WATER FOR BROWN SUGAR: Hot water turns light brown sugar into a sticky mess that clumps like glue. Start with cold water, then heat slowly while stirring—this keeps the syrup smooth and prevents a gummy disaster. Trust me, your future cocktails will thank you.
- STRAIN THROUGH A FINE-MESH SIERRA: Cheesecloth or a coffee filter leaves behind tiny sugar crystals and vanilla flecks. A fine-mesh sieve (the kind for nut butters) catches everything while letting the syrup flow freely. Spend the 10 seconds—your drink’s clarity depends on it.
Troubleshooting this recipe
Grainy Syrup Fix
If your syrup develops crystals during storage, don’t panic—this is a common issue with homemade syrups. Simply reheat the syrup in a saucepan over low heat while stirring constantly until all crystals dissolve completely.
For stubborn crystals, add 1 tsp water per 2 oz syrup and reheat. Store in an airtight glass container to prevent future crystallization. 💫
Burnt Sugar Rescue
Accidentally burnt your syrup? First, remove the pan from heat immediately. If only the bottom has dark streaks, strain the syrup through a fine-mesh sieve to remove the burnt particles. For deeper burns, add ½ cup fresh water and reheat gently to dilute the flavor.
The good news is that a small amount of burnt sugar won’t ruin your syrup—it just adds a caramelized depth perfect for cocktails like Old Fashioneds. 🔥
Infusion Overload
Too much vanilla or citrus? If your syrup tastes overwhelmingly infused, dilute it by adding 1 oz water per 4 oz syrup and reheating gently. For vanilla, strain out the bean and reduce the syrup by ⅓ on the stove to concentrate the flavor.
If you used too much zest, strain through cheesecloth for a smoother texture. Remember, you can always add more infusion later—it’s harder to fix overpowering flavors.
Storage Contamination
If your syrup develops an off smell or mold, it’s time to toss it. Always use sterilized glass jars and store in the fridge at 40°F or below. For long-term storage, freeze in ice cube trays—each cube equals 1 oz of syrup.
When ready to use, thaw in the fridge overnight. Never leave syrup at room temperature for more than 2 hours to prevent bacterial growth. ❄️
Ratio Adjustments
Need a sweeter syrup? Increase the sugar by 1 oz per 4 oz syrup and reheat to dissolve. For less sweetness, add 1 oz water per 4 oz syrup. If your syrup is too thin after cooling, simmer uncovered for 5-10 minutes to reduce.
The key is maintaining the 1:1 ratio—any deviation affects both sweetness and texture. Always taste as you go!
Equipment Malfunctions
No heavy-bottomed pan? Use a stainless steel saucepan instead—it distributes heat evenly and prevents scorching. If your whisk breaks, a wooden spoon works fine. For precise measurements, use a digital kitchen scale in gram mode (12 oz sugar = 340 grams).
When in doubt, start with the basic 1:1 ratio and adjust to taste—simple syrups are forgiving once you understand the fundamentals. 💡
Nutrition facts
Frequently asked questions
Can I use any type of sugar for this syrup?
Yes, but the texture and flavor will vary. Granulated white sugar creates a smooth, clear syrup perfect for cocktails. Light brown sugar adds subtle caramel notes, while turbinado or raw sugar gives a textured, rustic finish. For delicate desserts, stick with white sugar—it dissolves completely and won’t alter color. For cocktails, brown sugar works beautifully in drinks like Old Fashioneds.
How do I know when the sugar is fully dissolved?
The syrup is ready when it becomes completely clear with no visible sugar crystals. Stir occasionally while heating—if you see dark streaks at the bottom, reduce heat immediately and keep stirring. A fully dissolved syrup should pour smoothly without any graininess. If in doubt, let it simmer 5 more minutes—patience prevents grainy surprises in your drinks!
Can I make this syrup without heating?
Technically yes, but it takes much longer—up to 24 hours at room temperature. For quick results, always heat gently to dissolve the sugar completely. Cold-dissolved syrups often develop crystals over time. If you prefer no-heat methods, try using powdered sugar (like for frosting) mixed with warm water instead—it dissolves instantly without heating.
What’s the best way to store leftover syrup?
Transfer to a clean glass jar and refrigerate for up to 3 months. For longer storage, freeze in ice cube trays—each cube equals 1 oz of syrup. Always use sterilized containers to prevent contamination. If your syrup thickens in the fridge, simply reheat gently until smooth. Never store at room temperature longer than 2 hours to prevent spoilage.
How much syrup should I add to cocktails?
Start with ½ oz per drink and adjust to taste. For stronger sweetness, use ¾ oz—this works well in margaritas or mojitos. Remember, you can always add more syrup, but you can’t remove it! For coffee or tea, use 1 oz per 8 oz liquid. The 1:1 ratio ensures consistent sweetness every time, whether you’re mixing drinks or baking.

- 6 Oz Chocolate Chip Cookie Recipe: Perfectly Balanced Crispy Edges and Chewy Hearts - September 25, 2026
- 6-Inch Coffee Cake Recipe: Vanilla Bean Swirls and Buttery Streusel Topping - September 25, 2026
- 1 Hour Soup Recipe: Velvety Richness Without the Wait - September 25, 2026