
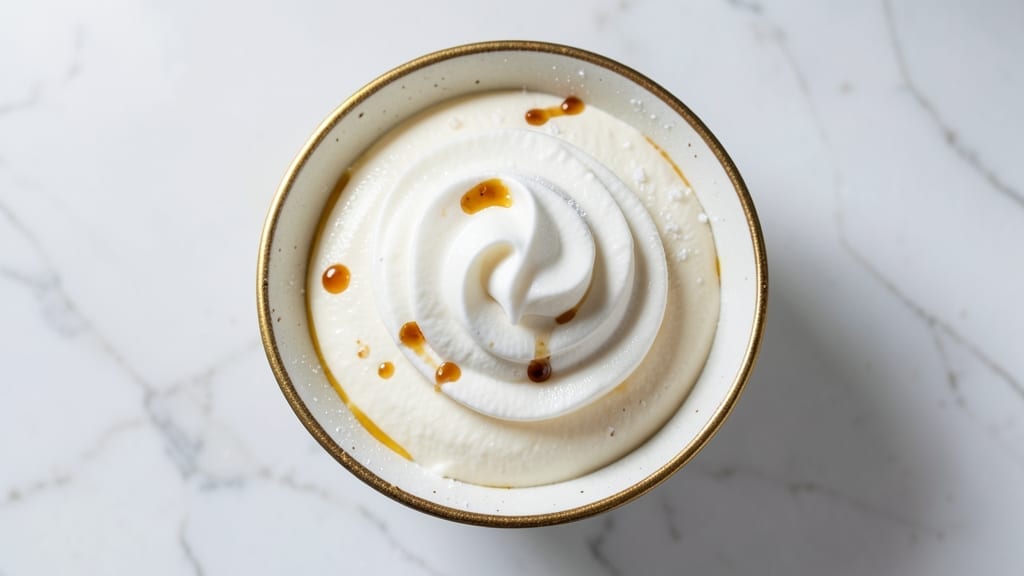
Mastering 8-ounce whipped cream transforms ordinary desserts into showstoppers—this recipe delivers stiff, glossy peaks every time with just three simple ingredients. The secret lies in chilling everything properly and whipping at the right speed, ensuring your cream holds its shape without turning grainy.
I’ve perfected this technique over years of baking, and it’s the foundation for everything from elegant fruit tarts to decadent hot chocolate toppings.
This method uses 1 cup of heavy cream (about 8 ounces) for precise measurements, with optional vanilla extract or powdered sugar for flavor. The key is patience—cold equipment and gradual whipping prevent butter formation, while a whisk attachment or stand mixer ensures smooth, airy texture.
Whether you’re piping rosettes or dolloping over berries, the result is light-as-air with a velvety finish that’s impossible to resist.
What sets this recipe apart is its versatility: swap vanilla for chocolate, citrus zest, or even espresso powder for endless variations. For stability, add a pinch of powdered sugar (it stabilizes the fat molecules), and always chill your bowl beforehand.
The process takes just 3-5 minutes—fast enough for last-minute desserts but precise enough for professional results.
Perfect for topping pavlova, trifles, or lattes, this whipped cream stays fresh for up to 2 hours at room temperature or 4 hours in the fridge. For a vegan twist, substitute coconut cream (though texture will differ slightly). Let’s get started—your desserts deserve this cloud-like perfection.
Ingredients for 8 oz whipped cream
Three core ingredients plus optional flavorings—this is all you need for restaurant-quality whipped cream.
| Ingredient | Amount | Notes |
|---|---|---|
| Heavy Whipping Cream 🥛 | 1 cup | Cold, full-fat, 36-40% fat content |
| Powdered Sugar 🍚 | 1 tbsp | Fine grain, stabilizes texture |
| Pure Vanilla Extract 🍯 | ½ tsp | Optional, for flavor |
| Whole Milk 🥛 | 1 tbsp | Cold, for extra stability |
| Kosher Salt 🧂 | ⅛ tsp | Fine grain, enhances flavor |
The heavy whipping cream is non-negotiable here—full-fat (36-40%) is essential for stiff peaks. Store-bought heavy cream works fine, but for best results, chill the can overnight. The powdered sugar isn’t just for sweetness; it stabilizes the fat molecules, preventing butter formation. Domino brand is my go-to for fine grain consistency. For extra stability, the whole milk adds moisture without altering texture—just ensure it’s ice-cold before whipping. The vanilla extract is optional but recommended; Nielsen-Massey is a reliable brand for pure flavor.
No powdered sugar? A pinch of cornstarch works in a pinch, though texture may soften slightly. Short on vanilla? Almond extract at half the amount or a dash of citrus zest adds brightness. For a savory twist, omit the sugar entirely and use lemon juice or espresso powder instead. The milk can be swapped for cold heavy cream if you prefer, though it may whip slightly faster. Always use chilled equipment—a cold metal bowl and whisk attachment are ideal for professional results.
Whipped cream must be used within 2 hours at room temperature or 4 hours refrigerated for peak texture. For longer storage, pipe into a parchment-lined container, cover tightly, and refrigerate for up to 24 hours—rewhip before use. Freezing isn’t recommended, as it alters the delicate fat structure. To revive slightly separated cream, gently fold in a tablespoon of cold milk and rewhip briefly. Always store in an airtight container to prevent drying.
Why You’ll Love This Recipe
- No-Fuss Whip: I swear by this method—just cream, sugar, and vanilla. No standing at the mixer for ages, no lumps, no stress. The trick? Chill your bowl first, and you’ll have fluffy perfection in under 5 minutes. That’s right, five.
- Sweet & Simple Luxury: Honestly, the flavor is where this recipe shines. The powdered sugar dissolves just enough to add a delicate sweetness without overpowering, while the vanilla extract—real extract, not imitation—gives it that warm, inviting depth. A pinch of salt? That’s the magic touch no one talks about.
- Every Occasion Ready: Between us, this whipped cream is my go-to for coffee dates, pie toppings, or even just dolloping on fruit. And the best part? It keeps beautifully in the fridge for up to 3 days. No waste, no last-minute scrambling. I’ve even frozen small batches for smoothies—because why not?
- Budget-Friendly Indulgence: You’d be shocked how far this goes. An 8 oz batch stretches across multiple uses, and the ingredients? Basic pantry staples. No specialty items, no markup. The whole milk in the mix keeps it creamy without breaking the bank, and the salt? A pinch from your shaker. Frugal but feels fancy.
Step-by-step instructions for light, fluffy whipped cream
Mastering whipped cream comes down to precise technique and cold ingredients. Follow these steps for professional results every time.
Chill All Equipment and Ingredients
Place your mixing bowl and beaters in the freezer for 10 minutes before starting. The cold surfaces help stabilize the cream as you whip it. Meanwhile, ensure the 1 cup heavy whipping cream is thoroughly chilled—it should feel cold to the touch and have a slight sheen on the surface.
I like to refrigerate the cream for at least 2 hours before whipping. Cold cream incorporates air more easily and holds its volume better. The 1 tbsp whole milk should also be cold, as room-temperature milk can prevent the cream from reaching peak stiffness. If you’re using the optional 0.5 tsp pure vanilla extract, chill it in the refrigerator as well.
Whip the Cream to Soft Peaks
Remove the chilled bowl and beaters from the freezer and place them in your stand mixer. Add the cold 1 cup heavy whipping cream to the bowl. Attach the whisk attachment and begin mixing on low speed for 30 seconds to break up any surface tension.
Increase the speed to medium-high and whip for 1-2 minutes until the cream forms soft peaks. Soft peaks mean the cream holds its shape when the whisk is lifted, but the tip still droops slightly. This stage is crucial—over-whipping at this point can cause the cream to break. If the cream looks too thick, it’s ready to move to the next step.
Incorporate Stabilizers for Structure
With the mixer running on low speed, gradually add the 1 tbsp powdered sugar and 0.125 tsp kosher salt to the whipped cream. The powdered sugar acts as a stabilizer, preventing the cream from deflating too quickly, while the salt enhances the flavor. Mix for 15-20 seconds until fully combined.
Next, add the 1 tbsp whole milk and the optional 0.5 tsp pure vanilla extract (if using). Increase the speed to medium-high and whip for another 30-45 seconds until the cream is fully incorporated and slightly thicker. The milk adds extra stability and helps create a lighter texture. At this point, the cream should be smooth and glossy, with no visible streaks of stabilizers.
Whip to Stiff Peaks for Serving
Continue whipping the cream on medium-high speed until it reaches stiff peaks. Stiff peaks form when the cream holds its shape firmly and the tip of the whisk leaves a distinct peak that doesn’t flatten. This typically takes 1-2 additional minutes, depending on your mixer and the temperature of the ingredients.
Watch the cream closely during this final stage—it should increase in volume and become thick enough to hold its shape when the whisk is lifted straight up. The surface should also appear glossy and smooth. If the cream starts to look grainy or separates, it has been over-whipped. At this point, gently fold in any separated cream with a spatula to restore consistency.
Serve Immediately or Store Properly
Transfer the whipped cream to a piping bag or airtight container. If piping, use immediately for the best texture. For storage, cover the container with plastic wrap pressed directly onto the surface to prevent a skin from forming. Refrigerate for up to 24 hours, but note that the texture will soften slightly over time.
The key to serving is speed—whipped cream is at its peak freshness right after whipping. For desserts like pies or cakes, pipe the cream just before serving. For toppings, add it to hot coffee or fresh fruit immediately after whipping to maintain that light-as-air consistency. If you notice the cream separating after storage, gently fold it back together before using.
Pro Tips For Making 8 Oz Whipped Cream
- CHILL THE CREAM FIRST: I learned this the hard way—whipping cold cream straight from the fridge gives you stiff peaks faster and without the struggle. Skip the “room temp” myth; just pop the heavy cream in the fridge for 30 minutes before starting. Your mixer will thank you.
- WEIGH THE SUGAR: Powdered sugar clumps like a drama queen, so don’t eyeball it. Use a kitchen scale for the 2-3 tablespoons called for—this keeps your whipped cream light, not grainy. A damp spoon helps break up clumps if you’re in a rush, but measure first.
- SALT THE CREAM: A pinch of kosher salt (about ¼ teaspoon) isn’t just for flavor—it tightens the protein structure, making your whipped cream hold its shape longer. Skip it, and you’ll end up with a sad, deflating mess by dessert time.
- WHIP IN STAGES: Start with just the heavy cream and vanilla, whip to soft peaks, then add sugar and milk gradually. Dumping everything at once turns your cream into butter—trust me, I’ve seen it happen. Slow and steady wins the fluff battle.
Serving suggestions for this 8 oz whipped cream
Dessert Toppings
This whipped cream shines as a topping for fresh berries—strawberries, raspberries, or blackberries—where its light texture contrasts beautifully with juicy fruit. I love dolloping it over warm apple pie or panna cotta for a velvety finish.
For a showstopper, pipe rosettes onto chocolate-dipped strawberries or mini cheesecakes—the visual appeal is as impressive as the taste. 🍓
Coffee & Tea Pairings
Hot beverages get an instant upgrade with this whipped cream. A dollop on cappuccinos, lattes, or hot chocolate adds richness and sweetness without overpowering. For a boozy twist, mix ½ tsp espresso powder into the cream before whipping—it pairs perfectly with dark chocolate mocha.
I also love adding a pinch of cinnamon for warmth in spiced drinks like chai. ☕
Savory Surprises
Don’t limit whipped cream to sweets! Fold 1 tbsp sour cream and ½ tsp smoked paprika into the base before whipping for a smoky, tangy topping on chili or tacos. It also works as a light garnish for creamy soups like butternut squash or potato leek.
For a seafood twist, mix with lemon zest and chives for a bright contrast to poached salmon or shrimp scampi. 🍽️
Bakery & Pastry Uses
Pipe this whipped cream between layers of layer cakes or mille-feuille for a professional touch. It’s also perfect for filling crepes or choux pastries—just add a splash of orange liqueur for a boozy kick.
For macarons, use it as a filling between two cookies, or spread it on thin toast with honey and walnuts for a French-inspired brunch. 🥐
Seasonal Variations
Summer calls for citrus-infused cream—add 1 tsp lemon or lime zest and ½ tsp grated orange peel for a refreshing topping on shortcake or ice cream. In fall, swap vanilla for maple syrup and cinnamon to complement pumpkin pie or pecan tarts.
Winter desserts benefit from chocolate-dipped strawberries or gingerbread cookies topped with a dusting of powdered sugar over the cream. 🍁
Make-Ahead Tips
Prep ahead by whipping the cream, storing it in an airtight container, and refrigerating for up to 24 hours. Rewhip briefly before serving to restore volume.
For holiday desserts, pipe rosettes onto a tray, freeze for 1 hour, then store in the freezer for up to 1 month. Thaw before using—this trick works great for Christmas cookies or Valentine’s Day treats. ❄️
Nutrition facts
Frequently asked questions
Can I make this whipped cream without a stand mixer?
Use a hand mixer or even a chilled whisk in a bowl. The key is to whip vigorously for 3-5 minutes—just be patient and keep the bowl cold. For best results, place your mixing bowl in the freezer for 5 minutes before starting. A whisk requires more elbow grease, but you’ll still get stiff peaks with this method.
Why did my whipped cream turn grainy or separate?
Over-whipping is the most common cause—keep an eye on the texture and stop when it reaches stiff peaks. Room-temperature ingredients or dirty mixing tools can also cause separation. To fix it, gently fold in 1 tbsp cold milk and rewhip briefly. For prevention, always chill your bowl and beaters, and avoid using metal bowls that warm up quickly.
How can I make this whipped cream sweeter or less sweet?
Adjust the powdered sugar to taste—start with 1 tbsp and add more if needed. For a less sweet version, reduce to ½ tbsp or omit entirely. For extra sweetness without sugar, try 1 tsp honey or ½ tsp maple syrup mixed into the milk before whipping. The cream will still hold its structure, just with a different flavor profile.
Can I substitute heavy cream with something else?
For traditional whipped cream, heavy cream is non-negotiable—it contains enough fat (36-40%) to hold air. However, for a lighter version, you can use whipping cream (30% fat) though the texture may be softer. For a vegan option, chilled full-fat coconut cream works (though it has a coconut flavor) or store-bought vegan whipped topping. The results won’t be identical, but they’re great for specific dietary needs.
How do I store leftover whipped cream for later use?
Transfer to an airtight container and refrigerate for up to 24 hours. To revive, let it sit at room temperature for 10 minutes before gently folding with a spatula. For longer storage (1 month**), pipe into a freezer-safe bag, freeze, and thaw in the fridge overnight. Never refreeze—always rewhip briefly before serving to restore texture.

- 12 Bean Chili Recipe: Hearty Slow-Cooked Depth With 12 Legumes - October 17, 2026
- 5 Seed Bread Recipe: Nutty Crunch and Artisan Flavor in One Loaf - October 17, 2026
- 1 Lb Macaroni Salad Recipe: Bold, Crunchy, and Crowd-Pleasing - October 17, 2026