
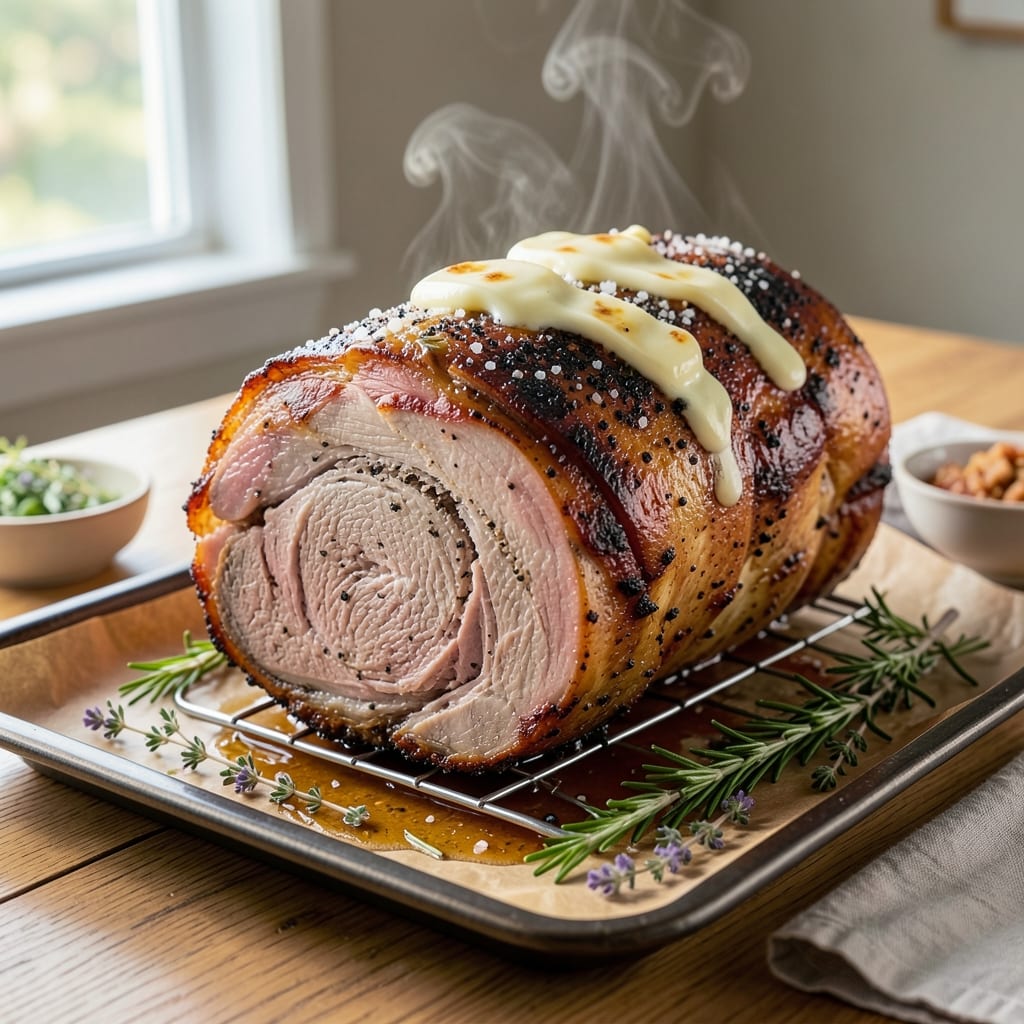
An 8-pound standing rib roast cooked to juicy pink perfection requires precision—low-temperature mastery that transforms tough cuts into melt-in-your-mouth tenderness. This technique ensures every slice delivers that signature beefy richness without drying out, even in the center.
The secret lies in dry-brining, slow roasting, and a final sear that seals in flavor while keeping the interior succulent.
Professional butchers swear by this method for its ability to retain moisture and develop deep, caramelized crusts without overcooking. You’ll start with a dry brine (salt and pepper) that enhances seasoning penetration, then roast at a steady 250°F until internal temps reach 125°F for medium-rare.
The standing position keeps the roast stable, preventing uneven cooking or collapse.
What you’ll achieve is a roast with a crispy, flavorful crust and a pink, buttery center that slices like silk. The low-and-slow approach breaks down connective tissue, ensuring every bite is tender while maintaining that classic beefy satisfaction.
Serve with au jus and roasted garlic mashed potatoes for a restaurant-worthy meal.
This recipe delivers restaurant-quality results at home—no guesswork, just technique. Whether you’re hosting a holiday feast or treating yourself to a special dinner, this method guarantees a roast that wows without stress. Ready to master it?
Ingredients for 8 pound standing rib roast
Precision-crafted ingredients ensure your 8-pound standing rib roast achieves restaurant-quality tenderness and flavor.
| Ingredient | Amount | Notes |
|---|---|---|
| Standing Rib Roast 🥩 | 8 lb | Bone-in, center-cut for even cooking |
| Diamond Crystal Kosher Salt 🧂 | ½ cup | Coarse grain for dry brine |
| Freshly Ground Black Pepper 🌶️ | 2 tbsp | Cracked peppercorns preferred |
| Unsalted Butter 🧈 | ½ cup | Cold, cubed for crust development |
| Fresh Rosemary 🌿 | ¼ cup | Needles finely chopped |
| Fresh Thyme 🌿 | ¼ cup | Leaves only, stems removed |
| Garlic Cloves 🧄 | 8 cloves | Smash flat for aromatic release |
| Extra-Virgin Olive Oil 🫒 | 2 tbsp | High-quality, fruity variety |
| Beef Tallow or Duck Fat 🧈 | 1 tbsp | For final sear, optional |
| Beef Au Jus Base 🍲 | 2 cups | Homemade or quality store-bought |
| Red Wine 🍷 | ½ cup | Bold dry red, like Cabernet |
| Beef Stock 🥫 | 1 cup | Homemade preferred |
| Worcestershire Sauce 🍶 | 1 tbsp | Vegetarian version if needed |
The standing rib roast is non-negotiable for this technique—look for a center-cut, bone-in roast with good marbling from your butcher. Costco or specialty meat counters like D’Artagnan carry excellent quality, but any reputable grocery store’s premium beef section will suffice. Avoid roasts with excessive fat caps or uneven thickness, as these can lead to inconsistent doneness. The 8-pound size is ideal for 8 servings, balancing yield and cooking time. If you can’t find exactly 8 pounds, aim for 7.5-8.5 pounds—the low-temperature method is forgiving with minor weight variations. For best results, remove the roast from the fridge 1 hour before cooking to equalize temperature.
No Diamond Crystal kosher salt? Morton coarse kosher salt works identically, but avoid table salt—its fine grains won’t adhere properly to the roast. Freshly ground black pepper is essential; pre-ground loses potency quickly. The butter, rosemary, and thyme trio creates the signature crust. Trader Joe’s carries excellent fresh herbs at reasonable prices, or grow your own if you’re ambitious. For the garlic, peeling and smashing the cloves (rather than mincing) maximizes flavor infusion during the dry brine. The olive oil should be extra-virgin—its fruity notes complement the beef’s richness without overpowering. Vegetarian Worcestershire (like Annie’s) maintains the umami depth without anchovies. If you’re making au jus from scratch, reduce the wine and stock until syrupy before adding the roast’s drippings.
The dry brine (salt and pepper) can be applied up to 24 hours ahead—store the roast uncovered in the fridge to develop flavor. Herbs and aromatics should be added 1 hour before roasting to prevent wilting. For long-term storage, the roast freezes beautifully—vacuum-seal or wrap tightly in butcher paper before freezing for up to 6 months. Leftover slices reheat best low-and-slow in the oven (275°F) with a splash of beef stock to maintain moisture. The au jus keeps for 5 days refrigerated or 3 months frozen, making it perfect for leftovers. Portion slices immediately after carving to prevent drying during storage.
Why You’ll Love This Recipe
- Hands-Off Roast: The standing rib roast does all the work—just season it with kosher salt and pepper, slap on a rosemary sprig, and let it slow-roast while you sip wine or scroll through your phone. No flipping, no fussing, no stress.
- Crispy-Creamy Magic: That butter basted under the roast? Pure gold—crisp edges, tender inside, with rosemary perfume cutting through the richness. Honestly, the first time I sliced it, my kids paused mid-video game to stare.
- Sunday Dinner, Done: Whether it’s Thanksgiving prep or a lazy weekend meal, this roast nails the occasion without the panic. Between us, my in-laws still ask for the recipe every year, and I’ve barely changed a thing.
Step-by-step instructions for 8-Pound standing rib roast
Mastering this technique delivers melt-in-your-mouth tenderness with a perfect pink center.
Prepare the Dry Brine for Maximum Flavor Penetration
Remove the 8 lb standing rib roast from the refrigerator and place it on a wire rack set over a rimmed baking sheet. This elevation allows air circulation for even drying. Using your hands, gently pat the roast dry with paper towels—this step is critical for developing that coveted crust. The meat should feel completely dry to the touch.
In a small bowl, combine the 0.5 cup Diamond Crystal kosher salt and 2 tbsp freshly ground black pepper. Rub this mixture all over the roast, including inside the cavity. I press the salt and pepper into the meat rather than just sprinkling it on—this ensures even distribution and maximum flavor penetration. Place the roast on a fresh wire rack, uncovered, and refrigerate for 24 hours. This dry brine transforms the meat’s texture and flavor profile, resulting in a more tender, juicy roast with a deeply seasoned crust.
Create the Herb Butter Rub for Rich Flavor
After the dry brine, remove the roast from the refrigerator and let it sit at room temperature for 1 hour. In a food processor, combine the 0.5 cup unsalted butter (cold and cubed), 0.25 cup finely chopped fresh rosemary, 0.25 cup fresh thyme leaves, and the 8 smashed garlic cloves. Pulse until the mixture resembles coarse crumbs with visible herb flecks. This texture ensures even distribution of flavor while maintaining a good seal for crust development.
Gently rub this herb butter mixture all over the roast, including inside the cavity. The butter should adhere to the meat rather than pooling. Return the roast to the wire rack and let it sit uncovered at room temperature for another 30 minutes. This resting period allows the butter to soften slightly and the aromatics to meld with the meat’s surface, creating an irresistible crust when seared.
Sear the Roast for Deep Flavor Development
Preheat your oven to 250°F. Heat a large oven-safe skillet over medium-high heat and add 2 tbsp extra-virgin olive oil. Once the oil is shimmering, carefully place the roast fat-side down in the skillet. Sear for 5 minutes until the fat renders and the surface develops a deep golden-brown crust. Flip the roast and sear the other side for another 5 minutes. The key here is patience—don’t rush the searing process or you’ll end up with uneven cooking and a less flavorful crust.
Transfer the skillet to the preheated oven and continue cooking for 3 hours. The low temperature ensures even cooking throughout the roast while allowing the internal temperature to rise gradually. I like to check the temperature periodically using a meat thermometer inserted into the thickest part of the roast—it should read 125°F after this initial cooking time. This internal temperature ensures you’ll achieve that perfect pink center while still having room for carryover cooking.
Build the Au Jus for Pan Sauce Perfection
While the roast cooks, prepare the pan sauce. Remove the roast from the oven and transfer it to a cutting board. Place the skillet with all the rendered fat and browned bits on the stovetop over medium heat. Deglaze the pan by adding the 0.5 cup red wine, scraping up all the browned bits with a wooden spoon. Let the wine reduce by half, about 3-4 minutes.
Add the 2 cups beef au jus base, 1 cup beef stock, and 1 tbsp Worcestershire sauce to the skillet. Bring to a gentle simmer and let it reduce by half again, about 8-10 minutes. The sauce should coat the back of a spoon and be rich and flavorful. Strain the sauce through a fine-mesh sieve into a saucepan and keep it warm over low heat. This reduction process intensifies the flavors and creates a velvety sauce that complements the roast beautifully.
Finish with a High-Temperature Sear and Rest
Return the roast to the oven and increase the temperature to 450°F. Cook for an additional 15-20 minutes, or until the internal temperature reaches 130°F. This final high-temperature sear creates a beautiful crust while ensuring the roast is perfectly cooked. For the final touch, remove the roast from the oven and let it rest for 30 minutes. During this time, the juices redistribute throughout the meat, resulting in that melt-in-your-mouth tenderness.
To serve, slice the roast between the bones into individual portions. Spoon the warm au jus over each serving and garnish with additional fresh rosemary and thyme if desired. The result is a standing rib roast with a perfect pink center, rich flavor, and a luxurious pan sauce that elevates the entire dish. Each bite should be juicy, tender, and bursting with herb-infused flavor.
Pro Tips For Making 8 Pound Standing Rib Roast
- Start Room Temp: Take that 8-pound roast out of the fridge at least 2 hours before cooking—yes, even if you’re impatient. Cold meat cooks unevenly, and you’ll end up with a dry outside while the center stays chilled. Trust me, the extra time saves you from a sad, unevenly cooked roast.
- Salt Generously First: Don’t skimp on the Diamond Crystal kosher salt—use about 1 tablespoon per pound, rubbed all over the meat (including the bone side) at least 40 minutes before cooking. I used to half it, thinking it was too much, but the crust and flavor suffer when you hold back.
- Sear Bone-Side Down: Flip the roast bone-side down first and sear it hard for 5 minutes—this renders fat into the pan and keeps the meat moist. After that, flip to the meaty side for the crust. I learned this the hard way when my first roast turned out greasy but dry.
- Butter Last 30 Minutes: Tuck those herb butter pats (rosemary + unsalted butter) under the meat with the bone side up for the final 30 minutes of cooking. The heat melts the butter, basting the roast naturally—no fussing required. (And yes, even if you’re skeptical, it works.)
Troubleshooting great 8 pound standing rib roast
Uneven Cooking
If your roast shows hot spots or uneven doneness, the issue is likely airflow or temperature fluctuations.
I’ve seen this happen when roasts are crowded in the oven or when oven racks aren’t properly positioned. Solution: Use a wire rack on a baking sheet to allow air circulation, and place the roast on the middle rack—this ensures even heat distribution.
Also, avoid opening the oven door frequently, as temperature drops can create uneven cooking. If using a skillet, ensure it’s oven-safe and large enough to accommodate the roast without overcrowding. 🌡️
Dry, Tough Meat
A dry, tough roast usually means it was overcooked or didn’t rest properly. The low-and-slow method is forgiving, but exceeding 130°F internal temp will dry out the meat. Fix it: Use a meat thermometer to monitor the roast closely—125°F for medium-rare is ideal.
If you accidentally overcook, try reheating slices low-and-slow in a 275°F oven with a splash of beef stock to restore moisture. Always let the roast rest for 30 minutes before slicing to lock in juices. 💧
Weak Flavor or Bland Crust
If your roast tastes mild or lacks depth, the issue is often insufficient seasoning or improper searing. A dry brine is key—don’t skip the 24-hour rest in the fridge, as this allows salt to penetrate deeply.
For the crust, sear over medium-high heat until you get golden-brown color, and use butter, garlic, and herbs for richness. If the crust isn’t forming, try adding 1 tbsp beef tallow to the skillet before searing—it adds extra fat for a crispier, more flavorful crust. 🧈
Au Jus Too Thin or Too Thick
A watery au jus means the pan wasn’t deglazed properly, while a thick, gluey sauce indicates over-reduction. Solution: Deglaze with red wine and scrape up all browned bits—these contain flavor.
For reduction, simmer until the sauce coats the back of a spoon but remains smooth and glossy, not syrupy. If it’s too thin, reduce further; if too thick, thin with a splash of beef stock. Always strain the sauce to remove any sediment for a silky texture. 🍲
Roast Collapses or Shifts
If your roast loses its shape or shifts during cooking, it’s likely due to uneven thickness or improper positioning. A standing rib roast should be cooked fat-side down to stabilize it. If it’s too thick in spots, trim slightly or use a roasting rack to elevate it.
For extra stability, secure the roast with kitchen twine (if bone-in) or place it on a sturdy baking sheet with a wire rack. Never cook it directly on a pan—this can cause uneven cooking and collapse. 🥩
Nutrition facts
Frequently asked questions
Why is the standing rib roast positioned upright?
The upright position prevents the roast from collapsing during cooking, ensuring even heat distribution and maintaining its natural shape. This technique also allows fat to render more evenly, creating a juicier interior while developing a flavorful crust. The bone-in cut naturally stabilizes the roast when cooked vertically.
Can I cook this roast in a regular oven without a skillet?
Yes, but use a wire rack on a baking sheet to allow airflow. Place the roast fat-side up on the middle rack and cook at 250°F for 3 hours, then finish with a 450°F sear. For best results, sear in a skillet first to develop crust, then transfer to the oven. If skipping the skillet, increase oven temp to 275°F for the initial cook.
How do I adjust for a smaller or larger roast?
For every 1 pound less, reduce cooking time by 10-15 minutes at 250°F. For larger roasts, increase time by 10-15 minutes per pound but monitor with a meat thermometer. The key is reaching 125°F internal temp for medium-rare. Never exceed 130°F or the meat will dry out.
What sides pair best with this roast?
Classic pairings include roasted garlic mashed potatoes, creamy polenta, or buttery egg noodles. For freshness, add a simple green salad with vinaigrette. The rich au jus also complements roasted root vegetables like carrots and parsnips. Avoid heavy sides that compete with the roast’s flavor.
Can I make this roast ahead of time?
Yes! Cook the roast completely, then refrigerate uncovered for 24 hours to develop deeper flavor. Reheat slices in a 275°F oven with beef stock for 10-15 minutes. For the au jus, make it fresh before serving or reheat gently. The roast keeps well for 3-4 days refrigerated or 3 months frozen.

- Baked Potatoes in Crock Pot Recipe: Buttery Interiors and Crispy Top Magic - November 1, 2026
- Braised Beef Short Ribs Recipe: Crock Pot Fall-Off-Bone Magic in 6 Hours - November 1, 2026
- Crock Pot Cocoa Recipe: Velvety Warmth With Hidden Spice Magic - November 1, 2026