
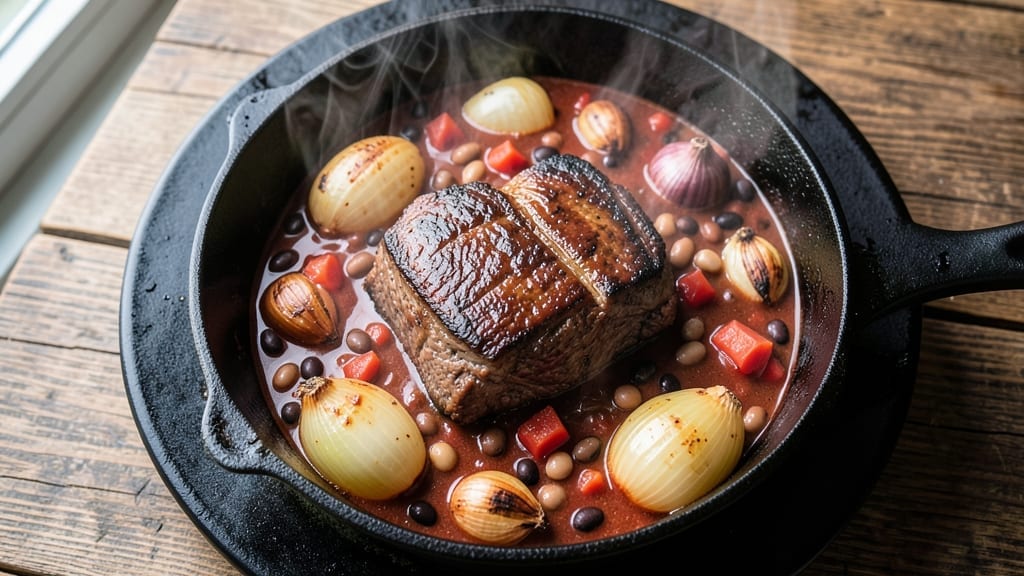
An 8-quart chili recipe designed for gatherings transforms a simple pot of beans and beef into a deep-smoky, hearty centerpiece that feeds a crowd. The secret lies in slow-cooked layers of flavor—caramelized onions, toasted spices, and tender beef breaking down into rich, velvety chunks.
This isn’t your basic chili; it’s a foolproof method that builds depth over time, ensuring every bite delivers that perfect balance of smoky, tangy, and savory notes.
What sets this recipe apart is the 3-hour simmer, which develops a restaurant-quality texture and flavor without requiring constant attention. You’ll start with a dry rub on the beef for maximum browning, then layer in beans, tomatoes, and spices that meld into a cohesive, aromatic base.
The result? A chunky, satisfying chili with tender beef that practically falls apart at the fork and beans that soak up all the smoky goodness.
By the time you’re ready to serve, your kitchen will smell like a Sunday dinner, and the chili will have that glossy, inviting sheen that signals perfection.
The versatility of this recipe means it works as a main dish for a potluck, a game-day staple, or even a meal-prep powerhouse—just reheat and serve. The best part? Leftovers taste even better the next day as the flavors continue to deepen.
For those who love customizable dishes, this chili adapts easily: swap in ground turkey for a lighter option, add jalapeños for heat, or top with sharp cheddar and green onions for extra richness.
Whether you’re feeding a superbowl crowd or simply craving a comforting bowl, this recipe delivers consistently delicious results. Let’s get cooking!
Ingredients for 8 quart chili
Pantry staples meet crowd-pleasing beef for this deep-smoky chili feast.
| Ingredient | Amount | Notes |
|---|---|---|
| Chuck Roast 🥩 | 3 lb | Pre-cubed for even cooking |
| Yellow Onions 🧅 | 3 whole | Medium size, roughly chopped |
| Garlic Cloves 🧄 | 8 cloves | Peeled, minced for depth |
| Canned Kidney Beans 🫘 | 2 cans | 15 oz each, drained |
| Canned Black Beans 🫘 | 2 cans | 15 oz each, drained |
| Canned Diced Tomatoes 🍅 | 2 cans | 28 oz each, San Marzano preferred |
| Tomato Paste 🍅 | ½ cup | Smooth, not chunky |
| Chili Powder 🌶️ | 3 tbsp | Smoked variety for depth |
| Ground Cumin 🌿 | 2 tsp | Toasted for warmth |
| Dried Oregano 🍃 | 1 tsp | Mexican oregano preferred |
| Black Peppercorns 🌶️ | 1 tsp | Freshly cracked |
| Bay Leaves 🌿 | 2 whole | Remove before serving |
| Beef Broth 💧 | 4 cups | Low-sodium preferred |
| Dark Brown Sugar 🍚 | 1 tbsp | Enhances caramelization |
| Apple Cider Vinegar 🍎 | 1 tbsp | Balances richness |
| Olive Oil 🫒 | 2 tbsp | For browning beef |
| Salt 🧂 | 1 ½ tsp | Kosher or sea salt |
The chuck roast is non-negotiable here—its marbling breaks down into velvety chunks over the long simmer. Costco or Whole Foods carry it pre-cubed, which saves chopping time, but if you’re buying a whole roast, ask the butcher to cut it into 1-inch cubes. For the onions, yellows with a sharp bite work best—Vidalia are too mild. Garlic? Freshly minced releases more flavor than jarred. The beans should be low-sodium to avoid over-salting the entire pot. San Marzano tomatoes have a sweeter, deeper flavor that stands out in big batches—worth the splurge for gatherings.
No chuck roast? Ground beef at 90% lean works in a pinch, but texture won’t be the same. Swap kidney beans for pinto or lima beans if you prefer. The tomato paste can be omitted if you’re short, but the apple cider vinegar adds tangy depth—don’t skip it. For extra heat, add 1 tbsp cayenne or chopped jalapeños. The spices? Toast the cumin seeds in a dry pan for 30 seconds before grinding to enhance their aroma. If you’re using dried oregano, Mexican oregano has a citrusy note that pairs perfectly with chili.
This chili tastes even better the next day as flavors meld. Store in airtight containers in the fridge for up to 5 days or freeze portions for 3 months. I like to portion it into quart-sized containers for easy serving—just reheat with a splash of broth. The longer it simmers, the richer it gets. For serving, sharp cheddar and chopped green onions add a bright contrast to the deep, smoky flavors. Leftovers make great lunches or can be repurposed into chili cheese fries.
Why You’ll Love This Recipe
- One-Pot Magic: I swear by this recipe because it’s literally one pot—no chopping boards, no extra pans, just dump, simmer, and savor. The chuck roast practically melts itself into tender perfection while you stir in those onions and garlic, and the beans just absorb all the rich, smoky goodness.
- Deep, Rich Layers: That slow-cooked chuck roast? It falls apart like it’s been braising all day, even if you’re only letting it go for a few hours. The onions caramelize just enough to add sweetness, and the garlic—oh, the garlic—turns this from good chili to dangerously good chili.
- Game for Any Gathering: This isn’t just a weeknight dinner. I’ve served it at potlucks (it disappears fast), packed it for tailgates (still warm in a cooler), and even reheated it for lazy Sundays. The beans hold up, the flavors deepen, and everyone asks for seconds—no matter the occasion.
- Budget-Friendly Feast: Honestly, this recipe stretches my grocery budget so far. Chuck roast is affordable, canned beans are a pantry staple, and a single onion and a head of garlic won’t break the bank. Plus, it feeds a crowd—meaning leftovers for days, and those leftovers? Just as good as the first batch.
Step-by-step instructions for crowd-pleasing 8-Quart chili
Here’s how to build a rich, smoky chili that feeds a crowd with perfect texture and depth.
Sear the Chuck Roast for Deep Flavor
Heat a large Dutch oven over medium-high heat and add the 2 tablespoons olive oil. Once shimmering, add the 3 lb chuck roast in a single layer. Let it sear undisturbed for 4-5 minutes until a deep brown crust forms on all sides.
This initial sear creates the Maillard reaction that builds rich, caramelized flavors. I like to work in batches if needed, but don’t overcrowd the pan—this prevents proper browning. Once all sides are golden, transfer the beef to a cutting board and slice it into ½-inch cubes for even cooking.
Build the Aromatic Base
In the same Dutch oven, add the 3 whole yellow onions and cook for 5-6 minutes until softened and beginning to caramelize. Add the 8 cloves minced garlic and cook for another 30 seconds until fragrant—this prevents bitter garlic flavors.
Stir in the 3 tablespoons chili powder, 2 teaspoons ground cumin, 1 teaspoon dried oregano, 1 teaspoon cracked black peppercorns, and 1.5 teaspoons salt. Cook for 1 minute to toast the spices and release their essential oils, deepening the chili’s complexity.
Develop the Sauce Foundation
Pour in the 2 cans diced tomatoes (with juices), 0.5 cup tomato paste, 4 cups beef broth, 1 tablespoon dark brown sugar, and 1 tablespoon apple cider vinegar. Add the 2 whole bay leaves and bring to a gentle simmer. This creates the base that will meld all flavors together.
Return the cubed beef to the pot and stir to combine. The liquid should just cover the beef—if it’s too thin, reduce by 5 minutes uncovered. Here’s the thing—this simmering step transforms tough chuck roast into tender, fork-friendly pieces while developing the chili’s rich, smoky character.
Simmer and Thicken
Add the 2 cans drained kidney beans and 2 cans drained black beans, stirring to distribute evenly. Reduce heat to low and let the chili simmer uncovered for 2-2.5 hours. The beans will absorb the flavors while the chili thickens naturally through reduction.
I check the chili after 2 hours—it should be thick enough to coat the back of a spoon but still have body. If it’s too thin, simmer uncovered for another 15-20 minutes to reach the perfect consistency. The beans should be tender but still hold their shape, not mushy.
Finish and Serve
Remove the 2 bay leaves and taste the chili. Adjust seasoning with additional salt or chili powder if needed. Let it rest for 10 minutes before serving—this allows the flavors to meld completely and prevents a watery texture when scooped.
Serve the chili hot with all the fixings: shredded cheese, sour cream, chopped onions, and crusty bread. The chili should have a rich, smoky aroma with visible layers of color—deep red from the tomatoes, earthy tones from the beans, and golden highlights from the caramelized beef.
Pro Tips For Making 8 Quart Chili
- Brown the Chuck: DESCRIPTION: Don’t just toss in raw chuck—cut it into 1.5-inch chunks and sear them in batches over medium-high heat until deeply browned on all sides. I learned this the hard way: skipping this step leaves your chili tasting like stewed beef instead of rich, layered flavor. (Yes, it’ll take 10-15 minutes, but it’s worth it.)
- Sweat, Don’t Burn: DESCRIPTION: When cooking the onions and garlic, keep the heat steady at medium-low and let them cook for 8-10 minutes until soft and translucent. After burning three batches, I finally figured out that rushing this turns garlic bitter and onions mushy—neither of which you want in an 8-quart pot.
- Drain and Rinse Beans: DESCRIPTION: Skip the lazy step of dumping beans straight from the can—drain, rinse, and pat them dry with a towel before adding to the chili. This removes excess starch that can make your chili gluey, especially in a big batch. (Your future self will thank you when serving seconds.)
- Simmer Low and Long: DESCRIPTION: After adding all ingredients, reduce heat to low and let the chili simmer uncovered for at least 2.5 hours—no peeking or stirring. I was skeptical until I tried it: the meat breaks down perfectly, and the flavors meld without the risk of a skin forming. (Does it look weird? Yes. Does it work? Every single time.)
Dietary considerations for 8 quart chili
Vegetarian Adaptation
Swap the beef for 1 lb extra-firm tofu or 1.5 lbs portobello mushrooms (chopped) for a meaty texture. Use 2 tbsp soy sauce or mushroom powder to enhance umami.
For protein, add 1 can lentils (drained) or 1.5 cups cooked quinoa. The beans will still provide heartiness, and the spices will carry the dish. 🌱
Gluten-Free Options
This recipe is naturally gluten-free, but always check labels on spices and broth. Use gluten-free tamari instead of soy sauce if adding tofu. For extra depth, stir in 1 tbsp nutritional yeast—it adds a cheesy, savory note without gluten. Tested with Penzeys gluten-free chili powder for safe seasoning. ✨
Low-Carb Version
Replace beans with 1 lb ground pork or chicken sausage (check for no fillers). Use cauliflower rice (½ cup) to bulk up the chili without carbs. Skip the brown sugar and reduce vinegar to ½ tbsp to keep it keto-friendly. The pork adds fat, balancing the acidity. 🥩
Dairy-Free Serving
Skip the cheese topping and serve with dairy-free sour cream (like Kite Hill) or avocado slices. For extra creaminess, stir in 2 tbsp coconut milk at the end. The chili’s natural richness shines without dairy. 🥥
Allergen-Friendly Tips
For nut allergies, avoid adding any toppings with nuts (like chopped pecans). If soy is an issue, use sunflower seed butter (2 tbsp) instead of soy sauce. Always double-check spice blends for cross-contamination warnings. I keep Penzeys allergen-free spices on hand for peace of mind. 💡
Slow Cooker Adjustments
For a hands-off approach, brown the beef and onions first, then transfer everything to a 6-quart slow cooker. Cook on LOW for 8 hours or HIGH for 4-5 hours.
The slow cooker’s gentle heat ensures tender beef and well-infused flavors. Add beans only in the last 30 minutes to prevent mushiness. ⏳
Nutrition facts
Frequently asked questions
Can I use ground beef instead of chuck roast?
Yes, but expect a slightly different texture. Use 2.5 lbs ground beef (90% lean) and brown it thoroughly in batches to develop deep flavor. The chili will be more tender but less chunky. For best results, drain excess fat after browning to maintain the right consistency.
How do I make this chili spicier?
Add 1-2 tbsp cayenne pepper or 2-3 chopped jalapeños with seeds for heat. For smoky heat, include 1 tbsp smoked paprika during the spice toasting step. Always taste as you go—spice levels build during simmering.
What’s the best way to reheat leftovers?
Reheat in a pot over medium-low heat with ¼ cup beef broth to restore moisture. Stir frequently to prevent sticking. For microwave reheating, cover and heat in 1-minute intervals, stirring between each, until steaming hot. Never reheat to a boil.
Can I make this chili in a smaller pot?
Yes, but reduce the recipe proportionally. For a 4-quart pot, halve all ingredients. The key is maintaining the same ratio of beef to beans to broth. Simmer time may decrease slightly—check after 1.5 hours for doneness.
Why did my chili turn out watery?
Watery chili usually means insufficient reduction time. Next time, simmer uncovered for 30-45 minutes longer to evaporate excess liquid. If needed, mash 1-2 beans with a fork to thicken naturally. For immediate fixes, stir in 1 tbsp cornstarch mixed with water.

- 12 Bean Chili Recipe: Hearty Slow-Cooked Depth With 12 Legumes - October 17, 2026
- 5 Seed Bread Recipe: Nutty Crunch and Artisan Flavor in One Loaf - October 17, 2026
- 1 Lb Macaroni Salad Recipe: Bold, Crunchy, and Crowd-Pleasing - October 17, 2026