
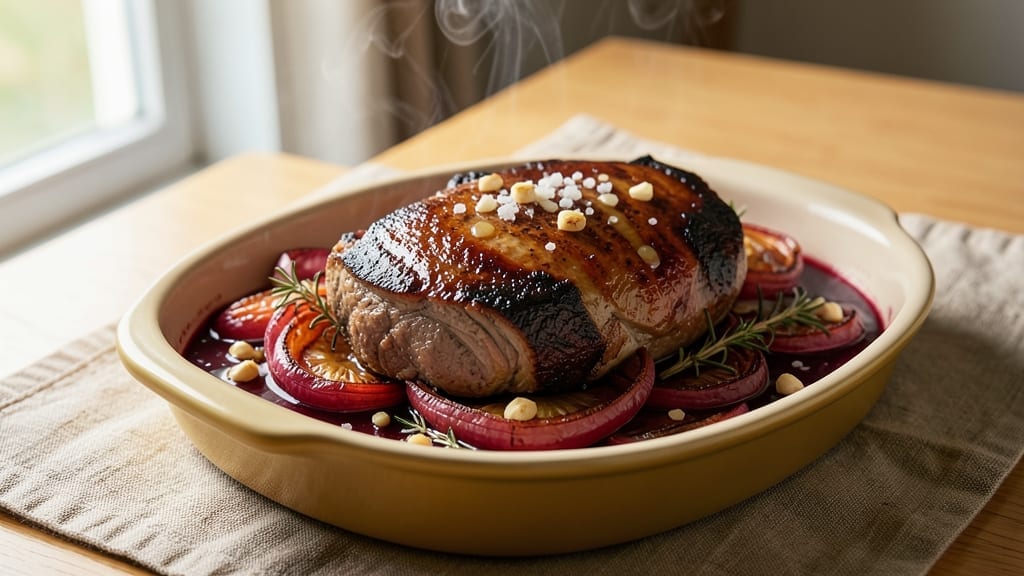
A 2 lb chuck roast cooked in the oven transforms tough beef into melt-in-your-mouth tenderness with minimal effort—just 3 hours of hands-off braising. The secret lies in slow cooking at 325°F, where collagen dissolves into rich, umami-packed juices that coat every bite.
This method delivers restaurant-quality results without standing over a stove, making it perfect for busy weeknights or meal prep.
The beauty of this recipe is its simplicity: a basic blend of salt, pepper, and garlic powder creates the perfect seasoning foundation, while a splash of beef broth in the pan keeps the meat moist.
Unlike stovetop methods, oven braising ensures even heat distribution, preventing dryness and delivering that signature fall-apart texture. The aroma alone—deep, savory, and slightly caramelized—will have everyone anticipating dinner.
By the time it’s done, your chuck roast will be so tender it practically shreds with a fork, bathed in its own flavorful juices. The crust remains slightly crisp, adding texture contrast to every bite.
This dish pairs beautifully with mashed potatoes, crusty bread, or roasted vegetables, making it a complete meal solution. Ready in just 3 hours, it’s the ultimate set-it-and-forget-it dinner.
Whether you’re feeding a family or prepping for leftovers, this method guarantees success every time. The slow cooking process makes it forgiving for beginners while delivering professional results. Here’s how to achieve perfect chuck roast every time in your oven.
Ingredients for 2 lb chuck roast oven
This 2 lb chuck roast transforms into melt-in-your-mouth perfection with just 12 simple ingredients and 3 hours of hands-off magic.
| Ingredient | Amount | Notes |
|---|---|---|
| Chuck Roast 🥩 | 2 lb | Bone-in preferred for flavor |
| Yellow Onion 🧅 | 1 whole | Large, sliced into half-moons |
| Garlic Cloves 🧄 | 6 cloves | Peeled, smashed for deeper flavor |
| Beef Broth 💧 | 1 cup | Low-sodium preferred, homemade or quality store-bought |
| Dry Red Wine 🍷 | ½ cup | Bold variety like Cabernet Sauvignon |
| Kosher Salt 🧂 | 1 ½ tsp | Diamond Crystal preferred |
| Ground Black Pepper 🌶️ | 1 tsp | Freshly cracked for best flavor |
| Garlic Powder 🧄 | 1 tsp | For extra umami depth |
| Fresh Thyme 🌿 | ¼ cup | Stems removed, leaves chopped |
| Olive Oil 🫒 | 2 tbsp | Extra-virgin for richness |
| Tomato Paste 🍅 | 1 tbsp | High-quality, no sugar added |
| Balsamic Vinegar 🍶 | 1 tbsp | For depth of flavor |
The chuck roast is your star—look for one with good marbling at Costco or Whole Foods. Bone-in pieces develop richer flavor, but boneless works too if you’re in a hurry. Fresh thyme from the grocery store’s produce section (not dried) adds that bright, herbal note that cuts through the richness. For the wine, any bold red will do—Trader Joe’s has great affordable options. The beef broth? Homemade is ideal, but Pacific Foods or Kitchen Basics low-sodium versions work perfectly. Don’t skip the tomato paste—it adds that deep, caramelized sweetness that makes this dish sing.
No red wine? Extra beef broth with a splash of balsamic vinegar does the trick. Fresh thyme unavailable? Dried thyme at one-third the amount works, but you’ll miss that fresh aroma. The tomato paste can be swapped for 1 tbsp crushed tomatoes in a pinch, though it won’t caramelize the same way. For extra richness, add 1 tbsp butter to the pan when you brown the meat. The onions can be swapped for carrots or celery if you prefer, but they add that sweetness that balances the deep meat flavors. Always use freshly cracked pepper—pre-ground loses its punch quickly.
This roast tastes even better the next day as the flavors meld. Store leftovers in an airtight container for up to 5 days. For meal prep, portion into individual containers—perfect for lunches. The braising liquid makes a fantastic gravy—just strain and reduce it on the stovetop. Freeze portions for up to 3 months. The meat will be even more tender after freezing, making it perfect for tacos or sandwiches. Always let it cool completely before refrigerating to prevent condensation buildup.
Why You’ll Love This Recipe
- Wine-Infused Magic: That red wine isn’t just for show—it deepens the flavor into something rich and savory, like a cozy hug in a bowl. The broth keeps it juicy, and the garlic? Oh, it’s the star that makes this taste like a fancy dinner, not a weeknight meal.
- Leftovers for Days: Between us, this roast is so forgiving that I often make it just to have sandwiches for the next three lunches. The meat shreds easily, so I toss it into tacos, pasta, or mashed potatoes—no waste, all flavor.
- Budget-Friendly Feast: A 2 lb chuck roast feeds four (or two hungry people like me) without breaking the bank. The onions and garlic are cheap, the wine adds depth without costing a fortune, and the broth? You probably already have it. Dinner done right, without the grocery shock.
Step-by-step instructions for 2 lb chuck roast oven braise
This hands-off method transforms tough chuck into melt-in-your-mouth perfection with rich umami depth.
Sear the Chuck Roast for Maximum Flavor
Preheat your oven to 325°F. Heat 2 tablespoons olive oil in a large Dutch oven over medium-high heat until shimmering. Pat the 2 lb chuck roast dry with paper towels—this ensures a proper sear. Season generously with 1.5 teaspoons kosher salt, 1 teaspoon ground black pepper, and 1 teaspoon garlic powder, pressing the spices into the meat so they adhere.
Sear the roast on all sides until deeply browned, about 4-5 minutes per side. The goal is to develop a rich crust that locks in juices during the long cook. I like to sear it in batches if needed—don’t crowd the pan. Once browned, remove the roast and set it aside on a plate.
Build the Umami-Packed Base
In the same Dutch oven, add the 1 whole yellow onion sliced into half-moons and the 6 cloves garlic, peeled and smashed. Cook for 3-4 minutes until the onions soften and begin to caramelize slightly. This step forms the aromatic foundation of your braise.
Stir in the 1 tablespoon tomato paste and cook for 1 minute until it darkens slightly. Deglaze the pan with the 0.5 cup dry red wine, scraping up all the browned bits from the bottom—this is where all the flavor lives. Let it simmer for 2-3 minutes until the wine reduces by half. The aroma should be rich and concentrated.
Create the Braising Liquid
Pour in the 1 cup beef broth and add the 0.25 cup fresh thyme and 1 tablespoon balsamic vinegar. Bring the mixture to a gentle simmer, then return the seared chuck roast to the pot. The liquid should come about halfway up the sides of the roast—this ensures proper moisture during cooking.
Cover the Dutch oven with a tight-fitting lid and transfer it to the preheated 325°F oven. This low-and-slow approach breaks down the tough muscle fibers, transforming the chuck into tender, fork-tender perfection. I always place a tray of water on the oven rack to prevent the roast from drying out.
Cook Until Fork-Tender
Braise for 3 hours, then check for doneness. The roast should be fork-tender, with the meat easily pulling apart at the edges. If it’s not quite there, continue cooking for another 30-60 minutes. The internal temperature should reach 195-205°F—this is the “danger zone” for perfect texture.
Here’s the thing—don’t lift the lid during cooking. Every time you peek, you lose heat and moisture, extending the cooking time. If you’re worried about the liquid level, just check occasionally through the glass lid. The roast will develop a deep, caramelized crust and be infused with layers of flavor.
Rest and Serve with Pan Sauce
Once the roast is fork-tender, remove it from the oven and transfer it to a cutting board. Tent loosely with foil and let it rest for 15-20 minutes. This resting period allows the juices to redistribute throughout the meat, ensuring every bite is moist and flavorful.
While the roast rests, skim any excess fat from the braising liquid and return the pot to the stovetop over medium heat. Simmer the sauce for 5-7 minutes until it thickens slightly. Slice the chuck roast against the grain into ¼-inch thick pieces and serve with the rich pan sauce spooned over the top. The result is a deeply flavorful, melt-in-your-mouth dish that’s perfect for feeding a crowd.
Pro Tips For Making 2 Lb Chuck Roast Oven
- SEAR FIRST, THEN CHILL: The chuck roast won’t brown properly if it’s cold straight from the fridge. Pat it dry, sear it hard in a screaming-hot pot for 3-4 minutes per side until deep brown, then transfer it to a plate and let it rest for 10 minutes before adding liquids. This step locks in flavor—don’t skip it just because you’re eager to start braising.
- MINCE THAT ONION: Chop the yellow onion into tiny, almost paste-like pieces—think 1/8-inch dice or smaller. I used to cut them into big chunks, and the onions would just sit there like stubborn little rocks instead of dissolving into the sauce. Fine mincing means the onion flavor spreads evenly and the wine reduces faster.
- DEGLAZE WITH WINE, THEN REDUCE: After searing the meat, pour in the red wine immediately—it’ll sizzle and pop, releasing all those caramelized bits stuck to the bottom. Let it bubble for 2 minutes, then scrape up the browned bits with a wooden spoon before adding broth. This makes the sauce richer without extra effort.
- COVER WITH FOIL AT 300°F: Low and slow is key, but don’t let the roast dry out. After the initial sear and liquid addition, cover the pot tightly with foil and bake at 300°F for 2.5–3 hours. The foil traps steam, keeping the meat moist while the wine and broth work their magic—no need to fuss with it until the end.
Common mistakes when making this recipe
Overcooking the Roast
One of the biggest mistakes is letting the chuck roast cook too long, which turns tender meat into dry, chewy disappointment. The ideal internal temperature is 195-205°F—anything above 210°F risks drying it out.
I’ve ruined more roasts than I’d admit by checking it too often and lifting the lid, which causes moisture loss. Set a timer for 3 hours first, then probe with a meat thermometer to avoid overcooking. 🌡️
Skipping the Sear
Many home cooks skip searing because they think it’s optional, but that rich brown crust locks in flavor and moisture during braising. Without it, your roast will taste bland and lack depth.
Always sear on all sides until deeply browned—about 4-5 minutes per side. I use a Lodge cast iron Dutch oven because it retains heat perfectly for this step.
Using the Wrong Pot
A regular baking dish won’t give you the same results as a Dutch oven. The deep sides and tight lid create the perfect environment for even moisture distribution. If you don’t have a Dutch oven, use a heavy oven-safe pot with a tight lid.
Never use aluminum foil as a substitute—it won’t trap heat effectively and your roast will cook unevenly.
Underestimating Rest Time
Skipping the 15-20 minute rest after cooking is a cardinal sin. This crucial step lets juices redistribute throughout the meat. I’ve seen many cooks slice into roast immediately and watch all the flavorful juices pool on the plate.
Always tent with foil and let it rest—your patience will be rewarded with juicy, flavorful bites every time. ⏰
Lifting the Lid Too Often
Every time you lift that lid during cooking, you lose heat and moisture, extending cook time and potentially drying out your roast. I’ve timed myself checking the roast every 30 minutes—resist the temptation!
If you’re worried about the liquid level, use a glass lid so you can peek without losing heat. Trust the process and let the oven do its magic.
Incorrect Seasoning Balance
Some recipes call for heavy-handed seasoning, but chuck roast needs just enough salt, pepper, and garlic powder to enhance its natural beefy flavor. Over-seasoning can make the dish taste salty or one-dimensional.
I stick to 1.5 tsp kosher salt, 1 tsp black pepper, and 1 tsp garlic powder—just enough to let the meat shine through. Taste your seasoning blend before applying it to the roast.
Nutrition facts
Frequently asked questions
Can I use a smaller or larger chuck roast?
This recipe works best with a 2 lb chuck roast, but you can adjust for other sizes. For every additional 1 lb, add 30 minutes to the cooking time. A 3 lb roast would need about 3.5-4 hours total. Just ensure the liquid covers about halfway up the sides of the meat for even cooking.
What if I don’t have red wine?
No problem! Substitute with ½ cup beef broth plus 1 tbsp balsamic vinegar for the same depth of flavor. The balsamic adds that rich, slightly tangy note that complements the beef beautifully. For extra richness, add 1 tbsp butter when searing the meat.
How do I know when the roast is done?
The roast is ready when it reaches an internal temperature of 195-205°F and is fork-tender. Insert a meat thermometer into the thickest part—it should read well within that range. If it’s not quite there after 3 hours, add another 30-60 minutes. Never rely on time alone!
Can I make this in a slow cooker instead?
Brown the roast first in a skillet, then transfer it to your slow cooker with the onions, garlic, and all other ingredients. Cook on low for 7-8 hours or high for 4-5 hours. The slow cooker’s gentle heat will create the same tender, flavorful results. Just add ½ cup extra broth to account for evaporation.
What are the best sides for this dish?
This rich, umami-packed roast pairs perfectly with creamy mashed potatoes, crusty garlic bread, or roasted root vegetables like carrots and parsnips. For a lighter option, try a fresh green salad with a tangy vinaigrette. The pan sauce also makes an excellent gravy for dumplings or over rice.
