
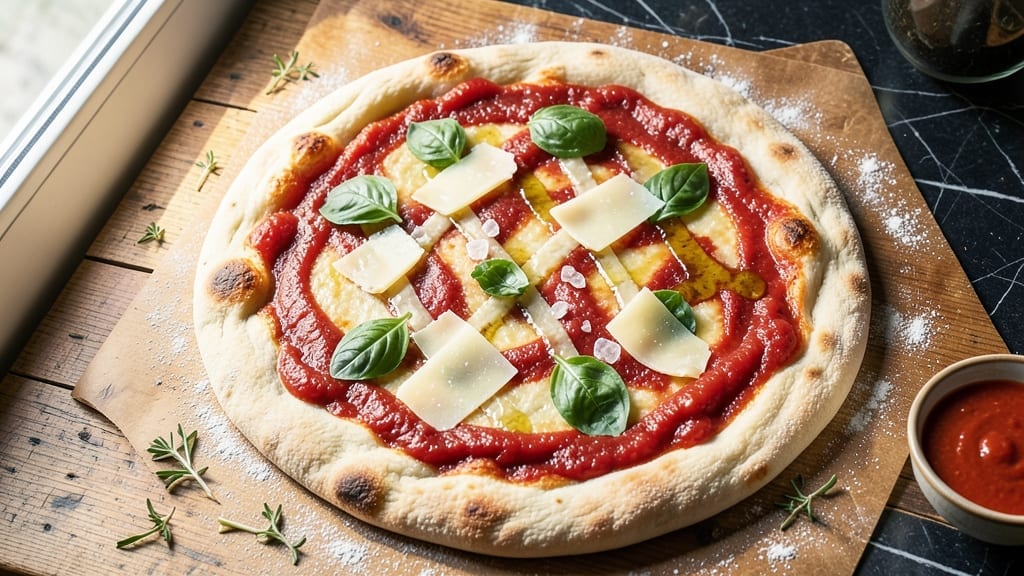
An 80 percent hydration pizza dough delivers that perfect chewy crust without the fuss of traditional kneading—just a simple no-knead shortcut. 💛 The high hydration creates an open, airy crumb while keeping the edges crispy, all thanks to a longer fermentation that develops deep flavor naturally.
This dough is the secret behind restaurant-quality pizza at home, with minimal effort and maximum reward.
The beauty of this recipe lies in its simplicity: mix the ingredients, let it rest, and shape when ready. No kneading means less mess, and the high hydration makes it more forgiving for beginners while still impressing pizza lovers.
The dough develops best over 24 hours, but even a quick 4-hour rest works in a pinch for a crispier, less chewy result.
What you’ll end up with is a chewy, slightly blistered crust with an open crumb—ideal for classic Neapolitan-style pizza or your favorite toppings. The longer fermentation enhances flavor, making every bite taste richer without needing extra oil or butter.
This dough is versatile enough for thin-crust, thick-crust, or even focaccia, proving it’s a game-changer for home bakers.
For extra flavor, add a splash of olive oil or fresh herbs to the dough, or brush the crust with garlic butter before baking. The possibilities are endless, but the base recipe stays foolproof. Let’s get started—your perfect pizza is just a few steps away.
Ingredients for 80 hydration pizza dough
Five simple ingredients transform into restaurant-quality pizza dough with minimal effort.
| Ingredient | Amount | Notes |
|---|---|---|
| All-Purpose Flour 🌾 | 3 ½ cups | High-protein preferred for chewiness |
| Bread Flour 🌾 | ½ cup | Boosts gluten development |
| Active Dry Yeast 🍞 | ¼ tsp | Or 1 packet instant yeast |
| Granulated Sugar 🍚 | ¼ tsp | Feeds yeast for fermentation |
| Salt 🧂 | 1 ½ tsp | Diamond Crystal preferred |
| Extra-Virgin Olive Oil 🫒 | ¾ cup | High-quality for flavor |
| Warm Water 💧 | 1 ½ cups | 105-115°F for yeast activation |
| Semolina Flour 🌾 | ¼ cup | For dusting work surface |
| Cornmeal 🌽 | ¼ cup | For pizza peel preparation |
The flour blend is where the magic happens. Bread flour’s higher protein creates that signature chewy texture, while all-purpose keeps it manageable for beginners. King Arthur or Caputo are my go-tos for bread flour—they handle high hydration beautifully. If you’re using only all-purpose, add 1 extra tablespoon of flour to account for the lower protein. The yeast should be fresh—test it by dropping a pinch in warm water with sugar; if it bubbles within 5 minutes, it’s active. For olive oil, California Extra Virgin has that perfect fruity punch that translates beautifully to the dough.
No bread flour? Add 1 extra tablespoon of vital wheat gluten to your all-purpose flour for similar results. Running short on sugar? A pinch of honey works in a bind (though it won’t feed yeast as effectively). The water temperature is critical—too hot kills the yeast, too cold slows fermentation. Use a thermometer if you’re unsure; 105°F is ideal. For extra flavor, add 1 tablespoon of dried Italian herbs to the dough or a splash of white wine (about 1 tablespoon) for a sophisticated twist. The semolina and cornmeal are non-negotiable for crispy crusts—they create that perfect barrier between dough and surface.
This dough is a marathon, not a sprint. 24 hours in the fridge is ideal, but even 4 hours will give you a decent rise. For longer storage, freeze shaped dough balls wrapped in plastic for up to 3 months. Thaw overnight in the fridge before baking. The dough doubles in size during fermentation—don’t be alarmed! When ready to use, let it sit at room temperature for 30-60 minutes before shaping. Pro tip: Keep a bowl of flour nearby when handling—this stuff gets sticky fast, but a little extra flour prevents tears.
Why You’ll Love This Recipe
- No-Knead Magic: I swear by this dough—just toss the flours, yeast, and water together, let it rest, and boom. No punishing kneading, no sticky mess, just hands-off perfection. The bread flour gives it that chewy bite, while the all-purpose keeps it tender, and honestly? I’ve made it while chatting with friends.
- Crispy-Chewy Crunch: That 80% hydration ratio? It’s the secret to a crust with structure—not too wet, not too dry. The sugar feeds the yeast for a light rise, and the salt? It balances everything so the dough tastes like it belongs in a pizzeria, not just my kitchen. First bite is always a win.
- Weeknight Wonder: Between us, this dough is my go-to for lazy Fridays or when I’m feeding a crowd. Make a big batch, portion it out, and freeze what you don’t use—thaw and bake later. It’s the kind of recipe that turns “what’s for dinner?” into “pizza night, again?”
- Budget-Friendly Flex: Five ingredients, zero fancy shortcuts. The yeast is cheap, the flours last forever, and a single batch stretches to two pizzas (or one giant feast). I’ll be real: I’ve stretched it into flatbreads, calzones, even garlic knots. It’s the kind of dough that makes grocery day feel like a victory.
Step-by-step instructions for 80 percent hydration pizza dough
Here’s how to craft a chewy, no-knead masterpiece with this high-hydration dough.
👨🍳 Step 1: Mix the Dough with Wet Ingredients First
In a large bowl, combine the 1.5 cups warm water (105-115°F), 0.75 cup extra-virgin olive oil, and 0.25 tsp granulated sugar. Stir until the sugar dissolves completely. This warm water activates the yeast while the oil helps create that signature chewy texture.
Next, sprinkle the 0.25 tsp active dry yeast over the surface and let it sit for 5 minutes until it becomes foamy. This quick test ensures your yeast is alive and ready to work. If it doesn’t foam, start fresh with new yeast—no dough will save you here.
👨🍳 Step 2: Combine Dry Ingredients for Optimal Gluten
In a separate bowl, whisk together the 3.5 cups all-purpose flour and 0.5 cup bread flour to create a uniform blend. The bread flour boosts gluten development, giving you that perfect chewy texture without overworking the dough. Add the 1.5 tsp salt and mix thoroughly to distribute evenly.
Create a well in the center of your dry ingredients and pour in the wet yeast mixture. Using a wooden spoon or dough whisk, gently combine everything until just mixed—you’ll still see some dry spots. Overmixing develops too much gluten and can make your pizza tough. The dough will be shaggy and sticky at this stage, and that’s exactly what we want for high hydration.
🥘 Step 3: Let the Dough Rest and Develop Naturally
Cover the bowl with plastic wrap or a damp kitchen towel and let the dough rest at room temperature for 1 hour. This initial rest allows the gluten to relax and the flour to hydrate properly. You’ll notice the dough become less sticky and more cohesive as it develops.
After the first hour, perform a windowpane test: wet your finger and gently press on the dough. If you can stretch it thin enough to see light through (like a windowpane), it’s ready. If not, let it rest another 30 minutes. This step is crucial for creating that perfect chewy-yet-tender crust without any kneading.
🔥 Step 4: Shape and Final Rest Before Baking
Lightly dust your work surface with 0.25 cup semolina flour to prevent sticking. Turn out the dough and gently shape it into a ball, using just enough flour to keep it from sticking to your hands. The semolina adds texture and prevents the dough from becoming too wet during shaping.
Place the shaped dough on a floured pizza peel or in a lightly oiled bowl, seam-side up. Cover again and let it rest for another 1 hour at room temperature. This final rest allows the gluten to fully relax, making your dough easier to stretch and preventing it from springing back when you add toppings.
⏰ Step 5: Prepare for Topping and Baking
Preheat your oven to 500°F (or as high as it will go) with a pizza stone or steel inside for at least 60 minutes. While it heats, dust your pizza peel with 0.25 cup cornmeal—this creates the perfect crispy bottom while preventing sticking. The cornmeal adds a subtle texture that pairs beautifully with your chewy crust.
When ready to bake, stretch your dough directly on the peel (no need to transfer to a pan) and add your favorite toppings. The high hydration means it’ll be more pliable than traditional dough, but don’t worry—it won’t tear if you handle it gently. Bake for 10-15 minutes until the crust is golden brown and the cheese is bubbly.
Pro Tips For Making 80 Hydration Pizza Dough
- Bloom the Yeast Right: Skip the guesswork—mix yeast, sugar, and warm water (110°F) in a separate bowl first, then wait exactly 5–10 minutes until it’s frothy and bubbly. I learned this the hard way after kneading dough with sluggish yeast, which made my crust taste flat and weak.
- Weigh Your Flours: Ditch the measuring cups—use a kitchen scale for bread flour and all-purpose flour. A 10% difference in volume (yes, really) throws off hydration, leading to either a sticky mess or a dry, crumbly dough. Bread flour is heavier; account for it.
- Cold Proof, Not Room Temp: After the first rise, shape your dough and refrigerate it for at least 12 hours. The cold slows fermentation, deepens flavor, and makes stretching easier—no more fighting a gummy, overproofed mess. (Yes, even if you’re impatient like me.)
- Salt the Water First: Dissolve the salt in the water before adding yeast—it activates faster and distributes evenly. I was skeptical until I tried it: the dough’s structure tightens better, and the crust gets that perfect crisp-chewy balance without overworking it.
Wine and beer pairings for these flavors
Crisp Whites
A dry, mineral-driven Vermentino from Sardinia is my go-to pairing for this high-hydration dough. The bright citrus notes cut through the rich olive oil in the crust, while its crisp acidity balances the chewiness.
Look for a bottle from Cantina Mesu—their 2022 vintage has that perfect salinity that makes every bite taste fresh. Serve slightly chilled to enhance the refreshing contrast. 🍷
Light Reds
For those who prefer red wine, a Gagliole from Tuscany delivers stunning harmony. This medium-bodied red has red fruit flavors and a touch of earthiness that complements the dough’s fermented depth.
I love pairing it with a Margherita pizza—the wine’s acidity mirrors the tomato sauce, while its tannins stand up to the chewy crust. Opt for a 2019 vintage from Castello di Volpaia for optimal balance. 🍇
Italian Beers
A Peroni Gran Riserva is the ultimate beer match—its effervescence cleanses your palate between bites, while the malt sweetness enhances the olive oil richness. For a craft option, try a Belgian witbier like Stella Artois Wit (yes, it’s Belgian-style now!).
The coriander and citrus notes elevate the dough’s natural flavors without overpowering. Serve both beer and wine slightly cooler than room temperature for best results. 🍺
Seasonal Adaptations
Summer calls for a Sparkling Lambrusco—its bubbles and berry notes create a playful contrast with the chewy crust. In winter, switch to a Barolo or Amarone della Valpolicella for bold tannins that stand up to heartier toppings like sausage or mushrooms.
For beer lovers, a dark Belgian dubbel like Rodenbach adds malty depth that pairs beautifully with caramelized onions. 🌡️
Non-Alcoholic Options
Don’t skip the pairing! A sparkling blood orange soda (like San Pellegrino Aranciata Rossa) mirrors the wine’s citrus brightness. For a savory twist, try a chilled hibiscus tea with a squeeze of lemon—its tartness enhances the dough’s natural flavors.
Both options work beautifully with white pizza variations like Bianca. 🥤
Pro Pairing Tip
Let your wine or beer breathe alongside your pizza—open bottles 15-20 minutes before serving. For beer, pour a small sample into a separate glass to release its aromas. And here’s my secret: Brush the crust edges with olive oil before baking—it enhances the wine’s fruitiness and beer’s malt sweetness. 💡
Nutrition facts
Frequently asked questions
Why does this dough need such a long rest time?
The 24-hour rest (or even 4 hours minimum) is what creates that signature chewy texture and deep flavor. High hydration dough like this benefits from slow fermentation, which breaks down gluten strands for a tender yet resilient crust. The longer it rests, the more complex flavors develop—think of it like aging cheese!
Can I make this dough without a stand mixer?
This is a no-knead recipe designed for minimal effort. Just mix with a wooden spoon or your hands until combined, then let gravity and time do the work. The dough’s high hydration makes it more forgiving than traditional dough—no kneading required!
What if my dough doesn’t rise after resting?
Check three things first: yeast freshness (test with warm water + sugar), water temperature (105-115°F), and room temperature (should be 70-75°F). If all checks out, try adding 0.125 tsp more yeast and letting it rest another 2 hours. Cold environments slow fermentation—move your dough to a warmer spot if needed.
How do I prevent the dough from sticking?
Use semolina flour (not regular flour) on your work surface—it adds texture and prevents sticking better than all-purpose. For shaping, wet your hands slightly and dust with flour only when necessary. The dough should be soft but manageable; if it’s too wet, add 1 tablespoon flour at a time until workable.
Can I use this dough for other baked goods?
Yes! This high-hydration dough works beautifully for focaccia, calzones, or even garlic knots. For focaccia, press it into an oiled pan and top with olive oil and herbs before baking. The dough’s flexibility makes it perfect for shaping into any form—just adjust baking times based on thickness.

- 12 Bean Chili Recipe: Hearty Slow-Cooked Depth With 12 Legumes - October 17, 2026
- 5 Seed Bread Recipe: Nutty Crunch and Artisan Flavor in One Loaf - October 17, 2026
- 1 Lb Macaroni Salad Recipe: Bold, Crunchy, and Crowd-Pleasing - October 17, 2026