
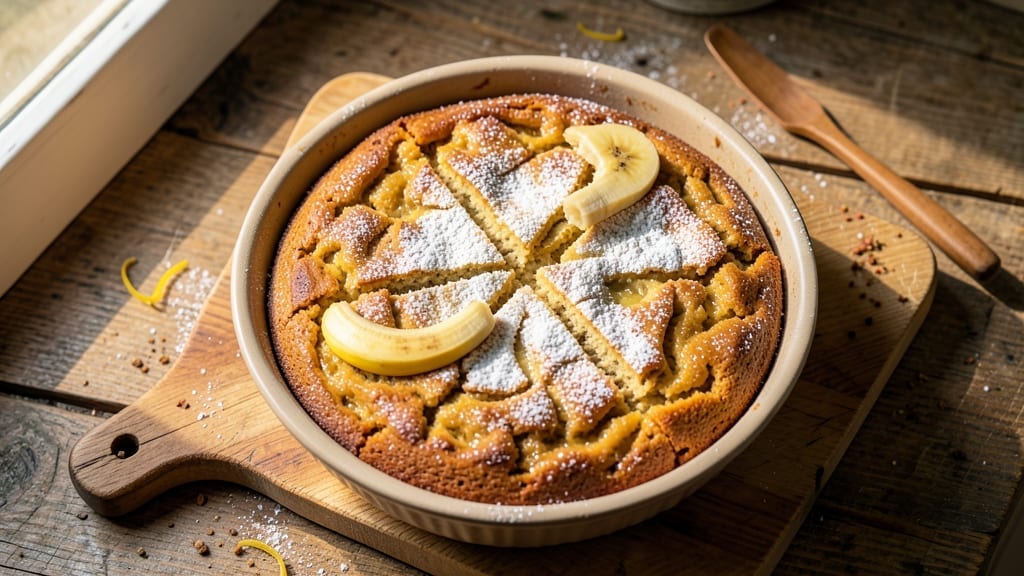
This 8×8 banana snack cake recipe delivers the perfect balance of moist banana layers and velvety vanilla frosting—every bite is a nostalgic treat with restaurant-quality texture. The secret lies in ripe bananas and a simple yet effective mixing technique that ensures tender crumb and rich flavor without drying out.
I’ve perfected this recipe over years of baking, and it consistently yields a cake that’s moist enough to cut cleanly yet sturdy enough to hold its shape.
The beauty of this recipe is its simplicity: just 9 ingredients and 30 minutes of prep time. You’ll start with a basic batter that transforms into layers of golden-brown cake with a subtle banana aroma that fills your kitchen.
The frosting—made with just powdered sugar, butter, and vanilla—adds a creamy contrast that makes each slice irresistible. This is the kind of dessert that disappears quickly, whether you’re serving it at a family gathering or indulging in a solo treat.
What sets this banana snack cake apart is its moistness—no dry edges or crumbly texture here. The cake stays tender for days when stored properly, making it ideal for meal prep or gifting.
The vanilla frosting isn’t just sweet; it’s lightly flavored enough to let the banana shine while adding just the right amount of richness. Each forkful delivers that perfect balance of banana sweetness and creamy frosting, proving that homemade desserts can be both effortless and extraordinary.
Serve this cake warm with a scoop of vanilla ice cream or enjoy it at room temperature for a classic snack cake experience. The 8×8 pan ensures even baking and easy slicing, making it perfect for parties, potlucks, or a quick homemade dessert.
Here’s how to make it—simple steps for a foolproof result every time.
Ingredients for 8×8 banana snack cake
Nine simple ingredients for a moist, nostalgic banana cake with velvety frosting—no dry crumbs in sight!
| Ingredient | Amount | Notes |
|---|---|---|
| Ripe Bananas 🍌 | 3 medium | About 1.5 cups mashed |
| All-Purpose Flour 🌾 | 1 ½ cups | Sifted for lighter texture |
| Granulated Sugar 🍚 | 1 cup | White or light brown |
| Unsalted Butter 🧈 | ½ cup | Melted, full-fat preferred |
| Eggs 🥚 | 2 large | Room temperature for blending |
| Baking Soda 🧂 | ½ tsp | Freshly measured |
| Vanilla Extract 🌸 | 1 tsp | Pure, high-quality extract |
| Powdered Sugar 🍚 | 1 ½ cups | For frosting, sifted |
| Vanilla Frosting 🍯 | ½ cup | Store-bought or homemade |
The bananas are everything here—ripe with brown spots means natural sweetness and moisture. Trader Joe’s or any grocery store usually has them at the perfect stage. Don’t over-mash them though—just rough chop and press through a fork for that perfect texture. The flour? King Arthur or Gold Medal brands bake up lightest. And the butter—full-fat is non-negotiable for that rich flavor. I always buy mine in bulk from Costco to save money for extra batches.
No ripe bananas? Use 3 very ripe bananas—they’ll be sweeter and work just as well. Short on powdered sugar? Confectioners’ sugar works the same. Making your own frosting? Mix the powdered sugar with 0.25 cup softened butter and 1 tsp vanilla—it’s foolproof. The vanilla extract can be imitation if you’re pinched, but pure vanilla extract makes all the difference. And if you’re baking for a crowd, double the recipe—this cake disappears fast!
Store the cake in an airtight container at room temperature for up to 3 days—it actually gets better as it sits! For longer storage, wrap tightly and refrigerate for 1 week. The frosting? Keep it in the fridge and whip briefly before spreading to restore fluffiness. I always bake this ahead for gatherings—freezes beautifully for 2 months if you wrap it tightly. Just let it sit at room temp for 30 minutes before serving to enjoy that perfect balance of warm cake and creamy frosting.
Why You’ll Love This Recipe
- No Mash Required: I swear by this trick—just slice those ripe bananas right into the batter. No sticky fingers, no food processor, and the texture? Moist but not gummy. Honestly, it’s the kind of shortcut that makes baking feel like a victory.
- Sweet But Not Cloying: The sugar in the batter gets balanced by the natural sweetness of the bananas, so you won’t be drowning in syrup. That buttery richness from the melted butter? It’s like a hug for your taste buds—warm, comforting, and just enough to make you want seconds.
- Lunchbox Hero: Between us, this is my go-to for school lunches or office snacks. Cut into squares, wrap in foil, and they stay fresh for days. My kids (and my coworkers) always grab these first—no weird textures, no soggy edges, just pure, easy snacking.
- Pantry Staple Magic: You’re already using things you have: flour, sugar, butter, eggs. No specialty ingredients, no last-minute grocery runs. And if you end up with leftovers? Toss them in the toaster for crispy edges or freeze them for a quick breakfast later. Zero waste, all win.
Step-by-step instructions for 8×8 banana snack cake
Here’s how to bake a perfectly moist banana cake with layers that stay tender and a velvety frosting.
Prep and Mash the Bananas
Start by peeling the 3 medium ripe bananas—they should be soft enough to mash easily with a fork. I like to use a potato masher for this step because it creates a smooth, lump-free texture that blends beautifully with the other ingredients. Place the mashed bananas in a medium bowl and set aside.
Real talk: If your bananas aren’t ripe enough, sprinkle a few drops of water over them and let them sit for 10 minutes while you prep the rest. The goal is a smooth, creamy consistency that won’t make your cake dense. You’ll know you’re on track when the mashed bananas measure about 1.5 cups—this is your target volume.
Mix Wet Ingredients for Perfect Texture
In a separate large bowl, combine the 1 cup granulated sugar and 0.5 cup melted unsalted butter. I always melt the butter gently in the microwave for 30 seconds until just liquid, then let it cool slightly before mixing. This prevents the eggs from cooking when you add them next.
Add the 2 large eggs one at a time, whisking vigorously after each addition until fully incorporated. Then stir in the 1 tsp vanilla extract and the mashed bananas. The mixture should be smooth and slightly thick—this is your wet base. Don’t worry if it looks curdled at first; everything will come together when you add the dry ingredients.
Combine Dry Ingredients Gently
In a small bowl, whisk together the 1.5 cups all-purpose flour and 0.5 tsp baking soda. Sifting the flour first prevents lumps and ensures a lighter texture. Gradually fold the dry ingredients into the wet mixture using a spatula, mixing just until combined. I like to use the “fold and scrape” method—lift the batter from the bottom of the bowl and fold over the top to incorporate everything evenly.
This step is crucial for maintaining moisture. Overmixing develops gluten, which makes the cake tough. You’ll know you’re doing it right when there are still a few small flour streaks visible—this ensures a tender crumb. The batter should be thick but pourable, like a well-made pancake batter.
Bake Until Golden and Springy
Preheat your oven to 350°F and grease an 8×8-inch baking pan thoroughly with butter or nonstick spray. Pour the batter into the prepared pan and smooth the top with a spatula. Bake for 35-40 minutes until a toothpick inserted in the center comes out clean and the edges are golden brown.
Here’s the thing—don’t open the oven during the first 25 minutes of baking. The sudden temperature change can cause the cake to sink. When you do peek, look for the edges pulling away slightly from the pan and the center rising in the middle. This tells me the cake is nearly done and just needs a few more minutes to set.
Frost and Serve for Maximum Moisture
Let the cake cool in the pan for 10 minutes, then transfer it to a wire rack to cool completely. While it cools, prepare the frosting by combining the 1.5 cups powdered sugar with the 0.5 cup vanilla frosting in a bowl. Spread this evenly over the cooled cake using an offset spatula, creating a smooth, even layer.
For the ultimate presentation, I like to dust the top with a little extra powdered sugar or add sliced bananas as a garnish. The cake should be moist with tender layers that hold together beautifully. Slice it while still slightly warm for the perfect texture—each bite should be soft, sweet, and packed with banana flavor. Store any leftovers covered at room temperature for up to 3 days or refrigerate for up to 5 days.
Pro Tips For Making 8×8 Banana Snack Cake
- Mash Bananas Thoroughly: I learned this the hard way—lumpy banana puree means uneven texture. Use a fork first, then press through a fine-mesh sieve if you’re impatient (yes, even if you’re in a hurry). No one wants to bite into a surprise banana chunk in their cake.
- Cream Butter and Sugar First: Skipping this step makes your cake dense and dry. Beat the butter and sugar until light and fluffy—about 3-4 minutes with an electric mixer. This incorporates air, which is what gives that classic tender crumb. (Your future self will notice the difference.)
- Don’t Overmix the Batter: I used to treat this like a science experiment, mixing until the flour disappeared. Big mistake. Overmixing develops gluten, turning your cake into a tough, chewy brick. Mix just until combined—about 20-30 seconds after the flour disappears. Trust me, it’s subtle but makes a real difference.
- Check Oven Temp with Candy: Home ovens lie. Test yours by dropping a piece of sugar in the center rack—if it melts in 3-5 minutes, you’re good. Too hot? Lower the temp by 25°F. Too cool? Add 10-15 minutes to bake time. This isn’t the prettiest method, but it’s the tastiest. (And saves you from a gummy center.)
Dietary considerations for this recipe
Gluten-Free Adaptation
Swap the 1.5 cups all-purpose flour for a 1:1 gluten-free baking flour blend like King Arthur Measure for Measure. Add ½ tsp xanthan gum to mimic gluten’s structure. The cake will be slightly denser but still moist—just reduce baking time by 5 minutes to prevent over-browning. 🥄
Dairy-Free Options
Replace the ½ cup melted butter with ½ cup coconut oil or dairy-free butter like Miyoko’s. For extra richness, add 2 tbsp applesauce to compensate for moisture loss. The frosting can use dairy-free margarine or softened coconut oil—just ensure it’s chilled before whipping with powdered sugar.
Vegan Version
Use flax eggs (mix 2 tbsp ground flaxseed with 6 tbsp water, let sit for 5 minutes) and vegan butter like Earth Balance. Replace honey (if used) with maple syrup in the frosting.
The texture stays tender, though vegan cakes often have a slightly denser crumb—bake for 30-35 minutes to avoid dryness.
Lower Sugar Swaps
Cut the 1 cup granulated sugar by ¼ cup and add ¼ cup unsweetened applesauce to maintain moisture. For the frosting, use ½ cup powdered sugar and 1 tbsp lemon juice to brighten the flavor. The cake will still be sweet but less heavy—perfect for a lighter dessert. 🍊
Nut-Free Safety
Ensure all ingredients—especially vanilla frosting and powdered sugar—are certified nut-free. Check labels on store-bought frosting for cross-contamination warnings. For homemade frosting, use pure vanilla extract and butter from sealed, nut-free brands like Land O’Lakes.
Nutrition facts
Frequently asked questions
Can I use overripe bananas for this recipe?
Yes! Overripe bananas with brown spots are actually ideal—they’re sweeter and more flavorful. Just make sure they’re soft enough to mash easily with a fork. If they’re too mushy, you can peel them, place them in a bowl, cover with plastic wrap, and let them sit at room temperature for 10 minutes to firm up slightly before mashing.
How do I know when the cake is fully baked?
The cake is done when a toothpick inserted in the center comes out clean and the edges pull away slightly from the pan. For an 8×8-inch pan, this typically takes 35-40 minutes at 350°F. Avoid opening the oven during the first 25 minutes to prevent sinking—just trust your timer and the visual cues!
Can I make this cake in a different-sized pan?
Yes, but you’ll need to adjust the baking time. For a 9×9-inch pan, bake for 30-35 minutes (the cake will be thinner), while a 9×13-inch pan requires 40-45 minutes. Reduce the oven temperature by 25°F if using a dark-colored pan to prevent over-browning.
Why did my cake turn out dense instead of moist?
Overmixing the batter develops gluten, making the cake tough. Mix the dry ingredients just until combined—small flour streaks are okay! Also, ensure your bananas are ripe (not too firm) and don’t overbake. A toothpick should come out with a few moist crumbs, not completely clean. For extra moisture, try adding 1 tbsp yogurt to the batter.
How can I make this cake ahead of time?
Bake the cake up to 2 days ahead and store it in an airtight container at room temperature. For longer storage, refrigerate for up to 5 days or freeze for 2 months. Let it sit at room temperature for 30 minutes before frosting to restore texture. The frosting can be made separately and stored in the fridge for up to 3 days.
