
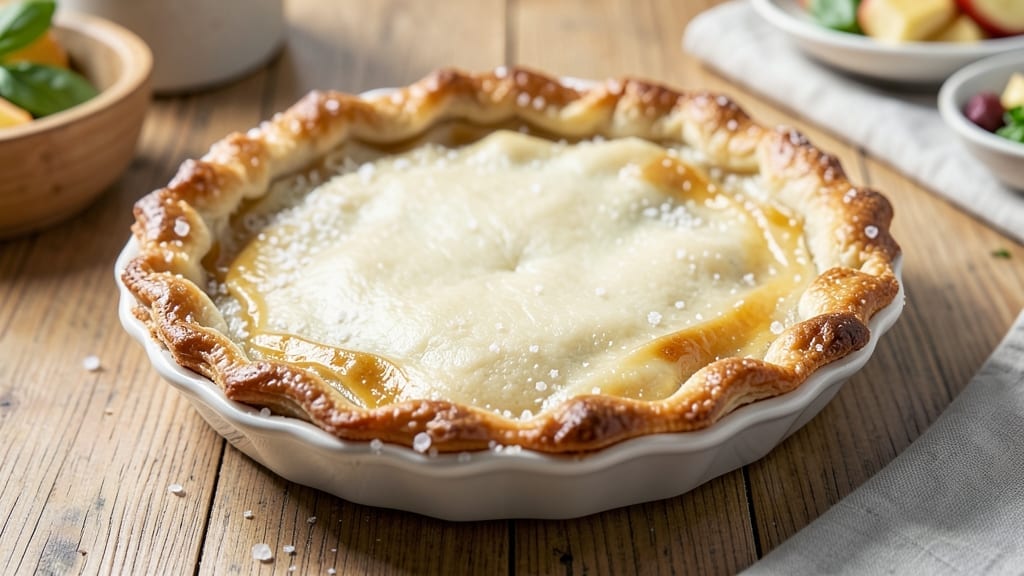
A 9 1/2-inch pie crust is the foundation for any perfect dessert—whether you’re baking a classic apple pie, a rich chocolate custard, or even a savory quiche. This recipe delivers the flaky, tender layers that separate home baking from store-bought, all while being adaptable to any filling.
The secret lies in cold butter and gentle handling, ensuring a crust that holds its shape and delivers that signature shatteringly crisp texture.
What sets this crust apart is its precision for a 9 1/2-inch pie dish, where proper rolling and fitting are critical. We’ll guide you through every step—from mixing the dough to creating a lattice pattern that’s both beautiful and functional.
Pre-baking is optional, so you can choose whether to blind-bake for custard fillings or trust the crust to hold up with fruit-based pies. The dough is simple: just flour, butter, salt, and ice water, but the technique makes all the difference.
By the end, you’ll have a golden-brown, lattice-topped pie crust that’s sturdy enough to hold its shape yet delicate enough to shatter with every bite. The flakiness comes from keeping everything cold, and the lattice design adds visual appeal while allowing fillings to breathe.
This is the crust that turns a simple dessert into something restaurant-worthy—no shortcuts, just proven results.
Ready to master it? Whether you’re a beginner or a seasoned baker, this recipe ensures your crust will always be perfectly flaky and ready for any filling. Let’s get started with the ingredients and instructions that will make your pies the star of every gathering.
Ingredients for 9 1/2 inch pie crust
Four essential ingredients create the perfect flaky lattice crust for any 9 1/2-inch pie.
| Ingredient | Amount | Notes |
|---|---|---|
| All-Purpose Flour 🌾 | 2 ½ cups | Sifted for light texture |
| Unsalted Butter 🧈 | 1 cup | Cold, cubed, 60% fat content |
| Ice Water 💧 | ⅓ cup | Chilled, not tap water |
| Diamond Crystal Kosher Salt 🧂 | ½ tsp | Fine grain preferred |
| Granulated Sugar 🍚 | 1 tbsp | For lattice edges |
The butter is non-negotiable—European-style or high-fat American brands like Land O’Lakes or Plugrá work best. Grab it from the freezer section (yes, the one with frozen veggies) and cut it into 1/2-inch cubes while still frozen. King Arthur or Bob’s Red Mill flour is ideal for flakiness, but any all-purpose brand works. The salt matters too—Diamond Crystal dissolves slower than Morton, so adjust to taste. For the ice water, fill an ice cube tray and let it melt slightly—you want it just cold enough to chill the dough but not freeze it.
No cold butter? Chill the cubed butter for 30 minutes in the freezer—it’s a game-changer. Short on time? Use refrigerated cookie dough butter (like from the store) at half the amount, but your crust won’t be as flaky. The sugar on the lattice edges? Skip it for fruit pies, but it’s essential for custard fillings to prevent sogginess. For a vegetarian rennet-free option, this crust is already compliant—just ensure your butter isn’t cultured with animal enzymes (most store brands are fine).
The dough keeps for 3 days wrapped tightly in plastic in the fridge, or 3 months frozen between parchment paper. For a 9 1/2-inch lattice, divide the dough into two equal discs—one for the base, one for the top. Roll them out on parchment paper dusted with flour (not too much, or it won’t stick). The lattice strips should be 1/2-inch wide for that classic look. Pre-baked crusts freeze beautifully for 2 months—just thaw overnight before adding filling.
Why You’ll Love This Recipe
- No-Fuss Foundation: I swear by this crust because it’s actually foolproof—just flour, cold butter, ice water, and a pinch of salt. No food processor, no overworking the dough, and no sad cracks in the bottom. That sugar in the butter? It keeps the flaky layers singing without extra fuss.
- Butter-Kissed Magic: This isn’t just any crust—it’s ridiculously tender with that cold butter cutting through the flour like a dream. The ice water keeps it from turning into a greasy mess, and that kosher salt? It’s the secret to making every bite taste like it was baked yesterday, not yesterday’s leftovers.
- Your Crust, Any Style: Need a pie for Thanksgiving? A galette for a lazy Sunday? This dough stretches to all of it. It’s my go-to for both sweet (apple, berry) and savory (spinach and ricotta) fillings—no need to tweak the recipe. Just roll, fill, bake, and watch it shine.
- Pantry Goldmine: Between us, this recipe costs next to nothing—just flour, butter, and salt. A single batch makes two crusts, so you’re always covered for impromptu desserts or meal prep. Honestly, I’ve made it so often I’ve lost count of how many times it’s saved my back when I forgot to pull out a store-bought one.
Step-by-step instructions for a perfectly flaky lattice pie crust
Here’s how to build a lattice masterpiece with layers so tender they’ll disappear in your mouth.
Cut and Chill the Butter for Maximum Flakiness
Place the 1 cup unsalted butter between two sheets of parchment paper and pound gently with a rolling pin until it measures about 10×4 inches and is ¼-inch thick. This creates thin, even layers that will melt beautifully during baking. Return the butter to the freezer while you prepare the dough.
I like to work quickly here—cold butter is your secret weapon. If it starts to soften while you’re rolling, just pop it back in the freezer for 5 minutes. The goal is to keep that butter cold enough to create flaky layers but pliable enough to roll smoothly. Think of it like buttering toast: too soft and it spreads, too hard and it cracks.
Combine Dry Ingredients and Cut in the Butter
In a large bowl, whisk together the 2.5 cups all-purpose flour, 0.5 tsp diamond crystal kosher salt, and 1 tbsp granulated sugar. The sugar isn’t just for sweetness—it helps create a tender lattice that won’t get too tough. Add the chilled butter cubes and use a pastry cutter or your fingers to work the butter into the flour until you have pea-sized crumbs with some larger pieces remaining.
Here’s where patience pays off: don’t overwork the dough. You want to see both flour and butter pieces—this ensures those signature flaky layers. If the mixture starts to look like wet sand, you’ve gone too far. Press a bit between your fingers—it should hold together but still feel cool to the touch.
Hydrate with Ice Water for Structure
Gradually add the 0.33 cup ice water, 1 tablespoon at a time, using a fork to mix gently. The water should be ice cold—this prevents the butter from melting too quickly. Stop adding water when the dough just comes together when pressed. It should be cool to the touch and hold its shape when you squeeze a handful.
Don’t be tempted to add extra water if the dough seems dry. This crust relies on proper hydration for its structure, but too much water will make it tough. The dough should be slightly crumbly but form a cohesive ball when pressed. If it feels too dry, let it rest for 5 minutes—sometimes the flour absorbs moisture as you work.
Roll Out the Crust for a Perfect Fit
Divide the dough in half and flatten each piece into a disk. Wrap one disk tightly in plastic wrap and refrigerate while you work with the other. On a lightly floured surface, roll the second disk into a 12-inch circle—about ⅛-inch thick. Transfer to a 9½-inch pie dish and gently press it into the bottom and up the sides, trimming any excess to ½-inch all around.
Here’s a pro tip: keep the dough chilled between steps. If it starts to warm up, pop it back in the fridge for 10 minutes. The colder the dough, the easier it rolls and the less it shrinks during baking. For the lattice top, roll out the second disk to 12×6 inches—this gives you enough length to create those classic diamond patterns.
Create the Signature Lattice Top
Cut the second rolled-out disk into 12 strips, each about ⅛-inch wide. Arrange 6 strips parallel to each other across the pie, spacing them ¼-inch apart. Fold back every other strip and tuck it under the adjacent strip to create the classic diamond pattern. Brush the lattice with a light coating of egg wash (optional but recommended) for that golden finish.
This is where the magic happens—those sugar crystals in the dough caramelize beautifully during baking, creating edges that are crisp yet tender. Press down gently on the lattice to ensure good contact with the filling. The strips should overlap just slightly at the edges to prevent them from burning while still allowing steam to escape for a perfect rise.
Pro Tips For Making 9 1/2 Inch Pie Crust
- Chill the Butter First: I learned this the hard way—when the butter’s too soft, the dough gets sticky and fights you every step. Pull it from the fridge 20 minutes before mixing, then check: it should hold its shape but still dent easily with your finger. Cold butter = flaky layers; warm butter = sad, tough crust.
- Cut the Butter in Small: Use a pastry cutter or your fingers to work the butter into pea-sized pieces, not big chunks. Big pieces melt unevenly and create steam pockets that turn your crust into a sad, greasy mess. Keep the butter cold and work fast—this isn’t a race.
- Skip the Overworking: Once the dough comes together, handle it just enough to form a loose ball. Every extra fold or knead tightens the gluten, and that’s the enemy of flaky crust. If it cracks, don’t panic—just press it back together gently. Less touching = better texture.
- Use Ice Water, Not Cold: The water should be freezing—like, ice cube tray cold. Warm water activates the flour too soon, and you end up with a dense, chewy crust instead of something light and crisp. If your water’s not icy, toss in a few cubes while mixing. Your future pie’s edges will thank you.
Creative variations of this 9 1/2 inch pie crust
Savory Herb Lattice
Swap out the sugar for 1 tbsp dried herbs like thyme or rosemary and add 1 tsp onion powder to the dough for a savory crust perfect for quiches or chicken pot pies.
Brush the lattice with garlic-infused olive oil instead of egg wash for extra flavor. This variation works beautifully with Gruyère cheese fillings or roasted vegetable medleys. 🌿
Gluten-Free Almond Crust
Replace the all-purpose flour with 1.5 cups gluten-free 1:1 baking flour (like Bob’s Red Mill) mixed with 1 cup almond flour for a nutty, sturdy crust. Use ½ cup cold vegetable shortening instead of butter—it creates flakiness without gluten.
This version holds up well to custard fillings and pairs perfectly with lemon curd or berry compotes. Chill the dough for 30 minutes extra before rolling.
Whole Wheat Rustic
Substitute 1 cup whole wheat flour for half the all-purpose flour to create a heartier, slightly denser crust. Add 1 tbsp honey to the dough for moisture and sweetness that complements fruit fillings.
This version works especially well with apple or pear pies, where the nuttiness of the whole wheat enhances the fruit flavors. Brush the lattice with honey butter (mix 2 tbsp softened butter with 1 tsp honey) for extra richness.
No-Roll Crust Shortcut
Skip the rolling entirely by pressing the dough directly into the pie dish using a glass or your fingers. Divide the dough into two equal parts, place one in the dish, and press it evenly with your fingertips.
For the lattice, roll out the second half and cut into strips as usual, then weave them over the uncooked bottom crust. This method saves time and reduces the risk of shrinking. Perfect for busy weeknights when you still want a restaurant-quality crust. ✨
Sweet Potato Crust
Blend 1 cup cooked sweet potato (mashed and cooled) with the dry ingredients for a naturally sweet, vibrant crust. The sweet potato adds moisture and a subtle caramelized flavor that pairs wonderfully with pumpkin or pecan pies.
Reduce the ice water to 0.25 cup since the sweet potato provides extra hydration. This crust has a beautiful golden color and holds its shape beautifully during baking.
Egg Wash Variations
Customize your egg wash for different effects: use whole egg + 1 tbsp water for a glossy finish, egg whites only for extra crispness, or milk + 1 tbsp melted butter for a tender crust.
For a vegan option, brush with plant-based milk + 1 tbsp olive oil. The egg wash not only adds color but also helps the lattice edges caramelize beautifully. 🍳
Nutrition facts
Frequently asked questions
Why does my pie crust shrink during baking?
Shrinking happens when the dough warms up too quickly or isn’t handled properly. Always keep your dough chilled between steps—never let it sit at room temperature for long. Use a 9 1/2-inch pie dish and press the crust gently but firmly into the edges. A 10-minute chill in the fridge before baking also helps maintain shape. The key is patience: cold dough = less shrinking!
Can I make this crust ahead of time?
The dough keeps for 3 days wrapped tightly in plastic in the fridge. For longer storage, freeze it between parchment paper for up to 3 months. Thaw overnight in the fridge before rolling. Pre-baked crusts freeze beautifully too—just thaw before adding filling. This makes weekend baking a breeze!
Do I need to pre-bake the crust for fruit pies?
Not always! For fruit pies like apple or berry, the crust can handle unbaked baking. However, pre-baking is essential for custard fillings (like pumpkin) to prevent sogginess. If pre-baking, use pie weights or dried beans to keep the shape. For fruit pies, blind-bake only if your filling is very wet. The lattice design helps with ventilation either way!
How do I fix a cracked lattice pattern?
Cracks usually happen if the dough warms up or the strips aren’t evenly spaced. Gently press the cracked areas down with your fingers or use a fork to smooth them. For a quick fix, brush the cracks with egg wash and bake as usual—they’ll crisp up nicely. If the lattice is too wide, trim the strips slightly before weaving. The secret is 1/2-inch wide strips with proper spacing!
What’s the best way to roll out the dough without tearing?
Keep everything cold and use parchment paper for rolling. Dust lightly with flour (not too much—excess flour makes the dough tough). Roll from the center outward, rotating the dough as you go. If it tears, gently press the edges together and cover with plastic wrap to rest for 5 minutes before continuing. A 12-inch circle for the base and 12×6-inch rectangle for the lattice work best for a 9 1/2-inch pie.

- Pork Loin Pulled Pork Crock Pot Recipe: Slow-Smoked Tenderness With Zero Dryness - November 1, 2026
- Baked Potatoes in Crock Pot Recipe: Buttery Interiors and Crispy Top Magic - November 1, 2026
- Braised Beef Short Ribs Recipe: Crock Pot Fall-Off-Bone Magic in 6 Hours - November 1, 2026