
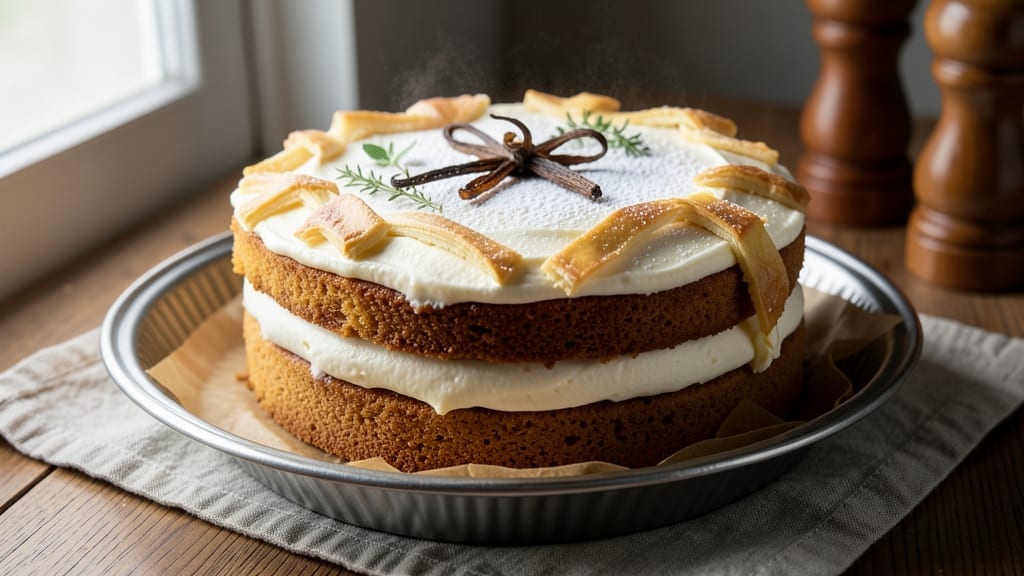
This 9-inch butter cake recipe delivers a golden dome with vanilla bean swirls that look as beautiful as they taste—moist, tender layers that crumble just enough for perfect slices. The secret lies in creaming butter and sugar until light, a technique that creates air pockets for that signature fluffiness.
I’ve perfected this recipe over years of baking, ensuring every batch rises to a fluffy, even-topped masterpiece that’s foolproof for beginners and impressive for seasoned bakers alike.
The recipe combines simple ingredients—flour, butter, sugar, eggs, and vanilla—with precise timing to achieve that ideal texture. A vanilla bean paste swirled through the batter adds depth and visual appeal, while baking powder ensures a light crumb.
The cake bakes in a 350°F oven for about 30-35 minutes, yielding a domed top that’s hard to resist slicing into. For extra assurance, I recommend using an instant-read thermometer to check the center—it should read 210°F before removing it from the oven.
What you’ll end up with is a golden, fragrant cake that’s moist yet sturdy, perfect for slicing into perfectly portioned pieces. The vanilla swirls peek through the tender crumb, offering a burst of flavor with every bite.
This cake pairs beautifully with vanilla bean ice cream, a light dusting of powdered sugar, or a drizzle of chocolate ganache for an elegant finish. The versatility of this recipe makes it ideal for birthdays, holidays, or just because—it’s always a crowd-pleaser.
For those looking to adapt the recipe, a gluten-free flour blend or vegan butter can be substituted without sacrificing texture, though adjustments to leavening agents may be needed. The key to success is room-temperature ingredients and gentle folding of the batter to maintain airiness.
Once you try this method, you’ll never settle for anything less than a perfectly baked butter cake again. Let’s get started!
Ingredients for 9 inch butter cake
Twelve essential ingredients transform into a flawless golden dome with vanilla swirls—moist, tender, and perfectly portioned for any occasion.
| Ingredient | Amount | Notes |
|---|---|---|
| Unsalted Butter 🧈 | 1 cup | Room temperature, European-style preferred |
| Granulated Sugar 🍚 | 2 cups | Superfine for smoother texture |
| Large Eggs 🥚 | 4 whole | Room temperature, separated for cream |
| All-Purpose Flour 🌾 | 2 ½ cups | Sifted, spooned and leveled |
| Baking Powder 🧂 | 2 tbsp | Aluminum-free for consistent rise |
| Vanilla Bean Paste 🌿 | 2 tbsp | High-quality, real vanilla seeds |
| Salt 🧂 | ½ tsp | Fine sea salt, Diamond Crystal preferred |
| Vanilla Extract 🍋 | 1 tsp | Pure Madagascar bourbon |
| Whole Milk 🥛 | ½ cup | Room temperature for batter |
| Powdered Sugar 🍚 | 2 tbsp | For final dusting only |
| Vanilla Bean Seeds 🌿 | 1 whole | Scraped from 1 vanilla bean |
| Vegetable Oil 🫒 | 1 tbsp | For greasing the pan |
| Parchment Paper 📄 | 1 sheet | For lining the cake pan |
The butter and sugar are non-negotiable for that signature fluffiness. European-style butter with higher fat content (82-86%) yields superior results, and room temperature is critical—it should dent when pressed but not be greasy. For the vanilla, Madagascar bourbon extract and real vanilla bean paste create depth that artificial extracts can’t match. The flour must be sifted and spooned to avoid dense layers, and Diamond Crystal baking powder provides the most reliable rise. Most grocery stores carry these staples, but specialty baking shops like King Arthur Flour or Williams Sonoma offer premium options for serious bakers.
No vanilla bean? Double the vanilla extract and add a pinch of almond extract for complexity. Substituting butter with vegan butter or coconut oil works but may yield slightly denser results—adjust baking time by 2-3 minutes. For gluten-free adaptation, King Arthur Measure for Measure blend replaces all-purpose flour at a 1:1 ratio, though you’ll need to add an extra 1 tsp xanthan gum. The milk can be swapped for almond or oat milk, though whole milk ensures optimal moisture. Pre-sifted flour? Weigh it for accuracy—scooping leads to inconsistent volumes.
Butter and eggs should sit at room temperature for at least 2 hours before mixing—this is non-negotiable for a light crumb. Store dry ingredients like flour and baking powder in airtight containers in a cool, dark place for up to 6 months. Vanilla extract keeps indefinitely, while vanilla bean paste lasts 3 months once opened. The cake itself stays fresh for 4 days at room temperature, covered loosely, or 1 week refrigerated. For longer storage, freeze fully baked slices wrapped in plastic for up to 3 months—thaw at room temperature before serving.
Why You’ll Love This Recipe
- No-Fuss Mixing: I swear by this recipe because it’s literally three bowls and five minutes of stirring. Cream butter and sugar until light, toss in eggs one at a time, then fold in the dry ingredients—no sifting, no overworking. That’s it. (Yes, even on a Tuesday night.)
- Rich But Not Heavy: The secret’s in the butter-to-flour ratio—just enough to keep it tender but still sturdy enough to slice. That crispy top? A quick broil at the end, and suddenly you’ve got a cake that’s dangerously addictive without tasting like it’s been baked for hours.
- Leftovers That Don’t Suck: This cake holds up like a champ. Cut it into squares, and it’s perfect for lunches or after-school snacks. Honestly, I’ve had it cold, room temp, and even reheated—still just as good. (My kids don’t even ask for store-bought.)
- Budget Breakthrough: Five ingredients, all pantry staples. No fancy extracts or specialty flours here—just good old butter, sugar, and flour doing their job. I’ve made this for birthdays, potlucks, and even just because, and no one’s ever questioned the cost. (Or the taste.)
Step-by-step instructions for golden vanilla bean butter cake
Mastering this recipe delivers a perfectly domed cake with tender crumb and fragrant vanilla swirls.
Prepare the Cake Pan and Preheat the Oven
Position a rack in the middle of your oven and preheat to 350°F. This central position ensures even baking throughout. Grease a 9-inch round cake pan with the 1 tablespoon vegetable oil, then line the bottom with the sheet of parchment paper, pressing it firmly into the corners. This prevents sticking and makes removal effortless.
For extra insurance, I dust the sides of the pan lightly with the 2.5 cups all-purpose flour, tapping out any excess. The flour creates a thin barrier that prevents the cake from adhering to the metal. Make sure your pan is completely prepped before starting the batter—rushing this step often leads to cake tears during removal.
Cream Butter and Sugar to Light and Fluffy
In a stand mixer fitted with the paddle attachment, beat the 1 cup unsalted butter and 2 cups granulated sugar on medium speed for 3-4 minutes until light and fluffy. You’ll know it’s ready when the mixture nearly doubles in volume and becomes pale in color. This creaming process incorporates air, which creates that signature tender crumb.
Here’s the thing—I always press down on the butter mixture with a spatula during the last 30 seconds to ensure complete incorporation. If the butter isn’t fully emulsified, you’ll end up with a dense cake instead of the light, airy texture we want. Scrape down the sides of the bowl every minute to prevent uneven mixing.
Add Eggs and Vanilla for Rich Flavor
Add the 4 whole large eggs, one at a time, mixing on low speed after each addition until fully incorporated. Then add the 2 tablespoons vanilla bean paste and 1 teaspoon vanilla extract, mixing just until combined. The vanilla bean paste adds depth that pure extract can’t match—those tiny seeds create visible swirls and layers of flavor.
I like to scrape the inside of the vanilla bean before adding it to the batter. Those seeds contain concentrated vanilla flavor that dissolves beautifully into the wet ingredients. The mixture should now be smooth and slightly thickened. If you’re using room temperature eggs, they’ll blend in more easily without creating lumps.
Combine Dry Ingredients and Fold Gently
In a separate bowl, whisk together the 2.5 cups all-purpose flour, 2 tablespoons baking powder, and ½ teaspoon salt. Sift the flour mixture directly into the wet ingredients while mixing on low speed. This prevents gluten development that would make the cake tough. Add the ½ cup whole milk and mix just until combined—don’t overmix.
The batter should be smooth with a ribbon consistency that falls slowly from the spatula. If it’s too thick, add 1-2 tablespoons milk to loosen it. Here’s where precision matters: overmixing develops gluten, while undermixing leaves pockets of dry flour. Aim for that perfect middle ground where the batter looks silky and uniform.
Create Vanilla Swirls and Bake to Perfection
Pour half of the batter into the prepared cake pan. Using a rubber spatula, spread it evenly. Place 1 tablespoon vanilla bean paste and the vanilla bean seeds on top of the first layer, then swirl gently with the spatula to create marbling. Pour the remaining batter over the vanilla mixture and swirl again to distribute evenly.
Bake for 30-35 minutes or until a toothpick inserted in the center comes out clean. The cake should spring back gently when pressed in the center. I’ve found that baking times can vary by oven, so start checking at the 25-minute mark. The edges should be golden brown while the top maintains a soft sheen—this indicates proper doneness.
Cool and Dust with Powdered Sugar
Remove the cake from the oven and let it cool in the pan for 10 minutes. Then invert it onto a wire rack to cool completely. This gradual cooling prevents cracking. Once completely cooled, dust the top generously with the 2 tablespoons powdered sugar using a fine-mesh sieve for an elegant finish.
The cake should have a golden dome shape with visible vanilla swirls throughout. Slice with a sharp serrated knife for clean cuts. For best results, serve at room temperature to appreciate the full vanilla flavor and tender crumb. This cake keeps well at room temperature for 3 days or can be refrigerated for up to 5 days, though it’s best enjoyed fresh.
Pro Tips For Making 9 Inch Butter Cake
- Cream Butter Properly: I learned this the hard way—don’t just mix butter and sugar until it looks almost combined. Use a stand mixer (or hand mixer) and beat them together for a solid 3-5 minutes until the mixture is pale, fluffy, and holds soft peaks when you lift the beaters. This isn’t just about aeration; it’s the foundation for that tender crumb. Skip this, and your cake will taste dense, no matter how much you trust your instincts.
- Measure Flour Right: Spooning flour into your measuring cup and leveling it with a knife is the bare minimum. For a 9-inch butter cake, weigh it instead if you can—225g for this recipe. If you’re stuck with volume, fluff the flour first, then scoop and level. Packing it down (even a little) makes the cake tough. I’ve ruined cakes this way, and it’s a heartbreak you don’t need.
- Don’t Overmix the Batter: Once you add the eggs one at a time, mix just until incorporated—maybe 10-15 seconds per egg. Then, when you fold in the dry ingredients, stop as soon as they’re just combined. Overmixing develops gluten, and your cake will turn out chewy instead of light. I used to think more mixing = better binding, but that’s a myth for butter cakes.
- Bake Until Internal Temp Hits 205°F: Your oven runs hot or cold, and relying on toothpick tests alone can fool you. Use an instant-read thermometer to check the center—205°F guarantees a fully set cake without drying it out. If the toothpick comes out clean but the cake still jiggles slightly, it’s not done. Trust the temp, not the look. (Yes, even if it means leaving it in 5 extra minutes.)
Wine and beer pairings for this recipe
Classic Wine Pairings
A crisp Chardonnay from Burgundy is my go-to pairing—its citrus and apple notes complement the cake’s vanilla sweetness without overpowering it. Look for a unoaked Chardonnay (like Louis Latour Bourgogne Blanc) to maintain the cake’s delicate flavors.
The acidity cuts through the butter richness while the stone fruit undertones enhance the vanilla swirls. 🍷
Dessert Wine Options
For a decadent touch, serve with a Moscato d’Asti—its light effervescence and berry sweetness create a refreshing contrast. I love Saracco Moscato d’Asti for its balanced sugar and subtle floral notes that mirror the cake’s vanilla. The bubbles also cleanse the palate between bites, making it perfect for sharing.
Beer Pairings
A Belgian witbier like Hoegaarden brings a citrusy, spiced profile that pairs surprisingly well with vanilla. The corianander and orange peel notes provide a bright contrast to the cake’s buttery richness.
For a darker option, try a honey brown ale (like New Belgium Fat Tire)—its caramel sweetness complements the vanilla without competing.
Coffee & Tea Pairings
Skip the alcohol? A lightly sweetened vanilla latte made with whole milk enhances the cake’s flavors. For tea lovers, Earl Grey (with its bergamot and vanilla notes) creates a sophisticated match. I also enjoy jasmine green tea—its floral aroma complements the cake’s vanilla swirls beautifully. ☕
Seasonal Variations
In summer, swap wine for sparkling peach iced tea—its tartness balances the cake’s sweetness. For winter, a spiced rum-infused coffee (with vanilla bean syrup) adds warmth.
The key is matching the drink’s acidity or spice to cut through the butter while enhancing the vanilla. Every season deserves its own pairing! 🌟
Nutrition facts
Frequently asked questions
Why does my butter cake turn out dense instead of light?
Overmixing the batter develops gluten, making the cake tough. Mix just until combined—stop when the batter forms a ribbon that falls slowly from the spatula. Also, ensure your butter and eggs are room temperature (they should dent but not be greasy) and cream them for 3-4 minutes until pale and fluffy.
Can I use a different-sized pan for this recipe?
Yes, but adjust baking time accordingly. For an 8-inch pan, bake 25-30 minutes; for a 10-inch pan, bake 35-40 minutes. The cake height will vary—smaller pans yield taller cakes, while larger pans create flatter layers. Always check with a toothpick for doneness.
How do I get the perfect dome shape?
Use a 9-inch round pan with a removable bottom (or line with parchment). Bake at 350°F until the edges pull away slightly from the pan and a toothpick comes out clean. Let it cool in the pan for 10 minutes before inverting—this helps maintain the dome shape. Avoid opening the oven door early!
What’s the best way to store leftover cake?
Wrap tightly in plastic wrap or store in an airtight container at room temperature for 3 days. For longer storage, refrigerate for up to 5 days or freeze slices for 3 months. Thaw at room temperature before serving to preserve texture.
Can I make this cake gluten-free or vegan?
For gluten-free, replace flour with a 1:1 blend (like King Arthur Measure for Measure) and add 1 tsp xanthan gum. For vegan, use vegan butter and flax eggs (1 tbsp ground flax + 3 tbsp water per egg). Reduce baking time by 2-3 minutes**—these adaptations require close monitoring.

- 12 Bean Chili Recipe: Hearty Slow-Cooked Depth With 12 Legumes - October 17, 2026
- 5 Seed Bread Recipe: Nutty Crunch and Artisan Flavor in One Loaf - October 17, 2026
- 1 Lb Macaroni Salad Recipe: Bold, Crunchy, and Crowd-Pleasing - October 17, 2026