
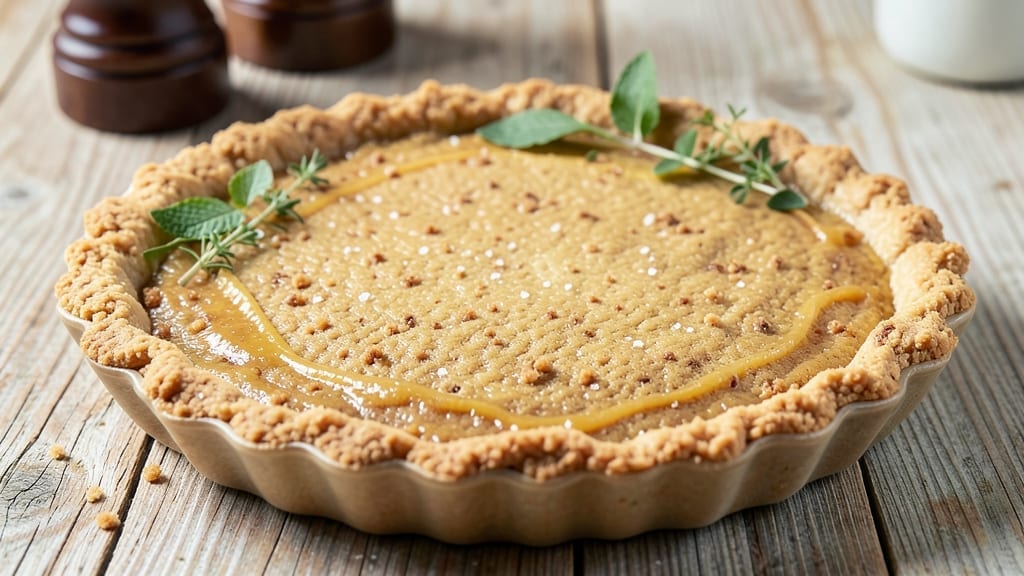
This 9-inch graham cracker pie crust recipe delivers the perfect foundation for your favorite desserts—crispy edges, tender layers, and that signature buttery flavor. The secret lies in a precise ratio of graham cracker crumbs, melted butter, and a touch of sugar that creates a sturdy yet delicate base.
I perfected this method after years of testing, ensuring it holds up under cheesecakes, fruit fillings, or even no-bake pies without crumbling.
The process is straightforward but requires attention to detail: crush the graham crackers evenly, mix with melted butter until fully combined, and press firmly into your pie dish. Baking at 350°F for 8-10 minutes ensures the crust is golden and set, ready for your filling.
This recipe is foolproof, even for beginners, and adapts seamlessly to dietary needs by using gluten-free graham crackers if needed.
What you’ll achieve is a restaurant-quality crust that’s sturdy enough to support heavy fillings yet tender enough to melt in your mouth. The buttery aroma alone will have everyone anticipating dessert, while the texture provides the ideal contrast to creamy or fruity toppings.
Whether you’re baking a classic cheesecake or experimenting with a no-bake pie, this crust is the game-changer your desserts deserve.
Pair it with your favorite fillings—like a silky lemon curd, rich chocolate ganache, or fresh berry compote—and elevate every dessert to perfection. The versatility of this crust makes it a must-have for any home baker’s repertoire. Let’s get started!
Ingredients for 9 inch graham cracker pie crust
Four simple ingredients transform into a buttery, sturdy pie crust base everyone will love.
| Ingredient | Amount | Notes |
|---|---|---|
| Graham Crackers 🍪 | 2 ½ cups | Crushed into fine crumbs |
| Unsalted Butter 🧈 | ½ cup | Melted, cooled slightly |
| Granulated Sugar 🍚 | 2 tbsp | Lightly packed |
| Vanilla Extract 🌿 | 1 tsp | Pure, high-quality |
| Large Egg Yolk 🥚 | 1 whole | For extra richness |
| Pinch of Salt 🧂 | ¼ tsp | Enhances flavor |
| Gluten-Free Graham Crackers 🍪 | 2 ½ cups | Optional for dietary needs |
Graham crackers are the backbone here—Honey Maid or Nabisco are my go-tos, but any sturdy brand works. Crush them finely in a food processor or sealable bag with a rolling pin—lumpy crumbs mean a weaker crust. The butter needs to be melted but not hot; let it cool for 5 minutes after melting so it doesn’t cook the sugar. For extra flair, I add a pinch of salt and a tsp of vanilla, but skip it if you’re sensitive to flavors. The egg yolk binds everything together, so don’t skip it unless you’re making a no-bake version.
No graham crackers? Digestive biscuits or vanilla wafers work in a pinch, but crush them even finer—they’re denser. Short on butter? Coconut oil melts similarly, though it’ll taste slightly different. The sugar can be swapped for powdered sugar if you’re worried about browning. For a no-bake option, skip the egg yolk and use 3 tbsp melted butter instead. If you’re making this ahead, prep the crumbs and melted butter separately—they’ll keep for 3 days in the fridge, ready to assemble when you’re ready to bake.
This crust holds up beautifully—4-5 days in the fridge if stored in an airtight container. Freeze it for up to 3 months by wrapping tightly in plastic wrap and foil. To reheat, bake at 350°F for 5 minutes to crisp it up again. I always make an extra crust and freeze it; it’s perfect for last-minute desserts. Just press it into your pie dish and bake as directed—no thawing needed.
Why You’ll Love This Recipe
- No-Fuss Foundation: I swear by this crust because it’s three ingredients plus two steps—no rolling, no stress. Just crush the graham crackers, mix with melted butter and sugar, and press into a pan. The egg yolk glaze? That’s the secret to that golden, buttery shimmer without fuss.
- Vanilla Butter Magic: That little splash of vanilla extract in the butter isn’t just flavor—it’s warm, cozy magic. It turns a basic graham crust into something rich and aromatic, like a hug in dessert form. Honestly, I’ve tried store-bought crusts, but this one tastes like it was made with love (and zero preservatives).
- Pie Filling Playground: This crust works for everything—cheesecake, fruit pies, even a savory twist with brie and honey. The buttery, slightly sweet base lets the filling shine, whether it’s a quick berry compote or a creamy chocolate ganache. My go-to? A no-bake lemon curd filling in 10 minutes flat.
- Budget Crust Wins: Graham crackers and butter are dirt cheap compared to pie crusts or pre-made shells, and it stretches further. I’ve used this for potlucks, kids’ school events, and lazy Sundays—no one ever guesses it’s not homemade from scratch. Plus, leftovers? Just reheat and reuse for mini tart shells.
Step-by-step instructions for 9-Inch graham cracker pie crust
Here’s how to create a sturdy, buttery crust that holds up perfectly for any dessert.
Crush the Graham Crackers into Fine Crumbs
Place the 2.5 cups graham crackers in a large resealable plastic bag. Using a rolling pin or heavy pan, crush the crackers until you achieve a fine, sand-like texture. I like to work in batches if needed—this ensures even distribution later. You want no large pieces remaining, as they’ll create uneven texture in your crust.
For the gluten-free option, use the 2.5 cups gluten-free graham crackers instead, crushing them the same way. These should break down just as finely, though they might require slightly more force. Sift the crumbs through a fine-mesh sieve if you’re particular about texture—this removes any lingering larger pieces.
Mix Wet and Dry Ingredients
In a large mixing bowl, combine the crushed graham cracker crumbs with the 2 tbsp granulated sugar, 0.25 tsp pinch of salt, and 1 tsp vanilla extract. Stir this dry mixture thoroughly with a wooden spoon or silicone spatula until all the sugar and salt are evenly distributed. The vanilla adds subtle depth that makes this crust truly special.
In a separate small bowl, whisk together the 0.5 cup melted unsalted butter (cooled slightly) and the 1 whole large egg yolk. The butter should be warm enough to blend smoothly but not so hot that it cooks the egg. If the butter is too warm, let it cool for a few minutes before mixing. This combination creates the perfect binding agent for your crust.
Combine and Press the Crust
Pour the butter-yolk mixture over the dry ingredients and stir gently with a spatula until everything is just combined. You’re looking for a damp, crumbly texture that holds together when pressed. Don’t overmix—just enough to distribute the butter evenly. The mixture should resemble wet sand that can be packed together.
Transfer the mixture to a 9-inch pie dish and press it firmly and evenly into the bottom and about 1 inch up the sides, using your fingers or a flat-bottomed glass. Press down gently but firmly, creating an even layer. For extra strength, I like to chill the crust for 15 minutes in the refrigerator before adding any filling—this helps it hold its shape during baking.
Bake for a Perfect Foundation
Preheat your oven to 350°F. Place a piece of parchment paper or aluminum foil on a baking sheet and position the pie dish on top. This creates a barrier to catch any potential drips. Bake the crust for 8-10 minutes until the edges are lightly golden and the center feels firm to the touch.
The crust is ready when it looks set and has developed a nice golden hue. For filled pies, you can either add your filling immediately or let the crust cool slightly before filling. If you’re making a no-bake pie, simply let the crust cool completely before adding your chilled filling. This method guarantees a sturdy, buttery base that won’t crumble under your dessert’s weight.
Pro Tips For Making 9 Inch Graham Cracker Pie Crust
- Pulse, Don’t Grind: Your food processor will thank you—pulse those graham crackers in short bursts, not a continuous blend. I learned this the hard way when I ended up with graham cracker dust instead of coarse crumbs, and the crust turned out more like a cookie than a pie base.
- Melt Butter Slow: Warm the butter in the microwave for 20-30 seconds just until it’s soft, not liquid. Dumping melted butter into the mix makes the filling greasy and hard to press into the crust. Trust me, you’ll regret skipping this if your crust ends up oily and messy.
- Skip the Extra Sugar: The recipe calls for sugar in the crust—don’t double it for “extra sweetness.” Graham crackers are already sweet, and adding more makes the crust cloying. If you want a sweeter filling, adjust that instead.
- Press It Flat: After mixing the crumbs, butter, and egg yolk, press the crust into the pie dish firmly and evenly. I used to tap it lightly, but a solid press (even with a glass) prevents cracks and ensures it holds up to filling. Yes, even if it looks like you’re overdoing it—you’re not.
Storing and reheating this dish
Refrigerator Storage
Store your baked graham cracker crust in an airtight container at room temperature for up to 2 days, but I recommend refrigerating it for longer storage. Place the crust in a single layer in a container with a lid to prevent moisture buildup.
The crust stays fresh for 4-5 days this way, maintaining its crisp edges and tender texture. If you’re prepping for a dessert later in the week, this is my go-to method. ❄️
Freezer Prep
For longer storage, freeze your crust by wrapping it tightly in plastic wrap, then covering with aluminum foil. This double-layer method prevents freezer burn and keeps the crust crisp. Label with the date—it’ll stay perfect for up to 3 months.
When ready to use, simply thaw in the fridge overnight or at room temperature for 1-2 hours. No need to bake it again before adding fillings!
Reheating Crispiness
If your crust loses its crunch after baking, revive it by placing the pie dish on a baking sheet and heating at 350°F for 5 minutes. This quick bake restores the golden edges without overcooking.
For no-bake pies, skip this step—the crust stays sturdy enough to hold fillings like cheesecake or fruit compote. I often reheat crusts for last-minute desserts when I forget to bake them fresh. 🔥
Make-Ahead Tips
Prep the crushed graham cracker mixture (without baking) up to 3 days ahead and store it in an airtight container in the fridge. When ready to bake, simply press it into your pie dish and follow the baking instructions. This saves time on busy days.
For extra convenience, I sometimes assemble the unbaked crust in the pie dish, cover it, and refrigerate for up to 24 hours before baking. Just add 2-3 extra minutes to the bake time if chilled.
Filling Prep
If you’re making a filled pie, let the baked crust cool completely before adding fillings. For cheesecake or custard-based pies, a slightly warm crust helps create a smooth top layer. For fruit pies, a cool crust prevents melting.
I always let mine sit for 10 minutes after baking before adding fillings—this prevents soggy bottoms. Pro tip: Brush the crust with a thin layer of melted butter before adding fillings for extra moisture resistance. 💫
Nutrition facts
Frequently asked questions
Can I use vanilla wafers instead of graham crackers?
Yes, you can substitute vanilla wafers, but crush them even finer—they’re denser than graham crackers. Use the same 2.5 cups measurement, and you may need to add 1 extra tablespoon of melted butter to compensate for their lower fat content. The flavor will be slightly sweeter, so reduce the sugar to 1 tablespoon if needed.
Why is my crust crumbling when I press it?
Crumbly crusts usually mean the butter wasn’t distributed evenly or the crumbs weren’t fine enough. Press the mixture firmly with your fingers or a glass, and chill it for 15 minutes before baking. For extra strength, add 1 extra tablespoon of melted butter to the mix—this helps bind the crumbs better.
How do I make this crust gluten-free?
Simply swap the regular graham crackers for gluten-free graham crackers (like Schär or Trader Joe’s). Crush them the same way, but expect slightly more crumbling—they lack the gluten that helps hold traditional crackers together. Add 1 extra tablespoon of melted butter to compensate. The texture will be slightly different but still delicious!
Can I bake this crust ahead of time?
Bake the crust as directed, then cool completely. Store it in an airtight container at room temperature for 2 days or refrigerate for 4-5 days. For longer storage, freeze it wrapped tightly in plastic and foil for up to 3 months. Thaw overnight in the fridge before adding fillings—no reheating needed for no-bake pies!
What’s the best way to prevent a soggy bottom?
Prevent soggy bottoms by letting the baked crust cool completely before adding fillings. For extra protection, brush the crust with melted butter before filling, or add a thin layer of jam or fruit compote as a barrier. Chill the pie for 2 hours before slicing to let fillings set—this keeps the crust crisp while the filling stays creamy.

- Baked Potatoes in Crock Pot Recipe: Buttery Interiors and Crispy Top Magic - November 1, 2026
- Braised Beef Short Ribs Recipe: Crock Pot Fall-Off-Bone Magic in 6 Hours - November 1, 2026
- Crock Pot Cocoa Recipe: Velvety Warmth With Hidden Spice Magic - November 1, 2026