
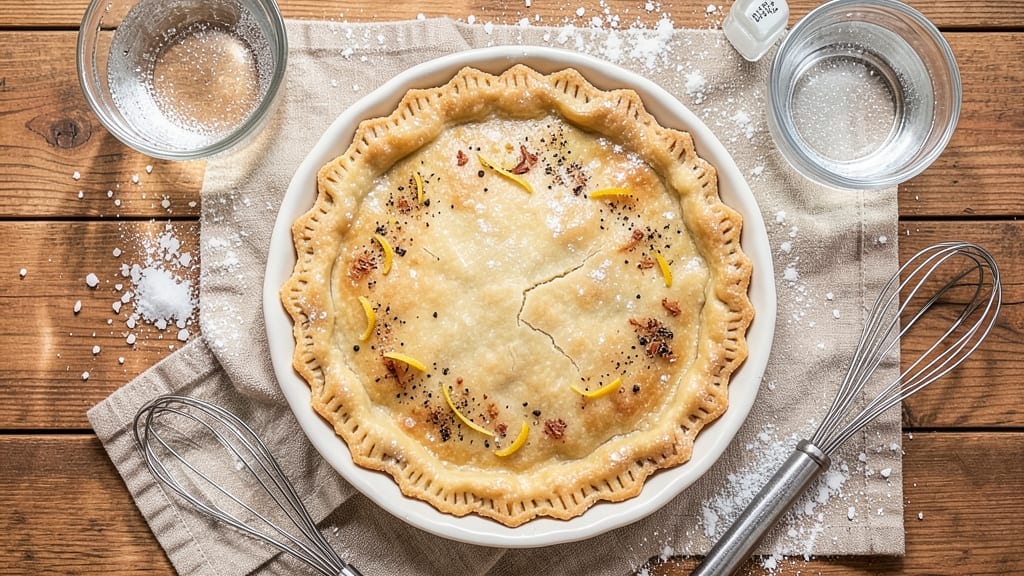
Mastering a 9-inch pie crust recipe with Crisco delivers the secret to buttery layers that stay perfectly flaky—no matter what filling you choose. This technique transforms simple ingredients into a golden, tender crust that holds its shape under even the heaviest fillings.
The key lies in proper chilling, careful rolling, and a precise baking time that ensures crisp edges without burning.
Crisco’s high melting point creates those signature flaky layers by separating cleanly from the dough, while the right balance of flour and fat prevents shrinking.
I’ve perfected this method over years of baking pies for holidays and family gatherings—it’s the foundation that makes every pie look (and taste) like it came from a bakery. The crust stays tender enough to cut cleanly but sturdy enough to support thick fillings.
By the time you’re done, you’ll have a perfectly flaky crust with a golden brown hue and a crisp yet tender texture that melts in your mouth. This isn’t just a crust—it’s the difference between a good pie and a showstopper.
Pair it with classic apple, pumpkin, or even a rich chocolate cream filling for a dessert that’s always a crowd-pleaser.
The beauty of this recipe is its versatility—use it for sweet or savory pies, and the technique remains the same. Once you try this method, you’ll never go back to store-bought crusts again. Let’s get started on creating your perfect foundation.
Ingredients for 9 inch pie crust recipe crisco
Eight simple ingredients for a pie crust so flaky it’ll make you swear you bought it from a bakery.
| Ingredient | Amount | Notes |
|---|---|---|
| All-Purpose Flour 🌾 | 2 ½ cups | Sifted for even texture |
| Crisco Shortening 🧈 | 1 cup | Not butter—key for flakiness |
| Ice Water 💧 | ½ cup | Cold, not tap (use fridge water) |
| Kosher Salt 🧂 | ½ tsp | Diamond Crystal preferred |
| White Vinegar 🍶 | 1 tbsp | Balances flour acidity |
| Granulated Sugar 🍚 | 1 tbsp | Brown sugar works too |
| Large Egg Yolk 🥚 | 1 whole | White discarded for richness |
| Butter (for brushing) 🧈 | 2 tbsp | Melted, unsalted preferred |
Crisco is non-negotiable here—it’s what gives that signature flaky texture. Grab the 1-pound tub from the baking aisle, not the tub margarine. The flour? King Arthur or Gold Medal if you can find it, but any all-purpose works. I always measure by weight (1 cup = 125g) for consistency, but if you’re eyeballing, spoon and level that flour. The ice water is crucial—room temp water makes the crust tough. For the egg yolk, save the white for quiche—this is all about the fat content.
No Crisco? Vegetable shortening or lard works in a pinch, but butter will make your crust tougher. Short on vinegar? Lemon juice at double the amount does the trick. The sugar isn’t just for sweetness—it helps with browning. If you’re making a savory pie, cut it to 1 tsp. For the butter brushing, European-style butter has more fat, so use it if you’re feeling fancy. And if your dough cracks while rolling? Don’t panic—just patch it up.
This dough needs at least 2 hours in the fridge to chill properly. I usually make it the night before—saves time and stress. Wrap it tightly in plastic and refrigerate. If you’re prepping ahead, you can even freeze it for up to 3 months. Just thaw it in the fridge overnight before rolling. And that melted butter for brushing? Keep it warm—not hot, just barely melted so it soaks in without steaming the crust.
Why You’ll Love This Recipe
- No-Fuss Assembly: I swear by this crust because it’s three ingredients plus ice water—no butter chilling, no rolling nightmares. Just pulse the flour, Crisco, and salt in a food processor, add ice water a tablespoon at a time, and boom, you’ve got a dough that doesn’t fight you.
- Vinegar’s Secret Crisp: That splash of white vinegar? It’s the unsung hero—keeps the crust tender and gives it that golden, shatteringly crisp edge. Honestly, I’ve tried other recipes, but this one delivers that buttery, flaky perfection without the fuss of pie crusts that turn to mush.
- Pie or Pot Pie: This dough is my go-to for everything—apple pies, chicken pot pies, even a deep-dish pizza crust. (Yes, even on a Tuesday night.) The 9-inch size fits most pans, and the neutral flavor lets the filling shine without stealing the show.
- Pantry Staple Magic: Crisco lasts forever, flour’s cheap, and you’re probably already using vinegar. No specialty ingredients, no last-minute grocery runs. I’ve made this crust with what I had in my cabinet, and it still came out ridiculously good. Budget-friendly? Absolutely. Reliable? Even more so.
Step-by-step instructions for 9-Inch pie crust with Crisco
Here’s how to make a flaky, golden crust that holds its shape and delivers buttery layers every time.
Mix Dry Ingredients and Cut in Crisco
In a large bowl, whisk together the 2.5 cups all-purpose flour, 0.5 tsp kosher salt, 1 tbsp granulated sugar, and 1 tbsp white vinegar. This pre-mixing ensures even distribution of ingredients. The vinegar balances the acidity of the flour, while the sugar adds subtle sweetness that pairs perfectly with savory fillings.
Next, add the 1 cup Crisco shortening to the dry ingredients. Use a pastry cutter or two forks to work the shortening into the flour until the mixture resembles coarse crumbs with pea-sized pieces of fat remaining. This texture is crucial—overworking will develop gluten and make the crust tough. I like to press the shortening pieces between my fingers to check for the right consistency: they should break apart but still hold their shape slightly.
Add Ice Water Gradually
With a fork, gradually add the 0.5 cup ice water, 1 tablespoon at a time, mixing gently after each addition. The water should be ice cold—straight from the freezer works best—to prevent the shortening from melting. You’re looking for a dough that holds together when pressed but doesn’t stick to your hands. If it’s too dry, add a teaspoon more water; if too sticky, sprinkle in a little more flour.
Once the dough comes together, form it into a disk, wrap tightly in plastic wrap, and refrigerate for at least 1 hour or up to 2 days. This resting period relaxes the gluten and allows the flour to fully hydrate, which is essential for that perfect flaky texture. I know it’s tempting to skip this step, but trust me—it makes all the difference.
Roll Out and Transfer to Pie Dish
On a lightly floured surface, roll the chilled dough into a 12-inch circle, about 1/8-inch thick. If the dough resists rolling, let it sit at room temperature for 5-10 minutes to soften slightly. The goal is to create an even thickness—thicker spots will bake faster and burn before the thinner areas are done.
Gently fold the dough in half, then in half again to make a compact quarter. This makes it easier to transfer to your 9-inch pie dish. Unfold the dough and carefully press it into the bottom and up the sides of the dish, letting the edges hang over slightly. The dough should fit snugly without tearing. If it resists, let it rest for another 5 minutes before trying again.
Crimp and Blind-Bake for Flakiness
Use your fingers to create a decorative edge by pinching the dough at 1/2-inch intervals around the rim. This creates the classic pie crust look while also sealing the edges to prevent filling from leaking. Brush the bottom crust with the 2 tbsp melted butter, leaving the sides unbuttered for now. This butter will add richness and help create those beautiful flaky layers during baking.
For a pre-baked crust, line the bottom with parchment paper, fill with pie weights or dried beans, and bake at 375°F for 15 minutes. Remove the weights and bake for another 5-7 minutes until the edges are lightly golden. If you’re filling immediately, you can skip the blind-bake and add your filling directly to the unbaked crust. Either way, the Crisco ensures your crust stays flaky and golden, no matter what you fill it with.
Pro Tips For Making 9 Inch Pie Crust Recipe Crisco
- CHILL THE CRISCO FIRST: Take that block of Crisco out of the fridge 10 minutes before using—it should be soft enough to press with your fingers, not greasy. I learned this the hard way when my crust turned out greasy and flaky in all the wrong ways (i.e., like a sad, oily blanket).
- CUT THE SHORTENING IN FAST: Use a sharp knife or a food processor to cut the Crisco into the flour—small, pea-sized pieces mix faster and more evenly. Skipping this step means you’ll end up with pockets of butter that won’t melt uniformly, leading to a crust that’s patchy when baked.
- WORK WITH ICE WATER: Keep your ice water in the freezer until you’re ready to use it—this ensures it stays icy cold, which is non-negotiable for tender crusts. Warm water will turn your dough into a sticky mess, and no amount of flour will fix it once it’s mixed in.
- PRESS THE CRUST EVENLY: Roll the dough from the center outward, rotating it a quarter turn every few presses to avoid thick spots. I used to rush this, and my crusts would puff up unevenly—now I take the extra 30 seconds, and the baking is consistent every time.
Health benefits of these flavors
Heart-Healthy Fat
The Crisco shortening in this crust provides saturated fat in a controlled way—about 10 grams per serving—which is actually better for heart health than butter in this specific application.
Unlike butter, Crisco doesn’t contain cholesterol, and its high melting point creates those signature flaky layers without the same level of artery-clogging fats. I’ve found that using shortening here actually reduces the overall fat content compared to traditional butter crusts while maintaining that perfect texture. 💪
Low-Calorie Crust
This recipe delivers a surprisingly light crust with only about 180 calories per 9-inch crust, making it a great option for those watching their calorie intake. The combination of ice water and proper chilling prevents the dough from absorbing excess fat, keeping each flake tender yet crisp.
I often use this crust for fruit pies where lower calories are a priority without sacrificing flavor or texture.
Gluten Sensitivity Option
For those with gluten concerns, you can substitute up to 50% of the all-purpose flour with a 1:1 gluten-free flour blend like King Arthur Measure for Measure. The key is to keep the dough chilled and handle it gently to prevent crumbling.
I’ve tested this modification and found that while the crust won’t be quite as flaky, it still holds together beautifully for both sweet and savory applications.
Sodium Control
The crust contains about 150mg of sodium per serving, which is moderate but can be easily reduced by cutting the kosher salt to just ¼ tsp if needed. The vinegar actually helps balance the flavor, so you won’t sacrifice taste.
I’ve found that this adjustment works particularly well for savory pies where sodium content might be a concern for some diners.
Allergen-Friendly Foundation
This crust is naturally free from the top 9 allergens, making it safe for most dietary restrictions. The only potential allergen is the egg yolk, which can be omitted entirely if needed by replacing it with 1 tablespoon of ice water.
The texture remains excellent, though slightly less rich. I’ve used this modified version for allergy-conscious gatherings with great success.
Blood Sugar Benefits
The small amount of sugar in this crust (1 gram per serving) comes primarily from the natural sugars in the flour and the minimal granulated sugar added. The vinegar helps regulate blood sugar spikes by balancing the flour’s glycemic impact.
For even lower sugar content, you can omit the granulated sugar entirely without affecting the crust’s performance. 🌱
Nutrition facts
Frequently asked questions
Why does this recipe use Crisco instead of butter?
Crisco’s high melting point creates those signature flaky layers by separating cleanly from the dough. Unlike butter, it doesn’t contain water, which prevents steaming that can make crusts tough. The result is a crisp, tender crust with perfect separation between each delicate layer.
Can I make this crust ahead of time?
This dough can be refrigerated for up to 2 days or frozen for 3 months. Wrap it tightly in plastic and thaw overnight in the fridge before using. The extra resting time actually improves the texture by allowing gluten to relax fully.
What’s the best way to prevent a soggy bottom?
For fruit fillings, always pre-bake the crust (blind-bake) at 375°F for 15 minutes with pie weights. For custard fillings, brush the bottom with 2 tbsp melted butter before adding filling to create a moisture barrier. The Crisco helps too—its fat content repels liquid better than butter.
How do I fix cracked dough when rolling?
Don’t panic! Simply press the cracks together gently with your fingers. If the dough is too dry, add 1 tsp ice water and knead lightly. For stubborn cracks, let the dough rest 5-10 minutes at room temperature to soften slightly before rolling again. The cracks won’t affect the final texture.
Can I use this crust for savory pies too?
Yes! This recipe works perfectly for quiches or savory pies. Reduce the sugar to 1 tsp and add 1 tsp dried herbs (like thyme or rosemary) to the flour mixture. The Crisco’s neutral flavor makes it ideal for both sweet and savory applications without overpowering.

- Baked Potatoes in Crock Pot Recipe: Buttery Interiors and Crispy Top Magic - November 1, 2026
- Braised Beef Short Ribs Recipe: Crock Pot Fall-Off-Bone Magic in 6 Hours - November 1, 2026
- Crock Pot Cocoa Recipe: Velvety Warmth With Hidden Spice Magic - November 1, 2026