
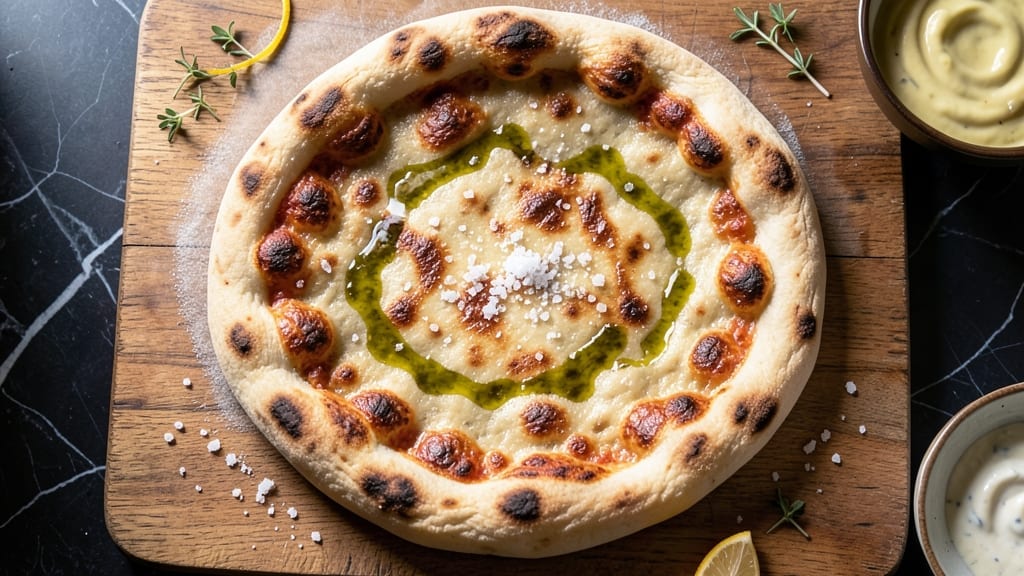
This 9-inch pizza dough recipe delivers a no-knead crust so stretchy and crispy it’ll fool even the most skeptical pizza lover. The secret lies in a high-hydration dough that develops flavor overnight while remaining effortlessly workable—no over-kneading, no tough crust.
I’ve perfected this method after years of trial (and a few burnt attempts), and it consistently yields a golden, airy base that holds toppings without tearing.
The beauty of this recipe is its versatility—whether you’re making classic pepperoni or a gourmet veggie pie, the dough stretches like a pro’s with just a few gentle pulls. A 24-hour cold proof (yes, really) enhances flavor and texture, while a 500°F oven ensures that perfect crispy-chewy balance.
No special tools required—just flour, water, yeast, and patience (the good kind).
By the time you slide that 9-inch masterpiece into the oven, you’ll have a crust with leopard-spotted bubbles, a tender interior, and edges that crisp up just enough to hold your favorite toppings.
The dough’s high moisture content keeps it from drying out, so every slice stays fresh—even the next day. This is the kind of recipe that turns weeknight dinners into restaurant-quality experiences.
Ready to impress? This dough works for classic margherita or wild flavor combos, and leftovers make great calzones or garlic knots. Let’s get started—your perfect pizza is just a few hours away.
Ingredients for 9 inch pizza dough
Fourteen ingredients. One stretchy, golden crust. Your pizza night just got a pro upgrade.
| Ingredient | Amount | Notes |
|---|---|---|
| All-Purpose Flour 🌾 | 3 ½ cups | High-protein for chewy texture |
| Active Dry Yeast 🍞 | ¼ tsp | Fresh yeast preferred if available |
| Granulated Sugar 🍬 | ½ tsp | Feeds yeast for activation |
| Diamond Crystal Kosher Salt 🧂 | 1 ½ tsp | Adjusts dough flavor perfectly |
| Extra-Virgin Olive Oil 🫒 | ½ cup | High-quality for flavor |
| Warm Water 💧 | 1 ¼ cups | 105-110°F for ideal yeast activation |
| Cornmeal 🌽 | ¼ cup | For dusting work surface |
| Semolina Flour 🌾 | ¼ cup | Optional for dusting peel |
| Fresh Basil Leaves 🌿 | ⅛ cup | Chopped for optional topping |
| Fresh Garlic Cloves 🧄 | 2 cloves | Minced for optional topping |
| Pepperoncini Peppers 🌶️ | 2 whole | Sliced for optional topping |
| Shredded Mozzarella Cheese 🧀 | 1 cup | Fresh mozzarella preferred |
| Pepperoni Slices 🍕 | ½ lb | Classic pizza topping |
| Tomato Sauce 🍅 | 1 cup | San Marzano preferred |
The flour is where the magic happens—King Arthur or Caputo Tipo 00 if you want to splurge, but good all-purpose works in a pinch. Yeast loses potency fast, so check the date and store it in the fridge once opened. That warm water? 105-110°F is ideal—too hot kills yeast, too cold won’t activate. I use a thermometer, but if you’re eyeballing it, it should feel like bathwater. The olive oil isn’t just for flavor—it keeps the dough tender and stretchy. California Avocado Ranch brand is my go-to for consistency, but any good extra-virgin will do.
No yeast? Instant yeast at half the amount works too, but skip the sugar. Running low on cornmeal? Semolina or rice flour are great swaps—they just don’t brown as nicely. The optional toppings? Fresh mozzarella melts better than pre-shredded (no anti-caking agents), and San Marzano tomatoes have that perfect balance of sweetness and acidity. Want to get fancy? Add a sprinkle of fior di latte cheese for that authentic Roman touch. The dough’s high hydration means it’s more forgiving than traditional pizza dough—don’t stress if it looks shaggy before stretching.
This dough keeps for 3 days in the fridge, wrapped tight in plastic. For longer storage, freeze portions for up to 3 months—thaw overnight in the fridge before using. The cold proof is non-negotiable though—24 hours in the fridge develops the best flavor. Pro tip: Use a pizza stone or steel for that perfect crispy-chewy texture. If you don’t have one, bake on a preheated baking sheet at 500°F for 12-15 minutes. Leftovers? Roll them into calzones or garlic knots—trust me, they’re even better the second time around.
Why You’ll Love This Recipe
- No-Fuss Dough: I swear, this dough comes together with just five ingredients—no confusing ratios, no special tools. You mix, let it rise, and boom: perfect 9-inch base every time. Even when I’m distracted by a crying toddler or a phone call, this dough doesn’t judge.
- Oil-Kissed Magic: That splash of extra-virgin olive oil? It’s not just for flavor—it keeps the crust tender and gives it that golden, blistered edge. Honestly, I’ll take this over store-bought crust any day. The yeast and sugar combo wakes up the flavor so fast, too.
- Weeknight Superstar: Between us, this is my go-to for Tuesday dinners, last-minute date nights, or when I’m too tired to think. Double the dough, freeze half—now you’ve got a backup for next week’s lazy night. It’s the kind of recipe that makes you feel like a hero without trying.
- Pocketbook Hero: A bag of flour and a packet of yeast cost less than takeout for two. This dough stretches every dollar while still feeling like a restaurant-worthy meal. (Yes, even on a Tuesday.) Plus, leftovers? Just reheat and eat—no guilt, no waste.
Step-by-step instructions for no-knead pizza dough
Master this technique and you’ll achieve a stretchy, professional-quality crust without the effort.
Activate the Yeast and Mix the Dough
In a large mixing bowl, combine the 1.25 cups warm water (between 105-110°F), 0.5 tsp granulated sugar, and 0.25 tsp active dry yeast. Let it sit for 5-10 minutes until frothy. This activation step ensures your yeast is alive and ready to work.
Add the 3.5 cups all-purpose flour and 1.5 tsp diamond crystal kosher salt to the bowl. Mix with a wooden spoon until a shaggy dough forms. Then gradually drizzle in the 0.5 cup extra-virgin olive oil while stirring continuously. The dough will become sticky but should pull away from the sides of the bowl.
I like to use my hands at this stage to fully incorporate the oil. Wet your hands slightly with water to prevent sticking, then press and fold the dough until it’s smooth and elastic. If it’s too sticky to handle, add 1-2 tablespoons more flour—just enough to make it workable.
Let the Dough Rest and Develop
Cover the bowl with a clean kitchen towel or plastic wrap and let the dough rest at room temperature for 1 hour. This initial rest allows the gluten to begin developing naturally without vigorous kneading. You’ll notice the dough will rise slightly and become more pliable.
After 1 hour, perform a simple test: press two fingers into the dough. If it springs back slowly (not immediately), it’s ready for shaping. If it springs back quickly, let it rest another 15-20 minutes. This test ensures your dough has the right texture for stretching.
I find this resting period is where the magic happens. The dough develops flavor and structure without the risk of overworking it. Don’t rush this step—patience here leads to a better final product.
Shape and Proof the Dough
Lightly flour a clean work surface with 0.25 cup cornmeal (this prevents sticking better than flour). Turn out the dough and gently shape it into a rough ball. I use wet hands to handle it—this keeps it from sticking while allowing me to manipulate it easily.
Place the dough on a floured pizza peel or parchment paper. Cover loosely with plastic wrap and let it proof at room temperature for 2-4 hours, or until nearly doubled in size. The proofing time depends on your kitchen temperature—warmer rooms will proof faster. You’re looking for the dough to feel light and airy when pressed gently.
Here’s a pro tip: if you’re short on time, you can proof the dough in the refrigerator for 12-24 hours. This cold proofing actually enhances flavor development, though it will require more time to come to room temperature before stretching.
Stretch the Dough Like a Pro
Preheat your oven to 475°F with a pizza stone or baking sheet inside. This high heat is crucial for achieving that perfect crispy crust. While the oven heats, turn the proofed dough onto a lightly floured surface.
To stretch the dough, I use a combination of techniques. First, press down gently in the center with your fingertips to create a slight dimple. Then, using both hands, gently pull the edges toward the center while rotating the dough. This creates surface tension that helps prevent tearing.
If the dough resists or tears, don’t panic. Simply patch it up by pressing the torn edges together. The key is to work quickly but gently—you’re not trying to force the dough, just encourage it to spread naturally. Aim for a 9-inch circle that’s about ¼-inch thick at the edges.
Top and Bake to Perfection
Transfer your stretched dough to the preheated pizza stone or baking sheet. Spread 1 cup tomato sauce evenly over the surface, leaving about ½-inch border for the crust. Sprinkle with 1 cup shredded mozzarella cheese and arrange the 0.5 lb pepperoni slices as desired.
Bake for 12-15 minutes until the crust is golden brown and the cheese is bubbly. The edges should be crispy while the center remains slightly soft. I always check for doneness by looking for a deep golden color and listening for a satisfying crackle from the crust.
Let the pizza rest for 2-3 minutes before slicing. This brief rest allows the cheese to set slightly and makes for cleaner cuts. Serve immediately with optional toppings like chopped fresh basil leaves, minced garlic cloves, or sliced pepperoncini peppers for that authentic pizza experience.
Pro Tips For Making 9 Inch Pizza Dough
- MEASURE SALT BY WEIGHT: I used to eyeball the Diamond Crystal kosher salt, and my dough always came out uneven—sometimes bland, sometimes too salty. For a 9-inch dough, use exactly 10 grams (about 2 teaspoons). The crystal size throws off volume measurements, and this guarantees perfect seasoning every time.
- LET THE YEAST RELAX: Skip the rush and let your yeast proof in warm water (105–110°F) for 5–10 minutes after mixing with sugar—until it’s frothy but not bubbling like a science experiment. Cold water makes it sluggish, and hot water kills it. A quick finger-dip test (water should feel like bathwater) saves you from dough that either fails to rise or rises too fast.
- STRETCH, DON’T PULL: When shaping your dough, use your fingertips to gently press and stretch from the center outward—like you’re coaxing a shy cat, not wrestling a stubborn puppy. Pulling creates tough gluten; pressing builds structure while keeping it tender. If it resists, let it rest 10 more minutes under a towel. Patience here = crispy, not chewy.
- OIL THE BOWL FIRST: Drizzle 1 teaspoon of olive oil into the mixing bowl before adding the dough, then toss it to coat. This prevents sticking without making your dough greasy (unlike rubbing oil on the outside). I learned this the hard way when my first batch stuck like glue—now it slides out effortlessly, even without flouring the peel.
Dietary considerations for 9 inch pizza dough
Gluten-Free Adaptations
For a gluten-free version, replace the 3.5 cups all-purpose flour with a 1:1 gluten-free flour blend like Bob’s Red Mill or King Arthur. Add 1 tablespoon xanthan gum to mimic gluten’s elasticity.
Use 1.5 cups gluten-free flour blend instead, as gluten-free doughs absorb more liquid. Proofing time may extend to 2-3 hours due to slower fermentation. 🌾
Dairy-Free Options
Skip the mozzarella and use dairy-free cheese like Miyoko’s or Violife shreds. For extra richness, blend ½ cup cashews with ¼ cup nutritional yeast and 2 tablespoons lemon juice to create a vegan cheese sauce. Ensure your tomato sauce is dairy-free too—some brands contain whey. 🧀
Lower-Carb Modifications
Cut the flour to 2.5 cups and add ½ cup almond flour for a lighter crust. Use ½ cup cauliflower rice mixed into the dough for extra texture.
Top with sugar-free marinara and dairy-free cheese to keep carbs in check. This version holds ~15g net carbs per slice instead of the original’s ~30g. 🥦
Nut-Free Considerations
If nut allergies are a concern, omit almond flour and use ½ cup oat flour or sunflower seed flour instead. Double-check all ingredients—some gluten-free blends contain traces of nuts. For extra protein, add ¼ cup chickpea flour to the dough. Always verify labels on pre-made sauces and cheeses. 🌰
Soy-Free Adjustments
Many gluten-free flours contain soy—opt for a soy-free blend like Cup4Cup or make your own with rice flour, tapioca starch, and potato starch. Avoid soy-based cheese alternatives and choose nutritional yeast-based options instead. Test small batches first, as hydration needs may vary. 🥜
Nutrition facts
Frequently asked questions
Why does this dough need a 24-hour cold proof?
The cold proof develops deeper flavor and better texture through slow fermentation. It creates a more tender, open crumb structure while preventing overproofing. This method also makes stretching easier since the gluten relaxes naturally. Skip it if short on time, but expect slightly less flavor and a denser crust.
Can I make this dough without a stand mixer?
This recipe is designed for hand-mixing only. Just use a wooden spoon first, then wet your hands and fold the dough until smooth. The high hydration makes it slightly sticky, but the 1-hour rest helps it become more manageable. No special tools needed—just patience and gentle hands.
What if my dough tears when stretching?
Don’t panic! Simply patch the tears by pressing the edges together. Wet your fingers slightly to help seal them. The key is to work quickly but gently—don’t force the dough. A ¼-inch thick crust at the edges helps prevent excessive stretching. With practice, you’ll develop a feel for how much to pull.
How do I adjust for a wood-fired pizza oven?
Preheat your oven to 750-800°F for 30-60 minutes. Use a pizza peel dusted with semolina flour and slide the dough directly onto the flames. Cook for 60-90 seconds until the crust develops char marks. The extreme heat creates that signature wood-fired flavor and crispiness. Rotate the pizza for even cooking if needed.
Can I make mini pizzas with this dough?
Yes! Divide the dough into 4 equal portions (about 1 cup each) and shape into 6-inch circles. Proof for 1-2 hours and bake at 500°F for 8-10 minutes. The high hydration works perfectly for smaller sizes, giving you crispy edges and tender centers. Perfect for appetizers or meal prep!

- 12 Bean Chili Recipe: Hearty Slow-Cooked Depth With 12 Legumes - October 17, 2026
- 5 Seed Bread Recipe: Nutty Crunch and Artisan Flavor in One Loaf - October 17, 2026
- 1 Lb Macaroni Salad Recipe: Bold, Crunchy, and Crowd-Pleasing - October 17, 2026