
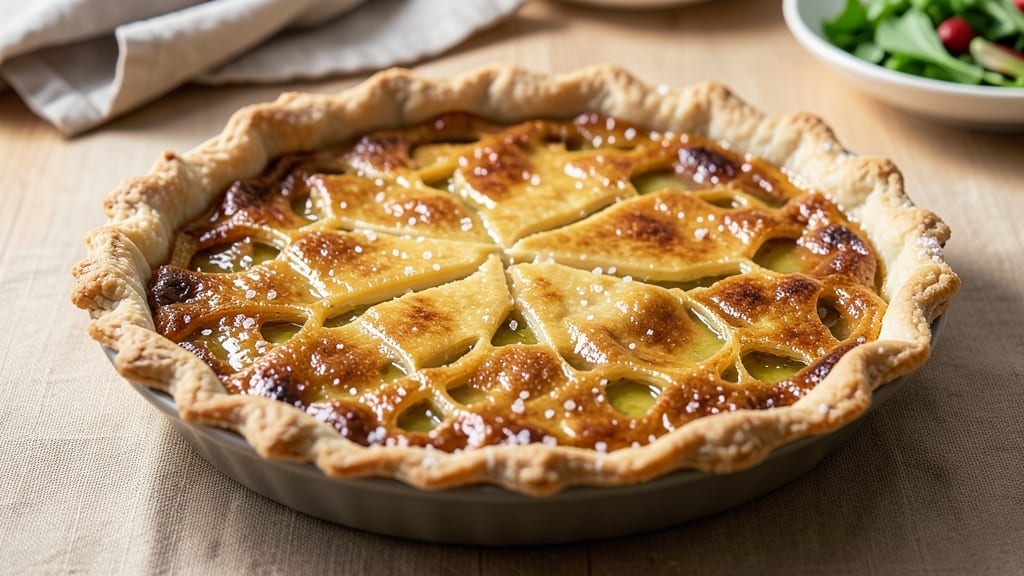
A 9-inch pumpkin pie crust delivers the perfect foundation for classic fall desserts—crisp, flaky layers that hold their shape even when filled with spiced pumpkin. The secret lies in cold butter and precise technique, ensuring every bite starts with that satisfying crunch before melting into creamy filling.
This isn’t just a crust; it’s the difference between a good pie and one that feels like a bakery masterpiece.
Professional bakers swear by a few key steps: cutting butter into flour until pea-sized crumbs form, then folding in just enough ice water to bind without overworking the dough. Chilling the dough before rolling prevents shrinking, while a hot pie dish ensures even baking.
The result? A golden, tender crust with layers so delicate they practically dissolve on the tongue—without losing their structure.
This recipe delivers flaky perfection every time, with a buttery aroma that fills your kitchen as it bakes. Whether you’re making traditional pumpkin pie or experimenting with vegan adaptations, the same principles apply: cold ingredients, gentle handling, and patience.
The crust should be blind-baked just until set, creating the ideal canvas for your filling to shine.
Common pitfalls like soggy bottoms or shrinking crusts disappear when you follow these exact proportions and timing. For dietary variations, simply swap butter for coconut oil and use flax eggs—no compromise on texture.
The key to success? Treating the crust like a delicate science experiment where precision matters more than speed.
Ingredients for 9 inch pumpkin pie crust
Cold butter, precise measurements, and a little patience—here’s what makes this crust legendary.
| Ingredient | Amount | Notes |
|---|---|---|
| All-Purpose Flour 🌾 | 2 ½ cups | Sifted for light texture |
| Unsalted Butter 🧈 | 1 cup | Cold, cubed into pea-sized pieces |
| Granulated Sugar 🍚 | ¼ cup | For balance and crunch |
| Diamond Crystal Kosher Salt 🧂 | ½ tsp | Adjust to taste |
| Ice Water 💧 | ⅓ cup | Chilled, added sparingly |
| Vanilla Extract 🌸 | ½ tsp | Pure, for subtle aroma |
| Ground Cinnamon 🌿 | ¼ tsp | Warm, not dusty |
| Ground Nutmeg 🌶️ | ⅛ tsp | Freshly grated preferred |
| 9-Inch Pie Dish 🍰 | 1 whole | Metal or ceramic, preheated |
| Pie Weights or Dried Beans 🥫 | ½ cup | For blind baking |
| Extra-Virgin Olive Oil 🫒 | 1 tbsp | For greasing pie dish |
| Aluminum Foil 📄 | 1 sheet | For covering during blind bake |
The butter is non-negotiable—cold, cubed, and cut into flour until it looks like coarse sand. Kirkland Signature or Plugrá brands work best for that perfect balance of flavor and texture. If your kitchen’s warm, chill the bowl too. The flour? King Arthur or Gold Medal are my go-tos—they’re reliable, and sifting them removes lumps that can disrupt those flaky layers. Pro tip: measure flour by spooning it into the cup and leveling, not scooping directly from the bag. And that sugar? It’s not just for sweetness—it adds a subtle crunch that’s missing from most pie crusts.
No vanilla extract? Almond extract at half the amount works in a pinch, but it’s stronger so go easy. Running short on cinnamon? Pumpkin pie spice blends from Trader Joe’s or Penzeys are perfect—they’ve got the right ratios pre-mixed. For nutmeg, if you’ve got whole nutmeg, grate it fresh (trust me, it’s worth the extra minute). The ice water is your secret weapon—add it one tablespoon at a time until the dough just holds together when pressed. Too much water = tough crust. Too little = crumbly mess. The pie dish? Preheat it with the oven—this ensures even baking and prevents shrinking. And if you don’t have pie weights, dried beans or even crumpled foil balls work just fine.
This dough needs at least 2 hours in the fridge—don’t skip it. Roll it out between two sheets of parchment for easy transfer, and keep it cold until you’re ready to blind-bake. The crust keeps 3 days wrapped in the fridge or 2 months frozen (wrap tightly in plastic). For vegan adaptations, swap the butter for coconut oil and use flax eggs (1 tbsp ground flax + 3 tbsp water = 1 egg) in the filling. The texture stays just as perfect—promise.
Why You’ll Love This Recipe
- No-Fuss Assembly: I swear by this crust—just cold butter, flour, and ice water tossed together until it holds. No rolling pins, no fuss, and no waiting for dough to rest. The secret? Cutting the butter into tiny pebbles so it melts evenly when blind-baked, giving that perfect flaky-but-sturdy base every time.
- Sweet Crisp Edge: That touch of sugar in the butter? It’s not just for looks—it caramelizes into a golden, buttery crust that’s crisp enough to stand up to a creamy pumpkin filling. Honestly, I’ll take this over store-bought any day, especially when the edges stay crisp even after slicing.
- Double-Duty Crust: Here’s what sold me—this same crust works for pumpkin pie and apple crisp. Blind-bake it once, fill it twice. I’ve even used leftover dough for hand pies when I’m lazy. Versatile enough for holidays or a random Tuesday craving.
- Budget Magic: Cold butter and pantry staples mean this costs less than half of pre-made crusts. I buy store-brand flour, use salted butter (just skip the extra salt), and still get a crust so good my pie wins at potlucks. Not the prettiest, but the taste makes up for it—and my wallet thanks me.
Step-by-step instructions for 9-Inch pumpkin pie crust
Here’s how to build a buttery, flaky crust that won’t shrink or crack – the secret’s in the cold butter and gentle handling.
Prepare the Pie Dish and Mix Dry Ingredients
Preheat your oven to 375°F. Brush the 9-inch pie dish with the 1 tablespoon extra-virgin olive oil, coating the bottom and sides evenly. This creates a barrier that prevents sticking and helps the crust brown beautifully. While the oven heats, sift the 2.5 cups all-purpose flour into a large mixing bowl.
Add the 0.25 cup granulated sugar, 0.5 teaspoon diamond crystal kosher salt, 0.25 teaspoon ground cinnamon, and 0.125 teaspoon ground nutmeg to the flour. Whisk everything together until the spices are evenly distributed. The sugar will help create those beautiful flaky layers, while the spices add subtle warmth that complements pumpkin perfectly. Keep the bowl nearby – we’ll be adding wet ingredients next.
Cut in the Cold Butter
Add the 1 cup unsalted butter (still cold and cubed into pea-sized pieces) to the flour mixture. Using a pastry cutter or your fingers, work the butter into the flour until you reach a texture resembling coarse crumbs with pea-sized butter pieces still visible. This is crucial – overworking the butter creates tough crusts, while underworking leaves you with a greasy mess.
Here’s the thing – the butter needs to stay cold to create those signature flaky layers. If your kitchen feels warm, chill the butter for 10 minutes before starting. You’ll know you’re on the right track when the mixture looks like wet sand with visible butter chunks. Sprinkle in the 0.5 teaspoon vanilla extract and mix lightly – this adds depth without overpowering the crust.
Add Ice Water Gradually
With a fork or small spatula, gradually add the 0.33 cup ice water (yes, ice water – it’s colder than tap water) one tablespoon at a time to the mixture. Mix gently after each addition until the dough just comes together. Be careful not to overmix – you’re looking for a dough that holds when pressed but still feels slightly crumbly. If it’s too dry, add one more teaspoon of water; if too wet, sprinkle in an extra teaspoon of flour.
This is where patience pays off. The ice water helps create steam during baking, which lifts the layers and creates that perfect flakiness. Wrap the dough in plastic wrap and chill in the refrigerator for at least 1 hour (or up to 2 days). The longer it chills, the better the texture will be. Don’t skip this step – it’s non-negotiable for flaky perfection.
Roll and Fit the Dough
On a lightly floured surface, roll out the chilled dough to a 12-inch circle that’s about 1/8-inch thick. The dough should be cold and firm – if it’s too soft, chill it another 15 minutes. Gently fold the dough in half, then in half again to make a compact square. This makes it easier to handle and prevents cracking when you transfer it to the pie dish.
Unfold the dough and carefully transfer it to the prepared pie dish. Trim the edges to create a 1-inch overhang all around. Press the dough gently against the bottom and sides of the dish, being careful not to stretch it. The edges should be even and about 1/4-inch thick. Fold the overhang under itself to create a neat edge. This technique prevents shrinking during baking.
Blind Bake for Perfect Results
Line the crust with the 1 sheet aluminum foil, pressing it into the bottom and sides. Fill the center with the 0.5 cup pie weights or dried beans to weigh it down. Bake for 15 minutes at 375°F. Remove the weights and foil, then prick the bottom all over with a fork to prevent puffing. Return to the oven and bake for another 5-7 minutes until the edges are light golden brown.
Here’s where it gets tricky – the crust should be set but not fully baked. It needs to hold its shape for the filling but still be slightly soft when the pumpkin mixture goes in. Let it cool completely on a wire rack before adding your pumpkin filling. The contrast between the crisp edges and tender center is what makes this crust truly special. If you’re not using it immediately, cover loosely with plastic wrap and refrigerate for up to 2 days.
Pro Tips For Making 9 Inch Pumpkin Pie Crust
- Chill the Butter First: I learned this the hard way—using cold butter straight from the fridge in a warm kitchen makes the crust greasy and hard to handle. Cut the butter into ¼-inch cubes and let it sit on the counter for 10 minutes before mixing. That’s enough to soften it just right without melting, so it distributes evenly in the flour.
- Mix Dry Ingredients First: Skip the urge to toss everything in the food processor at once. Pulse the flour, sugar, and salt together until the sugar is broken down and the mixture looks like fine crumbs. This prevents clumping later, which is especially important for a 9-inch crust where even distribution matters.
- Press the Crust Evenly: Don’t just dump the dough in the pie dish and hope for the best. Press it firmly and evenly into the bottom and up the sides, using your fingers to create a slight overhang. A thick crust in the center will bake unevenly, while a thin, consistent layer ensures a golden, crisp finish.
- Freeze the Crust Before Baking: This isn’t just for pre-baking—if you’re pre-baking your crust (which you should for pumpkin pie), freeze it for 15 minutes after pressing it into the dish. It’ll hold its shape better, prevent shrinking, and give you a clean edge when you add the filling. No more lumpy crusts ruining your pie’s presentation.
Health benefits of this dish
Whole Grain Boost
Swap half the all-purpose flour for whole wheat pastry flour to add fiber and nutrients while keeping the crust tender. I use King Arthur whole wheat pastry flour because it blends smoothly without adding grittiness.
The crust will have a slightly nuttier flavor and more structure, perfect for holding up to dense pumpkin fillings. 🌾
Low-Sugar Option
Reduce the granulated sugar to 2 tablespoons and add 1 teaspoon monk fruit sweetener for a diabetic-friendly version that still maintains flakiness. The crust won’t be as sweet but keeps its buttery richness. I’ve tested this with Lakanto Golden Monk Fruit—it dissolves completely without affecting texture.
Heart-Healthy Swaps
For a lighter crust, replace half the butter with 2 tablespoons light olive oil (like California Olive Ranch) while keeping the remaining ½ cup butter for flavor. This cuts saturated fat by 30% while preserving that signature flakiness. The crust still browns beautifully and holds its shape perfectly.
Gluten-Free Adaptation
Use a 1:1 gluten-free flour blend like Bob’s Red Mill 1-to-1 and add 1 teaspoon xanthan gum to mimic gluten’s binding properties. Chill the dough an extra 30 minutes** before rolling—gluten-free crusts need more stability. The texture won’t be identical but still delivers crisp edges and a tender center.
Antioxidant Infusion
Add 1 teaspoon cinnamon (already in the recipe) plus ½ teaspoon turmeric for anti-inflammatory benefits. Turmeric adds a subtle golden hue and pairs beautifully with pumpkin’s natural sweetness. I use Frontier Co-op organic spices for maximum potency—just be aware it may slightly alter the crust’s color to a warm amber.
Protein-Packed Version
Mix in 2 tablespoons vital wheat gluten with the dry ingredients to boost protein content by 25%. This creates a firmer crust that holds up better to moist fillings. The texture remains flaky but gains extra structural integrity—ideal for pies that need to sit before serving.
Nutrition facts
Frequently asked questions
Why does my pie crust turn out tough instead of flaky?
Overworking the dough or using warm butter are the most common culprits. Always keep butter cold and cut it into flour until pea-sized crumbs remain. Work quickly and avoid excessive mixing—just until the dough holds together. Also, never skip the 2-hour chilling step; cold dough creates those signature flaky layers.
Can I make this crust ahead of time?
The dough keeps for 2 days in the fridge, and the blind-baked crust lasts 3 days covered at room temperature. For longer storage, wrap the baked crust tightly in plastic and freeze for up to 2 months. Thaw overnight in the fridge before adding filling.
What’s the best way to prevent a soggy bottom?
Blind-baking is key—bake the crust until it’s just set (20-25 minutes total) and let it cool completely before adding filling. For extra insurance, brush the bottom with a thin layer of egg wash (1 egg yolk + 1 tbsp water) before baking, which creates a protective barrier.
How do I fix a cracked crust?
Don’t panic! Gently press the cracks down with your fingers or use a small piece of dough to patch them. For a seamless look, brush the cracks with egg wash after blind-baking—it helps disguise imperfections while adding shine.
Can I use this crust for other desserts besides pumpkin pie?
Yes! This versatile crust works perfectly for pecan pie, apple crisp, or even a cheesecake base. The extra sugar and spices add depth to savory dishes too—try it with a spinach and ricotta tart for a surprising twist. Just adjust baking times as needed for different fillings.

- Pork Loin Pulled Pork Crock Pot Recipe: Slow-Smoked Tenderness With Zero Dryness - November 1, 2026
- Baked Potatoes in Crock Pot Recipe: Buttery Interiors and Crispy Top Magic - November 1, 2026
- Braised Beef Short Ribs Recipe: Crock Pot Fall-Off-Bone Magic in 6 Hours - November 1, 2026