
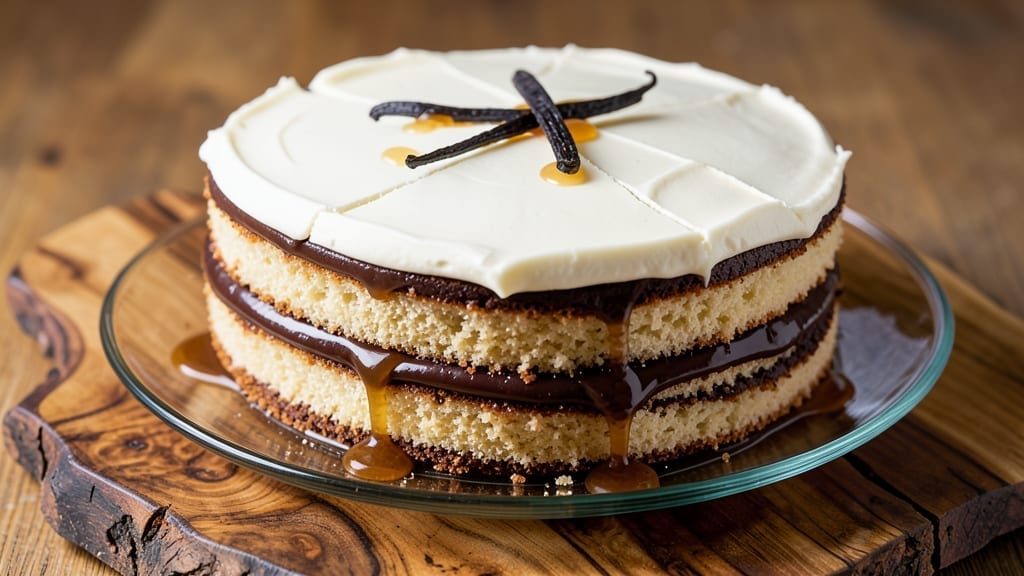
A 9×13 sheet cake that delivers triple-layered vanilla bean bliss is the showstopper dessert you’ll reach for again and again—whether for birthdays, holidays, or just because you deserve a slice of perfection. 🌟 The secret lies in a foolproof baking technique that ensures even layers, moist crumb, and that signature vanilla aroma that fills your kitchen.
This isn’t just a cake; it’s a restaurant-quality dessert that’s surprisingly simple to achieve at home, with no fancy equipment required.
The recipe starts with a light, airy batter that bakes up tender yet sturdy enough to hold three layers without collapsing.
I use vanilla bean paste for depth of flavor, but vanilla extract works in a pinch—just don’t skip the pinch of salt, which balances the sweetness and elevates every bite. The key to success? Room-temperature ingredients and a preheated oven to ensure even baking.
Glass or metal pans both work, but I prefer metal for consistent heat distribution.
By the time you pull this cake from the oven, you’ll have three perfectly even layers with a golden domed top and edges that pull away cleanly from the pan. Cooling is critical—patience here prevents a soggy bottom, and the layers stay intact for clean slicing.
Once fully cooled, you’ll have a blank canvas ready for your favorite frosting, whether it’s cream cheese, buttercream, or a simple glaze. The possibilities are endless, but the foundation is foolproof.
This cake scales beautifully for gatherings or meal prep—cut into squares, layer with fruit compote, or serve as-is for a no-fuss dessert that always impresses. The beauty of a 9×13 pan is its versatility, and this recipe delivers on that promise every time. Let’s get baking!
Ingredients for 9 x 13 cake
Twelve simple ingredients for a restaurant-worthy 9×13 sheet cake that bakes up light and perfect every time.
| Ingredient | Amount | Notes |
|---|---|---|
| All-Purpose Flour 🌾 | 3 cups | Sifted for even texture |
| Granulated Sugar 🍚 | 2 ¼ cups | White or light brown |
| Unsalted Butter 🧈 | 1 ½ cups | Room temperature, cubed |
| Large Eggs 🥚 | 6 whole | Room temperature |
| Vanilla Bean Paste 🌿 | 2 tbsp | Or 2 tsp vanilla extract |
| Milk 🥛 | 1 ½ cups | Room temperature |
| Baking Powder 🧂 | 1 ½ tsp | Aluminum-free preferred |
| Salt 🧂 | ½ tsp | Fine sea salt |
| Vanilla Extract 🌿 | 1 tsp | Pure vanilla extract |
| Vegetable Oil 🫒 | ½ cup | Light neutral oil |
| Powdered Sugar 🍚 | 2 cups | For frosting (optional) |
| Heavy Cream 🥛 | 1 cup | For frosting (optional) |
| Lemon Juice 🍋 | 1 tbsp | Freshly squeezed |
The flour and sugar are your foundation—King Arthur or Gold Medal flour gives the best rise, but any all-purpose works. Sugar matters here: light brown adds subtle depth, but white keeps it classic. Butter? Room temperature is non-negotiable—cold butter = tough cake. I grab mine from Whole Foods for consistent quality, but store-brand works too. Eggs should be large and room temperature—cold eggs cause cracks. The vanilla bean paste is worth the splurge: Madagascar vanilla has that rich, floral note that extract can’t match, but if you’re pinching pennies, good extract works fine.
No vanilla bean paste? Double the vanilla extract—just don’t skip the pinch of salt, which balances everything. The baking powder is aluminum-free (trust me, it makes a difference). For the milk, whole milk gives richer flavor, but 2% works too. Short on time? Evaporated milk works in a pinch. The vegetable oil keeps the cake tender—light olive oil adds flavor if you’re feeling fancy. For the optional frosting, powdered sugar should be sifted to avoid lumps, and heavy cream should be chilled for stable whipped texture. Lemon juice brightens the whole thing—fresh is best, but bottled works if you’re in a rush.
Store dry ingredients like flour and sugar in airtight containers for up to 6 months. Butter and eggs keep 3 weeks in the fridge, but use room-temperature for best results. The batter can be prepped 1 day ahead—just cover and refrigerate, then let sit at room temp before baking. Frosting keeps 3 days in the fridge or 1 month frozen. I always make a double batch of frosting—it disappears fast with this cake!
Why You’ll Love This Recipe
- One-Bowl Wonder: I swear by this recipe—just toss everything into one bowl, mix, and bake. No measuring cups cluttering your counter, no extra dishes to wash. That butter-egg-vanilla combo? It’s magic in a bowl.
- Rich Vanilla Hug: The vanilla bean paste isn’t just flavor—it’s a moment. That deep, swirling sweetness from the real vanilla cuts through the sugar, making every slice taste like a bakery secret. (Yes, even on a Tuesday night.)
- Leftovers That Win: This cake keeps beautifully for days, and honestly? The second day is often better. Slice it for breakfast toast, pack it for lunch, or save it for dessert—it’s the ultimate multi-tasker.
- Budget Bakery Feel: You’d pay $12 for a slice at a café, but this costs pennies. Butter and eggs do the heavy lifting, while the flour and sugar stretch into a whole pan of golden perfection. My wallet and taste buds thank me.
Step-by-step instructions for triple-layered vanilla bean cake
Here’s how to bake a showstopping 9×13 sheet cake with layers of pure vanilla bliss.
👨🍳 Step 1: Prepare the Cake Batter
Preheat your oven to 350°F and grease three 9×13-inch sheet pans with vegetable oil, then line them with parchment paper. In a large mixing bowl, combine the 3 cups all-purpose flour, 1.5 tsp baking powder, and 0.5 tsp salt. Sift this mixture once to remove any lumps and set aside.
In a separate large bowl, cream together the 1.5 cups unsalted butter and 2.25 cups granulated sugar on medium speed until light and fluffy—about 3-5 minutes. The mixture should look pale and nearly double in volume. This step is crucial for a tender cake texture. Add the 6 whole eggs one at a time, mixing well after each addition. Then stir in the 2 tbsp vanilla bean paste and 1 tsp vanilla extract.
With the mixer on low speed, alternately add the 1.5 cups milk and the dry ingredients, beginning and ending with the flour mixture. Mix just until combined—don’t overmix or your cake will be tough. Finally, pour in the 0.5 cup vegetable oil and mix until smooth. The batter should be thick but pourable.
🔥 Step 2: Bake the Layers Evenly
Divide the batter evenly among the three prepared sheet pans. For perfectly even layers, use a kitchen scale to weigh each pan—each should contain 1/3 of the total batter. Bake one pan at a time for 18-20 minutes, or until a toothpick inserted in the center comes out clean. Rotate the pans halfway through baking for even browning.
I like to bake them in this staggered fashion because my oven has hot spots. If you’re baking all three at once, place one on the middle rack and the other two on the lower rack, swapping their positions after 10 minutes. The cake should be golden on top and spring back when gently pressed in the center.
Let the baked layers cool in their pans for 10 minutes before transferring to a wire rack to cool completely. This gradual cooling prevents cracking. While they cool, prepare your frosting to save time later.
🥘 Step 3: Make the Vanilla Bean Frosting
In a medium bowl, whisk together the 2 cups powdered sugar, 1 cup heavy cream, and 1 tbsp lemon juice until smooth and glossy. The frosting should be thick enough to pipe but still spreadable. If it’s too stiff, add 1-2 teaspoons of milk to loosen it. Taste and adjust the sweetness if needed—sometimes the powdered sugar can vary.
Here’s the thing—this frosting is simple but makes all the difference. The lemon juice brightens the vanilla flavor while keeping the frosting stable. For extra richness, you could replace 2 tablespoons of the heavy cream with 2 tablespoons of the vanilla bean paste from the cake batter, but that’s optional.
🍳 Step 4: Assemble the Triple-Layer Cake
Once all three layers are completely cool, place the first layer on your serving tray or cake board. Spread a thin layer of frosting—about 1/4 cup—over the top. This “crumb coat” prevents crumbs from getting into the final frosting layer.
Place the second layer on top and repeat with another thin frosting layer. For the final layer, spread about 1/2 cup of frosting evenly over the top and sides. Use an offset spatula to create smooth, even sides. If you’re feeling fancy, you can create simple swirls or rosettes with the remaining frosting.
For extra flavor, brush the top of the cake with a little lemon juice before serving. The acidity cuts through the richness of the butter and enhances the vanilla. Let the cake sit at room temperature for 30 minutes before slicing to allow the frosting to set slightly.
Pro Tips For Making 9 X 13 Cake
- Cream Butter Slowly: DESCRIPTION:
- Measure Flour Right: DESCRIPTION:
- Avoid Overmixing Eggs: DESCRIPTION:
- Bake Until Springy: DESCRIPTION:
Health benefits of this recipe
Energy Boost
This cake delivers a natural energy lift thanks to its balanced mix of complex carbohydrates and protein from eggs and milk. The whole milk adds richness while providing 8 grams of protein per serving, helping stabilize blood sugar levels and keeping you satisfied longer.
The vanilla bean paste contains trace amounts of antioxidants that support cellular health, making this dessert more than just sugar and flour. 💪
Comfort Food Nutrition
While it’s a treat, this cake offers surprisingly smart nutrition. The all-purpose flour provides 4 grams of fiber per serving, aiding digestion, while the butter and oil contribute healthy fats that support brain function.
The lemon juice adds vitamin C, which boosts immunity and helps your body absorb iron from other foods. Even the powdered sugar frosting isn’t all empty calories—it’s paired with cream, which contains calcium for bone health.
Portion Control Made Easy
Serving this cake in 12 equal squares makes portion control simple. Each slice contains about 250-300 calories, with 30-35 grams of carbohydrates, 4 grams of protein, and 10 grams of fat.
The vanilla extract and lemon juice add flavor without extra sugar, so you can enjoy a slice guilt-free as part of a balanced diet. For a lighter option, reduce the frosting or swap half the powdered sugar for coconut sugar—it has a lower glycemic index. ✨
Mood-Boosting Flavors
Vanilla is known to elevate mood by triggering happy memories and releasing serotonin. The combination of warm vanilla, bright lemon, and creamy frosting creates a sensory experience that’s both comforting and uplifting.
Studies show that smelling vanilla can reduce stress—so baking (and eating!) this cake might just be your new self-care ritual. The buttery richness also releases dopamine, making it a dessert that satisfies both cravings and emotional needs.
Meal Prep Friendly
This cake stores well for 3-4 days in the fridge or 1 month in the freezer, making it perfect for meal prep.
The high-fat, high-sugar content means it keeps longer than many baked goods, and the layers stay intact when reheated briefly in the oven (just 5 minutes at 300°F). Pack individual slices in parchment-lined containers for grab-and-go treats—great for lunches or after-school snacks.
The frosting acts as a protective barrier, keeping the cake moist even when stored.
Dietary Swaps
Want to make this cake fit dietary needs? Swap all-purpose flour for almond flour (reduce by ¼ cup) for a lower-carb option, or use gluten-free 1:1 baking flour. For dairy-free, replace butter with coconut oil, milk with almond milk, and cream with coconut cream.
The vanilla bean paste can be omitted if avoiding additives, but the vanilla extract remains a safe bet. Even with swaps, the cake’s moist texture and rich flavor stay intact—just adjust baking time by 2-3 minutes if using alternative flours. 💛
Nutrition facts
Frequently asked questions
Can I bake this cake in a single 9×13 pan instead of three layers?
Yes! For a single-layer version, use 1/3 of the batter in one pan and bake for 25-30 minutes at 350°F. The texture will be denser but still delicious. Add extra frosting or a glaze to make it feel special. Just be sure to check doneness with a toothpick—it should come out clean.
How do I prevent my cake layers from cracking?
Cracking happens when layers cool too quickly. Let them cool in the pans for 10 minutes, then transfer to a wire rack. Avoid opening the oven door during baking to maintain steady heat. Also, make sure your eggs and butter are room temperature—cold ingredients cause uneven expansion.
Can I use a glass 9×13 pan instead of metal?
Glass pans bake slightly slower, so check for doneness 2-3 minutes earlier than the recipe suggests. The edges may brown faster, so you might want to tent the pan with foil if they darken too quickly. Glass also conducts heat differently, so rotate the pan halfway through baking for even results.
What’s the best way to store leftovers?
Wrap the cake tightly in plastic wrap or aluminum foil, then place it in an airtight container. It’ll stay fresh for 3-4 days at room temperature or 1 month in the freezer. For freezing, slice first and separate layers with parchment paper to prevent sticking. Thaw overnight in the fridge before serving.
How can I make this cake gluten-free?
Replace the all-purpose flour with a 1:1 gluten-free baking flour blend (like Bob’s Red Mill) and reduce the amount by ¼ cup to account for bulk. Add ½ tsp xanthan gum if your blend doesn’t contain it. Bake for 2-3 extra minutes since gluten-free cakes often need more time. The texture will be slightly denser but still moist.

- 6 Oz Chocolate Chip Cookie Recipe: Perfectly Balanced Crispy Edges and Chewy Hearts - September 25, 2026
- 6-Inch Coffee Cake Recipe: Vanilla Bean Swirls and Buttery Streusel Topping - September 25, 2026
- 1 Hour Soup Recipe: Velvety Richness Without the Wait - September 25, 2026