
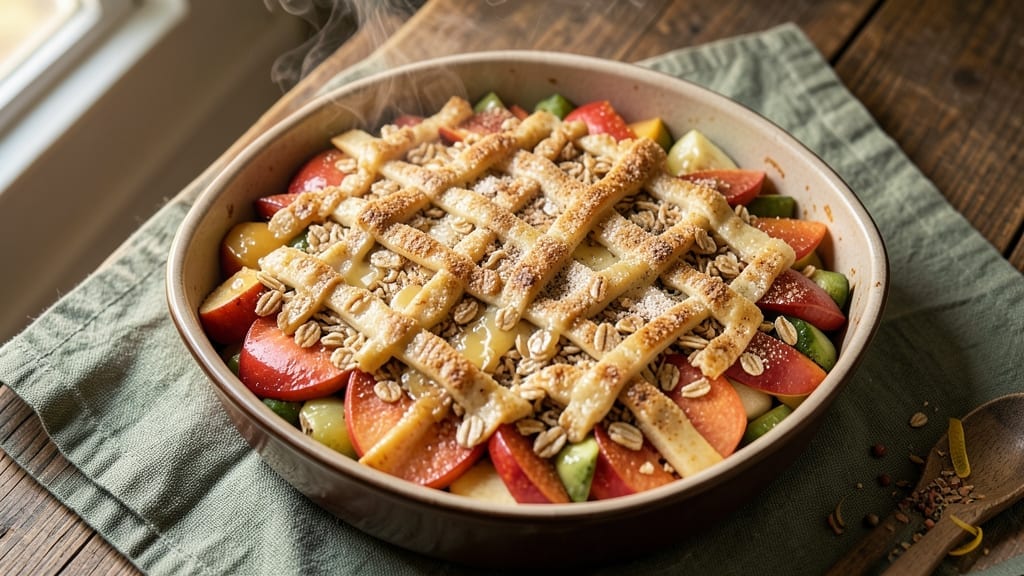
A 9 x 9 apple crisp recipe transforms simple apples into a dessert that smells like autumn in every bite. The secret lies in perfectly balanced juicy filling—tender apples tossed with cinnamon and lemon juice—topped with a buttery, spiced oat crumble that turns golden and crispy.
This single-dish dessert requires just 30 minutes of prep and 40 minutes of baking, yet feels like a labor of love.
What sets this recipe apart is the foolproof streusel topping, where cold butter creates flaky layers while brown sugar adds caramel depth. The filling stays juicy because we cook the apples just until tender—not mushy—and finish with a splash of lemon to brighten the flavors.
Every spoonful delivers warm cinnamon, buttery crunch, and tender fruit in perfect harmony.
Serve warm with a scoop of vanilla ice cream or a dollop of whipped cream for the ultimate comfort dessert. The crisp edges contrast beautifully with the soft, spiced filling, making it impossible to resist.
This recipe is designed to impress without fuss—just one pan, minimal cleanup, and guaranteed crowd-pleasing results.
Perfect for weeknight desserts, holiday gatherings, or meal prep (it reheats beautifully), this apple crisp delivers restaurant-quality flavor at home. Let’s get baking—your kitchen will smell like fall in no time.
Ingredients for 9 x 9 apple crisp
Six juicy apples, warm spices, and one golden pan—this crisp delivers autumn in every bite.
| Ingredient | Amount | Notes |
|---|---|---|
| Apples (Mixed Varieties) 🍎 | 6 medium | Peeled, cored, sliced evenly |
| Granulated Sugar 🍚 | ¾ cup | For filling sweetness |
| Brown Sugar (Packed) 🍚 | ½ cup | Light or dark variety |
| Ground Cinnamon 🍃 | 2 tbsp | Freshly ground preferred |
| Lemon Juice 🍋 | 2 tbsp | Freshly squeezed |
| All-Purpose Flour 🌾 | 1 cup | For streusel texture |
| Old-Fashioned Rolled Oats 🌾 | 1 cup | Not quick oats |
| Unsalted Butter (Cold) 🧈 | ¾ cup | Cut into cubes |
| Ground Nutmeg 🌿 | ½ tsp | Freshly grated nutmeg |
| Vanilla Extract 🥛 | 1 tsp | Pure vanilla preferred |
| Salt 🧂 | ½ tsp | Kosher or sea salt |
| Vanilla Ice Cream (Optional) 🍦 | 1 cup | For serving |
The apples are the heart of this dessert, so pick firm, sweet varieties like Honeycrisp or Fuji—they hold up to baking without turning mushy. Trader Joe’s and Whole Foods usually have great mixed bags in season. If you can only find one type, Granny Smith adds a tart kick that balances the sweetness. Slice them evenly so they cook at the same rate—about 1/4-inch thick. The secret to juicy filling? Cooking them just until tender, not mushy, and finishing with lemon juice to brighten the flavors.
No mixed apples? Any firm apple works—just adjust the sugar to taste. Running short on brown sugar? White sugar plus 1 tsp molasses mimics the flavor. The butter needs to stay cold for that perfect streusel texture, so don’t let it soften. No vanilla extract? Vanilla bean paste or even a pinch of vanilla sugar works in a pinch. For extra crunch, add 1/4 cup chopped pecans or walnuts to the streusel. And if you’re feeling fancy, swap the oats for crushed graham crackers for a deeper flavor.
This crisp reheats beautifully—just pop it in the oven at 350°F for 10-15 minutes until warmed through. Store leftovers in an airtight container for 4-5 days, though it rarely lasts that long. Freeze portions for up to 3 months—wrap tightly in foil or plastic wrap. I always make a double batch because it disappears faster than you can say ‘fall flavors.’ Serve warm with that scoop of vanilla ice cream, and you’ve got dessert perfection.
Why You’ll Love This Recipe
- One-Pan Magic: I swear by this recipe because it’s that simple—just toss sliced apples into a 9×9 pan, sprinkle the cinnamon-sugar mix, and bake. No fancy layers, no stress, just warm, gooey perfection with zero extra dishes.
- Crispy-Creamy Balance: That golden-brown topping with the soft, spiced apples? It’s the kind of contrast that makes you close your eyes and sigh. The brown sugar caramelizes just right, while the lemon juice keeps the filling bright—no mushy apples here.
- Weeknight Workhorse: I make this for breakfast, dessert, or even a quick lunch with yogurt. The leftovers? Still delicious the next day, straight from the fridge. Honestly, it’s my go-to when I need something reliable but still feels special.
- Budget-Friendly Luxury: You’re using seasonal apples and pantry staples, but it tastes like you slaved over it. Between us, this is the kind of dessert that makes you feel fancy without breaking the bank—especially when you’re feeding a crowd.
Step-by-step instructions for warm spice streusel over juicy fruit
Here’s how to create a perfect 9×9 apple crisp with a crispy streusel that stays crunchy and juicy apples that stay tender.
Prepare the Juicy Apple Filling
Peel, core, and slice the 6 medium apples into even ¼-inch thick slices. I like to use a mix of sweet and tart varieties like Honeycrisp and Granny Smith for that perfect balance. Place the sliced apples in a large bowl and toss them with the 2 tablespoons of lemon juice—this prevents browning and adds a bright citrus note that cuts through the sweetness.
In a separate small bowl, whisk together the 0.75 cup granulated sugar, 0.5 cup packed brown sugar, 2 tablespoons ground cinnamon, 0.5 teaspoon salt, and 0.5 teaspoon ground nutmeg. Pour this spice sugar mixture over the apples and toss everything gently until each slice is evenly coated. The spices will infuse into the apples as they cook, creating that warm, comforting aroma we all love.
Assemble the Crisp in Your Pan
Transfer the spiced apple mixture to a greased 9×9-inch baking dish, spreading it out evenly. I always press down gently on the apples with my fingers to help them release their juices—this ensures a moist filling instead of a dry one. The apples should fit snugly in the pan, but not be packed too tightly.
Preheat your oven to 375°F while you prepare the streusel topping. This temperature is perfect for creating that golden brown streusel while keeping the apples tender underneath. If you’re using the optional 1 cup vanilla ice cream, let it sit at room temperature for about 10 minutes before serving—this makes it easier to scoop and enjoy with your warm crisp.
Make the Perfect Streusel Topping
In a medium bowl, combine the 1 cup old-fashioned rolled oats, 1 cup all-purpose flour, and 0.75 cup cold cubed butter. Using your fingers or a pastry cutter, work the butter into the oat mixture until it’s crumbly but still has some pea-sized butter pieces—this creates pockets of flavor and texture. The cold butter is key here; it prevents the streusel from becoming greasy.
Add the 1 teaspoon vanilla extract and mix it in thoroughly. You’ll notice the mixture becomes fragrant and slightly sticky, but don’t worry—this is normal. The vanilla adds depth to the warm spice flavors. Sprinkle the streusel evenly over the apple mixture in the baking dish, pressing down very lightly with your fingers. This helps the topping crisp up nicely and creates those beautiful caramelized patches.
Bake to Golden Perfection
Bake the apple crisp in the preheated oven for 35-40 minutes. You’ll know it’s ready when the top is golden brown and the filling is bubbling around the edges. The apples should be tender enough to pierce easily with a fork, but still hold their shape. If the edges start to brown too quickly, tent the pan with aluminum foil to prevent over-browning.
Let the crisp cool for 15-20 minutes before serving. This resting period allows the filling to set slightly and makes it easier to slice. Serve warm with a scoop of that 1 cup vanilla ice cream melting on top, or with a dollop of whipped cream for an extra special treat. The contrast of warm crisp and cold ice cream is simply irresistible!
Pro Tips For Making 9 X 9 Apple Crisp
- Prep Apples Thin: DESCRIPTION: Slice them ¼-inch thick—any thicker and they’ll stay tough in the oven. I used to eyeball it and end up with mushy spots; measuring with a ruler (yes, really) guarantees even cooking.
- Skip the Crowding: DESCRIPTION: Spread apples in a single layer before adding the topping—this ensures even browning and prevents a soggy bottom. I learned this the hard way after pulling out a crisp with half the apples still raw.
- Toast the Oats: DESCRIPTION: Pulse rolled oats in a food processor for 10 seconds before mixing with butter and sugar—this mimics store-bought topping texture. It’s the thing that makes the crisp actually crispy, not just crumbly.
- Salt the Butter: DESCRIPTION: Mix ¼ teaspoon salt into the brown sugar-butter topping—it cuts through the sweetness and balances the cinnamon. I was skeptical until I tried it; now I can’t imagine skipping it.
Storing and reheating your leftovers
Refrigerator Storage
Store your apple crisp in an airtight container for up to 4-5 days—just let it cool completely first. I like using glass Pyrex containers because they keep the crisp moist and prevent freezer burn.
The filling stays juicy, and the streusel maintains its crunch if you cover it tightly with plastic wrap pressed directly onto the surface. 🍎
Freezer-Friendly Tips
For longer storage, freeze individual portions in quart-sized freezer bags (leave 1 inch headspace for expansion). Thaw overnight in the fridge before reheating.
I’ve found that wrapping the crisp tightly in aluminum foil before freezing preserves the texture best—just pop it straight from the freezer into the oven when ready. 🥶
Oven Reheating
Preheat your oven to 350°F and place the crisp (still in its container or foil) on a baking sheet. Reheat for 10-15 minutes until the edges are golden and the filling is bubbly.
A quick spritz of water before reheating helps restore moisture if it’s dried out. Trust me, it’ll taste almost as good as fresh! 🔥
Microwave Shortcut
For a quick fix, cover the crisp with a damp paper towel and microwave on 50% power for 1-2 minutes. Stir, then continue in 30-second bursts until warmed through.
Add a splash of water or apple juice to revive the filling if it looks dry. This method works best for small portions. ✨
Serving Warm
Serve your reheated crisp straight from the oven with a scoop of vanilla ice cream or a dollop of whipped cream. The contrast of warm and cold makes every bite magical.
If you’re meal prepping, I recommend reheating just before serving—this keeps the streusel crispy and the filling juicy. 💛
Nutrition facts
Frequently asked questions
Can I use any type of apple for this recipe?
You can use most firm apples, but sweet varieties like Honeycrisp or Fuji work best for a balanced flavor. Tart apples like Granny Smith add brightness—just reduce sugar slightly if using all tart apples. Avoid mealy varieties like Red Delicious, as they won’t hold up during baking.
Why does my streusel turn greasy?
The butter must stay cold when mixing—if it melts, the streusel loses its texture. Cut butter into cubes and work quickly. For extra crunch, chill the streusel mixture for 10 minutes before sprinkling on top.
Can I make this ahead of time?
Assemble the crisp (unbaked) up to 24 hours ahead, cover tightly, and refrigerate. Bake straight from the fridge—add 5-10 minutes to baking time. For best results, bake it fresh, but this works well for busy schedules.
How do I prevent a soggy bottom?
Press the apples gently into the pan to release juices, then bake on the middle oven rack for even heat. If needed, tent with foil after 25 minutes to prevent over-browning while keeping the filling tender. A 15-minute rest before serving also helps set the filling.
What’s the best way to serve leftovers?
Reheat slices in the oven at 350°F for 10 minutes to restore crispness. For quick reheating, microwave on 50% power with a damp paper towel. Always serve with ice cream or whipped cream to revive the texture.

- 12 Bean Chili Recipe: Hearty Slow-Cooked Depth With 12 Legumes - October 17, 2026
- 5 Seed Bread Recipe: Nutty Crunch and Artisan Flavor in One Loaf - October 17, 2026
- 1 Lb Macaroni Salad Recipe: Bold, Crunchy, and Crowd-Pleasing - October 17, 2026