
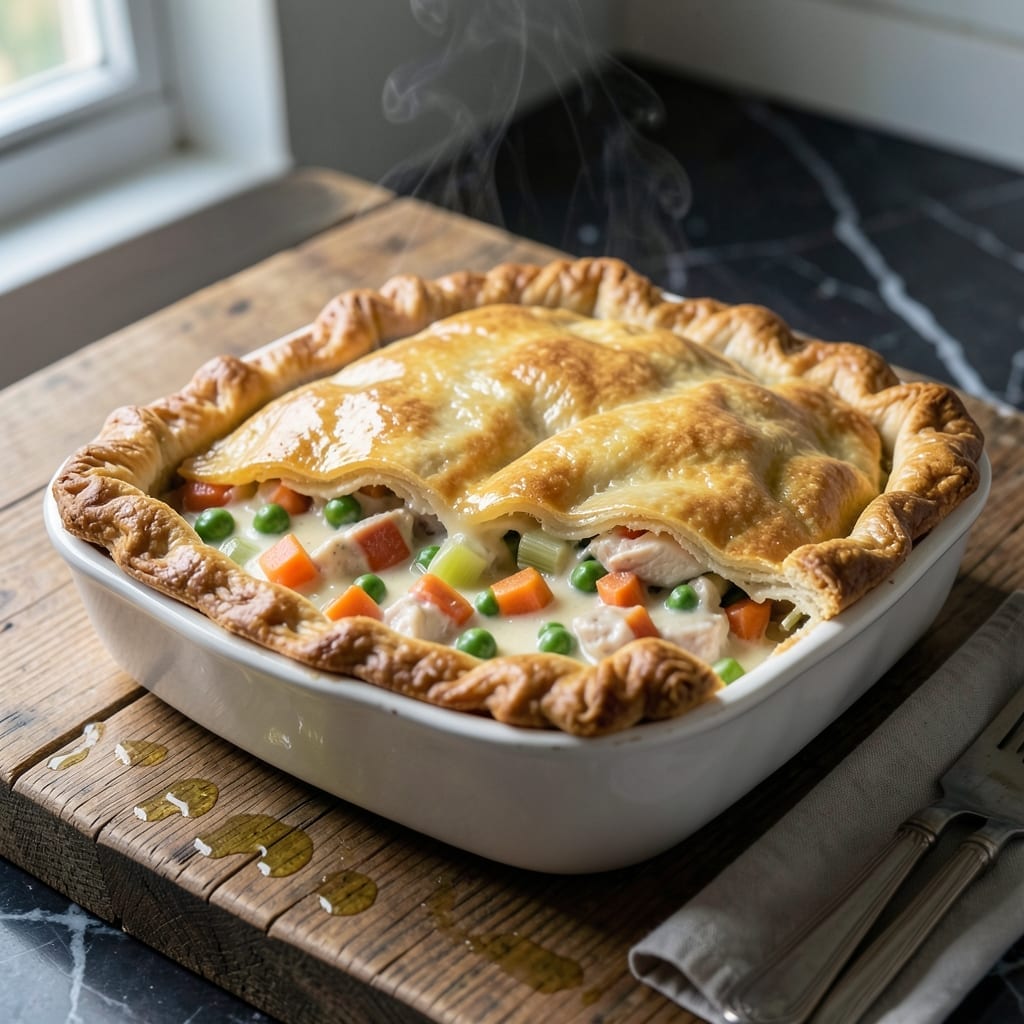
This 9×13 pot pie brings comfort food to the next level with its flaky, golden crust and rich, hearty filling. The large format makes it perfect for feeding a crowd or meal prepping for the week.
What sets this version apart is the balance between tender vegetables and a creamy, savory filling that holds together beautifully. The top and bottom crusts ensure every bite has that satisfying crunch.
The filling comes together in one pot before being transferred to the baking dish, keeping cleanup minimal. A few simple techniques guarantee a perfectly baked crust that stays crisp, not soggy.
This dish delivers the classic pot pie experience with the convenience of a sheet pan. The result is a meal that feels both nostalgic and impressive.
Ingredients for 9×13 Pot Pie
Two crusts, hearty filling, and a sheet pan make this crowd-pleaser effortlessly impressive.
| Ingredient | Amount | Notes |
|---|---|---|
| Pie Crusts 🥧 | 2 sheets | Store-bought or homemade, thawed |
| Boneless Skinless Chicken Breasts 🍗 | 2 lb | Diced into bite-sized pieces |
| Carrots 🥕 | 3 whole | Peeled and diced |
| Frozen Green Peas 🌱 | 1 ½ cups | No need to thaw |
| Yellow Onion 🧅 | 1 whole | Diced finely |
| Celery Stalks 🌿 | 2 whole | Diced finely |
| Garlic Cloves 🧄 | 3 cloves | Minced for depth |
| Butter 🧈 | ½ cup | Unsalted, for roux |
| All-Purpose Flour 🌾 | ⅔ cup | For thickening filling |
| Chicken Broth 💧 | 2 ½ cups | Low-sodium preferred |
| Heavy Cream 🥛 | 1 cup | Full-fat for richness |
| Dried Thyme 🌿 | 1 tsp | Crushed between fingers |
| Dried Rosemary 🌿 | 1 tsp | Crushed between fingers |
| Salt 🧂 | 1 ½ tsp | Kosher or sea salt |
| Black Pepper 🌶️ | 1 tsp | Freshly ground preferred |
The crust is non-negotiable here. Pillsbury refrigerated pie crusts save time without sacrificing flakiness—just let them sit at room temperature for 15 minutes before rolling. For homemade, use a standard pie dough recipe doubled. The chicken should be fresh (not frozen) for even cooking. Costco or Sam’s Club are great for bulk chicken breast if you’re feeding a crowd.
No chicken? Rotisserie chicken at 2.5 cups shredded works perfectly. Vegetarian? Swap in mushrooms or chickpeas at the same weight. Out of peas? Frozen corn or green beans can substitute. The broth can be vegetable if needed, but chicken broth gives the classic flavor. For extra richness, half-and-half can replace the heavy cream.
Assemble up to a day ahead—cover tightly and refrigerate. Bake straight from the fridge (add 10-15 minutes to cooking time). Leftovers keep 3-4 days in the fridge or freeze slices for 2 months. Reheat in the oven to keep crust crisp.
Why You’ll Love This Recipe
- One Pan Wonder: I love that everything goes straight into the 9×13 dish—no extra pots, just layer the crust, chicken, and veggies and let the oven do the work.
- That Crust Moment: The flaky top crust over the creamy chicken and peas filling? Honestly, it’s the part I look forward to most.
- Feeds a Crowd: Between us, this is my go-to for Sunday dinner—fills the pan, fills the family, and still leaves leftovers for lunch.
- Pantry Friendly: Frozen peas and basic veggies mean I can make this without a special grocery run. I’ll be real: that’s half the battle won.
Step-by-Step Instructions for 9×13 Pot Pie
This method ensures a flaky crust over a rich, creamy filling packed with tender chicken and vegetables.
Step 1: Cook the Chicken and Vegetables
In a large pot, melt the ½ cup butter over medium heat. Add the diced yellow onion, carrots, and celery stalks. Sauté for 5-7 minutes until the vegetables soften and the onion becomes translucent. Stir in the minced garlic cloves and cook for 30 seconds until fragrant.
Add the 2 lb boneless skinless chicken breasts and cook for 6-8 minutes, stirring occasionally, until the chicken is no longer pink and reaches an internal temperature of 165°F. This step builds the flavor foundation for your filling.
Step 2: Create the Creamy Roux-Based Filling
Sprinkle the ⅔ cup all-purpose flour evenly over the chicken and vegetable mixture. Stir well to coat everything and cook for 1-2 minutes to remove the raw flour taste. Slowly pour in the 2½ cups chicken broth while stirring constantly to prevent lumps.
Stir in the 1 cup heavy cream, 1 tsp dried thyme, 1 tsp dried rosemary, 1½ tsp salt, and 1 tsp black pepper. Bring to a gentle simmer and cook for 5 minutes until the mixture thickens enough to coat the back of a spoon. Fold in the 1½ cups frozen green peas and remove from heat.
Step 3: Assemble and Bake to Golden Perfection
Preheat your oven to 375°F. Unroll the 2 sheets pie crusts and place one sheet in the bottom of a 9×13-inch baking dish, pressing it gently into the corners. Pour the chicken and vegetable filling over the crust and spread it evenly.
Top with the second sheet of pie crust, crimping the edges to seal. Cut several small slits in the top crust to allow steam to escape. Bake for 30-35 minutes or until the crust is golden brown and the filling is bubbling. Let it rest for 10 minutes before serving to allow the filling to set.
Pro Tips For Making 9×13 Pot Pie
- Precook the Chicken: Poach the chicken breasts in salted water for 12-15 minutes until just done, then shred—this prevents dry, overcooked meat in the final bake.
- Thaw the Peas: Rinse frozen peas under cold water to thaw slightly before mixing in, so they warm evenly without turning mushy in the oven.
- Vent the Crust: Cut 3-4 small slits in the top pie crust before baking to let steam escape and keep the crust from getting soggy underneath.
- Blind-Bake the Bottom: I learned this the hard way—par-bake the bottom crust for 8 minutes at 375°F before adding filling to avoid a gummy, undercooked base.
Dietary Considerations for These Flavors
Gluten-Free Option
Swap the pie crusts for a gluten-free version like Mi-Del or Wholly Wholesome brands. Use 1:1 gluten-free flour blend for the roux—Bob’s Red Mill works well. The filling remains naturally gluten-free with these simple adjustments. 💪
Dairy-Free Adaptation
Replace the butter with vegan butter like Miyoko’s and swap heavy cream for coconut milk (full-fat). Use dairy-free chicken broth and ensure your pie crusts are vegan. The result is just as creamy and satisfying.
Lower-Carb Version
For a lighter crust, use almond flour pie dough or skip the bottom crust entirely. Replace all-purpose flour with 2 tbsp cornstarch for thickening. Add extra veggies like zucchini or cauliflower to bulk up the filling without added carbs.
Vegetarian Swap
Omit the chicken and use 2½ cups mushrooms or chickpeas for protein. Sauté them with the vegetables for 8-10 minutes until browned. Use vegetable broth and add 1 tbsp soy sauce for umami depth.
Allergen Notes
This recipe contains dairy, wheat, and egg (in store-bought crusts). For nut allergies, check crust labels carefully. Always verify substitutions meet dietary needs before serving to groups. 💡
Nutrition Facts
Frequently Asked Questions
Can I use store-bought pie crust?
Use 2 sheets of refrigerated pie crust for convenience. Let them sit at room temperature for 15 minutes before rolling to prevent cracking.
How do I prevent a soggy bottom crust?
Blind-bake the bottom crust for 8-10 minutes before adding filling. Also, ensure your filling is thick enough to coat a spoon before assembling.
Can I make this ahead of time?
Yes! Assemble completely, cover tightly, and refrigerate up to 1 day before baking. Add 10-15 minutes to the baking time if starting from cold.
What if my filling is too thin?
Simmer uncovered for 2-3 extra minutes or mix 1 tablespoon cornstarch with 1 tablespoon cold water, then stir into the filling.

- 4C Bread Crumbs Meatballs Recipe: Crispy Crust and Juicy Centers - September 25, 2026
- 6 Oz Chocolate Chip Cookie Recipe: Perfectly Balanced Crispy Edges and Chewy Hearts - September 25, 2026
- 6-Inch Coffee Cake Recipe: Vanilla Bean Swirls and Buttery Streusel Topping - September 25, 2026