
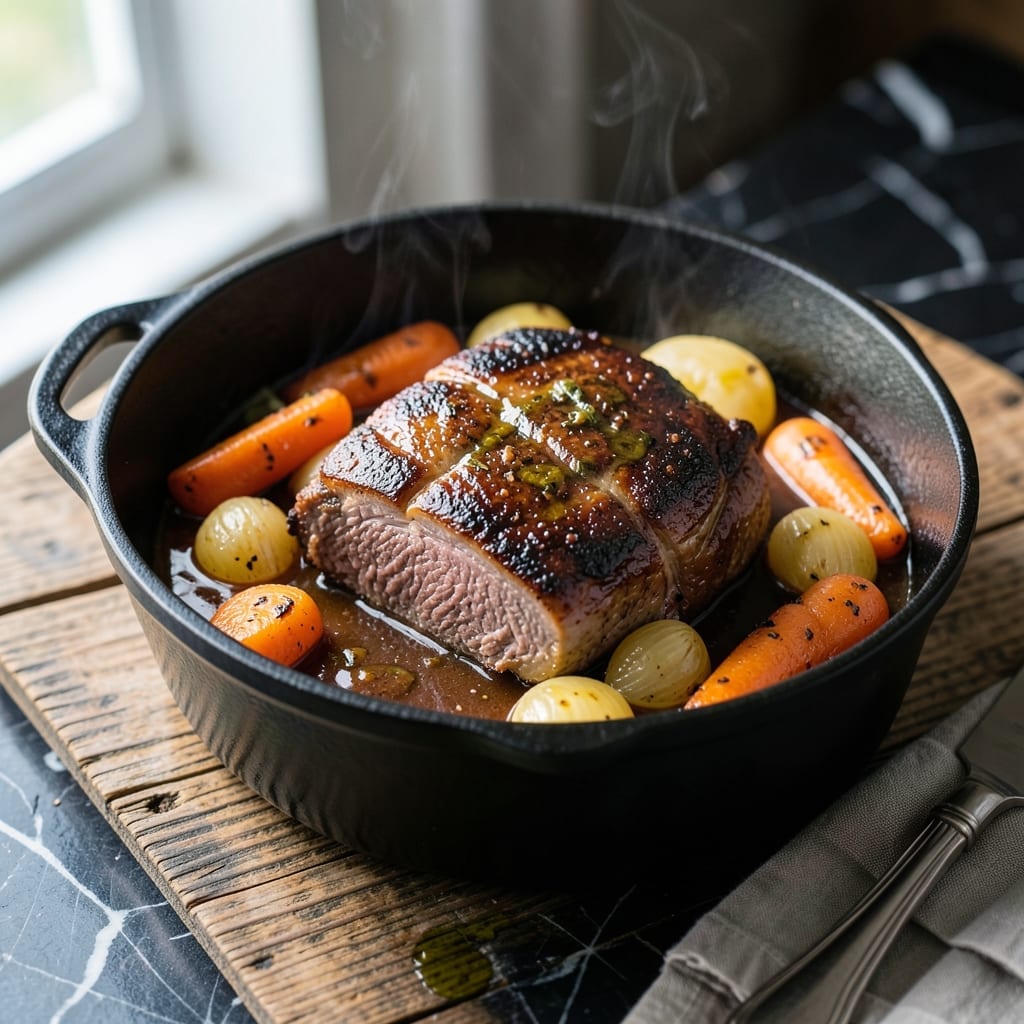
I’ve spent years perfecting this pot roast, and this version finally nails that fall-apart tender beef with rich, savory gravy.
Low and slow is the only way to go here—3 hours in the oven transforms tough chuck roast into something magical. The root vegetables soak up all that beefy flavor as they cook alongside.
You’ll end up with meat that shreds at the touch of a fork, surrounded by carrots, potatoes, and onions that have caramelized in the juices. It’s the kind of meal that makes your house smell incredible for hours.
Serve this with crusty bread for soaking up every drop of gravy. Let’s get it in the oven.
Ingredients for Amazing Pot Roast
Chuck roast, root vegetables, and a handful of aromatics create this hearty braise.
| Ingredient | Amount | Notes |
|---|---|---|
| Chuck Roast 🥩 | 3 lb | Well-marbled, trimmed of excess fat |
| Kosher Salt 🧂 | 2 tsp | Diamond Crystal preferred for even seasoning |
| Freshly Ground Black Pepper 🌶️ | 1 tsp | Coarse grind for robust flavor |
| Olive Oil 🫒 | 2 tbsp | Extra-virgin for searing depth |
| Yellow Onions 🧅 | 2 whole | Large, quartered for melting texture |
| Carrots 🥕 | 4 whole | Peeled, cut into 3-inch chunks |
| Yukon Gold Potatoes 🥔 | 1 ½ lb | Halved if small, quartered if large |
| Garlic Cloves 🧄 | 6 cloves | Smashed, unpeeled for roasting |
| Fresh Thyme Sprigs 🌿 | 4 pieces | Plus 1 tsp chopped for gravy |
| Fresh Rosemary Sprigs 🍃 | 2 pieces | Woody stems removed before serving |
| Dry Red Wine 🍷 | 1 ½ cups | Cabernet Sauvignon or Merlot recommended |
| Beef Stock 🥩 | 2 cups | Low-sodium preferred for control |
| Tomato Paste 🍅 | 2 tbsp | San Marzano for superior depth |
| Bay Leaves 🌿 | 2 pieces | Dried, removed before serving |
The beef is non-negotiable here—chuck roast with visible marbling (look for those white fat streaks) ensures that fall-apart texture. I grab mine from Costco when I’m batch cooking, but any supermarket with a decent butcher counter works. The potatoes should be Yukon Golds (their buttery flavor holds up to long cooking). Avoid russets—they turn to mush. Fresh herbs matter more than you think; grab them from the refrigerated section (not the wilted bunches on the shelf).
No red wine? Substitute beef stock plus 1 tbsp balsamic vinegar for acidity. Out of fresh thyme? Dried thyme at one-third the amount works, but add it with the liquids, not at the end. The tomato paste can be skipped in a pinch (the wine and stock carry enough depth), but don’t skip the searing step—browning the beef first builds layers of flavor. Baby carrots are fine (just halve them so they don’t turn to mush).
Leftovers taste even better the next day—store in the fridge for up to 4 days or freeze for 3 months (the gravy thickens slightly when reheated). Make extra: this freezes beautifully. Portion into meal-sized containers for easy weeknight dinners.
Why You’ll Love This Recipe
- Set It and Forget: Mostly hands-off—just sear the chuck roast, toss in onions, and let the oven do the work.
- Feeds the Whole Crew: One pot, one meal, and everyone from picky kids to hungry adults cleans their plate.
- Stretches for Days: Leftovers taste even better, and the budget-friendly chuck roast makes enough for sandwiches or tacos later.
Step-by-Step Instructions for Braised Beef With Root Vegetable Medley
Here’s the method that transforms tough cuts into fork-tender perfection with rich, layered flavors.
Step 1: Sear the Chuck Roast to Develop Deep Flavor
Pat the 3 lb Chuck Roast dry with paper towels, then season aggressively with the 2 tsp Kosher Salt and 1 tsp Freshly Ground Black Pepper on all sides. This dry surface creates the perfect Maillard reaction. Heat the 2 tbsp Olive Oil in a heavy Dutch oven over medium-high heat until it shimmers.
Sear the roast for 4-5 minutes per side until you achieve a deep mahogany crust. Don’t move it—let it develop that beautiful brown color that signals caramelization. This step builds the foundation of flavor for your entire dish. Remove the roast and set aside.
Step 2: Build the Aromatic Base with Vegetables and Herbs
In the same pot, add the quartered 2 whole Yellow Onions, 4 whole Carrots, and 1.5 lb Yukon Gold Potatoes. Sauté for 5-7 minutes until the onions begin to soften and develop golden edges. The residual fond from the roast will coat the vegetables beautifully.
Add the 6 cloves Garlic Cloves (smashed but unpeeled), 4 pieces Fresh Thyme Sprigs, 2 pieces Fresh Rosemary Sprigs, and 2 tbsp Tomato Paste. Stir constantly for 1-2 minutes until the tomato paste darkens slightly—this intensifies its sweetness and removes any raw flavor.
Step 3: Deglaze and Create the Braising Liquid
Pour in the 1.5 cups Dry Red Wine and scrape the bottom of the pot with a wooden spoon to release all those flavorful browned bits. Let it simmer for 3-4 minutes until reduced by about half. You’ll smell the alcohol cook off, leaving behind concentrated fruit notes.
Add the 2 cups Beef Stock and 2 pieces Bay Leaves, then return the seared roast to the pot along with any accumulated juices. The liquid should come about halfway up the roast—this ensures proper braising rather than boiling. Bring to a gentle simmer.
Step 4: Braise Until Fork-Tender and Finish
Cover the pot and transfer to a preheated 325°F oven. Braise for 3 to 3.5 hours, turning the roast every hour, until it’s fork-tender and shreds easily with a gentle tug. The vegetables should be soft and have absorbed the rich braising liquid.
Remove the Fresh Rosemary Sprigs and Bay Leaves before serving. The braising liquid will have reduced into a luxurious sauce that coats the back of a spoon. Serve the roast whole or shredded, surrounded by the root vegetables and plenty of that amazing sauce.
Pro Tips For Making Amazing Pot Roast
- Sear It Hard: Use high heat to get a deep brown crust on the chuck roast—about 3-4 minutes per side in olive oil. I learned this the hard way: a pale sear means weak flavor.
- Salt Generously: Hit the chuck roast with kosher salt at least 30 minutes before cooking, or even overnight. Sounds like overkill, but it actually changes the outcome.
- Don’t Rush Braising: After searing, drop the heat to low and let it cook slow—2.5 to 3 hours for a 3-pound roast. Resist the urge to crank the temperature.
- Use Onion Layers: Slice the yellow onions thick and layer them under the roast. They’ll melt into the pot, adding sweetness without burning.
Dietary Considerations for These Flavors
Gluten-Free Adaptations
This dish is naturally gluten-free as written, but watch your ingredients carefully. Some beef stocks contain wheat, so I always use Certified Gluten-Free beef stock to be safe. The red wine should also be verified gluten-free, as some are processed with wheat-based fining agents. 💡
Low-Carb Version
To reduce carbs, simply swap the 1.5 lb Yukon Gold Potatoes for 2 lb radishes or 1 lb turnips. They hold up well to long cooking and absorb the braising liquid beautifully. You’ll save about 30g net carbs per serving.
Dairy-Free Notes
This pot roast is inherently dairy-free, but be mindful of garnishes. If you’re serving with bread for dipping, opt for a dairy-free crusty loaf. Skip any butter-based additions to the gravy if you’re avoiding dairy entirely.
Slow Cooker Adjustments
For a hands-off approach, sear the roast first, then transfer everything to your slow cooker. Cook on low for 8-10 hours or high for 5-6 hours. The texture will be slightly different but still delicious.
Allergy Considerations
For nut allergies, ensure your wine and stock are processed in nut-free facilities. The recipe contains no tree nuts or peanuts, but cross-contamination can occur in some brands. I always check labels carefully.
Vegetarian Swap
replace the chuck roast with 3 lb portobello mushrooms (halved) or 4 large eggplants (cut into chunks). The cooking time reduces to 1.5-2 hours, but the flavor profile remains rich and satisfying. 🌱
Nutrition Facts
Frequently Asked Questions
Can I use a different cut of beef?
Brisket or short ribs work well, but avoid lean cuts like sirloin. Chuck roast is ideal because its marbling breaks down during the 3-3.5 hour braise, creating that melt-in-your-mouth texture.
What if I don’t have red wine?
Substitute with 2 cups beef stock plus 1 tbsp balsamic vinegar for acidity. The vinegar mimics wine’s tang and helps tenderize the meat during cooking.
How do I know when it’s done?
It’s ready when a fork slides in with zero resistance. If it resists, give it another 30 minutes at 325°F. The meat should pull apart effortlessly when fully tender.
Can I make this in a slow cooker?
Yes! Sear the meat first, then cook on low for 8-10 hours or high for 5-6 hours. The texture will be softer but just as flavorful.

- 4C Bread Crumbs Meatballs Recipe: Crispy Crust and Juicy Centers - September 25, 2026
- 6 Oz Chocolate Chip Cookie Recipe: Perfectly Balanced Crispy Edges and Chewy Hearts - September 25, 2026
- 6-Inch Coffee Cake Recipe: Vanilla Bean Swirls and Buttery Streusel Topping - September 25, 2026