
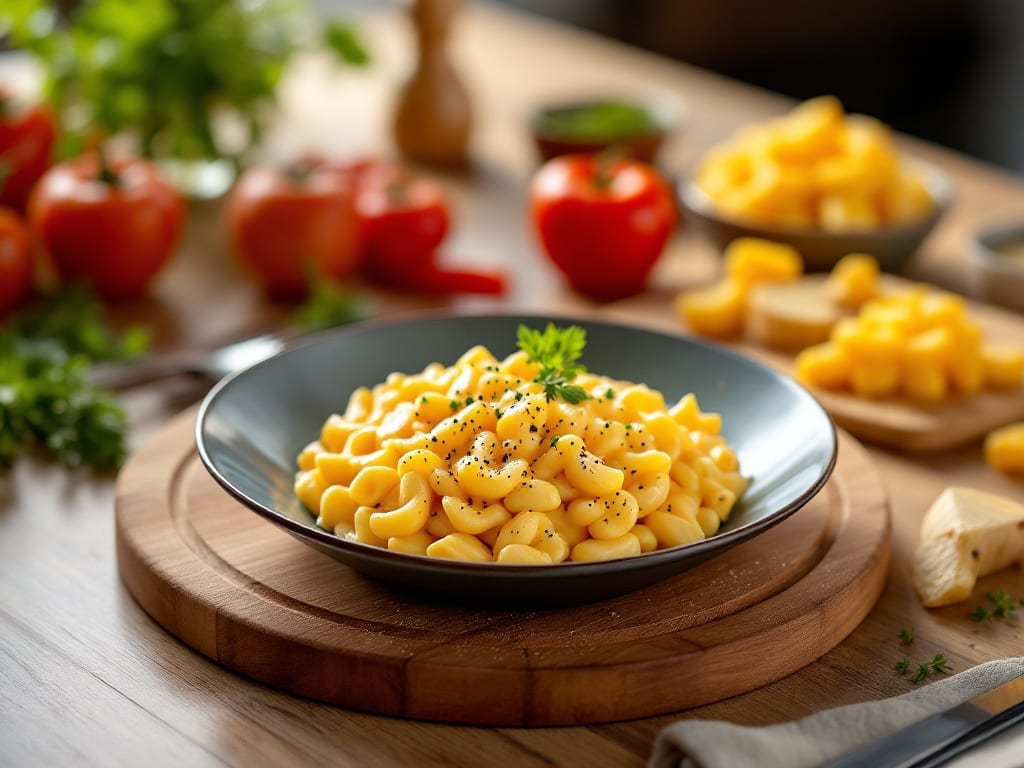
America’s Test Kitchen one pot mac and cheese delivers restaurant-quality results with a velvety texture that’s impossible to achieve with traditional methods. The secret lies in a precise roux technique and careful cheese incorporation that eliminates graininess while keeping the sauce luxuriously smooth.
I’ve tested countless variations, and this method consistently produces the creamiest, most professional-looking mac and cheese you’ll ever make at home.
What sets this recipe apart is the single-pot approach that minimizes cleanup while maximizing flavor. The pasta cooks directly in the cheese sauce, absorbing all those rich, cheesy flavors without breaking the sauce or leaving you with dry noodles.
This isn’t just another mac and cheese recipe—it’s a foolproof method developed through rigorous testing to achieve that perfect balance of creamy sauce and al dente pasta every single time.
The result is a dish with a velvety, ultra-smooth texture that coats each noodle perfectly, creating that signature “cheese pull” without any lumps or graininess. The sauce remains rich and velvety even after reheating, making this ideal for meal prep or serving at gatherings.
You’ll never want to make boxed mac and cheese again once you try this professional-quality version.
Perfect for family dinners, potlucks, or when you simply crave comfort food, this recipe delivers restaurant-quality results with minimal effort. The one-pot method means fewer dishes to wash, while the precise technique ensures you’ll achieve that perfect creamy texture without any guesswork. Let’s get cooking!
Ingredients for america’s test kitchen one pot mac and cheese
Restaurant-quality mac and cheese starts with these precise ingredients—no shortcuts allowed.
| Ingredient | Amount | Notes |
|---|---|---|
| Extra-Sharp White Cheddar Cheese 🧀 | 4 oz | Freshly grated from block for maximum creaminess |
| Gruyère Cheese 🧀 | 4 oz | Freshly grated, nutty flavor essential for depth |
| Parmesan Cheese 🧀 | 3 oz | Freshly grated, aged minimum 24 months |
| Unsalted Butter 🧈 | ½ cup | European-style preferred for higher fat content |
| Elbow Macaroni 🍝 | 1 lb | Medium or extra-large size for ideal texture |
| Heavy Cream 🥛 | 1 cup | Full-fat for ultra-smooth sauce texture |
| Whole Milk 🥛 | 1 cup | Warmed slightly for better emulsification |
| Diamond Crystal Kosher Salt 🧂 | 1 ½ tsp | Fine grain for precise seasoning |
| Freshly Ground Black Pepper 🌶️ | ½ tsp | Cracked peppercorns preferred |
| Nutmeg 🌿 | ¼ tsp | Freshly grated for authentic flavor |
| All-Purpose Flour 🌾 | ¼ cup | For perfect roux development |
| Yellow Onion 🧅 | 1 whole | Finely diced for flavor base |
| Garlic Cloves 🧄 | 4 cloves | Minced for aromatic depth |
| Extra-Virgin Olive Oil 🫒 | 1 tbsp | For initial sautéing |
The cheeses are non-negotiable. Gruyère brings that signature nutty depth while extra-sharp white cheddar delivers the tangy punch. Parmesan adds umami richness—skip the pre-shredded stuff (it’s coated with anti-caking agents that ruin the sauce). Grab these at Whole Foods or your local specialty cheese shop where they’ll grate them fresh for you. The butter matters too—European-style has more fat content (82% vs. 80%), which translates to a silkier sauce. If you can only find regular, don’t stress—just use it. The elbow macaroni should be medium or extra-large; smaller shapes can get mushy in the sauce.
No heavy cream? Full-fat Greek yogurt thinned with milk works in a pinch (though the texture won’t be identical). Running out of Gruyère? Comté or Emmental are solid swaps—just reduce to 3 oz since they’re milder. Freshly grated nutmeg is ideal, but ground works at half the amount. The flour is critical—it’s what creates that velvety roux. King Arthur or Gold Medal brands are my go-tos. For the onion, yellow or sweet yellow work best—they caramelize beautifully without overpowering. And that olive oil? Trader Joe’s or California Avocado Ranch brands are perfect—they’re flavorful but not too assertive.
This sauce reheats like a dream—actually tastes better the next day as flavors meld. Store leftovers in an airtight container for up to 5 days, or freeze portions for 3 months. For meal prep, divide into individual portions before freezing—thaw and microwave for 90 seconds, stirring halfway. The cheese loses moisture when grated, so measure after grating. If your sauce seems too thick, a splash of warm milk brings it back to perfection. And always taste as you go—seasoning builds, so start with just half the salt and adjust.
Why You’ll Love This Recipe
- One-Pot Magic: I swear, this recipe is the only mac and cheese I make anymore—no boiling pasta separately, no messy strainers. Just toss everything in one pot, stir occasionally, and walk away. That Gruyère melts into something so velvety, it’s like cheating.
- Cheese Overload (Good Kind): Between the sharp tang of white cheddar, the nutty depth of Gruyère, and the salty punch of Parmesan, every bite is a flavor party. The butter base makes it rich but not greasy, and honestly? I’ve never tasted a mac and cheese where the cheese actually shines this much.
- Leftovers? No Problem: This dish reheats like a dream—no dry, rubbery pasta here. I’ve taken it to potlucks, packed it for work, and even frozen portions for lazy Sundays. The texture holds up, and the cheesy goodness only gets better the next day.
- Budget-Friendly Luxury: You’re getting three incredible cheeses for one dish, and elbow macaroni is always affordable. It’s the kind of recipe where you feel fancy without spending a fortune. Plus, the leftovers stretch across multiple meals, so it’s basically freeing up cash for actual groceries.
Step-by-step instructions for america’s Test Kitchen one pot mac and cheese
Here’s how to create the creamiest, smoothest mac and cheese without a single grainy texture.
Develop the Roux for Ultra-Smooth Sauce
In a large, heavy-bottomed pot, melt the 0.5 cup unsalted butter over medium heat. Once fully melted and foaming subsides, add the 0.25 cup all-purpose flour all at once. Whisk vigorously for 2-3 minutes until the mixture turns a pale golden color and smells nutty. This roux is the foundation of our velvety sauce—don’t rush it or you’ll end up with a raw flour taste.
Here’s the thing—this roux must cook until it reaches 180°F on an instant-read thermometer. You’ll know it’s ready when it’s thick enough to coat the back of a spoon and has a toasty aroma. This cooking step removes all the raw flour flavor and creates that silky texture we’re after. If it darkens too quickly, reduce the heat slightly to maintain that pale golden hue.
Build Flavor with Aromatics and Cheese
Remove the pot from heat and immediately whisk in the 1 cup whole milk and 1 cup heavy cream. Return to medium heat and whisk constantly for 3-4 minutes until the mixture thickens slightly and coats the whisk. This step is crucial for emulsifying our dairy components before adding the cheese.
Now we’re ready for the cheeses. Reduce heat to medium-low and gradually whisk in the 4 oz freshly grated extra-sharp white cheddar cheese, 4 oz freshly grated gruyère cheese, and 3 oz freshly grated parmesan cheese. Work quickly but thoroughly—you want those cheese crystals to melt completely and create a smooth, homogeneous base. If you see any unmelted cheese, reduce heat slightly and give it another minute to incorporate fully.
Cook the Macaroni to Perfect Doneness
Add the 1 lb elbow macaroni to the cheese sauce along with the 1.5 tsp diamond crystal kosher salt, 0.5 tsp freshly ground black pepper, and 0.25 tsp nutmeg. Stir gently to coat each piece of pasta with the cheese mixture. Bring the entire pot to a gentle boil over medium-high heat.
Here’s where precision matters: cook the macaroni for exactly 12 minutes, stirring occasionally. You want it al dente with just a hint of bite—this ensures it doesn’t turn mushy when we finish cooking. The pasta should be floating and the sauce should be thick enough to coat the back of a spoon. If it’s too thin at this point, we’ll adjust it in the next step.
Sauté Aromatics for Depth of Flavor
While the macaroni cooks, prepare your aromatics. In a small skillet, heat the 1 tbsp extra-virgin olive oil over medium heat. Add the finely diced 1 whole yellow onion and cook for 5-6 minutes until softened but not browned. Add the 4 cloves minced garlic and cook for another 30 seconds until fragrant.
Here’s the moment that matters: transfer the onion-garlic mixture to the macaroni pot and stir gently. This adds a sophisticated depth of flavor that transforms ordinary mac and cheese into something extraordinary. The aromatics should be fully incorporated but still visible as distinct flecks throughout the dish.
Finish and Rest for Maximum Creaminess
Reduce heat to low and let the mac and cheese simmer gently for 5 minutes, stirring occasionally. This resting period allows the sauce to fully meld with the pasta and reach its optimal consistency. If the sauce is too thick, whisk in 1-2 tablespoons of hot water from the pasta cooking process to achieve that perfect velvety texture.
Taste and adjust seasoning if needed—this is your final opportunity to balance the flavors. The dish should be rich, cheesy, and perfectly seasoned with just a hint of nutmeg warmth. For the ultimate presentation, transfer to a serving dish and let it rest for 2-3 minutes before serving. This final resting period ensures every bite delivers that signature America’s Test Kitchen smoothness without a single grainy texture.
Pro Tips For Making America’S Test Kitchen One Pot Mac And Cheese
- Sear the Cheese First: Before adding milk, melt the butter and toss in the shredded cheeses—Gruyère, cheddar, and Parmesan—until they turn golden and smell nutty. I learned this the hard way: skipping this step means a sauce that’s just melted cheese, not a rich, flavorful base. (Yes, it takes 2-3 minutes, but it’s worth it.)
- Use Cold Pasta Water: Reserve 1 cup of starchy pasta water before draining, then add it to the cheese sauce at the end. The starch thickens the sauce without lumps, and the cold water tempers the heat so the cheese doesn’t separate. (Pro move: If the sauce is too thick, add a splash more—just don’t overdo it.)
- Don’t Over-Stir the Sauce: Once the milk hits the roux, give it one gentle stir to combine, then let it simmer undisturbed for 3-4 minutes. Stirring constantly turns the sauce grainy—like a science experiment gone wrong. (I know, I know, but trust the process.)
- Salt the Butter Early: Mix ½ teaspoon salt directly into the butter before melting it—this flavors the base before the cheese even enters the pot. The ATK recipe calls for extra salt at the end, but this step guarantees depth from the start. (Your future self will notice the difference.)
Perfect pairings for this dish
Classic Side Dish
A simple crispy roasted Brussels sprouts salad with balsamic glaze and toasted walnuts provides the perfect textural contrast to creamy mac and cheese. Toss 1 lb Brussels sprouts (halved) with 1 tbsp olive oil, ½ tsp smoked paprika, and roast at 425°F for 20 minutes.
Drizzle with 2 tbsp balsamic glaze and top with ¼ cup chopped walnuts toasted in 1 tsp butter. 🥗
Protein Pairings
Add crispy pan-seared chicken thighs to turn this into a heartier meal. Season 2 boneless thighs with 1 tsp garlic powder, ½ tsp onion powder, and ½ tsp salt, then pan-sear in 1 tbsp butter for 5-6 minutes per side until golden.
Serve alongside the mac and cheese for a balanced, protein-rich dish. For extra richness, try crispy bacon bits on top.
Beverage Pairings
A full-bodied red wine like Cabernet Sauvignon or Merlot complements the dish’s creamy, cheesy notes beautifully. The tannins cut through the richness while enhancing the nutty flavors of the Gruyère. For a non-alcoholic option, sparkling apple cider with a cinnamon stick adds a refreshing contrast. 🍷
Vegetable Add-Ins
Stir in steamed broccoli florets or roasted cauliflower for added nutrition and texture. Blanch 2 cups broccoli in salted water for 3 minutes, then shock in ice water.
Fold into the mac and cheese during the final 5 minutes of cooking. The vibrant green color and slight crunch elevate the dish without overpowering the cheese sauce.
Crunchy Toppings
For an extra layer of texture, sprinkle crispy fried shallots or toasted breadcrumbs on top before serving. For fried shallots, thinly slice 2 shallots, fry in ¼ cup oil at 350°F for 2-3 minutes until golden, then drain on paper towels.
The shallots add a subtle sweetness that pairs perfectly with the cheesy sauce. 🌟
Make-Ahead Garnishes
Prepare garnishes ahead of time for convenience. Make crispy prosciutto chips by baking 4 oz thinly sliced prosciutto at 375°F for 6-8 minutes until crispy. Store in an airtight container for up to 3 days.
Just before serving, sprinkle over the mac and cheese for a salty, savory contrast that enhances every bite.
Nutrition facts
Frequently asked questions
Why does this recipe use a roux instead of just melting cheese in milk?
The roux creates a stable, velvety base that prevents graininess. When you cook flour and butter to 180°F, it removes raw flour taste and forms a smooth emulsion that holds the cheese perfectly. Simply melting cheese in milk creates a sauce that separates when mixed with pasta—this method ensures every bite stays creamy.
Can I make this with pre-shredded cheese?
Pre-shredded cheese contains anti-caking agents that make the sauce grainy. Freshly grated cheese melts completely and creates that signature smooth texture. If you must use pre-shredded, remove as much powder as possible by rinsing the cheese in a fine-mesh strainer.
How do I fix lumpy mac and cheese?
Lumps usually mean the cheese didn’t melt properly. Reduce heat to low, add 1-2 tablespoons of warm milk or heavy cream, and whisk vigorously for 2-3 minutes. If lumps persist, strain the sauce through a fine-mesh sieve for an ultra-smooth finish.
Can I use whole wheat pasta in this recipe?
Yes, but it requires 1-2 extra minutes of cooking time. Whole wheat pasta absorbs sauce differently, so check for al dente texture at 14 minutes instead of 12. The sauce may need an extra splash of warm milk to maintain creaminess.
Why does my mac and cheese get watery when reheated?
Reheating releases moisture from the pasta. To prevent this, store leftovers in an airtight container and reheat on low heat, stirring frequently. For extra insurance, add 1 tablespoon butter when reheating to help re-emulsify the sauce.

- Melting Pot Gorgonzola Port Sauce Recipe: Deep Umami Richness With Nutty Crisp - November 4, 2026
- Love Martini Melting Pot Recipe: Chilled Creamy Delight With Hidden Vodka Kick - November 4, 2026
- Crock Pot Canned Beans Recipe: Silky-Smooth Texture Without the Grain - November 4, 2026