
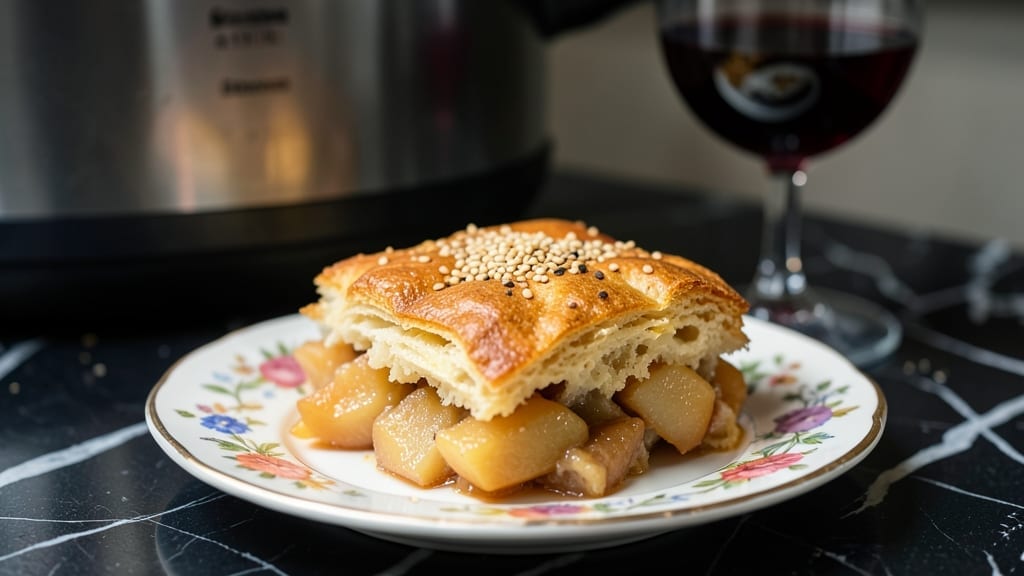
This Instant Pot apple cobbler recipe transforms a classic dessert into a 30-minute wonder with tender spiced fruit and a golden, buttery crust that melts perfectly every time.
After years of baking cobblers that either turned soggy or required hours in the oven, I finally cracked the code using my Instant Pot—a game-changer for busy weeknights.
The secret lies in the pressure cooker’s ability to infuse flavors while keeping the fruit tender, followed by a quick broil to achieve that restaurant-quality crust.
The beauty of this method is its simplicity: you combine sliced apples with cinnamon, sugar, and a splash of lemon juice, then let the Instant Pot work its magic.
The crust, made with just butter, flour, and a touch of brown sugar, gets pressed on top and broiled until bubbly and golden.
What you end up with is a dessert that tastes like it simmered all day—warm, spiced apple filling with a crispy, buttery crust that holds its shape beautifully. It’s the kind of dessert that disappears faster than you can say “second helping.”
This recipe delivers restaurant-quality results without the fuss, making it perfect for family dinners, potlucks, or whenever you crave something comforting. The apples stay juicy and flavorful, the spices infuse deeply, and the crust achieves that perfect balance between crispy and tender.
Best of all, it requires minimal cleanup—just one pot to wash. Whether you’re a seasoned Instant Pot user or trying it for the first time, this cobbler is foolproof and impossible to resist.
For an extra touch, consider adding a sprinkle of chopped pecans or a dollop of vanilla ice cream on top. The possibilities are endless, but the base recipe is already so good, you might not need any variations at all.
Let’s get started on this 30-minute dessert that tastes like a labor of love.
Ingredients for apple cobbler instant pot
Four juicy apples and a handful of pantry staples make this Instant Pot cobbler a dream.
| Ingredient | Amount | Notes |
|---|---|---|
| Granny Smith Apples 🍎 | 4 medium | Peeled, cored, sliced thinly |
| Brown Sugar 🍚 | ¾ cup | Packed, light or dark |
| Ground Cinnamon 🌿 | 2 tsp | Freshly ground preferred |
| Lemon Juice 🍋 | 2 tbsp | Freshly squeezed |
| Vanilla Extract 🥛 | 1 tsp | Pure, high-quality |
| All-Purpose Flour 🌾 | 1 cup | Sifted for best texture |
| Unsalted Butter 🧈 | ½ cup | Cold, cubed, full-fat |
| Granulated Sugar 🍚 | ¼ cup | For crust sweetness |
| Salt 🧂 | ½ tsp | Fine sea salt |
| Ground Nutmeg 🌿 | ¼ tsp | Freshly grated if possible |
| Heavy Cream 🥛 | ¼ cup | Whipped for optional topping |
| Vanilla Ice Cream 🍦 | ½ cup | For serving (optional) |
Granny Smiths are ideal—they hold their shape and stay bright during cooking. Local farmers markets often have them at peak flavor, but grocery stores work too. Look for firm apples with no bruises. I usually grab 4-5 apples and slice them into even pieces (about 1/4-inch thick) so they cook uniformly. The butter matters here—full-fat, cold cubes create the best flaky crust. If you’re in a rush, Trader Joe’s sells pre-sliced apples that save time, though fresh always tastes better.
No Granny Smiths? Honeycrisp or Fuji work perfectly—they’re just as sweet and hold up well. Ran out of vanilla extract? Almond extract at half the amount gives a nice twist, though it’s stronger. For the crust, if you’re out of butter, cold coconut oil works in a pinch (it adds a subtle coconut flavor). The nutmeg is optional but adds that warm, spiced depth that makes this taste like grandma’s recipe. If you’re feeling fancy, toss in chopped pecans on top before broiling for extra crunch.
Prep the apples and mix the filling first—they’ll keep in the fridge for 24 hours if you want to make ahead. The crust can be prepped and chilled for up to 4 hours before baking. This cobbler reheats beautifully—just cover with foil and warm in the microwave for 1-2 minutes. Store leftovers in an airtight container for 3-4 days or freeze for 3 months. The crust gets crispier when reheated, so it’s worth it!
Why You’ll Love This Recipe
- No-Fuss Prep: I swear by this Instant Pot version—just toss those Granny Smiths into the pot whole, add the brown sugar and cinnamon, and let it do all the work. No peeling, no chopping, no fuss. (Yes, even on a Tuesday night.)
- Tangy-Sweet Magic: That splash of lemon juice and vanilla? It’s what turns this from good to ridiculously good—bright, warm, and just a little sophisticated. The apples stay crisp enough to bite into, but soft enough to melt in your mouth.
- Weeknight & Potluck Star: Serve it warm with vanilla ice cream for dinner, or pack it in jars for a picnic—it’s that versatile. Honestly, I’ve taken it to book clubs, holiday gatherings, and even my kid’s soccer game. (No judgment if you eat it straight from the pot.)
- Budget-Friendly Leftovers: Brown sugar and cinnamon stretch a long way, and this recipe makes enough for seconds. I’ll be real: my husband’s favorite part is the next-day slices, toasted in the toaster oven with a drizzle of honey. Zero waste, all flavor.
Step-by-step instructions for apple cobbler in an Instant Pot
This method delivers a warm, spiced apple filling with a golden, buttery crust in record time.
Prepare the Apple Filling
In a large bowl, combine the 4 medium Granny Smith apples, sliced thinly, with the 0.75 cup packed brown sugar, 2 teaspoons ground cinnamon, 2 tablespoons lemon juice, and 1 teaspoon vanilla extract. Toss everything together until the apples are evenly coated and glistening.
Here’s the thing—those Granny Smith apples are tart, so the sugar and lemon juice help balance their sharpness while keeping the filling juicy. Don’t skip the tossing; you want every slice to get that flavorful coating. The mixture should look vibrant and inviting, with the cinnamon giving it a warm, inviting hue.
Create the Buttery Crust Mixture
In a separate bowl, whisk together the 1 cup all-purpose flour, 0.25 cup granulated sugar, 0.5 teaspoon salt, and 0.25 teaspoon ground nutmeg. Add the 0.5 cup cold, cubed unsalted butter and use a pastry cutter or your fingers to work it into the flour until the mixture resembles coarse crumbs with pea-sized butter pieces.
This texture is crucial—you want the butter to stay in chunks so it melts beautifully during cooking, creating that signature crispy, flaky crust. If the mixture looks too dry, you can add a splash of the 0.25 cup heavy cream (whipped separately) to help bind it, but don’t overdo it. The crust should hold together when pressed gently but still have visible butter pieces.
Assemble in the Instant Pot
Pour the apple mixture into the Instant Pot liner or directly into the pot, spreading it out evenly. Sprinkle the flour-butter mixture evenly over the top, pressing down gently with your fingers to create a sealed crust. This ensures the filling doesn’t bubble over during cooking and gives you that perfect golden-brown top.
Here’s where it gets fun—give the pot a gentle shake to help distribute the crust mixture evenly. You’ll see the butter chunks peeking through, and that’s exactly what you want. The crust should look like it’s ready for a golden bake, but we’re doing this all in one pot with minimal cleanup.
Cook to Perfection
Place the lid on the Instant Pot and set the valve to sealing. Cook on high pressure for 12 minutes. You’ll hear the pressure build up, and that’s when the magic starts happening—the apples soften while the crust transforms into a golden, crispy blanket.
When the cooking time is complete, allow the pressure to release naturally for 10 minutes, then quick-release any remaining pressure. The aroma filling your kitchen will be incredible—warm apples, cinnamon, and that buttery crust scent. Let the cobbler sit for 5 minutes before serving to allow the filling to set slightly and the crust to firm up.
Finish and Serve
Carefully remove the liner (if using) and transfer the cobbler to a serving plate. The crust should be golden brown with some crispy spots, while the apples underneath should be tender but still holding their shape. Here’s the moment that matters: spoon the whipped heavy cream over the top for an extra-rich finish, and serve warm with the 0.5 cup vanilla ice cream on the side.
This is the perfect balance of warm cobbler and cool ice cream. The contrast in temperatures makes every bite amazing. Don’t forget to save any leftovers—they reheat beautifully in the microwave for a quick dessert the next day.
Pro Tips For Making Apple Cobbler Instant Pot
- Peel the Apples: Granny Smiths stay firm when cooked, so skip peeling unless you’re going for a fussy look. The skin adds texture and holds shape—just give them a quick rinse and a dry with a towel first, or your cobbler will turn into soup.
- Use High Heat First: Start the Instant Pot on high pressure for 5 minutes with the apples and liquid. This jumpstarts the caramelization before the slow cook—trust me, it makes the filling taste deeper, not just steamed.
- Skip the Overmixing: Once you dump the biscuit topping on, resist the urge to stir it into the apples. A few streaks of brown sugar and cinnamon on top? That’s the flavor you’re after—let the steam do the work.
- Add the Lemon Last: Toss the lemon juice over the apples after the pressure release, not before. The acid needs to brighten the finished dish, not turn your filling into a sad, watery mush while it cooks.
Dietary considerations for this recipe
Gluten-Free Adaptation
To make this cobbler gluten-free, swap the all-purpose flour for a 1:1 gluten-free flour blend like Bob’s Red Mill or King Arthur. I’ve tested this with great success—just ensure the blend contains xanthan gum for that same tender texture.
For the crust, you’ll need 1 extra tablespoon of gluten-free flour to help it bind properly. The apples and spices remain the same, so the flavor stays rich and comforting. 🌾
Dairy-Free Option
Skip the butter entirely and use ½ cup dairy-free butter alternative (like Earth Balance) for the crust. For extra richness, replace the heavy cream with coconut cream—it whips up beautifully and adds a subtle tropical note.
The crust will still achieve that golden brown, though it may be slightly more fragile. Trust me, it’s still delicious! 🥥
Lower Sugar Version
Reduce the brown sugar to ½ cup and the granulated sugar to ¼ cup for a lighter dessert. Boost the cinnamon to 2.5 teaspoons and add 1 teaspoon of vanilla bean paste (instead of extract) for deeper flavor.
The apples will still caramelize beautifully, and you’ll save 50 grams of sugar per serving without sacrificing taste. 🍎
Nut-Free Additions
For a nut-free topping, sprinkle ½ cup of sunflower seeds or toasted pumpkin seeds on the crust before broiling. These add crunch without nuts and pair perfectly with the warm apples. If you’re avoiding seeds too, skip this step—the crust alone is already irresistible. 🌻
Vegan-Friendly Twist
Use vegan butter (like Miyoko’s) and flax eggs (1 tbsp ground flax + 3 tbsp water per egg) to bind the crust. Replace the heavy cream with coconut yogurt for a tangy finish.
The texture stays crispy, and the flavors hold up beautifully. This version proves vegan desserts can be just as comforting! 🌱
Allergen-Friendly Notes
Always check labels—some gluten-free blends or dairy-free butters contain hidden allergens. I recommend certified gluten-free products if you’re highly sensitive. For nut allergies, ensure your kitchen is free of cross-contamination. When in doubt, make this classic version first—it’s foolproof and safe for most dietary needs. 💡
Nutrition facts
Frequently asked questions
Can I use frozen apples instead of fresh in this Instant Pot cobbler?
Yes, but thaw and drain them thoroughly first. Frozen apples release more moisture, which can make the filling soggy. Pat them completely dry with paper towels before tossing with the spices and sugar. For best results, use 1 cup thawed, drained apples instead of the 4 medium fresh apples called for.
Why does my crust sometimes turn out greasy instead of crispy?
Greasy crusts happen when the butter melts too much before cooking. Always use cold, cubed butter and work it into the flour quickly to keep it in pea-sized pieces. Also, don’t overmix the crust—just combine until it resembles coarse crumbs. The Instant Pot’s high pressure will melt the butter perfectly during cooking.
Can I make this cobbler ahead of time?
Prepare the apple filling and crust mixture up to 24 hours ahead and store them separately in airtight containers in the fridge. Assemble and cook just before serving. For make-ahead serving, cook the cobbler, let it cool completely, then refrigerate for up to 3 days. Reheat covered in the microwave for 1-2 minutes—the crust will crisp up again.
What’s the best way to serve this dessert?
Warm cobbler pairs perfectly with vanilla ice cream or whipped cream for contrast. For an elegant touch, dust with powdered sugar or sprinkle with extra cinnamon. It’s also delicious with a scoop of salted caramel ice cream if you want to elevate the flavors. Serve immediately after cooking for the best texture.
Can I use a different type of apple?
Yes! While Granny Smiths are ideal for their tartness, Honeycrisp, Fuji, or Braeburn work beautifully too. Avoid overly soft varieties like Red Delicious. For sweeter apples, reduce the brown sugar to 0.5 cup to balance flavors. The key is using apples that hold their shape during cooking.

- Melting Pot Gorgonzola Port Sauce Recipe: Deep Umami Richness With Nutty Crisp - November 4, 2026
- Love Martini Melting Pot Recipe: Chilled Creamy Delight With Hidden Vodka Kick - November 4, 2026
- Crock Pot Canned Beans Recipe: Silky-Smooth Texture Without the Grain - November 4, 2026