
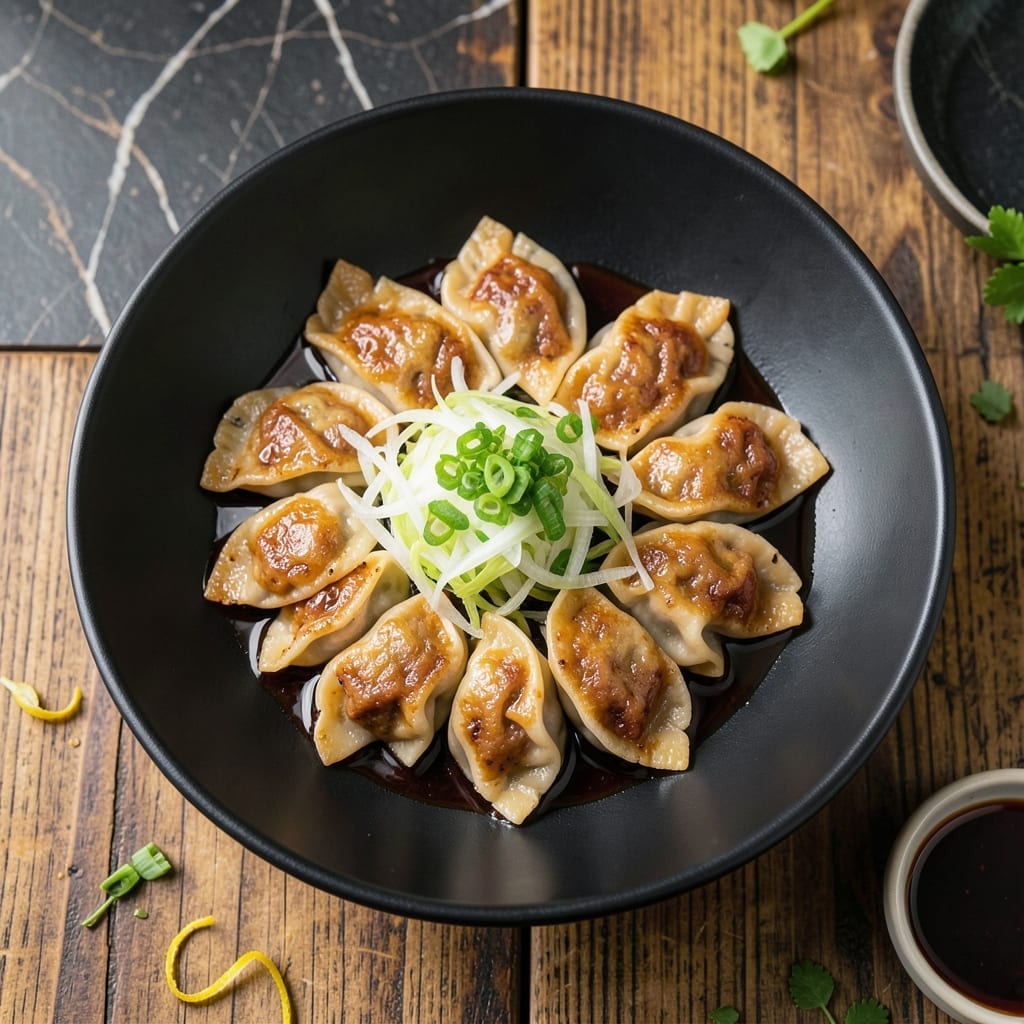
There’s something deeply satisfying about nailing the perfect pot sticker—crispy golden bottoms giving way to juicy fillings with every bite.
This recipe delivers restaurant-quality results at home with a simple folding technique and precise cooking method. The key is the two-stage cooking process that creates that signature texture contrast.
You’ll achieve perfectly browned bases that shatter with the first bite, while the pork and cabbage filling stays moist and flavorful. The dipping sauce ties everything together with its tangy, savory depth.
Serve these as an appetizer or main dish—they disappear quickly no matter the occasion.
Ingredients for Asian Pot Stickers
These authentic ingredients create that signature crispy-juicy contrast you crave in every bite.
| Ingredient | Amount | Notes |
|---|---|---|
| Ground Pork 🥩 | 1 lb | Regular or lean, not extra-lean |
| Napa Cabbage 🥬 | 2 cups | Finely shredded, salted and drained |
| Green Onions 🧅 | ½ cup | Thinly sliced, green parts only |
| Garlic Cloves 🧄 | 3 cloves | Minced for maximum flavor |
| Fresh Ginger Root 🌿 | 1 tbsp | Peeled and finely grated |
| Soy Sauce 🥢 | 2 tbsp | Low-sodium preferred for balance |
| Sesame Oil 🫒 | 1 tbsp | Toasted for depth of flavor |
| Rice Vinegar 🍯 | 1 tbsp | Unseasoned for clean acidity |
| Pot Sticker Wrappers 🥟 | 40 pieces | Round dumpling wrappers, thawed if frozen |
| Vegetable Oil 💧 | ¼ cup | Neutral high-smoke point for frying |
| Cornstarch 🌾 | 1 tbsp | For thickening filling |
| Salt 🧂 | ½ tsp | Fine sea salt for seasoning |
| Black Pepper 🌶️ | ¼ tsp | Freshly ground for best results |
| Water 💧 | ½ cup | For steaming pot stickers |
The pork is the foundation here. Optimal quality requires 80/20 ground pork—leaner cuts dry out. Whole Foods or Asian markets often carry better-quality pork with the right fat ratio. For the cabbage, Napa is essential (not green cabbage) for its tender texture. Fresh ginger and garlic from Trader Joe’s are consistently potent. Standard practice is using fine sea salt for even distribution in the filling.
No pork? Ground chicken or turkey work with adjusted seasoning. Shiitake mushrooms add umami for vegetarian versions. Low-sodium soy sauce can be swapped for tamari at 1:1 ratio. If you lack rice vinegar, apple cider vinegar at half the amount works. For the wrappers, frozen gyoza skins (found at H Mart) are identical to fresh. Always thaw before using.
Filling can be prepped 1 day ahead and refrigerated. Wrappers dry out fast—keep them covered with a damp towel. Cooked pot stickers freeze beautifully for 2-3 months. Reheat in a pan with a splash of water to restore crispness.
Why You’ll Love This Recipe
- Minimal Chopping: I just need to finely dice the napa cabbage, green onions, and ginger—everything else comes together quickly.
- Flavor Bomb: The pork soaking up all that garlic, ginger, and cabbage flavor makes every bite ridiculously good.
- Freezer Friendly: I make a double batch and freeze half for those nights I need dinner in 15 minutes flat.
- Stretches Far: One pound of pork and a head of cabbage feeds my family of four with leftovers for lunch the next day.
Step-by-Step Instructions for Asian Pot Stickers
Master the technique for achieving golden crispy bottoms and succulent fillings in every bite.
Step 1: Prepare the Filling Mixture
In a large mixing bowl, combine the 1 lb Ground Pork, 2 cups Napa Cabbage, 0.5 cup Green Onions, minced 3 cloves Garlic Cloves, and 1 tbsp Fresh Ginger Root. I use my hands for this—they mix the ingredients together more effectively than a spoon.
Add the 2 tbsp Soy Sauce, 1 tbsp Sesame Oil, 1 tbsp Rice Vinegar, 1 tbsp Cornstarch, 0.5 tsp Salt, and 0.25 tsp Black Pepper. Mix until everything is evenly distributed and the pork becomes slightly sticky. The cornstarch helps bind the filling and keeps it moist during cooking.
Step 2: Assemble the Pot Stickers
Place a Pot Sticker Wrapper on a clean surface and add about 1 tablespoon of the filling in the center. Be careful not to overfill—this makes them harder to seal and can cause them to burst during cooking.
Moisten the edge of the wrapper with a bit of 0.5 cup Water, then fold in half to create a half-moon shape. Press the edges together firmly, then make small pleats along the sealed edge by pinching and folding. This not only looks beautiful but helps create that perfect seal to prevent filling from leaking out.
Step 3: Pan-Fry to Achieve Crispy Bottoms
Heat 2 tablespoons of the 0.25 cup Vegetable Oil in a large non-stick skillet over medium-high heat. When the oil shimmers, arrange the pot stickers in a single layer, pleat-side up. Cook undisturbed for 2-3 minutes until the bottoms turn golden brown.
Watch for the edges to become crisp and lightly browned. If your pan isn’t large enough for all 40 pieces, cook in batches—overcrowding will steam them instead of frying. The oil should sizzle gently when the pot stickers hit the pan, but not smoke.
Step 4: Steam to Ensure Juicy Fillings
Carefully add 0.5 cup Water to the skillet—it will sizzle violently, so stand back. Immediately cover with a tight-fitting lid and reduce heat to medium-low. Let steam for 6-8 minutes until the water has mostly evaporated.
This steaming step is crucial—it cooks the filling through while keeping it juicy, and the trapped steam also softens the wrapper slightly, creating the perfect contrast with the crispy bottom. You’ll know they’re done when the wrappers appear slightly translucent and the filling is hot throughout.
Step 5: Finish and Serve with Crispy Perfection
Remove the lid and let any remaining water cook off for 1-2 minutes. The bottoms should be deep golden brown and crispy. Transfer to a serving plate, crispy side up.
Serve immediately while hot—the contrast between the crispy bottom and tender, juicy filling is at its best right out of the pan. The pot stickers should hold their shape, with no leaks, and the bottoms should have that satisfying crunch with every bite.
Pro Tips For Making Asian Pot Stickers
- Pre-cook the Cabbage: Sauté the Napa cabbage first and squeeze out all the water—I learned this the hard way after my first batch turned into soggy dumplings.
- Chill the Filling: Pop the pork mixture in the fridge for 20 minutes before folding. Sounds weird, but it works: the filling stays put while you crimp.
- Skip the Overcrowding: Leave at least an inch between pot stickers in the pan, or they’ll steam instead of crisp. After burning three batches, I finally figured this out.
- Use Cold Water: Pour cold water into the hot pan to create steam for cooking the tops, then let it evaporate completely before removing the lid for that perfect crust.
Pro Cooking Tips for This Dish
Oil Temperature Control
Heat your vegetable oil to medium-high heat before adding pot stickers—the oil should shimmer but not smoke. I use a Lodge cast iron skillet for even heat distribution. Too low heat makes them greasy instead of crispy. 🌡️
Prevent Overcrowding
Cook in batches if needed—40 pieces won’t fit in most home pans. Overcrowding steams rather than fries. Leave ½ inch between each pot sticker for proper browning. The edges should sizzle gently when first added.
Perfect Pleat Technique
Press edges firmly after moistening with water, then make 3-4 pleats along the sealed edge. This creates a strong seal and looks professional. I find pinching between thumb and forefinger works best for consistent pleats.
Steam Management
After adding ½ cup water, immediately cover with a tight lid to trap steam. Use medium-low heat during steaming to prevent burning. The water should fully evaporate in 6-8 minutes for perfect texture contrast.
Crispy Finish
Uncover and cook off remaining moisture for 1-2 minutes until bottoms are deep golden brown. Listen for the sizzle to return—this means the water is gone. Transfer immediately to maintain crispness.
Non-Stick Success
If using non-stick pans, avoid metal utensils that can scratch. I recommend wooden or silicone tools for turning. Let the pan reheat between batches to maintain consistent medium-high heat for each round. 💡
Nutrition Facts
Frequently Asked Questions
Can I use a different type of meat?
Yes! Ground chicken or turkey work well with the same seasonings. For vegetarian versions, try shiitake mushrooms with tofu. The key is maintaining the same moisture level as pork.
What if my pot stickers stick to the pan?
Ensure your pan is at medium-high heat and use enough oil. Wait until the bottoms are golden brown before attempting to move them. A non-stick pan helps prevent sticking.
How do I store leftovers?
Cooked pot stickers keep in the fridge for 2-3 days in an airtight container. To reheat, pan-fry with a splash of water to restore crispness. Freezing raw ones works for 2-3 months.

- 4C Bread Crumbs Meatballs Recipe: Crispy Crust and Juicy Centers - September 25, 2026
- 6 Oz Chocolate Chip Cookie Recipe: Perfectly Balanced Crispy Edges and Chewy Hearts - September 25, 2026
- 6-Inch Coffee Cake Recipe: Vanilla Bean Swirls and Buttery Streusel Topping - September 25, 2026