
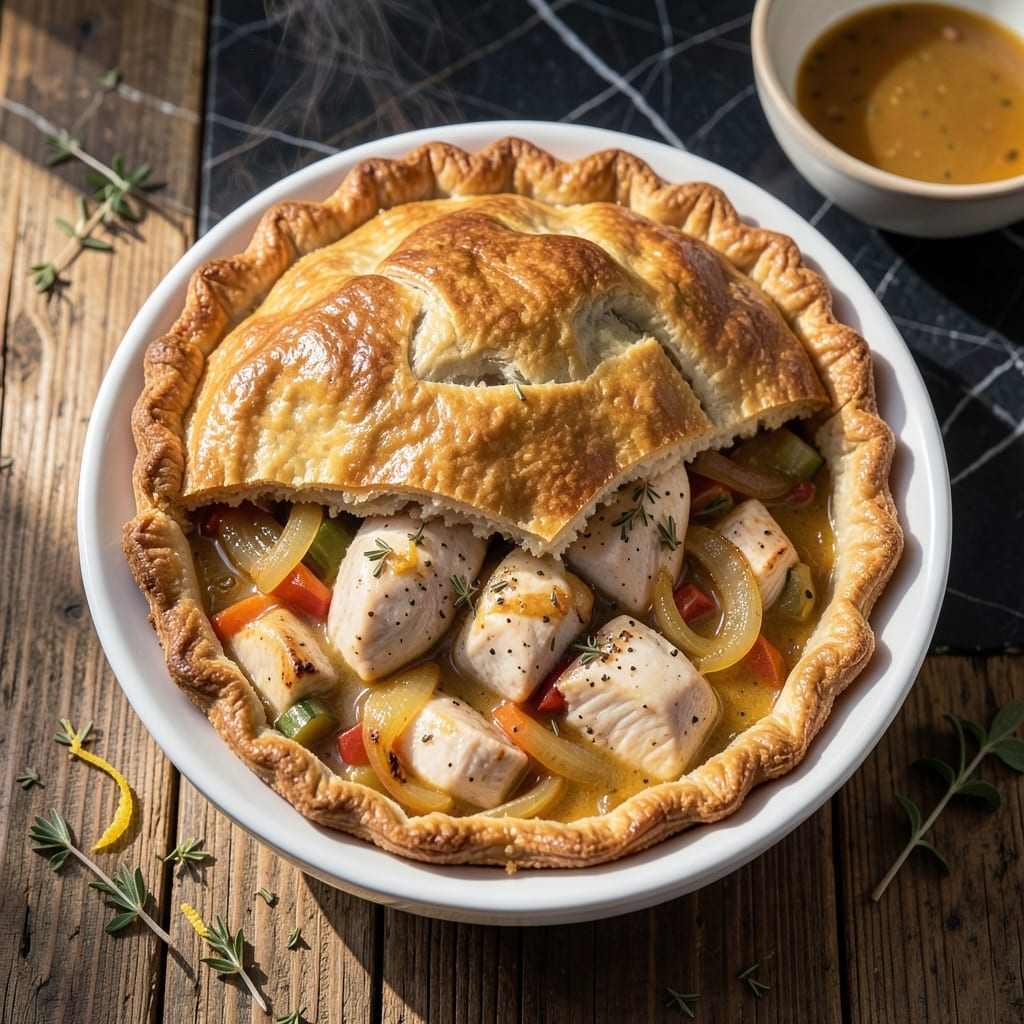
There’s nothing quite like a homestyle chicken pot pie to bring comfort to your table.
This dish captures the essence of traditional American cooking with a flaky crust that shatters with every bite. The filling is rich and hearty, packed with tender chicken and fresh vegetables swimming in a velvety sauce.
I’ve perfected the technique to ensure the crust stays golden and the filling stays creamy, never soggy. It’s the kind of meal that feels like a warm hug on a chilly evening.
Serve it straight from the oven for a meal that’s as satisfying as it is nostalgic.
Ingredients for Authentic Chicken Pot Pie
Homestyle comfort starts with these quality ingredients for a golden, flaky classic.
| Ingredient | Amount | Notes |
|---|---|---|
| All-Purpose Flour 🌾 | 3 cups | Divided for crust and filling |
| Unsalted Butter 🧈 | 1 cup | Cold, cubed for flaky crust |
| Ice Water 💧 | ½ cup | For pie dough |
| Salt 🧂 | 1 ½ tsp | Divided for dough and filling |
| Boneless Skinless Chicken Breasts 🍗 | 1 ½ lb | Cut into 1-inch pieces |
| Yellow Onion 🧅 | 1 whole | Medium, finely diced |
| Carrots 🥕 | 2 whole | Medium, peeled and diced |
| Celery Stalks 🌿 | 2 whole | Diced for flavor base |
| Frozen Peas 🌱 | 1 cup | No need to thaw |
| Garlic Cloves 🧄 | 3 cloves | Minced for sauce |
| Chicken Broth 🍲 | 1 ½ cups | Low-sodium preferred |
| Whole Milk 🥛 | ¾ cup | For creamy sauce |
| All-Purpose Flour 🌾 | ¼ cup | For thickening sauce |
| Fresh Thyme Leaves 🍃 | 1 tbsp | Chopped, or 1 tsp dried |
| Black Pepper 🌶️ | ½ tsp | Freshly ground preferred |
The butter is critical here—Land O’Lakes or Plugrá for that perfect flake. Use cold, cubed butter (don’t soften it) and King Arthur flour if you want to splurge. The chicken should be fresh, not frozen, for the best texture. Most supermarkets carry good quality broth, but Swanson or College Inn are reliable brands for the base.
No thyme? Poultry seasoning at half the amount works well. Out of peas? Diced green beans or corn can stand in (fresh or frozen). If you don’t have whole milk, half-and-half or heavy cream adds even more richness. The veggies can be prepped ahead—store them in cold water in the fridge to keep them crisp.
The unbaked pie keeps 1 day in the fridge, or freeze it for up to 3 months. Baked pie stays fresh 3-4 days—reheat in the oven to keep the crust crisp. Leftovers? They’re great for lunch the next day (the filling thickens more as it cools).
Why You’ll Love This Recipe
- One Bowl Magic: I mix the crust dough right in the same bowl I use for the filling—flour, butter, ice water, and salt, then straight to rolling.
- Buttery Crust Love: That flaky, all-butter crust made with just flour, water, and a pinch of salt? It’s the kind of comfort that makes you close your eyes with every bite.
- Feeds the Freezer: I always make two—one for dinner and one for the freezer. Honestly, it’s my secret for those nights when cooking feels impossible.
- Stretches a Pound: A single pound of chicken breasts fills this pie so generously, it’s my go-to when I need to feed a hungry crowd without breaking the bank.
Step-by-Step Instructions for Chicken Pot Pie
Here is the method for creating this classic dish with a golden crust and rich filling.
Step 1: Prepare the Flaky Pie Crust
In a large bowl, combine 3 cups All-Purpose Flour and 1.5 tsp Salt. Cut in 1 cup Unsalted Butter that has been cubed and chilled. Use a pastry cutter or your fingers to work the butter into the flour until the mixture resembles coarse crumbs with some pea-sized butter pieces visible.
Gradually add 0.5 cup Ice Water, one tablespoon at a time, mixing gently with a fork until the dough just comes together. Do not overwork it. The dough should be slightly crumbly but hold when pressed. This creates the flaky layers that define an authentic crust.
Divide the dough into two equal portions, shape into discs, wrap in plastic, and refrigerate for at least 1 hour. This chilling step is essential for preventing shrinkage and ensuring a tender texture.
Step 2: Cook the Chicken and Vegetable Filling
In a large skillet, cook the 1.5 lb Boneless Skinless Chicken Breasts (cut into 1-inch pieces) over medium-high heat until no longer pink, about 6-8 minutes. Remove and set aside. In the same skillet, add 1 whole Yellow Onion (finely diced), 2 whole Carrots (peeled and diced), and 2 whole Celery Stalks (diced).
Sauté the vegetables for 5-7 minutes until softened. Add 3 cloves Garlic Cloves (minced) and 1 tbsp Fresh Thyme Leaves, cooking for 1 minute until fragrant. Stir in 0.25 cup All-Purpose Flour to create a roux, then slowly whisk in 1.5 cups Chicken Broth and 0.75 cup Whole Milk.
Bring to a simmer and cook for 5 minutes until thickened. Return the chicken to the skillet along with 1 cup Frozen Peas and 0.5 tsp Black Pepper, then remove from heat. The filling should be rich and creamy, coating the back of a spoon.
Step 3: Assemble and Bake the Pot Pie
On a lightly floured surface, roll out one disc of dough to fit a 9-inch pie dish. Transfer the dough to the dish, pressing it gently into the bottom and sides. Trim any excess dough hanging over the edge, leaving a slight overhang.
Pour the chicken and vegetable filling into the crust-lined dish. Roll out the second disc of dough and place it over the filling. Crimp the edges to seal, then cut a few slits in the top crust to allow steam to escape. This prevents the pie from becoming soggy as it bakes.
Preheat the oven to 375°F. Bake the pot pie for 40-45 minutes until the crust is golden brown and the filling is bubbling. If the edges begin to brown too quickly, cover them with foil. Let the pie rest for 10 minutes before serving to allow the filling to set.
Pro Tips For Making Authentic Chicken Pot Pie
- Chill the Dough: After mixing the flour, butter, and ice water, wrap the dough and refrigerate for at least 30 minutes—I learned this the hard way when my crust shrank in the oven.
- Poach the Chicken: Simmer the boneless skinless chicken breasts in salted water for 12-15 minutes until just cooked through, then shred. Boiling dries it out, and undercooking makes it rubbery.
- Drain the Filling: After combining your chicken and veggies with the sauce, let it sit in a colander for 5 minutes to shed excess liquid—nothing ruins a pot pie like a soggy bottom crust.
- Vent the Top: Cut 3-4 small slits in the top crust before baking. My first few pies had lopsided, bursting crusts until I started doing this—steam needs an escape route.
Essential Equipment for This Dish
Pie Dish Essentials
I always reach for my 9-inch glass pie dish—it conducts heat evenly and lets you monitor the crust’s browning. Pyrex is my go-to brand for durability. Avoid dark metal pans as they can over-brown the bottom crust before the filling heats through. 💡
Rolling Pin Matters
A French-style tapered rolling pin gives you more control for rolling dough to an even ⅛-inch thickness. I use a J.K. Adams maple wood pin. For beginners, a pin with handles might be easier to manage.
Pastry Tools
A pastry cutter makes quick work of cutting cold butter into flour. The OXO Good Grips model is affordable and effective. If you don’t have one, two forks or your fingertips work in a pinch.
Skillet Choice
For the filling, I use a 12-inch stainless steel skillet—it provides ample space for browning chicken and vegetables without crowding. All-Clad is my preferred brand for even heat distribution. Avoid nonstick for this step as you want those browned bits for flavor.
Thermometer Check
An instant-read thermometer ensures your filling reaches a safe 165°F before assembly. I trust my ThermoWorks ThermoPop for accuracy. This step is crucial for food safety with poultry.
Venting Tool
A small, sharp knife works for cutting steam vents, but I love my pie bird—it creates a decorative center vent while supporting the top crust. You can find them at most kitchenware stores for under $10. 🥧
Nutrition Facts
Frequently Asked Questions
Can I use store-bought pie crust instead?
Yes, but the texture will differ. Homemade crust offers superior flakiness and flavor. If using store-bought, opt for an all-butter version and pre-bake the bottom crust for 8-10 minutes to prevent sogginess.
Why does my filling turn out watery?
This usually happens if the filling wasn’t thickened properly. Simmer the roux and liquid for the full 5 minutes until it coats the back of a spoon. Also, let the pie rest for 10 minutes after baking to set fully.
Can I make this ahead of time?
Assemble the pie (unbaked), cover tightly, and refrigerate for up to 1 day or freeze for 3 months. Bake from frozen, adding 10-15 minutes to the cooking time.

- 4C Bread Crumbs Meatballs Recipe: Crispy Crust and Juicy Centers - September 25, 2026
- 6 Oz Chocolate Chip Cookie Recipe: Perfectly Balanced Crispy Edges and Chewy Hearts - September 25, 2026
- 6-Inch Coffee Cake Recipe: Vanilla Bean Swirls and Buttery Streusel Topping - September 25, 2026