
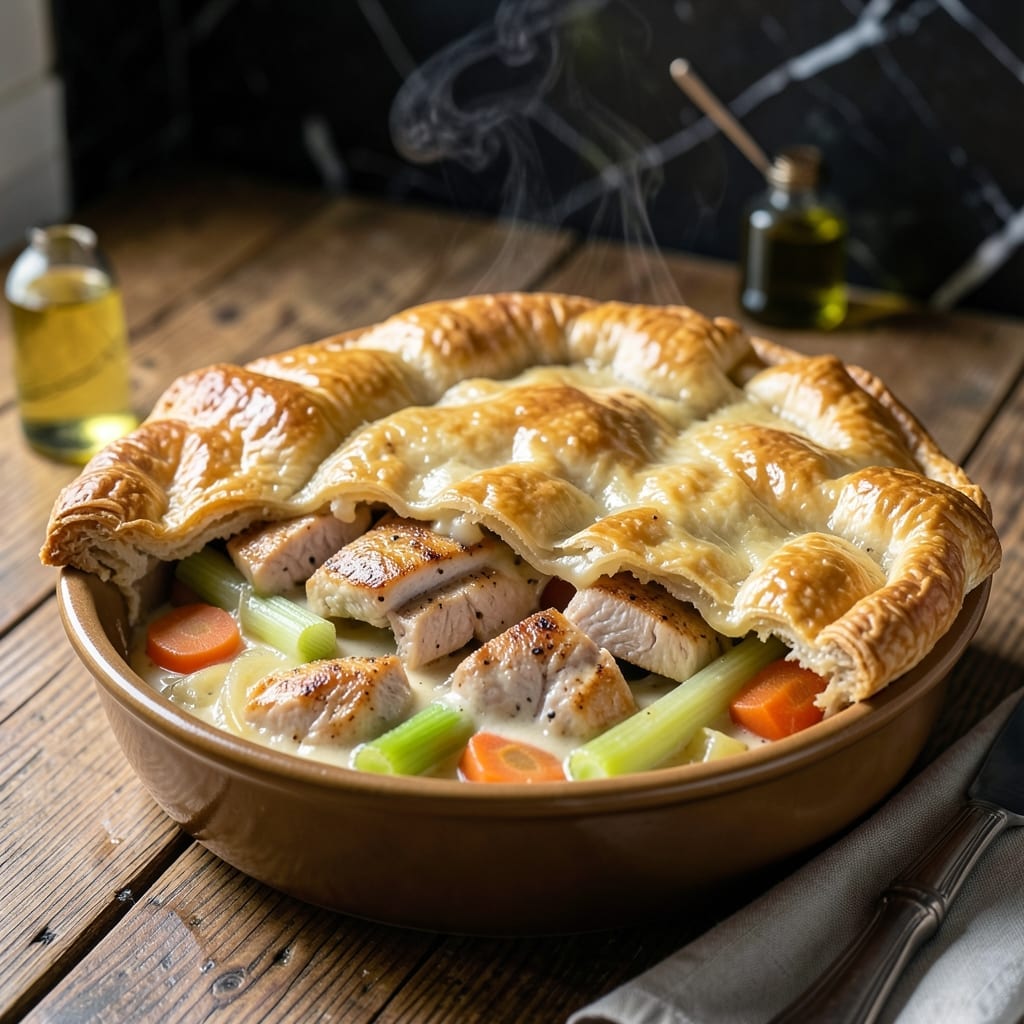
This pot pie delivers the ultimate comfort food experience, with a flaky crust and creamy filling that feels like a warm hug.
I developed this recipe to capture the homestyle goodness of traditional pot pie without the fuss. The key is a rich, velvety filling packed with tender chicken and fresh vegetables, all topped with a buttery, golden crust.
What sets this version apart is the attention to detail—each bite offers perfectly cooked chicken, crisp-tender veggies, and a sauce that’s creamy without being heavy. The crust bakes to a golden brown finish that shatters with every forkful.
Perfect for family dinners or cozy nights in, this dish brings hearty satisfaction to the table. Here’s how to make it.
Ingredients for Barefoot Contessa Pot Pie
Homestyle ingredients create that signature comfort in every buttery, flaky bite.
| Ingredient | Amount | Notes |
|---|---|---|
| Chicken Breast 🍗 | 1 ½ lb | Boneless, skinless, cubed |
| Unsalted Butter 🧈 | ½ cup | For roux and crust |
| All-Purpose Flour 🌾 | ½ cup | For filling thickener |
| Yellow Onion 🧅 | 1 whole | Medium, finely diced |
| Carrots 🥕 | 2 whole | Medium, peeled and diced |
| Celery Stalks 🌿 | 2 whole | Diced for aromatic base |
| Frozen Peas 🌱 | 1 cup | No need to thaw |
| Chicken Stock 🥣 | 2 cups | Low-sodium preferred |
| Heavy Cream 🥛 | ½ cup | For creamy filling |
| Puff Pastry Sheets 🥧 | 2 sheets | Thawed, for crust |
| Garlic Cloves 🧄 | 2 cloves | Minced for depth |
| Fresh Thyme Leaves 🌿 | 1 tbsp | Chopped, for seasoning |
| Salt 🧂 | 1 tsp | Kosher or sea salt |
| Black Pepper 🌶️ | ½ tsp | Freshly ground preferred |
| Egg 🥚 | 1 whole | For egg wash on crust |
The puff pastry is non-negotiable for that Barefoot Contessa flake—Pepperidge Farm is the standard. Chicken breast stays tender when cubed evenly (about 1-inch pieces). Whole Foods or Trader Joe’s have good pre-cut options if you’re short on time. For the stock, low-sodium lets you control the seasoning. Fresh thyme is worth the effort (or use 1 tsp dried in a pinch).
No puff pastry? Homemade pie crust works but won’t have the same lift. Short on fresh thyme? Dried at one-third the amount. Chicken thighs can swap in for breast—they’re more forgiving if overcooked. Heavy cream is key for that velvety sauce, but half-and-half works too (just less rich). The peas can be fresh if you prefer, but frozen are convenient and just as good.
Assemble and refrigerate the pie for 30 minutes before baking—this prevents soggy bottoms. Leftovers keep 3-4 days in the fridge (reheat in oven for crisp crust). The filling thickens as it cools, so don’t worry if it seems loose right out of the oven.
Why You’ll Love This Recipe
- One Pot Magic: I love that everything—chicken, carrots, onions—cooks together in a single dish, no constant stirring required.
- Buttery Crust: The combo of butter and flour makes that golden, flaky top that’s impossible to resist.
- Feeds the Crew: Honestly, it’s my go-to when I need to feed a hungry family or prep meals for the week.
- Leftovers Win: The filling thickens up overnight, so day-two slices taste even better—if they last that long.
Step-by-Step Instructions for Chicken Pot Pie
Here’s the method that guarantees a golden, flaky crust with a rich, creamy filling every time.
Step 1: Prepare the Chicken and Vegetables
Cut the 1.5 lb Chicken Breast into 1-inch cubes and season with 1 tsp Salt and 0.5 tsp Black Pepper. This ensures every bite is perfectly flavored. Set the chicken aside while you prepare the vegetables.
Finely dice the 1 whole Yellow Onion. Peel and dice the 2 whole Carrots and 2 whole Celery Stalks into small, even pieces so they cook uniformly. Mince the 2 cloves Garlic Cloves and chop the 1 tbsp Fresh Thyme Leaves. Keep the 1 cup Frozen Peas in the freezer until ready to use—no need to thaw.
Step 2: Make the Creamy Filling
In a large skillet, melt 0.5 cup Unsalted Butter over medium heat. Add the diced onion, carrots, and celery, cooking for 8-10 minutes until the vegetables soften and the onion becomes translucent.
Stir in the minced garlic and thyme, cooking for 1 minute until fragrant. Sprinkle 0.5 cup All-Purpose Flour over the vegetables and stir to coat. Pour in 2 cups Chicken Stock and 0.5 cup Heavy Cream, scraping up any browned bits. Simmer for 5 minutes until the mixture thickens.
Add the cubed chicken to the skillet and cook for 10-12 minutes until the chicken is no longer pink and the internal temperature reaches 165°F. Stir in the frozen peas and remove from heat. The filling should be thick and bubbly.
Step 3: Assemble the Pot Pie
Preheat the oven to 375°F. Unfold the 2 sheets Puff Pastry Sheets and cut one sheet to fit the top of a 9-inch pie dish. Spoon the chicken and vegetable filling into the dish, ensuring it’s evenly distributed.
Brush the edges of the pie dish with water and lay the puff pastry sheet over the filling. Trim any excess pastry and crimp the edges to seal. Cut a few small slits in the top to allow steam to escape. Whisk the 1 whole Egg with 1 tablespoon water and brush it over the pastry for a golden finish.
Step 4: Bake to Perfection
Bake for 30-35 minutes until the crust is deep golden brown and the filling is bubbling. If the crust begins to brown too quickly, tent the pie with foil.
Remove from the oven and let it rest for 10 minutes before serving. This allows the filling to set slightly, making it easier to serve. The crust should be flaky and crisp, and the filling rich and creamy.
Pro Tips For Making Barefoot Contessa Pot Pie
- Poach the Chicken: Simmer the chicken breasts in broth for 10-12 minutes until just cooked through—this keeps them moist, and you can use the poaching liquid for the sauce. I learned this the hard way after too many dry pot pies.
- Sauté the Onions Longer: Cook the yellow onions in butter for at least 8-10 minutes until golden and sweet. Sounds tedious, but it builds the flavor base that makes the filling taste rich and deep.
- Chill the Dough: Give your homemade crust (or even store-bought) 15 minutes in the fridge before rolling. My grandmother swore by this, and she was right: it prevents shrinking and keeps the layers flaky.
- Vent the Top: Cut a few small slits in the top crust before baking. After one exploded pie in my oven, I finally figured out that steam needs an escape route, or you’ll have a mess on your hands.
Health Benefits of These Flavors
Protein-Rich Comfort
This dish delivers 35 grams of protein per serving from the chicken breast, supporting muscle maintenance and keeping you full. The lean protein helps balance the richness of the buttery crust and creamy filling. 💪
Vegetable Nutrient Boost
With carrots, celery, and peas, you get a hefty dose of vitamin A and fiber. Carrots provide beta-carotene, while peas add vitamin K and folate. Together, they create a nutrient-dense, flavorful mix.
Energy-Sustaining Carbs
The puff pastry and flour in the filling offer complex carbohydrates for sustained energy. These carbs fuel your body, while the B vitamins in the whole-grain options support metabolism.
Healthy Fats Balance
While indulgent, the unsalted butter and heavy cream provide essential fatty acids. These fats help your body absorb fat-soluble vitamins from the vegetables. Moderation is key to enjoying this treat.
Comfort Without Guilt
Homemade versions let you control the ingredients—reducing sodium with low-sodium chicken stock and skipping preservatives. It’s a smarter way to enjoy classic comfort food. 🥗
Nutrition Facts
Frequently Asked Questions
Can I use store-bought pie crust instead of puff pastry?
Yes, but puff pastry gives that signature flaky crust. If using pie crust, roll it thin for best results. The texture will be slightly different but still delicious.
How do I prevent a soggy bottom crust?
Chill the assembled pie for 30 minutes before baking. Also, ensure the filling is thick and bubbly before adding the top crust. This creates a barrier against moisture.
Can I make this ahead of time?
Assemble the pie, cover tightly, and refrigerate for up to 1 day. Bake as directed, adding 5-10 minutes if cold.
What’s the best way to reheat leftovers?
Reheat in a 350°F oven for 15-20 minutes until the crust is crisp. Microwaving will make the crust soggy.

- 6 Oz Chocolate Chip Cookie Recipe: Perfectly Balanced Crispy Edges and Chewy Hearts - September 25, 2026
- 6-Inch Coffee Cake Recipe: Vanilla Bean Swirls and Buttery Streusel Topping - September 25, 2026
- 1 Hour Soup Recipe: Velvety Richness Without the Wait - September 25, 2026