
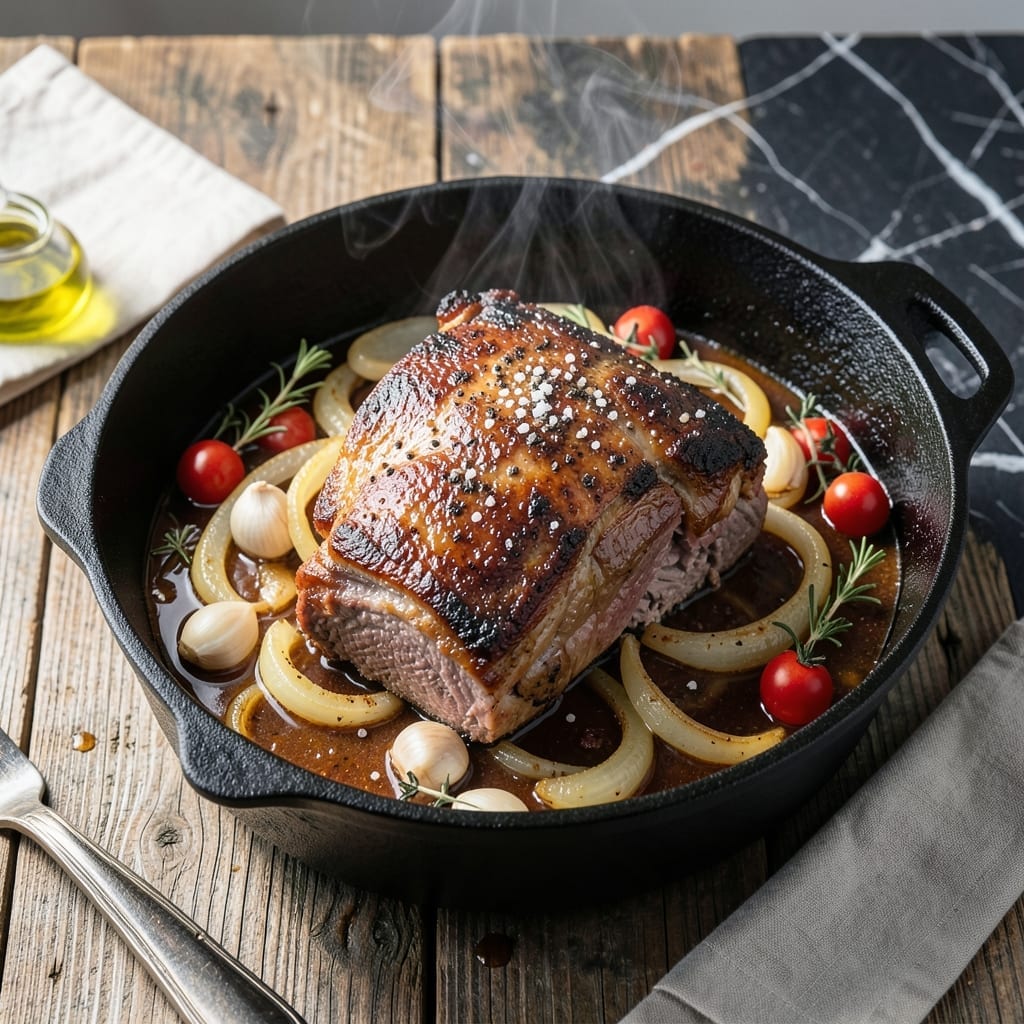
This oven-baked beef chuck pot roast transforms a humble cut into a fork-tender centerpiece that defines Sunday suppers.
Low and slow cooking breaks down the connective tissue, yielding meat so tender it falls apart at the touch. The oven’s dry heat creates a rich, caramelized crust while keeping the interior impossibly moist.
With just 5 ingredients and 3 hours of mostly hands-off time, you’ll achieve results that rival any professional kitchen. The aroma alone will gather the family around the table.
The secret lies in proper searing and maintaining a consistent 325°F temperature. Serve with roasted vegetables for a complete, comforting meal.
Ingredients for Beef Chuck Pot Roast Oven
Five essential ingredients transform humble beef chuck into an unforgettable Sunday supper centerpiece.
| Ingredient | Amount | Notes |
|---|---|---|
| Beef Chuck Roast 🥩 | 3 lb | Boneless, well-marbled preferred |
| Kosher Salt 🧂 | 2 tsp | Diamond Crystal preferred for even seasoning |
| Black Pepper 🌶️ | 1 tsp | Freshly ground for best flavor |
| Olive Oil 🫒 | 2 tbsp | Divided for searing and roasting |
| Yellow Onion 🧅 | 1 whole | Large, quartered for roasting |
| Garlic Cloves 🧄 | 4 cloves | Smashed but left whole |
| Fresh Rosemary Sprigs 🌿 | 2 whole | Woody stems removed |
| Fresh Thyme Sprigs 🍃 | 3 whole | Woody stems removed |
| Beef Broth 💧 | 1 cup | Low-sodium preferred for control |
| Red Wine 🍷 | ½ cup | Dry variety like Cabernet Sauvignon |
The beef chuck is non-negotiable here. Look for a well-marbled piece—fat equals flavor and tenderness. Most butchers will cube it for you if asked, but Costco and Whole Foods carry pre-cut chuck roast with excellent marbling. Avoid lean cuts like sirloin; they’ll dry out. The 3 lb size feeds four generously with leftovers for sandwiches the next day.
No red wine? Beef broth with a splash of balsamic vinegar mimics the acidity and depth. Fresh herbs are ideal, but dried at one-third the amount works—just add them directly to the liquid. For the onion, sweet varieties like Vidalia caramelize beautifully. If you’re out of fresh garlic, garlic powder at half the quantity can substitute, though fresh is preferred for this slow-cooked dish.
Leftovers keep beautifully. Refrigerate in an airtight container for up to 4 days, or freeze for 3 months. The flavors deepen overnight, making this even better reheated. Slice against the grain before storing for easier portioning later.
Why You’ll Love This Recipe
- I’ll be real: the sandwiches I make with the next-day beef might be even better than the original meal.
- Hands-Off Cooking: I just sear the beef, toss in onions, season, and let the oven do all the work for hours.
- Feeds a Crowd: Between us, this is my go-to for Sunday dinners when the whole family’s over.
- Leftovers for Days: I’ll be real: the sandwiches I make with the next-day beef might be even better than the original meal.
Step-by-Step Instructions for Beef Chuck Pot Roast
Master the art of slow-roasting with this time-tested technique for melt-in-your-mouth results.
Step 1: Season and Sear the Beef Chuck Roast
Pat the 3 lb Beef Chuck Roast completely dry with paper towels. This ensures a proper sear rather than steaming. Season all sides aggressively with the 2 tsp Kosher Salt and 1 tsp Black Pepper, pressing the seasoning into the meat so it adheres well.
Heat 1 tbsp Olive Oil in a large Dutch oven over medium-high heat until shimmering. Sear the roast for 4-5 minutes per side until deeply browned. The fond created here is the flavor foundation for your braising liquid.
Step 2: Prepare the Aromatic Base
After removing the roast, reduce heat to medium. Add the remaining 1 tbsp Olive Oil to the pot, then add the quartered Yellow Onion. Cook for 3-4 minutes, stirring occasionally, until the edges begin to caramelize.
Add the 4 cloves Garlic Cloves, 2 whole Fresh Rosemary Sprigs, and 3 whole Fresh Thyme Sprigs to the pot. Stir for 30 seconds until fragrant—this blooms the herbs and garlic, releasing their essential oils into the oil.
Step 3: Deglaze and Begin Braising
Pour in the 0.5 cup Red Wine to deglaze the pot, scraping up all the browned bits with a wooden spoon. Let it simmer for 2-3 minutes until reduced by half. This step dissolves the fond into the liquid, creating depth of flavor.
Return the beef chuck roast to the pot. Pour in the 1 cup Beef Broth around the meat. The liquid should come about halfway up the roast—this ensures even cooking without submerging the meat, which would make it steamed rather than roasted.
Step 4: Slow-Roast to Fork-Tender Perfection
Cover the Dutch oven tightly with its lid and transfer to a preheated 325°F oven. Roast for 2.5 to 3 hours, flipping the roast halfway through. The low and slow heat breaks down the collagen in the beef, transforming tough connective tissue into gelatin for that signature tenderness.
You’ll know it’s ready when a fork slides in and out with absolutely no resistance. The internal temperature should reach at least 195°F for optimal tenderness. Avoid the temptation to increase the heat—this would toughen the meat.
Step 5: Rest and Serve
Carefully transfer the roast to a cutting board, tent loosely with foil, and let it rest for 15-20 minutes. This allows the juices to redistribute throughout the meat, ensuring every bite is moist and flavorful.
Skimming excess fat from the braising liquid gives you a rich, velvety sauce to serve alongside the roast. Slice against the grain for maximum tenderness, and serve this Sunday centerpiece with the natural jus spooned over the top.
Pro Tips For Making Beef Chuck Pot Roast Oven
- Sear It Hard: Crank the oven to 450°F for the first 20 minutes to get a deep crust on that chuck—this is where all the flavor lives. I learned this the hard way after too many pale, sad roasts.
- Salt Overnight: Hit the beef with kosher salt at least 12 hours before cooking. Sounds weird, but it works: the meat stays juicier and seasons all the way through.
- Skip the Crowding: Don’t cram the onions under the roast—spread them around so they caramelize, not steam. Steer clear of this and you’ll get sweet, jammy bits instead of soggy mess.
- Use a Meat Thermometer: Pull it at 195°F internal temp, not a minute before. My grandmother swore by this, and she was right: anything less and the chuck stays chewy.
Dietary Considerations for This Dish
Gluten-Free By Nature
This dish is naturally gluten-free as written, since the recipe relies on whole ingredients like beef, herbs, and vegetables. Just ensure your beef broth and red wine are certified gluten-free, as some brands may contain additives. I always check labels on Swanson or Kitchen Basics broths. 💪
Low-Carb Friendly
With only 5g net carbs per serving from the onion and wine, this fits perfectly into keto or low-carb diets. The fat content from the 3 lb Beef Chuck Roast provides sustained energy, making it a satisfying meal without the carb crash.
Dairy-Free And Nut-Free
No dairy or nuts are used in this recipe, so it’s safe for those with lactose intolerance or nut allergies. The rich flavor comes purely from the beef and aromatic herbs—no need for butter or cream to achieve depth.
Sodium Considerations
To reduce sodium, use low-sodium beef broth and cut the Kosher Salt to 1 tsp. I also recommend rinsing the roast under cold water and patting dry before seasoning to remove any surface-level salt from processing.
Protein-Packed Meal
Each serving delivers approximately 50g of protein, ideal for muscle maintenance and repair. The slow cooking preserves all the natural proteins in the beef, making this a powerhouse meal for active lifestyles. 💛
Paleo And Whole30 Adaptations
For strict paleo or Whole30, omit the red wine and replace with an additional ½ cup beef broth. The dish still develops deep, rich flavors from the caramelized onions and herbs during the 3-hour roast.
Nutrition Facts
Frequently Asked Questions
What’s the best way to check doneness?
Use a meat thermometer to check the internal temperature. It’s done at 195°F when the collagen has fully broken down. A fork should slide in and out with no resistance.
Can I cook this without a Dutch oven?
Yes! Use a heavy oven-safe pot with a tight lid or cover a roasting pan with foil. The key is maintaining 325°F and keeping the environment moist during the 3-hour cook.
Why rest the meat before slicing?
Resting for 15-20 minutes allows juices to redistribute. Skipping this step means those flavorful juices will spill out onto the cutting board, leaving the meat dry.
What if my roast isn’t tender after 3 hours?
Return it to the oven for another 30-60 minutes. Chuck roast varies in toughness. Ensure there’s enough liquid and the oven is truly at 325°F.

- 6 Oz Chocolate Chip Cookie Recipe: Perfectly Balanced Crispy Edges and Chewy Hearts - September 25, 2026
- 6-Inch Coffee Cake Recipe: Vanilla Bean Swirls and Buttery Streusel Topping - September 25, 2026
- 1 Hour Soup Recipe: Velvety Richness Without the Wait - September 25, 2026