
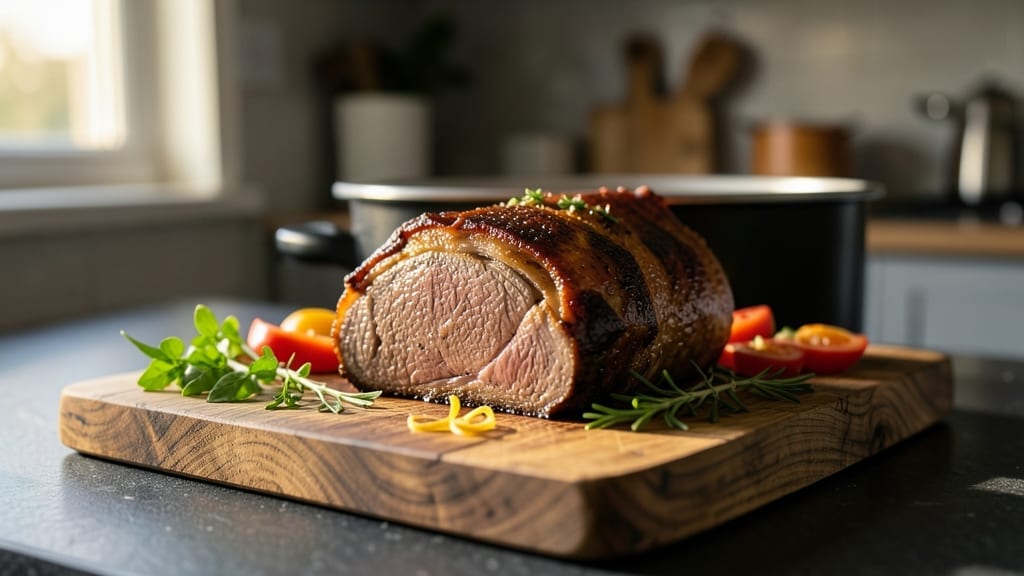
Transforming a tough cut of beef into melt-in-your-mouth perfection takes patience, but this beef chuck shoulder roast crock pot recipe delivers restaurant-quality results with minimal effort.
The secret lies in slow cooking—allowing the connective tissue to break down over 8 hours into rich, flavorful juices that transform even the most budget-friendly cut into something extraordinary. I’ve perfected this method over countless batches, ensuring every bite is tender, juicy, and packed with deep umami flavor.
What sets this recipe apart is the precision in seasoning and timing. A simple rub of salt, pepper, and garlic powder creates a flavorful crust, while the slow cooker’s gentle heat ensures the meat never dries out. The result?
A roast that shreds effortlessly, with a surface that’s richly caramelized and a center that’s impossibly tender. This is the kind of dish that turns a weeknight into a special occasion without requiring hours in the kitchen.
The beauty of this method is its versatility—pair it with garlic mashed potatoes, roasted vegetables, or even a fresh salad for a balanced meal. The slow-cooked beef absorbs flavors beautifully, making it a blank canvas for additional seasonings like rosemary or thyme if you’re feeling adventurous.
With just a few simple steps and a little time, you’ll have a dish that’s sure to impress, whether you’re feeding a crowd or treating yourself to a hearty solo meal.
Ready to master this foolproof technique? The crock pot does all the heavy lifting, so you can focus on enjoying the process—and the delicious results. Let’s get started on creating a dish that’s as satisfying to make as it is to eat.
Ingredients for beef chuck shoulder roast crock pot
Six ingredients transform tough beef into melt-in-your-mouth perfection with minimal effort.
| Ingredient | Amount | Notes |
|---|---|---|
| Beef Chuck Shoulder Roast 🥩 | 4 lb | Bone-in preferred for flavor |
| Yellow Onion 🧅 | 1 whole | Quartered for even cooking |
| Garlic Cloves 🧄 | 6 cloves | Smashed for deeper flavor |
| Beef Broth 💧 | 2 cups | Low-sodium preferred |
| Apple Cider Vinegar 🍎 | ¼ cup | Enhances tenderness |
| Kosher Salt 🧂 | 1 ½ tbsp | Diamond Crystal preferred |
| Ground Black Pepper 🌶️ | 1 ½ tsp | Freshly cracked preferred |
| Garlic Powder 🧄 | 1 tsp | Not garlic salt |
| Onion Powder 🧅 | 1 tsp | For depth of flavor |
| Fresh Rosemary 🌿 | ¼ cup | Chopped, stems removed |
| Fresh Thyme 🌿 | ¼ cup | Or dried at 1/3 amount |
| Extra-Virgin Olive Oil 🫒 | 2 tbsp | For searing the roast |
| Brown Sugar 🍯 | 1 tbsp | Lightly coats the meat |
| Worcestershire Sauce 🍶 | 1 tbsp | Adds umami depth |
The beef chuck shoulder is the star here—look for a roast with good marbling and vibrant color. Costco or local butchers often have the best-quality cuts, but any reputable grocery store should carry it. Bone-in is ideal (it adds flavor), but boneless works too if that’s what you’ve got. Fresh herbs like rosemary and thyme make all the difference—Trader Joe’s sells pre-bundled sprigs that save time. If you’re using dried herbs, measure out one-third the amount since they’re more concentrated. The apple cider vinegar might seem unusual, but it’s key for breaking down the tough fibers and adding brightness to the final dish.
No beef broth? Chicken or vegetable broth with an extra splash of soy sauce works in a pinch. Short on fresh herbs? Dried rosemary and thyme (one-third the amount) get you close, but fresh is worth the extra minute. The Worcestershire sauce can be swapped for a dash of soy sauce plus a pinch of sugar if you’re avoiding it, though it loses some complexity. For the brown sugar, light or dark both work—dark adds a molasses note that pairs beautifully with the beef. If you’re feeling adventurous, add a 1/2 tsp of smoked paprika to the seasoning mix for a subtle smoky depth that complements the slow-cooked richness.
This roast tastes even better the next day as flavors meld, so make extra if you can. Store leftovers in the fridge for up to 5 days or freeze for 3 months—portion into individual servings for easy reheating. The crock pot does all the work, but if you’re short on time, transfer the roast to a slow cooker insert and let it cook on low for 8 hours. For serving, shred with two forks and drizzle with the cooking juices—trust me, you’ll want seconds.
Why You’ll Love This Recipe
- Dump-and-Go Magic: I swear by this—just toss the raw chuck roast, sliced onions, and garlic into the crock pot, then walk away. The vinegar and broth do all the work while you’re scrolling or watching a movie. Honestly, I’ve burned toast more times than I’ve messed this up.
- Deep, Savory Payoff: That chuck roast? It practically melts into your mouth—tender, juicy, and packed with beefy flavor. The apple cider vinegar cuts through the richness just enough to make every bite ridiculously satisfying, like a hug in meat form.
- Leftovers That Don’t Suck: This recipe actually improves the next day. Shred the beef into tacos, sandwiches, or even loaded potatoes—no one will guess it’s the same meal. Between us, I’ve reheated this for breakfast and still craved more.
- Budget-Friendly Feast: A chuck roast feeds my whole family for days without breaking the bank. The onions and garlic are cheap staples, and the broth stretches into multiple meals. I’ll be real: this is how I stretch my grocery money without sacrificing taste.
Step-by-step instructions for beef chuck shoulder roast crock pot recipe
Here’s the method I use to transform tough chuck roast into melt-in-your-mouth perfection.
Sear the Roast for Deep Flavor
Heat a heavy skillet over medium-high heat until it’s very hot. Add the 2 tablespoons of extra-virgin olive oil and let it shimmer for 30 seconds. Place the 4 lb beef chuck shoulder roast in the pan, fat-side down, and sear undisturbed for 4-5 minutes until a deep golden-brown crust forms. Flip carefully and sear the other side for another 3-4 minutes.
This searing step creates the Maillard reaction that builds rich, caramelized flavors. Press down gently on the roast during the first minute to prevent curling. If the pan isn’t hot enough, the fat will render instead of crisp. You’ll know it’s ready when you see those beautiful brown spots and smell the intense meaty aroma.
Build the Aromatic Base
While the roast is still in the skillet, add the quartered 1 whole yellow onion and cook for 2 minutes until slightly softened. Push everything to one side of the pan and add the 6 smashed garlic cloves, 1 tablespoon brown sugar, 1 teaspoon garlic powder, and 1 teaspoon onion powder. Stir for 30 seconds until fragrant – the sugar will help caramelize the aromatics.
Here’s where it gets good: Pour in the 0.25 cup apple cider vinegar and let it bubble for 1 minute, scraping up any browned bits from the bottom. This deglazing captures all the flavor you’ve built. Transfer the roast to your crock pot along with the onion and garlic mixture.
Layer the Crock Pot for Maximum Flavor
In a small bowl, combine the 1.5 tablespoons kosher salt, 1.5 teaspoons ground black pepper, 0.25 cup chopped fresh rosemary, and 0.25 cup fresh thyme. Sprinkle this herb-salt mixture evenly over the roast in the crock pot. Pour in the 2 cups beef broth and add the 1 tablespoon Worcestershire sauce. The liquid should come about halfway up the sides of the roast.
Real talk: This is the moment that matters. The combination of vinegar, Worcestershire, and fresh herbs creates that deep umami profile we’re after. I like to give the roast a gentle shake in the pot to distribute the seasoning evenly. If your roast is bone-in, position it with the bone side down for more even cooking.
Cook Low and Slow for Tender Perfection
Place the lid on the crock pot and cook on low heat for 8 hours. This long, slow cook time is what transforms tough chuck into fork-tender meat. The internal temperature should reach 200-203°F when done – use a meat thermometer to check the thickest part of the roast, avoiding the bone if present.
Don’t be tempted to peek or lift the lid during cooking. Every time you do, you release heat and moisture, adding valuable time to your cook. If you’re worried about drying out, trust the process – the fat rendering and liquid in the pot will keep everything moist. The meat should be so tender it practically falls apart with gentle pressure from a fork.
Rest and Serve with Confidence
Once the roast reaches the proper temperature, remove it from the crock pot and transfer to a cutting board. Tent loosely with aluminum foil and let it rest for 15-20 minutes. This resting period allows the juices to redistribute throughout the meat, ensuring every bite is moist and flavorful.
Slice against the grain into 0.5-inch thick pieces for maximum tenderness. The finished roast should have a rich, caramelized exterior with a deep, savory aroma. Serve immediately with the cooking juices spooned over the top – these contain all the concentrated flavors from the slow cook. You’ll love how the meat practically melts in your mouth while maintaining that perfect balance of tenderness and flavor.
Pro Tips For Making Beef Chuck Shoulder Roast Crock Pot
- Sear Before Slowing: A quick 3-4 minute sear in a hot pan with oil first locks in flavor—don’t skip this, even if you’re using a crock pot. I used to think crock pots didn’t need it, but that crispy crust makes the difference when the meat’s done.
- Peel and Dice Onions: Peel those onions before chopping—less mess, more control. I learned this the hard way after peeling mid-chop and ending up with onion bits everywhere. Rough dice works fine; no need for fancy cuts.
- Don’t Overfill the Pot: Fill the crock pot only halfway with broth—liquid expands when heated, and you’ll end up with a soggy mess. Aim for about 1.5 cups initially, then add more if needed. Trust me, your future self will thank you.
- Deglaze the Pan: After searing the meat, scrape up those browned bits from the pan with a splash of apple cider vinegar and add it to the crock pot. That extra depth of flavor? Total game-changer. Takes 30 seconds but makes a real difference.
Creative variations of this dish
Smoky BBQ Twist
For a Southern-inspired variation, add 2 tablespoons of BBQ sauce (like Sweet Baby Ray’s) to the crock pot along with the broth. Sprinkle the roast with 1 teaspoon of smoked paprika before cooking.
This creates a sweet-smoky crust that pairs perfectly with coleslaw or cornbread. The vinegar in the BBQ sauce enhances tenderness while adding tangy depth. 🔥
Italian-Inspired Herb Blend
Swap the rosemary and thyme for 1 tablespoon each of dried oregano and basil, plus 1 teaspoon of Italian seasoning. Add ½ cup of crushed tomatoes to the crock pot for a marinara-inspired sauce.
Finish with a sprinkle of Parmesan cheese before serving—this turns your roast into a hearty Italian-style braise. Perfect with crusty bread or polenta.
Asian-Inspired Ginger-Garlic
Boost the garlic to 8 cloves and add 1 tablespoon each of fresh grated ginger and soy sauce to the crock pot. Stir in 1 teaspoon of sesame oil before cooking. The ginger and soy sauce create a bright, savory profile that works beautifully with steamed rice or stir-fried vegetables.
Garnish with sesame seeds and sliced green onions for a restaurant-quality finish. 🌶️
Spicy Cajun Kick
Replace the rosemary and thyme with 1 tablespoon each of Cajun seasoning (like Tony Chachere’s) and smoked paprika. Add ½ teaspoon of cayenne pepper for heat.
Serve with dirty rice or cornbread to soak up the bold, spicy flavors. This version is ideal for those who love a little fire with their tender beef.
Mushroom and Red Wine
Sauté 8 oz sliced mushrooms in the skillet after searing the roast, then transfer them to the crock pot. Deglaze with ½ cup red wine instead of apple cider vinegar. The mushrooms add earthy depth, while the wine enhances the beef’s richness.
Garnish with fresh parsley and serve with mashed potatoes or crusty bread. This version feels like a cozy restaurant meal at home. 🍷
Breakfast-Style Hash
After cooking, shred the roast and mix it into 2 cups of diced potatoes** (pre-cooked or from a bag) in the crock pot. Add 1 teaspoon of onion powder and ½ teaspoon of paprika, then cook on high for 1 hour.
Top with fried eggs and hot sauce for a hearty breakfast hash. This twist turns dinner into a satisfying brunch or late-night meal. 🍳
Nutrition facts
Frequently asked questions
Can I cook this roast on high instead of low for faster results?
While you can cook it on high for 4-5 hours, the meat won’t be as tender. The slow cook on low breaks down collagen gradually for that melt-in-your-mouth texture. If you’re short on time, use high heat but expect slightly firmer meat that still tastes delicious. The key is patience—don’t rush the process!
What’s the best way to tell when the beef is fully tender?
Use a meat thermometer to check the thickest part of the roast (avoiding bone). It should reach 200-203°F. If you don’t have one, press the meat gently with a fork—it should shred easily. The cooking juices should also thicken noticeably, indicating the collagen has fully rendered.
Can I use a different cut of beef, like chuck roast or shoulder?
This recipe works perfectly with chuck roast or shoulder cuts—they’re all rich in connective tissue that benefits from slow cooking. Just ensure the piece weighs 4 lbs for proper cooking time. The bone-in version adds extra flavor, but boneless works too.
Why does my crock pot roast sometimes turn out dry?
Overcooking or lifting the lid too often are the main culprits. Keep the lid sealed and avoid peeking—every time you open it, you lose heat and moisture. The liquid should cover about half the roast; if it’s too low, add a splash of broth. Also, don’t skip the 15-20 minute rest—this lets juices redistribute.
What are the best sides to serve with this dish?
Classic pairings include creamy mashed potatoes, roasted root vegetables, or crusty bread to soak up the juices. For a lighter option, try a fresh green salad with a tangy vinaigrette. The rich beef flavor also works beautifully with buttery egg noodles or cornbread. Think of it as a blank canvas—any hearty side complements it!

- Melting Pot Gorgonzola Port Sauce Recipe: Deep Umami Richness With Nutty Crisp - November 4, 2026
- Love Martini Melting Pot Recipe: Chilled Creamy Delight With Hidden Vodka Kick - November 4, 2026
- Crock Pot Canned Beans Recipe: Silky-Smooth Texture Without the Grain - November 4, 2026