
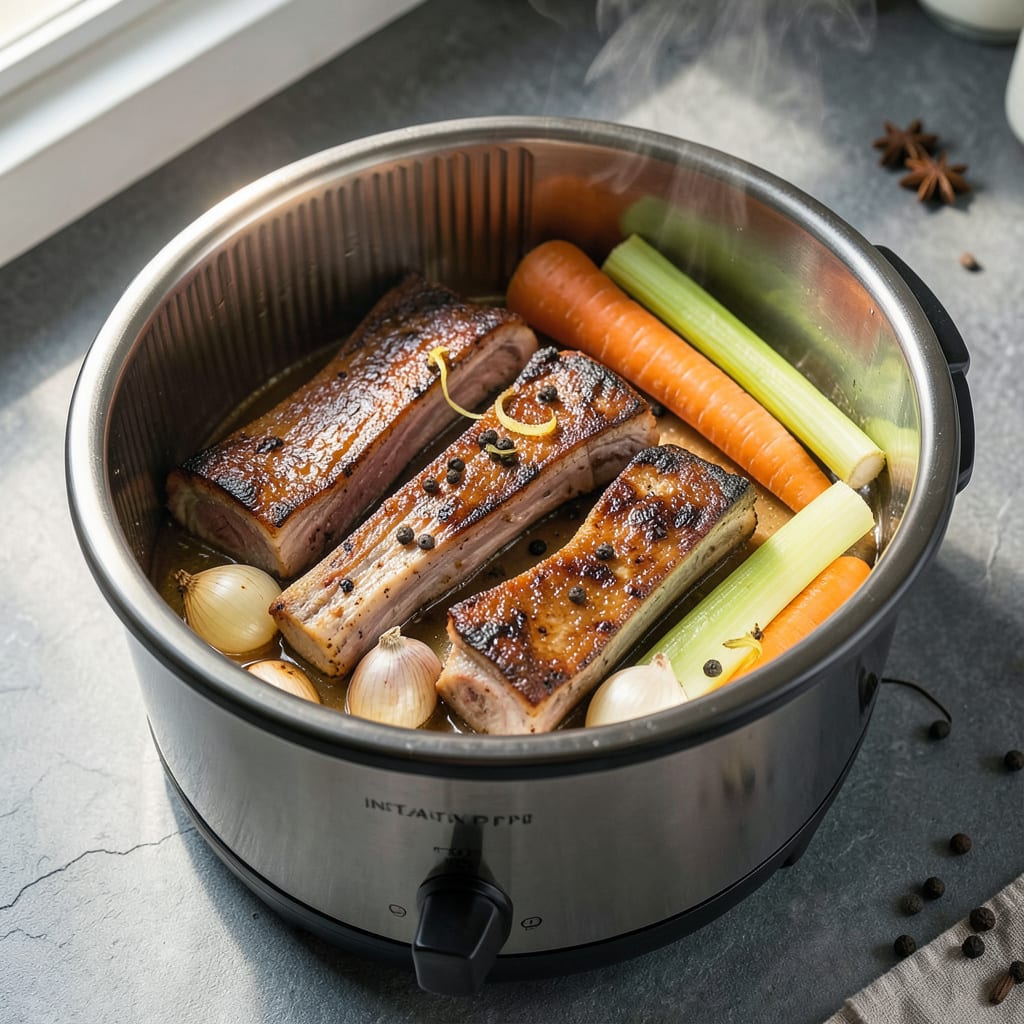
Homemade beef stock transforms ordinary dishes into restaurant-quality creations, and the Instant Pot makes this process remarkably efficient. This method delivers rich, deeply flavored stock in a fraction of traditional stovetop time, without sacrificing depth or body. The pressure cooker extracts maximum flavor from bones and aromatics while maintaining clarity in the final product.
What sets this approach apart is its precision—controlled pressure and timing ensure consistent results every time. You’ll produce 8 cups of golden, aromatic stock that serves as the foundation for soups, sauces, and braises. The technique works equally well with fresh or roasted bones, allowing customization based on your flavor preferences and available ingredients.
Ingredients for Beef Stock Recipe Instant Pot
Ten foundational ingredients yield 8 cups of intensely flavored, restaurant-quality beef stock with minimal active time.
| Ingredient | Amount | Notes |
|---|---|---|
| Beef Bones 🥩 | 4 lb | Marrow and knuckle preferred, fresh or roasted |
| Yellow Onions 🧅 | 2 whole | Quartered with skin on for color |
| Carrots 🥕 | 3 whole | Cut into 2-inch chunks, unpeeled |
| Celery Stalks 🌿 | 3 whole | Cut into 2-inch pieces, leaves included |
| Garlic Cloves 🧄 | 6 cloves | Smashed but unpeeled for depth |
| Whole Black Peppercorns 🌶️ | 1 tbsp | Lightly crushed for even distribution |
| Bay Leaves 🌿 | 2 whole | Fresh or dried, intact |
| Fresh Thyme Sprigs 🌿 | 4 sprigs | Tied with kitchen twine |
| Apple Cider Vinegar 🍏 | 2 tbsp | Balances richness, enhances extraction |
| Cold Water 💧 | 10 cups | Filtered preferred, covers ingredients |
The beef bones are non-negotiable for depth—marrow and knuckle bones deliver the most body and gelatin. Source from local butchers or high-end grocers like Whole Foods for grass-fed options, which produce cleaner-tasting stock. Roasting the bones (450°F for 30-45 minutes) adds caramelized complexity, but fresh bones work in a pinch. The apple cider vinegar isn’t just for acidity; its acetic properties extract up to 30% more collagen from bones during pressure cooking.
Substitutions must preserve the aromatic base: leeks or shallots can replace half the onions, while parsnips stand in for carrots. For herbs, rosemary or parsley stems work alongside thyme, but avoid dried herbs—they turn bitter under pressure. No black peppercorns? Use 1 tsp whole allspice berries for warmth without bitterness. The vinegar is critical; white wine or lemon juice lack the malic acid needed for proper extraction.
Stock keeps 5 days refrigerated in airtight containers, though it’s best used within 3 days for peak flavor. For long-term storage, freeze in 1-cup portions for up to 6 months—use silicone molds or ice cube trays for easy scaling. Skim solidified fat before using; it protects the stock during freezing but should be removed post-thawing. Label containers with the date; homemade stock’s potency fades faster than commercial versions.
Why You’ll Love This Recipe
- Dump-and-Go Magic: I toss in beef bones, roughly chopped onions, carrots, celery, and smashed garlic—no fancy prep. The Instant Pot does all the work while I fold laundry or scroll through my phone.
- Rich, Roasty Depth: Honestly, the pressure cooker pulls out so much flavor from those bones and veggies, it tastes like it simmered all day. That caramelized onion and garlic combo? Ridiculously good in soups or gravies.
- Soup Season MVP: This stock freezes perfectly in jars, so I always have it ready for chili nights, French onion soup, or even just cooking rice. Between us, it’s my secret weapon for weeknight meals.
- Pennywise & Practical: I use leftover beef bones from Sunday roasts and veggie scraps I’d normally toss. Two hours later, I’ve got 8 cups of stock for pennies—no store-bought carton can compete.
Step-by-Step Instructions for Beef Stock in the Instant Pot
This method delivers concentrated beef flavor in a fraction of traditional stovetop time while maintaining depth and clarity.
Step 1: Prepare and Brown the Beef Bones
Begin by arranging the 4 lb beef bones in a single layer in your Instant Pot. If using fresh bones, select marrow and knuckle cuts for optimal gelatin extraction. Set the Instant Pot to “Sauté” mode on high heat. Allow the bones to brown for 8-10 minutes, turning occasionally with tongs, until they develop a deep golden color.
The browning process creates the Maillard reaction, which develops complex flavor compounds essential for rich stock. You’ll notice the aroma shifting from raw meat to nutty, caramelized notes. If using pre-roasted bones, skip this step and proceed directly to pressure cooking.
Step 2: Add Vegetables and Aromatics
Place the 2 whole yellow onions (quartered with skin on), 3 whole carrots (cut into 2-inch chunks), and 3 whole celery stalks (with leaves) around the browned bones. Add the 6 cloves garlic (smashed but unpeeled), 1 tbsp whole black peppercorns (lightly crushed), 2 whole bay leaves, and 4 sprigs fresh thyme tied with kitchen twine.
The vegetable skins and celery leaves contribute subtle bitterness that balances the stock’s richness. Distribute the aromatics evenly around the bones to ensure uniform flavor extraction. Pour in the 2 tbsp apple cider vinegar—its acidity helps break down connective tissue and extract minerals from the bones.
Step 3: Deglaze and Pressure Cook
Carefully pour the 10 cups cold water into the Instant Pot, ensuring all ingredients are submerged. Use a wooden spoon to scrape any browned bits from the bottom of the pot—these fond particles contain concentrated flavor. Secure the lid and set the valve to “Sealing” position.
Select the “Pressure Cook” or “Manual” setting and program for 120 minutes at high pressure. The extended cook time allows for complete collagen breakdown while the sealed environment prevents moisture loss. You’ll observe the float valve rising as pressure builds—this indicates proper sealing.
Step 4: Natural Release and Straining
When the cooking cycle completes, allow the pressure to release naturally for 30 minutes. This gradual depressurization prevents violent boiling that could emulsify fat into the stock. After 30 minutes, carefully switch the valve to “Venting” to release any remaining pressure.
Set a fine-mesh strainer over a large bowl and line it with cheesecloth. Pour the entire contents through the strainer, resisting the urge to press on the solids—this would force cloudy particles into your stock. Discard the spent ingredients and transfer the clear, amber liquid to storage containers.
Step 5: Cool and Store Properly
Place the containers of hot stock in an ice bath to cool rapidly to 40°F within 2 hours, preventing bacterial growth. As it cools, you’ll see a layer of fat solidify at the surface—this can be removed after chilling or left intact for added flavor in cooking applications.
The finished stock should have a deep amber color, viscous body when chilled, and clean beef aroma without any burnt notes. Use within 5 days when refrigerated or freeze for up to 6 months in airtight containers. For concentrated flavor, reduce the stock by half before using in recipes.
Common Mistakes When Making This Recipe
Overfilling the Pot
One of the most common mistakes is exceeding the Instant Pot’s 2/3 full maximum capacity for liquids. With 4 lb bones and 10 cups water, you’re already at the limit. Overfilling risks clogging the pressure valve and creates safety hazards. I always leave 1 inch of headspace to account for expansion during cooking. 🔥
Skipping the Deglaze
Those browned bits stuck to the bottom after searing bones contain concentrated flavor compounds. Skipping the deglazing step means losing that depth. Use a wooden spoon to scrape every bit while adding water. I find tilting the pot slightly helps reach all corners. The 2 tbsp apple cider vinegar helps dissolve these fond particles completely.
Rushing Pressure Release
Immediately venting after cooking causes violent boiling that emulsifies fat into your stock, making it cloudy. Always allow a 30-minute natural release first. I set a timer to avoid temptation. The gradual depressurization also prevents splattering burns from hot steam. This patience ensures crystal-clear results every time.
Using Dried Herbs
Dried herbs like thyme or bay leaves become bitter under pressure cooking’s intense heat. The recipe specifies 4 fresh thyme sprigs and 2 whole bay leaves for a reason. If you must substitute, reduce dried quantities by half and add them in the last 30 minutes of cooking to prevent over-extraction.
Neglecting Fat Removal
The solidified fat layer that forms when chilled isn’t just unsightly—it can make your stock greasy. After refrigerating, use a spoon to lift off this ¼-inch fat cap. For easier removal, chill stock in a wide container. I save this fat for cooking potatoes or sautéing vegetables—nothing goes to waste!
Improper Storage
Leaving stock in the Instant Pot to cool overnight invites bacterial growth. Transfer to containers within 2 hours and use an ice bath to chill rapidly. For freezing, use airtight silicone molds or glass jars (leave 1-inch headspace). Label with dates—homemade stock loses potency after 6 months in the freezer. ✨
Nutrition Facts
Frequently Asked Questions
Can I use frozen beef bones for this?
Frozen bones work perfectly—just thaw them completely before browning. The freezing process actually helps break down cell walls, which can enhance flavor extraction. Pat them dry with paper towels for better browning in the Instant Pot.
Why do I need to brown the bones first?
Browning creates the Maillard reaction, developing deep, complex flavors that clear broths lack. The 8-10 minutes of searing transforms raw meat aromas into rich, nutty notes. Skipping this step results in a lighter, less robust stock.
How do I fix cloudy stock?
Cloudiness usually comes from emulsified fat or over-agitation. For clear results, avoid pressing solids when straining and never boil vigorously. If already cloudy, chill completely and skim off all fat—this often clarifies the liquid.
Can I reduce the cooking time?
The full 120 minutes is crucial for collagen extraction and depth. Shortening it risks weak, watery stock. If pressed for time, use pre-roasted bones and ensure you complete the full natural pressure release to preserve clarity.
What’s the best way to store leftover stock?
Portion into 1-cup silicone molds or ice cube trays for easy use. Freeze for up to 6 months in airtight containers, leaving 1-inch headspace for expansion. Refrigerated stock stays fresh for 5 days—skim fat before each use.

- 8 Bean Soup Recipe Crock Pot: Hearty Vegetable Medley in One Pot - September 25, 2026
- 4C Bread Crumbs Meatballs Recipe: Crispy Crust and Juicy Centers - September 25, 2026
- 6 Oz Chocolate Chip Cookie Recipe: Perfectly Balanced Crispy Edges and Chewy Hearts - September 25, 2026