
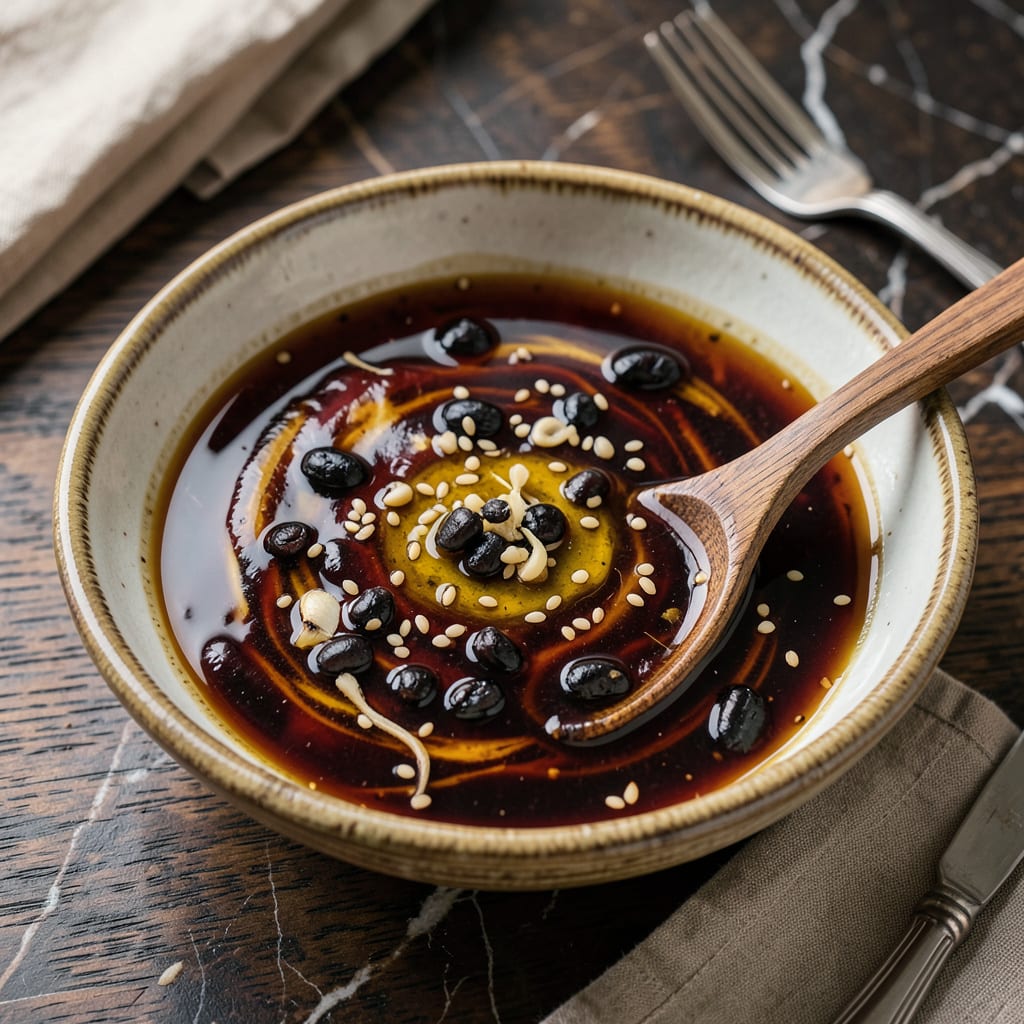
The perfect hot pot dipping sauce transforms a simple meal into an extraordinary experience. This recipe delivers a bold umami punch with balanced savory, spicy, and aromatic notes—designed to complement everything from delicate tofu to richly marbled beef. The foundation combines soy sauce, sesame oil, and chili paste in precise ratios for maximum flavor impact.
What sets this sauce apart is its versatility. Customize it with fresh garlic, cilantro, or lime juice to match your preferred heat level and flavor profile. Unlike store-bought alternatives, this homemade version maintains its vibrant taste and smooth texture for up to 5 days when refrigerated in an airtight container. The result is a restaurant-quality condiment that elevates every hot pot ingredient it touches.
Ingredients for Best Hot Pot Dipping Sauce
Ten precision-measured ingredients create this restaurant-quality dipping sauce with layered umami depth and customizable heat levels.
| Ingredient | Amount | Notes |
|---|---|---|
| Light Soy Sauce 🫙 | ½ cup | Low-sodium preferred for balance |
| Dark Soy Sauce 🫙 | 2 tbsp | For depth and caramelized notes |
| Toasted Sesame Oil 🫒 | 3 tbsp | Pure, 100% sesame oil only |
| Chili Garlic Sauce 🌶️ | 2 tbsp | Lee Kum Kee brand recommended |
| Fermented Black Beans ⚫ | 1 tbsp | Rinsed, finely chopped |
| Fresh Garlic Cloves 🧄 | 6 cloves | Minced to fine paste consistency |
| Fresh Cilantro 🌿 | ¼ cup | Stems removed, finely chopped |
| Scallions 🧅 | 3 whole | Thinly sliced, white and green parts |
| Fresh Lime Juice 🍋 | 1 ½ tbsp | Newly squeezed for brightness |
| Granulated Sugar 🍚 | 1 tsp | Balances salt and acidity |
The soy sauces form the foundation—Kikkoman for light and Pearl River Bridge for dark deliver optimal balance. Toasted sesame oil must be 100% pure (no blends); Kadoya is the professional standard. Fermented black beans add critical funk; find them in Asian markets or the international aisle. Fresh garlic is non-negotiable—pre-minced lacks the volatile compounds that create depth. For chili garlic sauce, Lee Kum Kee provides consistent heat and texture without artificial additives.
Substitutions require careful rebalancing. Tamari can replace light soy at a 1:1 ratio for gluten-free needs. No sesame oil? Toasted sesame seeds (2 tbsp) steeped in neutral oil for 30 minutes, then strained. Sriracha or gochujang may stand in for chili garlic sauce, but adjust quantities—sriracha lacks garlic complexity, while gochujang adds sweetness. Fresh cilantro is ideal, but flat-leaf parsley at half the amount works in a pinch. Lime juice may be replaced with rice vinegar, though the citrus brightness will differ.
Optimal storage maintains flavor integrity. Transfer to a glass container (plastic absorbs aromas) and refrigerate immediately. The sauce holds its vibrant flavor for 5 days—stir before each use as ingredients may separate. For longer storage, freeze in 1-ounce portions for up to 3 months; thaw overnight in the refrigerator. Avoid metal utensils when serving to prevent oxidation. The sauce’s potency increases after 24 hours as flavors meld—consider making it a day ahead for maximum impact.
Why You’ll Love This Recipe
- No-Chop Magic: I just dump everything in a bowl—no knives, no cutting board. The fermented black beans come pre-minced, and the sauces blend in seconds. Honestly, it’s the least fussy condiment I make.
- Umami Bomb: That first dip hits you with salty-sweet from the light and dark soy, then the chili garlic sauce sneaks in with heat, while the sesame oil ties it all together. The black beans add this funky depth that makes you go back for more.
- Hot Pot MVP: This sauce doesn’t just work for hot pot—it’s my secret weapon for dumplings, grilled meats, even roasted veggies. I’ll double the batch on Sundays and keep it in the fridge for the week’s takeout leftovers.
- Pennywise Flavor: A tiny bottle of toasted sesame oil and those fermented black beans stretch across so many meals. I spend maybe $10 total on ingredients, and they last for months in my pantry. No waste, all taste.
Step-by-Step Instructions for Hot Pot Dipping Sauce
This professional method ensures maximum flavor extraction and perfect balance in every bite.
Step 1: Prepare the Aromatic Base
Begin by finely mincing the 6 cloves fresh garlic cloves to a paste-like consistency. This fine texture ensures maximum flavor distribution throughout the sauce. Rinse and finely chop the 1 tbsp fermented black beans, removing any excess salt or brine that might overpower the balance.
In a small bowl, combine the minced garlic and chopped fermented black beans. The garlic’s sharpness will mellow as it sits, while the fermented beans contribute their signature umami depth. This aromatic foundation creates the complex flavor profile that defines exceptional dipping sauces.
Step 2: Balance the Soy Foundation
In a medium mixing bowl, whisk together the 0.5 cup light soy sauce and 2 tbsp dark soy sauce. The light soy provides the primary saltiness and umami, while the dark soy contributes caramelized depth and subtle sweetness. This combination creates a multidimensional soy base that’s richer than using either alone.
Add the 1 tsp granulated sugar to the soy mixture and stir until fully dissolved. The sugar doesn’t make the sauce sweet—it counterbalances the salt and enhances the natural umami flavors. You’ll notice the sauce becomes slightly more viscous as the sugar incorporates.
Step 3: Incorporate the Flavor Enhancers
To the soy base, add the 3 tbsp toasted sesame oil in a slow stream while whisking continuously. This emulsification process creates a silky texture and prevents oil separation. The toasted sesame oil should be pure and freshly opened for maximum nutty aroma.
Stir in the 2 tbsp chili garlic sauce, adjusting the quantity slightly if you prefer more or less heat. The sauce should develop a rich red hue while maintaining its pourable consistency. This is where the sauce gains its signature spicy-savory character that complements hot pot ingredients perfectly.
Step 4: Finish with Fresh Elements
Add the prepared garlic-black bean mixture to the sauce base, followed by the 0.25 cup fresh cilantro and thinly sliced 3 whole scallions. The fresh herbs should be added just before serving to preserve their bright, green flavors. Stir gently to combine without bruising the delicate herbs.
Finish with the 1.5 tbsp fresh lime juice, added last to maintain its citrus brightness. The lime’s acidity will cut through the richness of the sauce and balance the saltiness. Taste and adjust the lime quantity if needed—you want a subtle brightness, not sourness.
Step 5: Rest and Serve
Allow the completed sauce to rest for 10 minutes at room temperature before serving. This brief resting period lets the flavors meld and the aromatics infuse fully. The sauce should have a glossy sheen and coat the back of a spoon lightly.
Transfer to individual dipping bowls and serve immediately. Each component should be discernible—the heat from the chili garlic sauce, the umami from the soy and fermented beans, the freshness from the herbs, and the brightness from the lime—creating a harmonious yet complex dipping experience.
Essential Equipment for This Recipe
Mixing Bowls
For this sauce, I recommend using a medium glass mixing bowl (about 4-cup capacity). Glass won’t absorb odors or react with the acidic lime juice like some plastics can. My favorite is the Pyrex Smart Essentials set—their sturdy bases prevent tipping while whisking vigorously. 💡
Whisk Selection
A stainless steel balloon whisk is ideal for emulsifying the sesame oil into the soy base. The OXO Good Grips 11-inch whisk gives you perfect control without splattering. Avoid silicone whisks—they don’t create enough agitation for proper emulsification. The right whisk makes the sauce silky smooth.
Garlic Press
While you can mince garlic by hand, a garlic press creates the fine paste consistency needed here. I use the Zyliss Susie press—it extracts maximum juice and flavor without leaving fibrous bits. Press the cloves directly into your mixing bowl to capture every drop of aromatic oil.
Citrus Juicer
Fresh lime juice is non-negotiable, and a handheld citrus reamer ensures you get every last drop. The Chef’n FreshForce juicer is my go-to—it fits perfectly in lime halves and strains out seeds automatically. You’ll need about 2 medium limes to get the required 1.5 tbsp of juice.
Fine Mesh Strainer
If you prefer an ultra-smooth sauce texture, strain the finished product through a fine mesh sieve. The Cuisinox 5-inch strainer fits perfectly over dipping bowls. This step is optional but removes any fibrous bits from the garlic or herbs while keeping all the flavor.
Storage Containers
For storing leftovers, glass containers with airtight lids preserve flavor best. I use 16-ounce mason jars—they’re perfectly sized for this recipe and easy to clean. Avoid plastic containers as they can absorb the sesame oil’s aroma over time. The sauce keeps beautifully for 5 days refrigerated. ❄️
Nutrition Facts
Frequently Asked Questions
Can I make this sauce ahead of time?
The flavors actually deepen after 24 hours as the ingredients meld together. Store it in an airtight glass container for up to 5 days in the fridge. Just give it a quick stir before serving, as the sesame oil may separate slightly.
What if I don’t like spicy sauces?
No problem! Simply reduce or omit the chili garlic sauce. For a milder version, start with 1 tbsp instead of 2, or replace it with 1 tsp gochujang for a subtler heat. The sauce will still have rich umami flavor without the kick.
Can I use dried garlic instead of fresh?
Fresh garlic is ideal for its bold, aromatic flavor, but in a pinch, use 1 tsp garlic powder (not granules). Mix it with 1 tbsp water to create a paste before adding. Note that dried garlic lacks the sharpness and complexity of fresh, so the sauce may taste slightly flatter.
How do I adjust the sauce for gluten-free diets?
Swap the soy sauces for tamari at a 1:1 ratio. Tamari is naturally gluten-free and has a richer, less salty flavor, so you may want to reduce the sugar slightly. Always check labels to ensure no cross-contamination if serving to someone with celiac disease.
Why does my sauce taste too salty?
If the saltiness overpowers, balance it by adding 1 tsp honey or brown sugar and 1 tbsp lime juice. The sweetness and acidity will counteract the salt. Next time, try using low-sodium soy sauce or reducing the dark soy sauce by half.

- 8 Bean Soup Recipe Crock Pot: Hearty Vegetable Medley in One Pot - September 25, 2026
- 4C Bread Crumbs Meatballs Recipe: Crispy Crust and Juicy Centers - September 25, 2026
- 6 Oz Chocolate Chip Cookie Recipe: Perfectly Balanced Crispy Edges and Chewy Hearts - September 25, 2026