
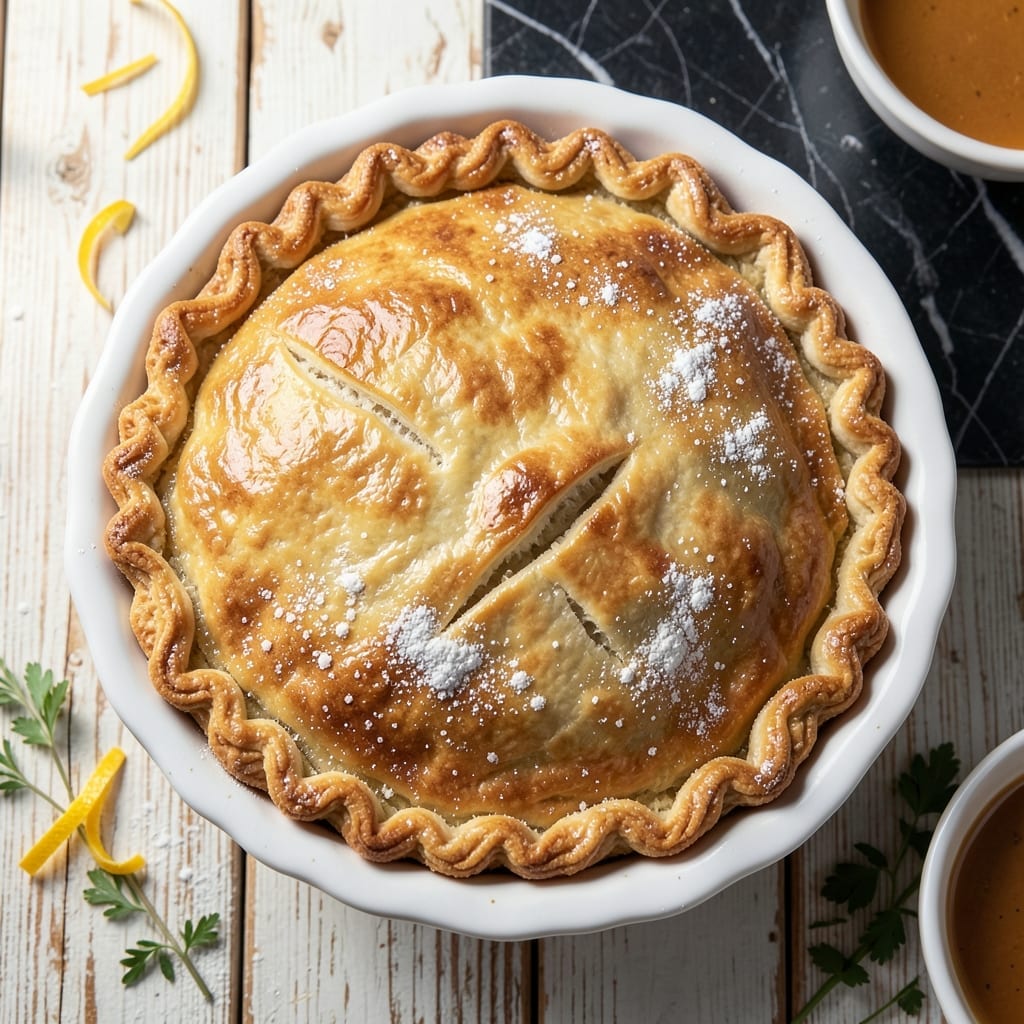
This crust delivers the flaky layers and golden finish that define classic pot pies. I developed this method to replicate Betty Crocker’s signature texture without complicated techniques or hard-to-find ingredients.
The secret lies in using very cold butter and minimal handling of the dough, which prevents gluten development and ensures tender layers. A touch of vinegar in the ice water also helps inhibit gluten formation for extra tenderness.
What results is a crust that bakes to a deep golden brown with distinct, flaky layers that shatter at the touch. It holds up beautifully to hearty fillings while maintaining a delicate, buttery texture that’s the hallmark of a well-made pie crust.
Perfect for both top and bottom crusts, this recipe works for any pot pie variation. Here’s how to achieve professional results at home.
Ingredients for Betty Crocker Pot Pie Crust
Eight ingredients transform into a golden, flaky crust worthy of Betty Crocker’s legacy.
| Ingredient | Amount | Notes |
|---|---|---|
| All-Purpose Flour 🌾 | 2 ½ cups | Sifted, plus extra for dusting |
| Salt 🧂 | 1 tsp | Fine sea salt preferred |
| Granulated Sugar 🍚 | 1 tsp | Balances salt and butter |
| Unsalted Butter 🧈 | 1 cup | Very cold, cubed into 1/2-inch pieces |
| Ice Water 💧 | ½ cup | Plus 1 tbsp white vinegar |
| White Vinegar 🍶 | 1 tbsp | Inhibits gluten formation |
| Large Egg 🥚 | 1 whole | For egg wash finish |
| Heavy Cream 🥛 | 1 tbsp | For egg wash richness |
The butter is non-negotiable here—only unsalted gives you control over seasoning. European-style with higher fat content (like Plugrá or Kerrigold) elevates the flavor and texture, but standard grocery store butter works if kept ice-cold. The flour should be all-purpose; avoid cake flour or bread flour, as their protein levels disrupt the delicate balance. Always measure by weight if possible, but volume works too (spoon and level method).
No vinegar? Lemon juice or vodka works at the same ratio—both inhibit gluten like vinegar. Short on butter? Shortening plus a splash of milk mimics the fat content, though flavor suffers. For a vegetarian crust, vegetable shortening (like Crisco) is the closest substitute. The egg wash can be skipped, but it’s the difference between pale and that coveted deep golden brown.
Dough keeps in the fridge for 2 days or freezes beautifully for 3 months (slice into rounds first for easy use). Baked crusts hold at room temperature for 24 hours—re-crisp in a 350°F oven for 5-10 minutes if needed. Always work on a lightly floured surface to prevent sticking.
Why You’ll Love This Recipe
- 5-Ingredient Magic: I love that it only needs flour, butter, salt, sugar, and ice water—no fancy ingredients, just pantry staples.
- Buttery Perfection: That flaky, golden crust from cold butter and ice water? It’s the kind of texture that makes people go back for seconds.
- Weeknight Hero: I can prep the dough while the filling simmers, making it a stress-free addition to any pot pie dinner.
Step-by-Step Instructions for Flaky Pot Pie Crust
Master the technique for perfect layers and a golden finish that rivals any bakery creation.
Step 1: Combine Dry Ingredients and Cut in Butter
In a large bowl, whisk together the 2.5 cups All-Purpose Flour, 1 tsp Salt, and 1 tsp Granulated Sugar until evenly distributed. The sugar isn’t for sweetness but to balance the salt and enhance the butter’s flavor.
Add the 1 cup Unsalted Butter, cubed into ½-inch pieces and very cold. Using a pastry cutter or your fingers, work the butter into the flour mixture until it resembles coarse crumbs with some pea-sized butter pieces visible. This uneven distribution creates the flaky layers we’re after.
Here’s the thing—the butter must stay cold. If it starts to soften, chill the mixture for 10 minutes before proceeding. Cold butter creates steam during baking, which separates the dough into those coveted flaky layers.
Step 2: Add Liquid and Form the Dough
In a small bowl, combine the 0.5 cup Ice Water and 1 tbsp White Vinegar. The vinegar inhibits gluten formation, which keeps the crust tender rather than tough. Create a well in the center of your flour-butter mixture.
Gradually pour the ice water mixture into the well, using a fork to gently stir until the dough just begins to come together. You’ll need about 6-8 tablespoons of the liquid—stop as soon as the dough holds when pressed. Overworking develops gluten, which is the enemy of flakiness.
Turn the shaggy dough onto a lightly floured surface and gently knead it into a smooth ball, handling it as little as possible. The dough should be slightly tacky but not sticky. If it’s too dry, add more ice water 1 teaspoon at a time.
Step 3: Chill and Roll Out the Dough
Divide the dough into two equal portions, flatten each into a 1-inch thick disc, wrap in plastic, and refrigerate for at least 1 hour (or up to 2 days). This chilling relaxes the gluten and re-solidifies the butter.
On a lightly floured surface, roll one disc into a 12-inch circle about ⅛-inch thick. For even thickness, rotate the dough a quarter turn after each roll. If the edges crack, press them together with your fingers—don’t worry about perfection.
Real talk: if the dough becomes too soft while rolling, slide it onto a baking sheet and refrigerate for 10-15 minutes to firm up. This prevents shrinking during baking and maintains those defined layers.
Step 4: Assemble and Finish with Egg Wash
Transfer the rolled dough to your pie dish, pressing it gently into the bottom and sides. Trim the edges, leaving a ½-inch overhang. For a double-crust pie, roll out the second disc and place it over the filling, then crimp the edges to seal.
In a small bowl, whisk together the 1 whole Large Egg and 1 tbsp Heavy Cream to create an egg wash. Brush this generously over the entire crust surface. The egg wash gives that professional golden sheen and helps the top crust brown evenly.
Cut several ½-inch slits in the top crust to allow steam to escape. This prevents the pie from bursting open in the oven and ensures even baking throughout.
Pro Tips For Making Betty Crocker Pot Pie Crust
- Chill the Butter: Cut your unsalted butter into small cubes and refrigerate for 15 minutes before mixing—this keeps it cold enough to create those flaky layers everyone loves.
- Measure Water Precisely: Use exactly 1/4 cup of ice water, no more. I learned this the hard way—too much makes the dough sticky, and too little leaves it crumbly.
- Don’t Overwork Dough: Mix just until the dough comes together, even if it looks a little shaggy. Overworking it makes the crust tough instead of tender.
- Rest Before Rolling: Let the dough rest in the fridge for at least 30 minutes before rolling. Sounds tedious, but it prevents shrinking and cracking when baking.
Make-Ahead Tips for This Dish
Prep Dough in Advance
Mix and shape the dough into discs, then wrap tightly in plastic wrap. Refrigerate for up to 2 days—this actually improves flavor as the butter fully chills and the gluten relaxes. I always prep my dough the night before for stress-free assembly. ❄️
Freeze for Future Use
For longer storage, freeze wrapped dough discs for up to 3 months. Thaw overnight in the fridge before rolling. For extra convenience, roll out the dough first, then freeze flat between parchment paper sheets.
Pre-Bake Crusts
Blind-bake crusts for 15 minutes at 375°F with pie weights, then cool completely. Store at room temperature for 24 hours in an airtight container. Re-crisp in a 350°F oven for 5-10 minutes before filling.
Assemble Unbaked Pies
Fully assemble pot pies (filling + crust) and freeze on a baking sheet. Once solid, wrap in foil and freeze for up to 2 months. Bake from frozen, adding 10-15 minutes to the baking time.
Egg Wash Prep
Whisk the egg and cream for the wash up to 1 day ahead. Store covered in the fridge. The fat in the cream prevents the egg from drying out and keeps the wash smooth for brushing.
Day-Of Efficiency
If making same-day, keep all ingredients cold until use. I pre-measure everything and set it in the freezer for 10 minutes while prepping the filling. This ensures the butter stays cold for maximum flakiness. 💡
Nutrition Facts
Frequently Asked Questions
Can I use shortening instead of butter?
Yes, but flavor will be less rich. Use 1 cup cold vegetable shortening as a direct substitute. Butter provides better taste and color, while shortening creates a slightly flakier texture.
Why does the dough need to chill?
Chilling relaxes the gluten and re-solidifies the butter for 1 hour minimum. This prevents shrinking during baking and ensures distinct, flaky layers. Skip this step and your crust may toughen.
Can I make this without vinegar?
Substitute with 1 tbsp lemon juice or vodka. These acids perform the same gluten-inhibiting function. Without any acid, the crust may be slightly less tender but will still work.
How do I prevent a soggy bottom crust?
Blind-bake the bottom crust for 15 minutes at 375°F before adding filling. Also brush the baked crust with a thin layer of egg wash to create a moisture barrier.

- 6 Oz Chocolate Chip Cookie Recipe: Perfectly Balanced Crispy Edges and Chewy Hearts - September 25, 2026
- 6-Inch Coffee Cake Recipe: Vanilla Bean Swirls and Buttery Streusel Topping - September 25, 2026
- 1 Hour Soup Recipe: Velvety Richness Without the Wait - September 25, 2026