
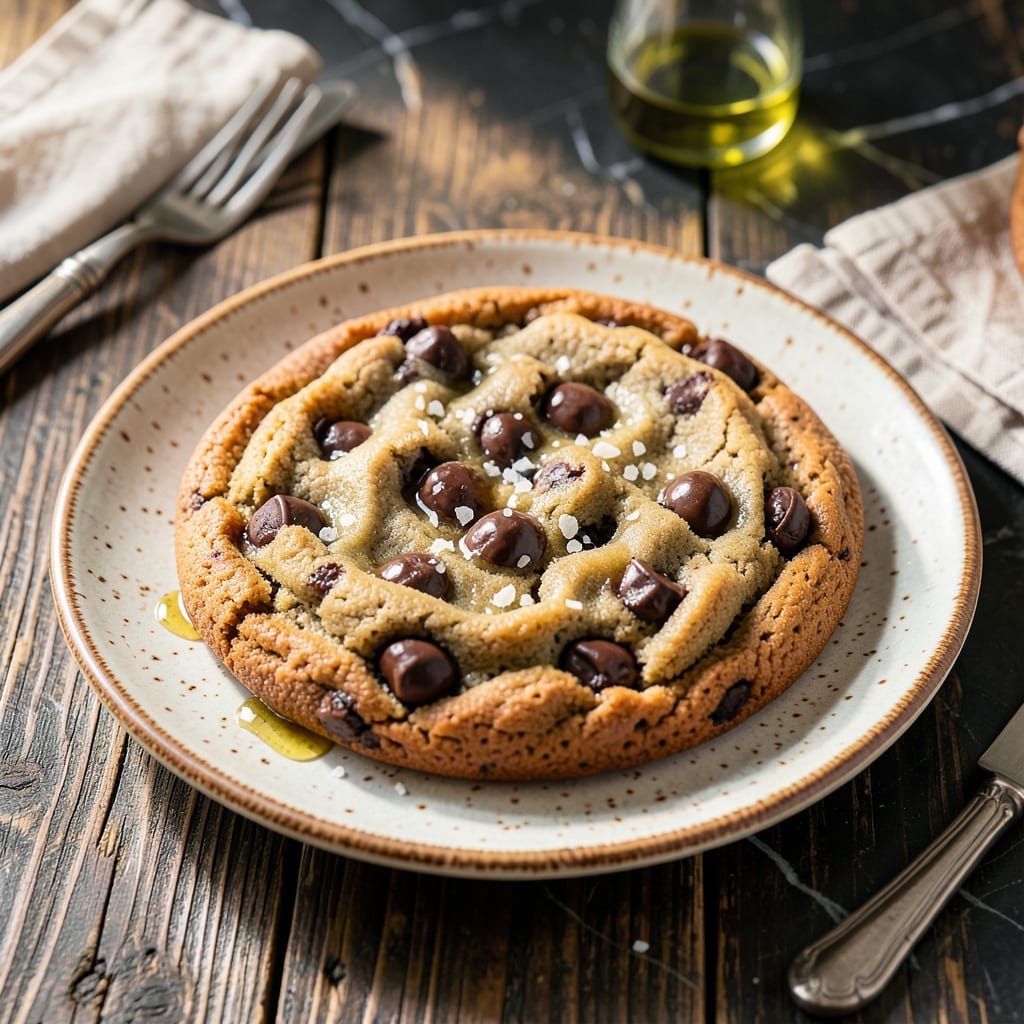
I’ve spent years perfecting this cookie recipe to achieve that elusive bakery-style texture. The secret lies in the right balance of ingredients and a crucial chilling step that prevents excessive spreading.
What you’ll get are big fat cookies with crisp edges, chewy centers, and pools of melted chocolate in every bite. This method delivers consistent results that rival any professional bakery.
Ingredients for Big Fat Chocolate Chip Cookie
A handful of quality ingredients transforms into bakery-style cookies with ease.
| Ingredient | Amount | Notes |
|---|---|---|
| All-Purpose Flour 🌾 | 2 ¾ cups | Spoon and level method |
| Baking Soda 🧂 | 1 tsp | Ensures proper rise |
| Cornstarch 🌾 | 2 tsp | For chewy texture |
| Salt 🧂 | 1 tsp | Fine sea salt preferred |
| Unsalted Butter 🧈 | 1 cup | Melted and cooled slightly |
| Dark Brown Sugar 🧈 | ¾ cup | Packed firmly |
| Granulated Sugar 🧂 | ¾ cup | Balances sweetness |
| Large Eggs 🥚 | 2 whole | Room temperature |
| Vanilla Extract 🌿 | 2 tsp | Pure vanilla preferred |
| Chocolate Chips 🍫 | 2 cups | Semi-sweet or bittersweet |
| Chocolate Bar 🍫 | 8 oz | Chopped into chunks |
| Walnut Halves 🌰 | 1 cup | Toasted and chopped |
The butter is critical here—Land O’Lakes or Plugrá for their high fat content (82-83%). Brown sugar with a higher molasses content (like Domino) gives deeper flavor and chewiness. The flour should be all-purpose, not bread flour, which would make the cookies too dense. For chocolate, Ghirardelli or Guittard chips have the right melt and flavor profile for bakery-style results.
No dark brown sugar? Light brown plus 1 tbsp molasses works. Out of cornstarch? Skip it, but texture won’t be as thick. For a nut-free version, omit walnuts or swap for toasted pecans. Vanilla can be imitation in a pinch, but pure extract makes a noticeable difference. The eggs are essential for structure—no easy substitute for this recipe.
Dough keeps refrigerated for 3 days or freezes beautifully for 3 months. Baked cookies stay fresh in an airtight container for 5 days. For best results, chill dough 24-48 hours before baking (worth the wait).
Why You’ll Love This Recipe
- One Bowl Wonder: I just dump everything in one bowl—no mixer, no fuss, and the cornstarch makes them extra tender.
- Buttery Heaven: The unsalted butter browns slightly in the oven, giving that rich, caramelized depth.
- Crowd Pleaser: Honestly, I’ve made these for bake sales, picnics, and midnight snack attacks—always a hit.
- Stays Soft: Between us, they stay chewy for days thanks to that cornstarch trick—no sad, stale cookies here.
Step-by-Step Instructions for Big Fat Chocolate Chip Cookies
This method ensures thick, bakery-style cookies with crisp edges and a chewy center every time.
Step 1: Cream Butter and Sugars to Perfection
In a stand mixer fitted with the paddle attachment, beat the 1 cup Unsalted Butter with the 0.75 cup Dark Brown Sugar and 0.75 cup Granulated Sugar on medium speed for 3-4 minutes. The mixture should become light and fluffy, nearly doubling in volume.
This creaming process incorporates air, which is essential for achieving that signature thickness. The butter must be melted and cooled slightly—too hot, and it won’t cream properly; too cold, and it won’t blend smoothly. Stop when the mixture is pale and ribbon-like in texture.
Step 2: Incorporate Eggs and Vanilla
Add the 2 whole Large Eggs, one at a time, mixing on low speed for 30 seconds after each addition until fully emulsified. Then add the 2 tsp Vanilla Extract and mix for another 10 seconds.
The eggs provide structure, while the vanilla deepens the flavor. Room temperature eggs blend more evenly, so take them out of the fridge at least 30 minutes before starting. The mixture may look slightly curdled at this stage—this is normal and will resolve once the dry ingredients are added.
Step 3: Combine Dry Ingredients and Mix Dough
In a separate bowl, whisk together the 2.75 cups All-Purpose Flour, 1 tsp Baking Soda, 2 tsp Cornstarch, and 1 tsp Salt. Gradually add this to the wet ingredients, mixing on low speed for 30-45 seconds until just combined. Avoid overmixing to prevent developing gluten, which would toughen the cookies.
The cornstarch is the secret to that soft, bakery-style texture—it tenderizes the gluten, giving the cookies their signature chew. Stop mixing as soon as the flour disappears; a few streaks are fine and will incorporate during the next step.
Step 4: Fold in Chocolate and Walnuts
Remove the bowl from the mixer and fold in the 2 cups Chocolate Chips, chopped 8 oz Chocolate Bar, and toasted, chopped 1 cup Walnut Halves by hand using a silicone spatula. This ensures even distribution without overworking the dough.
Use a mix of chocolate chips and chopped bar chocolate for varied texture—chips melt evenly, while chunks create gooey pockets. If you prefer nut-free cookies, simply omit the walnuts. The dough will be thick and slightly sticky; this is exactly what you want for big, fat cookies.
Step 5: Chill, Scoop, and Bake
Cover the dough and refrigerate for at least 1 hour (or up to 48 hours). Chilling solidifies the butter, preventing excessive spreading. Preheat the oven to 350°F and line baking sheets with parchment paper.
Scoop the dough into 3.5-ounce portions (about ⅓ cup each) and place them 3 inches apart on the sheets. Bake for 14-16 minutes until the edges are golden brown but the centers are still soft. They’ll continue cooking on the pan, so remove them just before they look fully done. Let cool on the baking sheet for 10 minutes before transferring to a wire rack.
Pro Tips For Making Big Fat Chocolate Chip Cookie
- Chill the Dough: After mixing, refrigerate the dough for at least 1 hour—this prevents the butter from melting too fast in the oven, keeping your cookies thick and chewy.
- Cream Butter Thoroughly: Beat the unsalted butter until it’s pale and fluffy, about 3-4 minutes; this traps air for a lighter texture, and I learned this the hard way after ending up with dense cookies.
- Measure Flour Correctly: Spoon the all-purpose flour into your measuring cup and level it off—scooping directly from the bag packs it down, and you’ll end up with dry, cakey cookies.
- Pull Early: Take the cookies out when the edges are golden but the centers still look soft—they’ll firm up as they cool, and waiting too long makes them overbaked.
Essential Equipment for Perfect Results
Stand Mixer Necessity
A stand mixer with paddle attachment is non-negotiable for this dough. I use my KitchenAid 5-Quart—it handles the thick dough without straining. The creaming step requires 3-4 minutes of mixing to incorporate enough air for that perfect rise. 💪
Accurate Scales
For consistent results, a digital kitchen scale is essential. I recommend the OXO Good Grips 11lb scale for its precision and easy-to-read display. Measuring by weight eliminates the variability of the spoon-and-level method.
Cookie Scoop
A large cookie scoop (3.5-ounce capacity) ensures uniform portions. The OXO Good Grips model has a comfortable grip and a sweeper to release sticky dough cleanly. This guarantees even baking and that signature big, fat shape.
Baking Sheets
Use heavy-duty, light-colored baking sheets—I swear by Nordic Ware half-sheets. Dark pans can cause over-browning on the bottoms. Line with parchment paper for easy release and cleanup.
Cooling Racks
A wire cooling rack is crucial for preventing soggy bottoms. I use stackable racks to save space. Let cookies cool for 10 minutes on the baking sheet first, then transfer to finish cooling completely. 🌟
Chilling Tools
An airtight container is key for chilling dough. I use glass containers with snap-on lids. For portioning, a spring-loaded ice cream scoop works perfectly if you don’t have a cookie scoop.
Nutrition Facts
Frequently Asked Questions
Why do I need to chill the dough?
Chilling solidifies the butter, preventing excessive spreading during baking. This ensures your cookies stay thick and fat with crisp edges. For best results, chill for 24-48 hours to develop maximum flavor.
Can I use salted butter instead?
Yes, but reduce the added salt by ½ teaspoon. Salted butter varies in sodium content, so adjust carefully to avoid over-salting. Unsalted butter is preferred for consistent results.
How do I make them extra chewy?
Use dark brown sugar instead of light, as the extra molasses adds moisture. Also, slightly underbake them—remove when edges are golden but centers are still soft.
Why are my cookies flat?
This usually happens if the butter was too warm or the dough wasn’t chilled long enough. Ensure butter is melted and cooled, and chill dough for at least 1 hour before baking.

- 8 Bean Soup Recipe Crock Pot: Hearty Vegetable Medley in One Pot - September 25, 2026
- 4C Bread Crumbs Meatballs Recipe: Crispy Crust and Juicy Centers - September 25, 2026
- 6 Oz Chocolate Chip Cookie Recipe: Perfectly Balanced Crispy Edges and Chewy Hearts - September 25, 2026