
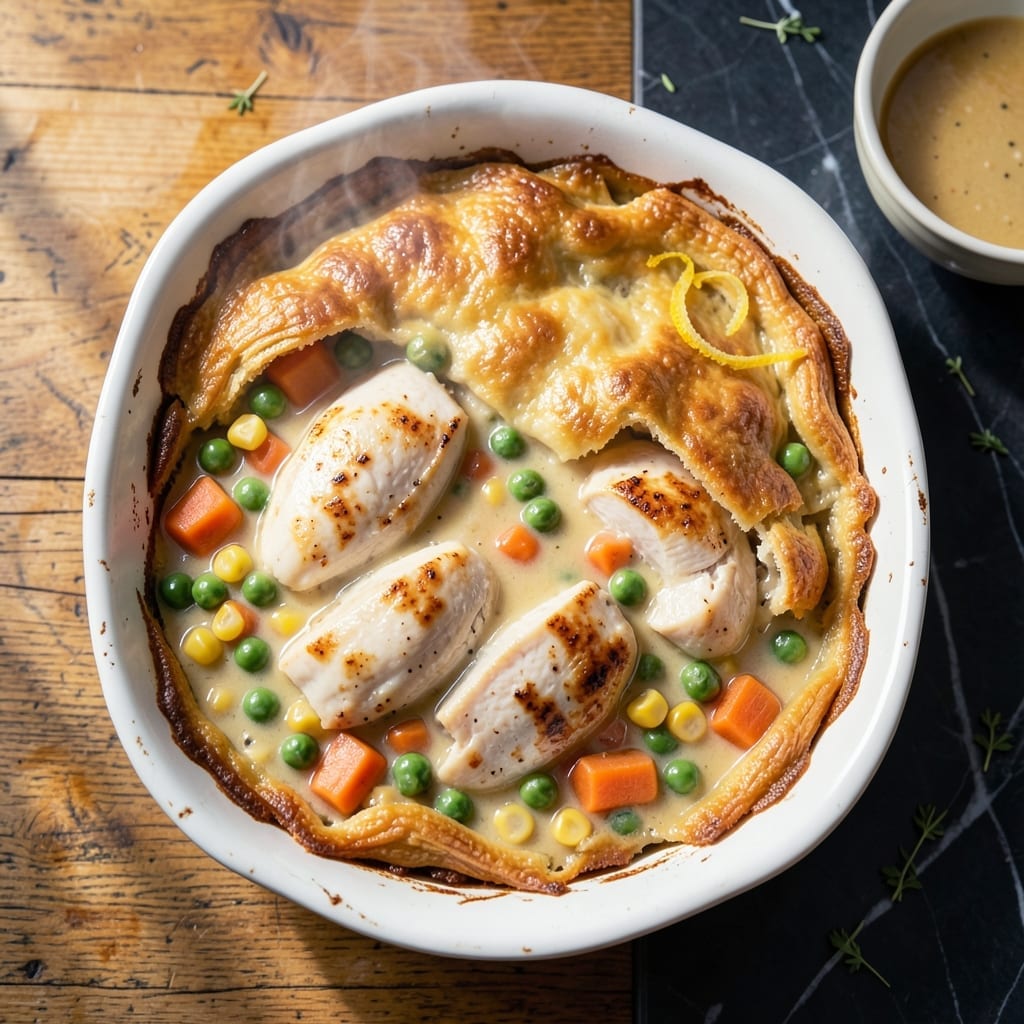
There’s a reason chicken pot pie remains a beloved comfort food classic. This casserole version delivers all the creamy goodness with a flaky Bisquick topping that bakes to golden perfection.
I developed this method to streamline the traditional process while maintaining that rich, hearty filling we all crave. The Bisquick topping creates a biscuit-like layer that’s quick to prepare and impossible to resist.
What you get is a complete meal in one dish—tender chicken, vegetables in a velvety sauce, all crowned with that perfect golden crust. It’s the kind of dinner that brings everyone to the table.
Perfect for busy weeknights or when you need comfort without the fuss. Here’s how to make it.
Ingredients for Bisquick Chicken Pot Pie Recipe Casserole
Pantry staples and a few fresh additions make this cozy classic shine bright.
| Ingredient | Amount | Notes |
|---|---|---|
| Boneless Skinless Chicken Breasts 🍗 | 1 ½ lb | Cubed into bite-sized pieces |
| All-Purpose Flour 🌾 | ½ cup | For thickening the sauce |
| Unsalted Butter 🧈 | ½ cup | Divided for sauce and topping |
| Chicken Broth 💧 | 2 cups | Low-sodium preferred |
| Whole Milk 🥛 | 1 cup | Full-fat for creaminess |
| Frozen Mixed Vegetables 🥕 | 2 cups | Peas, carrots, corn, green beans |
| Yellow Onion 🧅 | 1 whole | Medium, finely diced |
| Garlic Cloves 🧄 | 2 cloves | Minced for depth of flavor |
| Salt 🧂 | 1 tsp | Divided to taste |
| Black Pepper 🌶️ | ½ tsp | Freshly ground preferred |
| Dried Thyme 🌿 | ½ tsp | For earthy warmth |
| Bisquick Baking Mix 🍞 | 2 cups | Original flavor, for topping |
The Bisquick is non-negotiable here—original flavor only. Most grocery stores carry it in the baking aisle. I grab mine from Target or Walmart when stocking up. For the chicken, thighs work too (and stay juicier), but breasts are what I usually have on hand. Look for good color and no off smells. The veggies? Frozen is actually better than fresh here (no prep, same texture).
No chicken broth? Vegetable broth in a pinch, but the flavor changes a bit. Swap the milk for half-and-half if you want it extra rich. Fresh thyme can replace dried at triple the amount. The mixed veggies can be whatever you’ve got—just keep the total around 2 cups. Short on time? Rotisserie chicken shreds beautifully into this.
Assemble and bake immediately, or prep the filling ahead and refrigerate for up to 1 day. Leftovers keep for 4-5 days in the fridge. The topping softens over time, so reheat in the oven to crisp it back up.
Why You’ll Love This Recipe
- No-Fuss Dinner: I dump everything in one dish—Bisquick on top, creamy chicken filling below—and let the oven do the work.
- Buttery Comfort: The flaky Bisquick crust soaking up that rich chicken broth and milk sauce? Pure cozy goodness.
- Feeds the Gang: Honestly, it’s my go-to for potlucks or when the kids bring friends over last minute.
- Stretches Further: Leftovers taste even better the next day, and it’s way cheaper than takeout for my family of five.
Step-by-Step Instructions for Bisquick Chicken Pot Pie Casserole
This method delivers a creamy filling with a golden, flaky topping in record time.
Step 1: Sauté Aromatics and Cook Chicken
Heat a large skillet over medium heat and melt ¼ cup of the unsalted butter. Add the finely diced yellow onion and cook for 3-4 minutes until translucent and soft. Stir in the minced garlic cloves and cook for 30 seconds until fragrant.
Add the cubed boneless skinless chicken breasts and cook for 5-6 minutes, stirring occasionally, until the pieces are no longer pink and just cooked through. The chicken will finish cooking in the sauce, so don’t overdo it here.
I like to season the chicken with ½ tsp salt, ½ tsp black pepper, and the dried thyme at this stage. This builds layers of flavor right from the start.
Step 2: Create the Creamy Filling
Sprinkle the all-purpose flour evenly over the chicken and stir to coat. Cook for 1 minute to remove the raw flour taste. Slowly pour in the chicken broth and whole milk, whisking constantly to avoid lumps.
Bring the mixture to a gentle simmer over medium heat and cook for 3-4 minutes until the sauce thickens enough to coat the back of a spoon. The sauce should be rich and velvety, not thin or watery.
Stir in the frozen mixed vegetables and remaining ½ tsp salt. Cook for another 2 minutes to heat the vegetables through and blend all the flavors. The filling should be thick and hearty.
Step 3: Prepare and Add the Bisquick Topping
In a separate bowl, combine the Bisquick baking mix with the remaining ¼ cup melted unsalted butter. Use a fork to mix until the texture resembles coarse crumbs. This topping will bake into a flaky, golden crust.
Transfer the chicken and vegetable filling to a greased 9×13-inch baking dish. Spread it out evenly so the topping bakes uniformly. Sprinkle the Bisquick mixture evenly over the filling, ensuring full coverage for that perfect flaky layer.
Step 4: Bake to Golden Perfection
Preheat your oven to 375°F. Bake the casserole for 25-30 minutes until the topping is golden brown and the filling is bubbly around the edges. You’ll know it’s done when the crust looks crisp and the sauce beneath is hot and thick.
Let it rest for 5 minutes before serving. This brief pause allows the filling to set slightly, making it easier to serve clean portions. The topping should be flaky and tender, not soggy.
Pro Tips For Making Bisquick Chicken Pot Pie Recipe Casserole
- Pre-Cook the Chicken: Poach or sauté the chicken breasts in the broth first—this keeps them moist and infuses extra flavor into the filling. I learned this the hard way after pulling dry, stringy chicken from too many pot pies.
- Chill the Broth Mix: After making the roux with butter, flour, and milk, let it cool for 5 minutes before adding to the Bisquick topping. Sounds weird, but it works: it prevents a gummy, dense crust.
- Skip Overmixing the Topping: Stir the Bisquick batter just until the dry spots disappear—overworking it makes the casserole topping tough. My grandmother swore by this, and she was right.
- Use Warm Broth: Heat the chicken broth before adding it to the roux. Cold broth slows everything down and can make your filling lumpy. After burning three batches, I finally figured out this simple fix.
Troubleshooting Perfect Results
Soggy Topping Fix
If your Bisquick topping comes out dense or soggy, it likely didn’t get hot enough. Bake at 375°F for the full 30 minutes, and check that your oven reaches the correct temperature with an oven thermometer. I always use my Taylor Classic for accuracy. 🌡️
Thin Filling Rescue
A watery filling usually means the sauce wasn’t thickened properly. Simmer the mixture for an extra 2-3 minutes after adding the flour and liquids. The filling should coat the back of a spoon before baking.
Uneven Baking
Spread the filling evenly in your 9×13-inch baking dish and ensure the Bisquick topping is distributed in a uniform layer. Rotate the dish halfway through baking for consistent browning. This prevents burnt edges and a pale center.
Dry Chicken Prevention
Avoid overcooking the chicken during the initial sauté. Cook just until it’s no longer pink (about 5-6 minutes), as it will continue cooking in the sauce and oven. I often pull mine off the heat when it’s still slightly underdone.
Topping Too Thick
If your topping seems dry or crumbly before baking, add 1-2 tbsp milk to the Bisquick mixture. This helps it bind better and creates a more cohesive crust. The texture should resemble wet sand.
For extra richness, replace the milk with melted butter for a crispier finish. 💡
Nutrition Facts
Frequently Asked Questions
Can I use chicken thighs instead of breasts?
Chicken thighs stay juicier and add richer flavor. Cook them for 5-6 minutes just like breasts, as they’ll finish in the sauce.
Why is my topping not browning?
Your oven may run cool. Try baking at 400°F for the last 5 minutes. Also, ensure the Bisquick is evenly spread in a thin layer before baking.
Can I make this ahead of time?
Yes! Assemble the casserole, cover, and refrigerate for up to 1 day. Add 5 minutes to baking time if starting cold.
What if I don’t have Bisquick?
Mix 2 cups flour, 1 tbsp baking powder, 1 tsp salt, and ¼ cup cold butter for a similar effect. The texture will be slightly denser.

- 6 Oz Chocolate Chip Cookie Recipe: Perfectly Balanced Crispy Edges and Chewy Hearts - September 25, 2026
- 6-Inch Coffee Cake Recipe: Vanilla Bean Swirls and Buttery Streusel Topping - September 25, 2026
- 1 Hour Soup Recipe: Velvety Richness Without the Wait - September 25, 2026