
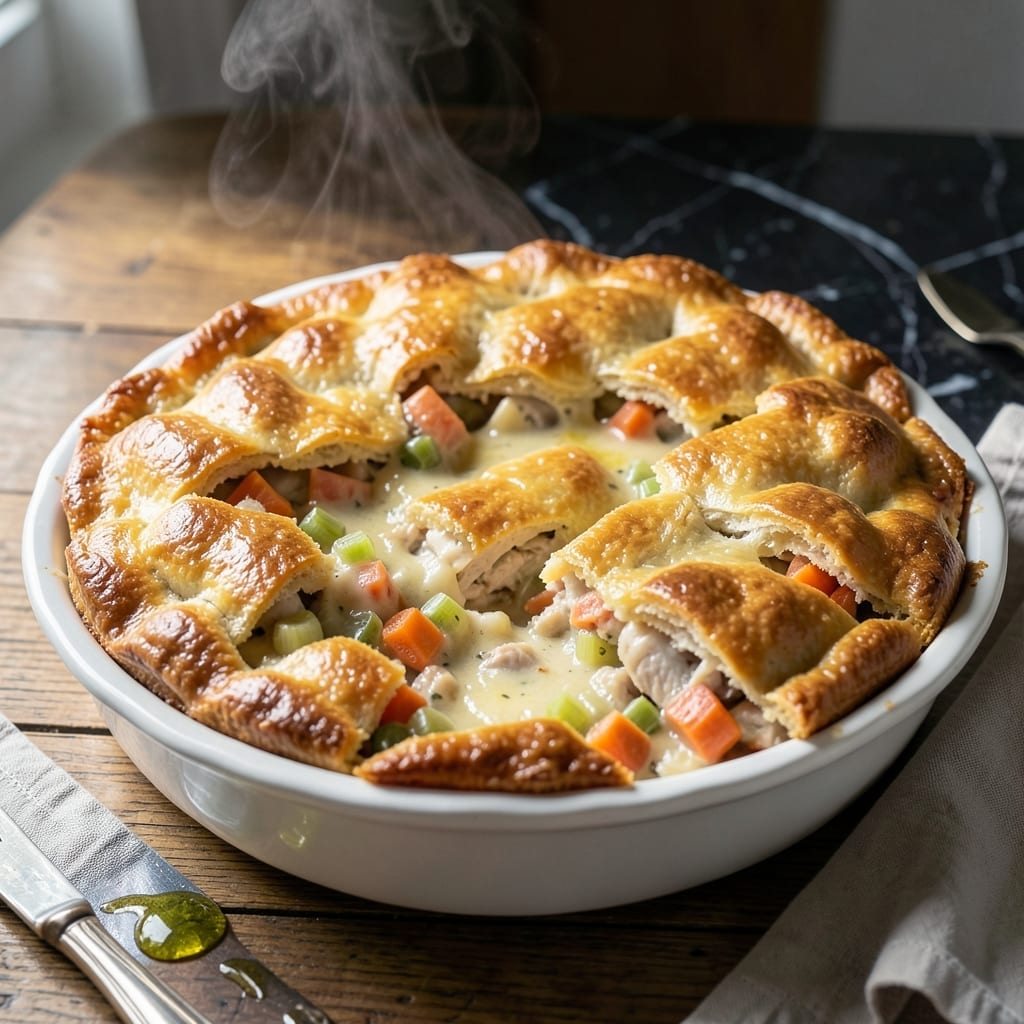
There’s something timeless about a homemade chicken pot pie, and this version brings that classic comfort to your table with minimal effort. The flaky Bisquick topping bakes to golden perfection, sealing in a creamy, savory filling.
I’ve streamlined the process without sacrificing flavor, using simple ingredients and a straightforward method. The filling comes together in one skillet, while the biscuit topping adds that signature flaky texture with almost no work.
What you get is a warm, hearty dish that tastes like it simmered for hours. The creamy chicken and vegetable filling pairs perfectly with the buttery, golden biscuit crust.
Ready in under an hour, this is the ultimate quick and satisfying meal for busy weeknights or cozy weekends.
Ingredients for Bisquick Chicken Pot Pie
Simple pantry staples and fresh veggies make this cozy dish effortlessly delicious.
| Ingredient | Amount | Notes |
|---|---|---|
| Bisquick Baking Mix 🥣 | 2 cups | Plus extra for dusting |
| Boneless Skinless Chicken Breasts 🍗 | 1 ½ lb | Cubed into bite-sized pieces |
| Unsalted Butter 🧈 | ½ cup | Divided for cooking and topping |
| Yellow Onion 🧅 | 1 whole | Medium, finely diced |
| Carrots 🥕 | 2 whole | Medium, peeled and diced |
| Celery Stalks 🌿 | 2 whole | Diced, leaves reserved for garnish |
| Frozen Green Peas 🌱 | 1 cup | No need to thaw |
| All-Purpose Flour 🌾 | ¼ cup | For thickening the filling |
| Chicken Broth 🥣 | 1 ½ cups | Low-sodium preferred |
| Whole Milk 🥛 | ½ cup | For creamy filling |
| Garlic Cloves 🧄 | 2 cloves | Minced finely |
| Dried Thyme 🍃 | 1 tsp | Or fresh thyme leaves equivalent |
| Salt 🧂 | 1 tsp | Adjust to taste |
| Black Pepper 🌶️ | ½ tsp | Freshly ground preferred |
The chicken should be fresh—look for plump, moist breasts without that grayish tint. I grab mine from Whole Foods or Costco (their organic is solid). The Bisquick is non-negotiable for that flaky topping, but check the date—old mix loses its lift. For the veggies, farmers market carrots and celery have better flavor than the bagged stuff. Don’t skip peeling the carrots; it makes a difference in texture.
Swapping proteins? Rotisserie chicken saves time (about 3 cups shredded). No fresh thyme? Dried works at one-third the amount. Out of peas? Corn or green beans keep that classic vibe. If you’re avoiding dairy, use unsweetened almond milk and a vegan butter substitute. The broth can be vegetable if that’s what you’ve got—just watch the salt.
This freezes beautifully for up to 3 months. Let it cool completely, then wrap tightly in foil and plastic. Reheat covered in a 350°F oven for about 30 minutes. Leftovers? They’ll keep in the fridge for 3-4 days—the biscuit topping softens but still tastes great.
Why You’ll Love This Recipe
- One Bowl Magic: I just dump the Bisquick mix with the veggies and chicken—no extra bowls, no fuss.
- That Golden Crust: The butter in the Bisquick makes the topping flaky and rich, with just the right crunch over the creamy filling.
- Feeds the Crew: I make one big pie for Sunday supper or divide it into small dishes for easy grab-and-go lunches all week.
- Stretches Further: Honestly, it uses pantry staples and a few fresh veggies, so I can pull it together without a big grocery run.
Step-by-Step Instructions for Bisquick Chicken Pot Pie
This method delivers that classic comfort food with a flaky biscuit top in record time.
Step 1: Sauté the Aromatics and Chicken
Melt ¼ cup unsalted butter in a large skillet over medium-high heat. Add the finely diced yellow onion, peeled and diced carrots, and diced celery stalks. Sauté for 5-6 minutes until the vegetables soften and the onion turns translucent.
Push the vegetables to one side and add the 1.5 lb cubed boneless skinless chicken breasts. Cook for 6-8 minutes, stirring occasionally, until the chicken is no longer pink and just cooked through. The chicken will finish cooking later, so don’t overcook it now.
Step 2: Create the Creamy Filling Base
Sprinkle the 0.25 cup all-purpose flour over the chicken and vegetables, stirring to coat everything evenly. This creates a roux that will thicken the filling. Cook for 1-2 minutes to remove the raw flour taste.
Slowly pour in the 1.5 cups chicken broth while stirring constantly to prevent lumps. Add the minced garlic cloves, 1 tsp dried thyme, 1 tsp salt, and 0.5 tsp black pepper. Stir in the 1 cup frozen green peas—no need to thaw them first.
Step 3: Simmer and Finish the Filling
Reduce heat to medium and let the mixture simmer for 5-7 minutes, stirring occasionally, until it thickens to the consistency of a creamy stew. The filling should coat the back of a spoon.
Remove from heat and stir in the 0.5 cup whole milk. This adds richness and balances the flavors. Taste and adjust seasoning if needed, though remember the biscuit topping will add some saltiness too.
Step 4: Assemble and Add the Biscuit Topping
Transfer the chicken filling to a 9×13-inch baking dish or similar oven-safe dish. In a separate bowl, prepare the 2 cups Bisquick Baking Mix according to package directions for biscuit topping, using the remaining ¼ cup unsalted butter and 0.5 cup whole milk if not already used.
Drop spoonfuls of the biscuit dough evenly over the hot filling. Don’t worry about perfect coverage—rustic is fine. The biscuits will expand and create that classic flaky top.
Step 5: Bake to Golden Perfection
Place the dish on a baking sheet (to catch any potential spills) and bake in a preheated 375°F oven for 20-25 minutes. You’re looking for the biscuit topping to turn golden brown and the filling to be bubbling at the edges.
Let it rest for 5-10 minutes before serving. This allows the filling to set slightly and makes serving easier. Garnish with reserved celery leaves for a pop of color and freshness. Each serving should have a perfect ratio of creamy filling to flaky biscuit topping.
Pro Tips For Making Bisquick Chicken Pot Pie
- Precook the Chicken: Poach or sauté the chicken breasts first—raw pieces won’t cook through in the filling. I learned this the hard way after pulling apart rubbery, underdone chunks.
- Sear the Veggies: Sauté the onion and carrots in butter for 5 minutes before mixing into the filling. It builds flavor and softens them just enough.
- Don’t Overmix the Topping: Stir the Bisquick batter just until combined—overworking it makes the crust dense and tough. My grandmother swore by this, and she was right.
- Vent the Crust: Cut a few small slits in the Bisquick topping before baking. Sounds weird, but it works: it lets steam escape and prevents a soggy crust.
Make-Ahead Tips for This Dish
Overnight Prep
You can prep the entire filling the night before—just cool it completely and store in an airtight container in the fridge. The flavors will deepen overnight as the herbs and spices meld together. In the morning, transfer to your baking dish and add the biscuit topping. 💡
Biscuit Topping Hack
Mix the Bisquick Baking Mix and liquid ingredients the night before too, but keep it in a separate bowl covered tightly. In the morning, give it a quick stir—it might thicken slightly—then drop spoonfuls onto the filling as directed.
Freeze for Later
Assemble the entire dish unbaked, cover tightly with plastic wrap and foil, then freeze for up to 3 months. When ready to bake, thaw overnight in the fridge, then bake at 375°F for 30-35 minutes. ❄️
Partial Assembly
Cook the chicken and veggies ahead, but keep the sauce separate. This prevents the filling from getting too thick. Store them separately in the fridge, then combine and heat before adding the biscuit topping and baking.
Reheating Leftovers
Store leftovers in the fridge for up to 3 days. Reheat individual portions in the microwave covered with a damp paper towel for 1-2 minutes, or in the oven at 350°F for 15-20 minutes to revive the flaky topping.
Time-Saving Tip
Use rotisserie chicken to cut prep time in half—just shred about 3 cups and add it at the end when combining everything. This skips the cooking step entirely while keeping that homemade flavor.
Nutrition Facts
Frequently Asked Questions
Can I use rotisserie chicken instead?
Yes! Use about 3 cups shredded rotisserie chicken and skip the cooking step. Add it when combining everything for a 10-minute prep shortcut.
Why is my filling too thin?
Simmer the filling for the full 5-7 minutes after adding broth. If still thin, mix 1 tablespoon flour with 2 tablespoons water and stir in.
Can I make this ahead and freeze?
Assemble unbaked, cover tightly, and freeze for up to 3 months. Bake from frozen at 375°F for 30-35 minutes.
What if I don’t have Bisquick?
Mix 2 cups flour, 1 tablespoon baking powder, 1 teaspoon salt, and ⅓ cup cold butter for a quick substitute.

- 6 Oz Chocolate Chip Cookie Recipe: Perfectly Balanced Crispy Edges and Chewy Hearts - September 25, 2026
- 6-Inch Coffee Cake Recipe: Vanilla Bean Swirls and Buttery Streusel Topping - September 25, 2026
- 1 Hour Soup Recipe: Velvety Richness Without the Wait - September 25, 2026