
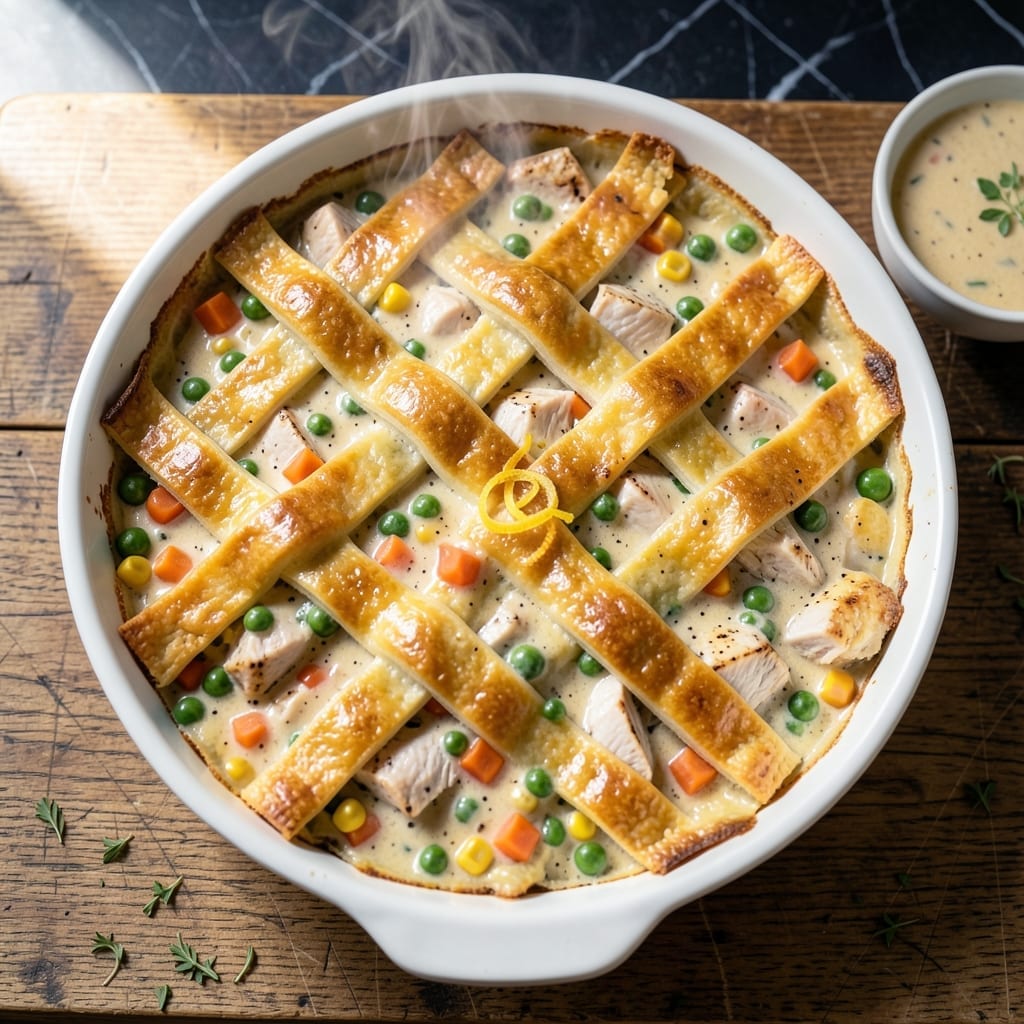
This casserole delivers flaky perfection with minimal effort. A rustic filling meets a golden Bisquick crust in a dish that’s ready in under an hour.
I’ve streamlined the process—no rolling pins or fuss. Just mix, layer, and bake. The Bisquick topping bakes into a flaky, buttery crust that’s impossible to resist.
The filling is hearty, packed with tender vegetables and savory chicken. It’s comfort food at its best, with all the flavors of classic pot pie.
Perfect for busy nights when you want a homemade meal without the hassle. Let’s get started.
Ingredients for Bisquick Pot Pie Casserole
Pantry staples and a few fresh additions create this cozy, comforting dish everyone loves.
| Ingredient | Amount | Notes |
|---|---|---|
| Bisquick Baking Mix 🥣 | 2 cups | Original variety preferred |
| Cooked Chicken Breast 🍗 | 2 cups | Shredded or diced |
| Frozen Mixed Vegetables 🥕 | 2 cups | Peas, carrots, corn, green beans |
| Cream of Chicken Soup 🥫 | 1 can | 10.5 oz size |
| Chicken Broth 🫕 | 1 cup | Low-sodium preferred |
| Whole Milk 🥛 | ½ cup | For creamier filling |
| Unsalted Butter 🧈 | ¼ cup | Melted for topping |
| Yellow Onion 🧅 | 1 whole | Medium, finely diced |
| Garlic Cloves 🧄 | 2 cloves | Minced for flavor |
| Dried Thyme 🌿 | ½ tsp | Crushed between fingers |
| Salt 🧂 | ½ tsp | Adjust to taste |
| Black Pepper 🌶️ | ¼ tsp | Freshly ground preferred |
| All-Purpose Flour 🌾 | 1 tbsp | For thickening if needed |
The Bisquick is key here—Betty Crocker’s original blend gives that perfect flaky layer. Grab it from any grocery store (it’s usually near the pancake mixes). For the chicken, rotisserie works great (Costco or your local deli counter), or poach your own. The veggies? Frozen blends from Green Giant or Birds Eye are perfect—no chopping, same great taste.
No cream of chicken? Cream of mushroom soup works just as well. Out of chicken broth? Vegetable broth in a pinch. Milk can be swapped for half-and-half if you want it extra rich. The thyme can be fresh (use double the amount) or skipped entirely if you’re not a fan. Trader Joe’s has great pre-diced onions to save time.
Assemble and bake the same day for best results, but leftovers keep 3-4 days in the fridge. Reheats beautifully in the microwave (cover with a damp paper towel). You can also freeze it baked for up to 2 months—just thaw overnight before reheating.
Why You’ll Love This Recipe
- One Bowl Wonder: I dump the Bisquick, soup, broth, and veggies in a single bowl, stir, and it’s ready for the oven—no fuss.
- Creamy Crunch: That buttery Bisquick topping with the rich chicken and veggie filling? Honestly, it’s the cozy flavor combo I crave.
- Feeds the Crew: Between us, this stretches to feed six with leftovers, and it’s just as good reheated the next day.
- Pantry Hero: I use whatever cooked chicken I have, plus frozen veggies I always keep on hand—no last-minute grocery runs.
Step-by-Step Instructions for Bisquick Pot Pie Casserole
This method delivers that flaky crust and hearty filling faster than you’d expect.
Step 1: Sauté Aromatics for Flavor Base
Heat a large skillet over medium heat and melt 1 tablespoon of the unsalted butter. Add the diced yellow onion and cook for 3-4 minutes until it turns translucent and just starts to brown at the edges.
Add the minced garlic cloves and dried thyme, stirring constantly for 30 seconds until fragrant. This builds the aromatic foundation that makes the filling taste rich and complex. Be careful not to let the garlic burn—it turns bitter quickly.
Sprinkle in the 1 tablespoon all-purpose flour and stir for 1 minute to cook out the raw taste. The mixture should look slightly pasty—this will help thicken your filling beautifully.
Step 2: Create the Creamy Filling
Pour in the 1 can cream of chicken soup, 1 cup chicken broth, and 0.5 cup whole milk. Stir well, scraping up any browned bits from the bottom of the pan. These bits add incredible depth of flavor.
Add the 2 cups cooked chicken breast and 2 cups frozen mixed vegetables. Stir to combine, then bring the mixture to a gentle simmer. Cook for 5-7 minutes until the sauce thickens and coats the back of a spoon.
Season with 0.5 tsp salt and 0.25 tsp black pepper. Taste and adjust seasoning if needed—remember that the Bisquick topping will add a touch of saltiness too.
Step 3: Prepare the Bisquick Topping
In a separate bowl, combine the 2 cups Bisquick baking mix with the remaining melted unsalted butter (about 3 tablespoons). Use a fork to mix until the mixture resembles coarse crumbs with some larger pea-sized pieces.
This creates the perfect texture for your topping—some crispy bits and some tender, biscuit-like pieces. Don’t overmix; you want that rustic, uneven texture that makes every bite interesting.
Step 4: Assemble and Bake to Golden Perfection
Transfer the chicken and vegetable filling to a greased 9×13-inch baking dish. Spread it out evenly, then sprinkle the Bisquick mixture evenly over the top. Press down very lightly—just enough to help it adhere but not so much that it becomes dense.
Bake in a preheated 375°F oven for 25-30 minutes until the topping is golden brown and the filling is bubbly at the edges. You’ll know it’s done when the crust has developed that beautiful flaky texture and the aroma fills your kitchen.
Let it rest for 5 minutes before serving. This allows the filling to set slightly so it doesn’t run out when you scoop it. The topping should be crisp on the outside with a tender, biscuit-like layer just beneath.
Pro Tips For Making Bisquick Pot Pie Casserole
- Preheat the Dish: I learned this the hard way—always preheat your baking dish for 5 minutes in the oven before adding the Bisquick topping. It guarantees a crispier bottom crust, not a soggy one.
- Drain the Veggies: After thawing the frozen mixed vegetables, squeeze out the excess water with a paper towel. Sounds tedious, but it prevents a watery filling that turns the casserole into soup.
- Skip the Cold Chicken: Use room-temperature cooked chicken breast—straight from the fridge cools down the filling and can make the Bisquick topping dense. I pull mine out 15 minutes before assembling.
- Thin the Soup: Mix the cream of chicken soup with ¼ cup chicken broth before combining with other ingredients. It spreads easier and keeps the casserole from turning into a thick, gluey block.
Common Mistakes When Making bisquick pot pie casserole
Overmixing the Topping
When combining the Bisquick baking mix with melted butter, stop as soon as it resembles coarse crumbs. Overworking creates a dense, tough layer instead of that coveted flaky texture we all love. 💡
Skipping the Sauté
Always cook your onion and garlic first. Raw aromatics make the filling taste flat and underdeveloped. The 3-4 minutes of sautéing builds the flavor base that defines this dish.
Using Cold Ingredients
Ensure your cream of chicken soup and chicken broth are at room temperature. Cold liquids can cause the Bisquick topping to bake unevenly, leaving you with soggy spots instead of golden perfection.
Overfilling the Dish
Use a 9×13-inch baking dish and don’t overfill it. The filling should be about 1 inch below the rim to prevent bubbling over during baking. This keeps your oven clean and your crust crisp.
Skipping the Rest
The 5-minute rest after baking isn’t just suggestion—it’s essential. This allows the filling to thicken slightly so it doesn’t run out when served, keeping every bite perfectly balanced. 🔥
Wrong Oven Temperature
Bake at exactly 375°F. Higher heat burns the topping before the filling heats through, while lower heat leaves you with a gummy crust. Consistency here ensures that ideal flaky finish.
Nutrition Facts
Frequently Asked Questions
Can I use a different baking mix?
Yes, but stick with a buttermilk-style mix for best results. Generic brands work, though the texture may vary slightly. Avoid pancake mixes—they lack the leavening needed for that perfect flaky topping.
What if my filling is too thin?
Simmer it for 2-3 minutes longer before baking. If still thin, mix 1 tablespoon cornstarch with 1 tablespoon cold water and stir into the hot filling. It will thicken as it bakes.
Can I make this ahead of time?
Assemble the casserole (without baking), cover, and refrigerate for up to 24 hours. Add 5-10 minutes to the baking time if starting cold. The topping stays crispest when baked fresh.

- 4C Bread Crumbs Meatballs Recipe: Crispy Crust and Juicy Centers - September 25, 2026
- 6 Oz Chocolate Chip Cookie Recipe: Perfectly Balanced Crispy Edges and Chewy Hearts - September 25, 2026
- 6-Inch Coffee Cake Recipe: Vanilla Bean Swirls and Buttery Streusel Topping - September 25, 2026