
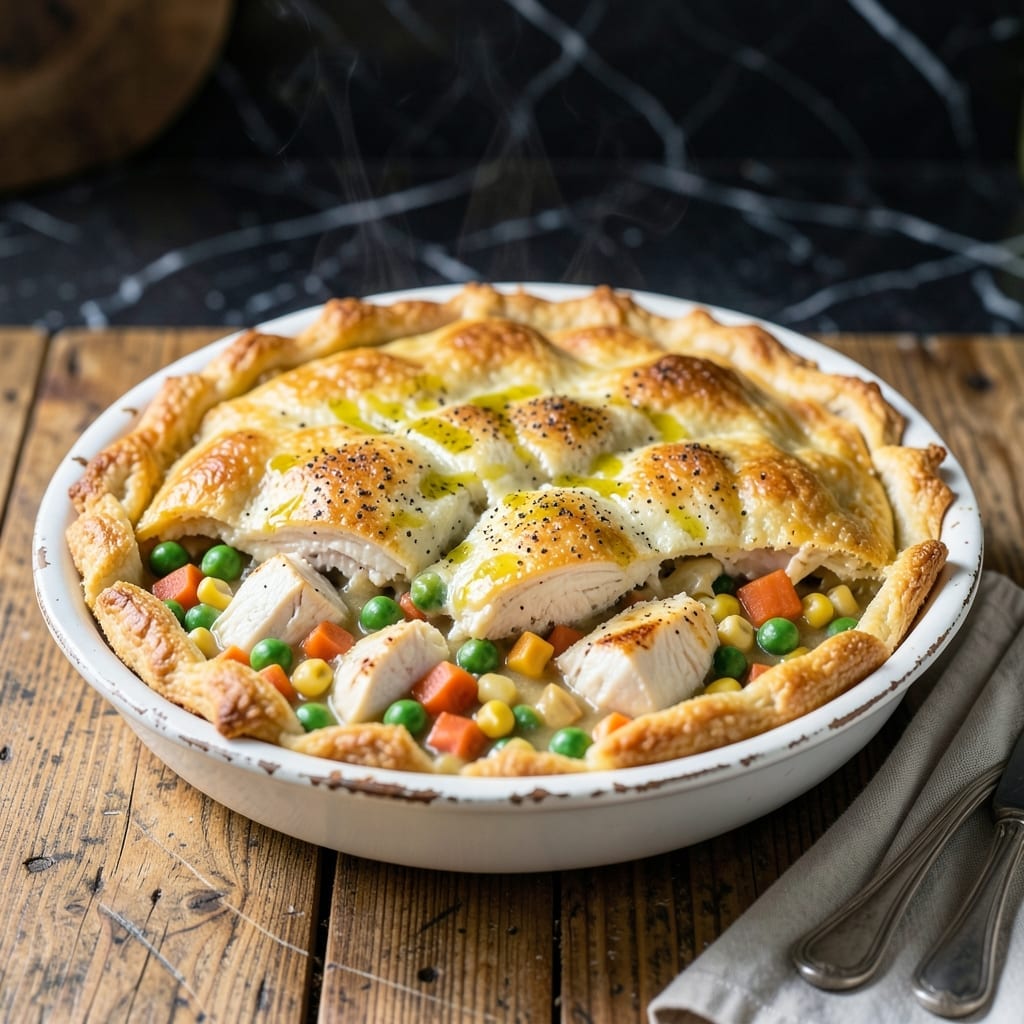
I’ve perfected a chicken pot pie that delivers all the comfort of the classic with a shortcut that doesn’t skimp on flavor. This version uses a Bisquick topping for a golden, flaky crown that bakes up light and tender in just 30 minutes.
The filling is rich and herb-infused, packed with tender chicken, vegetables, and a creamy sauce that feels homemade. The quick prep means you can have this on the table faster than takeout, without sacrificing depth or texture.
What sets this apart is the contrast: a savory, hearty filling under a buttery, biscuit-like crust that soaks up every drop of gravy. It’s comfort food at its most satisfying, with minimal effort.
Ideal for busy weeknights or when you need a dish that feels like a hug. Here’s how to make it.
Ingredients for Bisquick Topped Chicken Pot Pie
Classic comfort with a shortcut—tender chicken, veggies, and a golden Bisquick crown.
| Ingredient | Amount | Notes |
|---|---|---|
| Bisquick Baking Mix 🥣 | 2 cups | Original or buttermilk variety |
| Boneless Skinless Chicken Breasts 🍗 | 1 ½ lb | Diced into bite-sized pieces |
| Frozen Mixed Vegetables 🥕 | 2 cups | Peas, carrots, corn, green beans |
| Yellow Onion 🧅 | 1 whole | Medium, finely diced |
| Garlic Cloves 🧄 | 2 cloves | Minced for filling |
| Unsalted Butter 🧈 | ½ cup | Divided for cooking and topping |
| All-Purpose Flour 🌾 | ¼ cup | For thickening sauce |
| Chicken Broth 💧 | 1 ½ cups | Low-sodium preferred |
| Whole Milk 🥛 | ½ cup | For creamy sauce |
| Dried Thyme 🌿 | 1 tsp | For herb-infused flavor |
| Dried Rosemary 🍃 | 1 tsp | Crushed for best release |
| Salt 🧂 | 1 tsp | Kosher or sea salt |
| Black Pepper 🌶️ | ½ tsp | Freshly ground preferred |
| Whole Milk 🥛 | ⅔ cup | For Bisquick topping |
The Bisquick is non-negotiable here—original or buttermilk both work, but avoid the low-fat version. I grab mine at Target or any grocery store. For the chicken, thighs stay juicier than breasts (they handle the quick cooking better), but breasts work fine if that’s what you’ve got. Look for plump, moist pieces without that grayish tint.
No Bisquick? Homemade biscuit mix (2 cups flour + 1 tbsp baking powder + 1 tsp salt + 6 tbsp cold butter) gets you close. Out of fresh herbs? Dried thyme and rosemary at half the amount work perfectly. Frozen veggies can be swapped for fresh—just thaw and drain first (the bagged mixed kind saves time). Whole milk is ideal, but 2% or even half-and-half adds richness.
Leftovers reheat like a dream—3-4 days in the fridge, 2 months frozen. The topping softens when stored, but a quick broil brings the crunch back. I like making extra filling for easy lunches (it freezes beautifully on its own).
Why You’ll Love This Recipe
- OnePan Wonder: I dump everything in a skillet, top it with Bisquick mix, and bake—no rolling crusts or fancy techniques.
- That Golden Crust: The Bisquick topping gets crispy on the edges while staying tender inside, soaking up all the garlic and onion flavor.
- Feeds Everyone: Between us, this is my go-to for Sunday dinner, potlucks, or even a cozy night in with leftovers.
- Stretches the Budget: Honestly, chicken breasts and frozen veggies keep it cheap, but it tastes like I spent hours.
Step-by-Step Instructions for Bisquick Topped Chicken Pot Pie
This method moves fast but delivers a golden, flaky topping over a rich, creamy filling.
Step 1: Cook the Chicken and Vegetables
In a large skillet over medium-high heat, melt ¼ cup of the unsalted butter. Add the diced boneless skinless chicken breasts and cook for 5-6 minutes until no longer pink. I stir occasionally to ensure even browning without overcooking.
Add the finely diced yellow onion, minced garlic cloves, and 2 cups frozen mixed vegetables. Cook for 3-4 minutes until the onion softens. This builds the flavor base that makes the filling so satisfying.
Step 2: Create the Creamy Herb Sauce
Sprinkle the 0.25 cup all-purpose flour over the chicken and vegetables, stirring to coat evenly. Slowly pour in the 1.5 cups chicken broth and 0.5 cup whole milk, whisking constantly to prevent lumps from forming.
Stir in the dried thyme, dried rosemary, salt, and black pepper. Simmer for 4-5 minutes until the sauce thickens enough to coat the back of a spoon. The herbs will perfume the air, and the sauce will turn a rich, creamy ivory.
Step 3: Prepare and Add the Bisquick Topping
In a bowl, combine the 2 cups Bisquick Baking Mix with the remaining 0.66 cup whole milk and ¼ cup melted unsalted butter. Stir just until the dough comes together—it should be shaggy but cohesive. Overmixing will make the topping tough.
Drop spoonfuls of the Bisquick mixture evenly over the hot chicken filling. Don’t worry about perfection; the rustic look adds charm. The topping will spread slightly as it bakes, creating that signature golden crown.
Step 4: Bake Until Golden and Bubbly
Place the skillet in a preheated 375°F oven and bake for 20-25 minutes. You’ll know it’s done when the Bisquick topping is deep golden brown and the filling is bubbling around the edges.
Let it rest for 5 minutes before serving. This allows the filling to set slightly, making it easier to serve without the topping sliding off. Each spoonful will have tender chicken, creamy sauce, and that buttery, flaky Bisquick crust.
Pro Tips For Making Bisquick Topped Chicken Pot Pie
- Precook the Chicken: Poach or bake the chicken breasts first—raw chicken in the filling makes them tough by the time the Bisquick topping is done.
- Thicken the Filling: After mixing in the veggies and broth, let it simmer for 3-4 minutes until slightly thickened so it doesn’t soak the Bisquick crust.
- Use Cold Butter: Cut cold butter into the Bisquick mix for the topping—it creates flaky layers instead of a dense, flat crust.
- Vent the Top: Poke a few small holes in the Bisquick topping before baking to let steam escape and prevent a soggy bottom.
Essential Equipment for Perfect Results
Skillet Essentials
An oven-safe skillet is non-negotiable—10-12 inch works perfectly. I use my Lodge cast iron because it goes from stovetop to oven seamlessly and retains heat beautifully. A heavy-bottomed stainless steel skillet is a great alternative. 🔥
Mixing Bowls
You’ll need a medium mixing bowl for the Bisquick topping. I prefer glass or stainless steel for easy cleanup. A 2-quart size gives plenty of room to stir without spilling. The dough comes together quickly, so no fancy equipment is required.
Whisk and Spoon
A flat whisk helps prevent lumps when making the creamy sauce. For dropping the Bisquick topping, a large spoon or ice cream scoop works best. I keep both within reach to streamline the process.
Measuring Tools
Accurate measurements matter here, especially for the Bisquick topping. I use a set of nested measuring cups and measuring spoons from OXO. A liquid measuring cup ensures the milk and broth are precise.
Baking Sheet
Place a rimmed baking sheet under the skillet in the oven. This catches any potential spills, making cleanup easier. It also helps distribute heat evenly for a uniformly golden topping.
Cooling Rack
Let the pot pie rest on a wire cooling rack after baking. This prevents the bottom from getting soggy. I wait the full 5 minutes before serving—patience ensures the filling sets properly. 💛
Nutrition Facts
Frequently Asked Questions
Can I use chicken thighs instead of breasts?
Chicken thighs stay juicier and handle quick cooking better. Use 1.5 lb of boneless, skinless thighs and cook for 6-7 minutes until done. They add extra richness to the filling.
Why did my topping turn out dense?
Overmixing the Bisquick dough develops gluten, making it tough. Stir just until combined—it should look shaggy. Also, ensure your oven is fully preheated to 375°F for proper rise.
Can I make this ahead of time?
Assemble the filling and store it in the fridge for up to 1 day. Add the Bisquick topping just before baking. Leftovers reheat well at 350°F for 10-15 minutes.

- 6 Oz Chocolate Chip Cookie Recipe: Perfectly Balanced Crispy Edges and Chewy Hearts - September 25, 2026
- 6-Inch Coffee Cake Recipe: Vanilla Bean Swirls and Buttery Streusel Topping - September 25, 2026
- 1 Hour Soup Recipe: Velvety Richness Without the Wait - September 25, 2026