
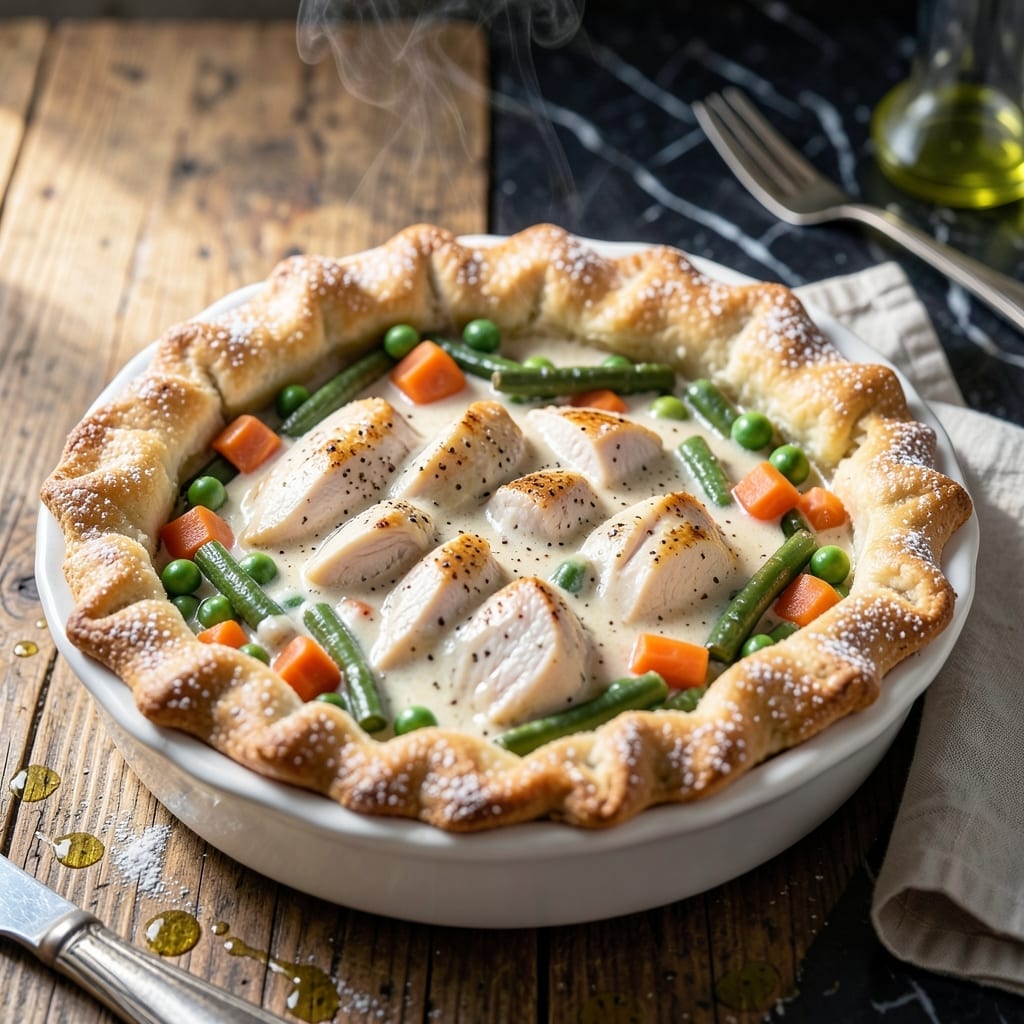
There’s a reason chicken pot pie remains a beloved comfort classic—this version elevates it with a flaky Bisquick crust and a creamy filling that’s rich without being heavy. The secret lies in the balance of tender chicken, hearty vegetables, and a velvety sauce that holds everything together.
I’ve refined this method to ensure the crust stays golden and crisp while the filling stays lusciously thick. The Bisquick base simplifies the process, delivering a buttery, layered texture that rivals traditional pastry. No complicated techniques are needed to achieve professional results.
What you’ll get is a dish where every bite offers the perfect ratio of crust to filling. The chicken stays moist, the vegetables remain tender, and the sauce binds it all without turning soggy. It’s comfort food that feels both nostalgic and fresh.
Ideal for weeknight dinners or cozy weekends, this pot pie delivers warmth in every serving. The recipe stays true to its promise of simplicity and satisfaction.
Ingredients for Bisquik Chicken Pot Pie
Bisquick simplifies the flaky crust while creamy filling brings comfort to every bite.
| Ingredient | Amount | Notes |
|---|---|---|
| Bisquick Baking Mix 🥣 | 2 cups | For crust and topping |
| Cooked Chicken Breast 🍗 | 2 cups | Shredded or diced |
| Frozen Mixed Vegetables 🥕 | 2 cups | Peas, carrots, corn, green beans |
| Cream of Chicken Soup 🥫 | 1 can | 10.5 oz size |
| Chicken Broth 🍲 | 1 cup | Low-sodium preferred |
| Milk 🥛 | ¾ cup | Whole milk for richness |
| Unsalted Butter 🧈 | ½ cup | Melted for crust |
| Onion 🧅 | 1 whole | Medium, finely diced |
| Garlic Cloves 🧄 | 2 cloves | Minced for flavor |
| Salt 🧂 | ½ tsp | Adjust to taste |
| Black Pepper 🌶️ | ¼ tsp | Freshly ground preferred |
| Dried Thyme 🌿 | ½ tsp | For aromatic depth |
| Egg 🥚 | 1 whole | For binding topping |
The Bisquick is non-negotiable here—Betty Crocker is the standard, but any name-brand baking mix works. For the chicken, rotisserie chicken from the grocery store saves time without sacrificing flavor (pull it while warm for easier shredding). The vegetables should be frozen—they hold up better than fresh to long cooking. Look for mixes with peas, carrots, and corn for classic texture.
No Bisquick? Homemade baking mix (flour, baking powder, salt, shortening) in a 1:1 ratio works. Swap cream of chicken for cream of mushroom if you prefer. Fresh vegetables can be used, but par-cook them first—frozen is honestly easier. The milk can be any variety, though whole milk makes the filling richest. For a lighter version, half-and-half cuts calories without losing creaminess.
Assemble and bake immediately, or refrigerate the filling and topping separately for up to 1 day. Leftovers keep 3-4 days in the fridge. Reheat in the oven (not microwave) to keep the crust crisp. This freezes beautifully for up to 2 months—wrap tightly in foil.
Why You’ll Love This Recipe
- One Bowl Wonder: I dump everything in a single bowl, stir, and bake—no fussing with pie crusts or complicated steps.
- Golden, Creamy Bites: The Bisquick crust gets perfectly flaky while the chicken and veggies soak up that rich, savory cream of chicken soup flavor.
- Feeds the Crew: I stretch one batch into two meals for my family of four, and it reheats beautifully.
- Pantry Hero: Between the Bisquick, frozen veggies, and canned soup, I almost always have everything on hand for this.
Step-by-Step Instructions for Chicken Pot Pie with Bisquick
Master these steps to create a pot pie with a flaky crust and rich, creamy filling.
Step 1: Prepare the Filling Base
In a large skillet over medium heat, melt the 0.5 cup unsalted butter. Add the finely diced onion and cook for 3-4 minutes until translucent and soft. Stir in the 2 minced garlic cloves and cook for 30 seconds until fragrant.
This aromatic base builds deep flavor for your filling. Don’t rush the onions—they should turn from white to just barely golden at the edges. The garlic adds its pungent note quickly, so keep it moving to prevent burning.
Step 2: Build the Creamy Chicken Mixture
Add the 1 can cream of chicken soup, 1 cup chicken broth, 2 cups cooked chicken breast, 2 cups frozen mixed vegetables, 0.5 tsp salt, 0.25 tsp black pepper, and 0.5 tsp dried thyme to the skillet.
Stir well to combine and bring to a gentle simmer. Cook for 5-7 minutes until the mixture thickens slightly and the vegetables are heated through. The sauce should coat the back of a spoon nicely—this ensures your filling will be rich and creamy, not watery.
Step 3: Prepare the Bisquick Topping
In a bowl, combine the 2 cups Bisquick baking mix, 0.75 cup milk, and 1 whole egg. Stir with a fork until just combined—the mixture will be thick and slightly lumpy. Don’t overmix; a few dry spots are fine and will absorb as it bakes.
This simple topping comes together in moments and will transform into a golden, flaky crust as it bakes. The milk adds richness while the egg helps bind everything for that perfect texture.
Step 4: Assemble and Bake to Golden Perfection
Transfer the chicken filling to a 9×13-inch baking dish or deep pie dish. Dollop the Bisquick topping evenly over the filling, spreading gently to cover completely. The topping doesn’t need to be perfectly smooth—rustic peaks will brown beautifully.
Bake in a preheated 375°F oven for 25-30 minutes until the topping is golden brown and the filling is bubbly at the edges. Let it rest for 5-10 minutes before serving to allow the filling to set slightly—this prevents a runny first bite.
Pro Tips For Making Bisquik Chicken Pot Pie
- Precook the Veggies: I learned this the hard way—dumping frozen veggies straight in leaves them crunchy. Microwave them for 3 minutes with a splash of broth first to soften and release their flavor.
- Shred the Chicken: Sounds obvious, but chopping cooked chicken into small, even pieces instead of chunks guarantees every bite has filling and the texture stays tender.
- Thicken the Filling: After mixing the soup and broth, let it simmer for 2-3 minutes before adding to the crust—it’ll hold together better and won’t make the biscuit topping soggy.
- Bake Until Golden: Don’t pull it at the minimum time—wait for the Bisquick topping to turn deep golden brown, usually 22-25 minutes, or the center stays doughy.
Dietary Considerations for This Dish
Gluten-Free Adaptation
Swap regular Bisquick for Betty Crocker Gluten-Free Bisquick—it behaves nearly identically. Use gluten-free chicken broth and verify your cream of chicken soup is certified gluten-free. I’ve tested this with Progresso and Pacific Foods brands with great results. 💡
Dairy-Free Version
Use dairy-free milk like unsweetened almond or oat milk in the topping. Replace butter with vegan butter (Earth Balance works well) and opt for dairy-free cream of chicken soup. The texture remains just as flaky and rich.
Lower Sodium Option
Choose low-sodium chicken broth and no-salt-added cream of chicken soup. Reduce added salt to ¼ tsp and boost flavor with extra dried thyme or fresh herbs. I often add 1 tsp lemon zest for brightness without the sodium.
Vegetarian Twist
Replace chicken with 2 cups cooked chickpeas or chopped mushrooms for heartiness. Use vegetable broth and cream of mushroom soup. The Bisquick topping stays the same—it’s naturally vegetarian. This version is just as comforting.
Lactose Intolerance Fix
Use lactose-free milk and lactose-free cream of chicken soup. The butter can stay (it’s low in lactose) or switch to olive oil. I’ve made this for lactose-intolerant friends, and they never notice the difference. ✨
Egg-Free Topping
Omit the egg and add 2 tbsp water to the Bisquick mixture. The topping will be slightly denser but still delicious. For extra flakiness, brush the top with 1 tbsp melted butter before baking. This works in a pinch!
Nutrition Facts
Frequently Asked Questions
Can I use rotisserie chicken?
Rotisserie chicken works perfectly and saves time. Shred or dice 2 cups of the cooked meat and add it directly to the filling.
Why is my topping not crispy?
This usually happens if the dish wasn’t baked long enough. Ensure your oven is at 375°F and bake until the topping is golden brown, about 25-30 minutes.
Can I make this ahead of time?
Yes! Assemble the dish, cover, and refrigerate for up to 1 day. Bake as directed when ready. Leftovers keep for 3-4 days in the fridge.

- 4C Bread Crumbs Meatballs Recipe: Crispy Crust and Juicy Centers - September 25, 2026
- 6 Oz Chocolate Chip Cookie Recipe: Perfectly Balanced Crispy Edges and Chewy Hearts - September 25, 2026
- 6-Inch Coffee Cake Recipe: Vanilla Bean Swirls and Buttery Streusel Topping - September 25, 2026