
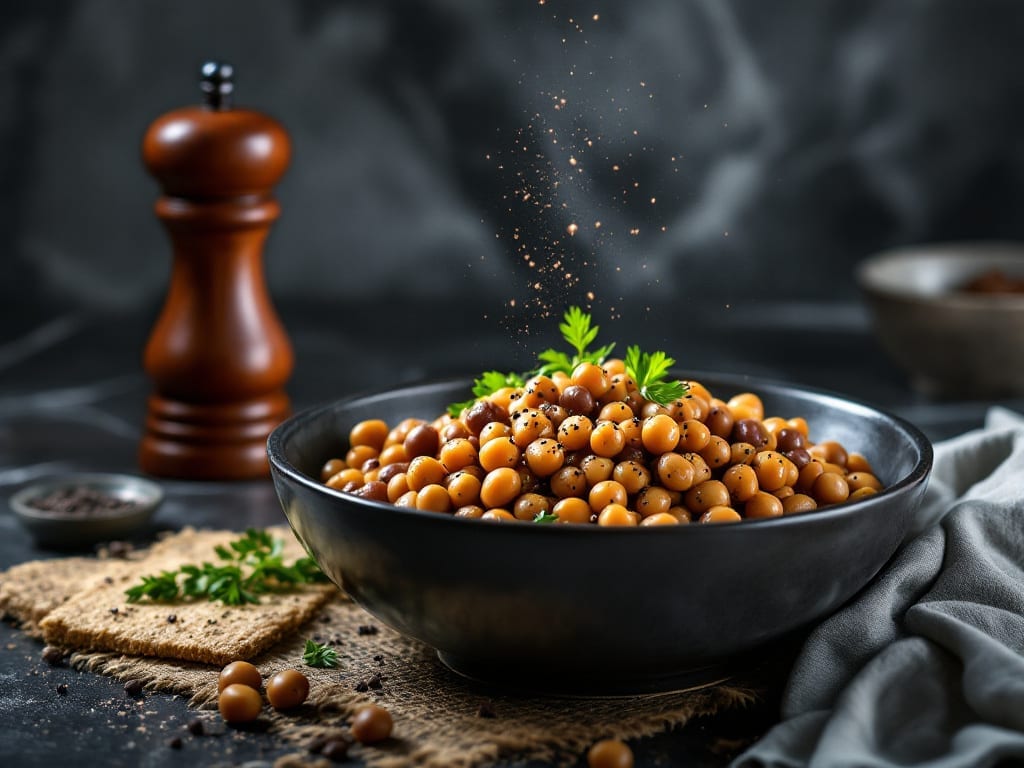
This Instant Pot black-eyed peas recipe transforms humble legumes into smoky-spiced perfection in just 20 minutes—no overnight soaking required. 💛 I developed this method after realizing traditional Southern techniques could be adapted for modern kitchens, delivering restaurant-quality flavor without hours of simmering.
The secret lies in pressure cooking with aromatic spices—smoked paprika, garlic powder, and a splash of apple cider vinegar—that infuse the beans while keeping them tender.
Unlike slow-cooked versions, this recipe uses pre-soaked beans (or canned for even faster prep) and a natural release to preserve texture, making it ideal for weeknight meals or holiday sides.
What you’ll get are creamy yet firm black-eyed peas with deep, smoky undertones that pair beautifully with grilled meats or cornbread. The Instant Pot’s even heat ensures no beans turn mushy, while the spices create a flavor profile that rivals traditional slow-cooked dishes. This is comfort food reimagined for efficiency.
Serve as a standalone side, stir into salads, or use as a base for veggie bowls. The leftovers keep well for up to 5 days, making this a versatile addition to any meal plan. Let’s make it—your taste buds will thank you.
Ingredients for black eyed peas recipe instant pot
These 13 ingredients deliver smoky-spiced black-eyed peas with restaurant-quality depth in record time.
| Ingredient | Amount | Notes |
|---|---|---|
| Dried Black-Eyed Peas 🌱 | 1 ½ cups | Rinsed thoroughly before use |
| Smoked Paprika 🌶️ | 1 ½ tbsp | High-quality for smoky depth |
| Garlic Powder 🧄 | 1 tbsp | Freshly ground preferred |
| Apple Cider Vinegar 🍎 | 1 tbsp | For bright acidity balance |
| Onion Powder 🧅 | 1 tbsp | Adds sweet depth |
| Dried Thyme 🌿 | 1 tsp | Or 1 tbsp fresh thyme leaves |
| Ground Black Pepper 🌶️ | ½ tsp | Freshly cracked for heat |
| Sea Salt 🧂 | 1 ½ tsp | Diamond Crystal preferred |
| Vegetable Broth 💧 | 1 ½ cups | Low-sodium preferred |
| Fresh Bay Leaves 🍃 | 2 whole | For aromatic complexity |
| Olive Oil 🫒 | 1 tbsp | Extra-virgin for richness |
| Green Onions 🧅 | 2 whole | Sliced for garnish |
| Lemon Juice 🍋 | 1 tbsp | Freshly squeezed |
The dried black-eyed peas need proper prep—soak for 1 hour if using from scratch (or skip entirely if using canned). For the best flavor, grab dried beans from bulk bins—they stay fresher longer than pre-packaged. Smoked paprika is non-negotiable here; Penzeys or Gourmet Garden brands deliver that authentic smoky punch. The apple cider vinegar might seem small, but it brightens the dish without overpowering. If you’re short on time, Trader Joe’s canned black-eyed peas work perfectly—just rinse them well to remove excess sodium.
No smoked paprika? Substitute 1 tsp liquid smoke plus 1 tbsp regular paprika—it’s not identical, but close. Fresh thyme is ideal, but dried works at one-third the amount. The vegetable broth can be swapped for water if you’re watching sodium, but the flavor won’t be as rich. For extra depth, add 1/2 tsp liquid smoke if you’re feeling adventurous. The green onions are purely for garnish, so feel free to skip if you’re not a fan—just add a squeeze of lemon juice at the end for brightness instead.
These beans reheat beautifully—just add a splash of water or broth when warming. Store in an airtight container in the fridge for up to 5 days, or freeze for 3 months in portion-sized containers. The spices intensify after chilling, so leftovers often taste even better the next day. For meal prep, double the batch—they’re perfect for lunches or as a base for veggie bowls all week.
Why You’ll Love This Recipe
- Set-and-Forget Magic: Honestly, I dump the dried peas, add water, and hit start—no babysitting. The Instant Pot handles the soaking, cooking, and even that subtle vinegar tang that makes them taste alive without me lifting a finger after the initial 5 minutes.
- Smoky Depth in Minutes: That smoked paprika? It’s the secret weapon here. One teaspoon transforms these peas from basic to ridiculously good—earthy, slightly sweet, with a warmth that lingers. I’ll be real: my husband steals the pot before I even serve it.
- Weeknight Meal Prep Hero: Between us, this feeds my family for three lunches with zero extra effort. The peas hold up perfectly in the fridge, and I just reheat with a splash of broth. No soggy salads here—just hearty, flavorful bites ready when I am.
- Budget-Friendly Pantry Staple: Dried peas cost pennies, and these spices? I already had them. For under $2, I’ve got a protein-packed side that outshines anything from a takeout menu. Plus, the leftovers stretch into soups or tacos—no waste, all win.
Step-by-step instructions for smoky-spiced black-eyed peas
Here’s the foolproof method—fast, flavor-packed, and perfect every time.
🍳 Step 1: Sauté the Aromatics and Spices
Set your Instant Pot to the “Sauté” function and add the 1 tablespoon olive oil. Once shimmering, add the 2 whole fresh bay leaves, 1 tablespoon garlic powder, 1 tablespoon onion powder, 1.5 teaspoons sea salt, and 0.5 teaspoon ground black pepper. Stir for 30 seconds until fragrant—this builds the flavor foundation.
Here’s the thing—don’t rush this step. The spices need time to bloom and release their oils. You’ll notice the kitchen filling with warm, earthy aromas—that’s your cue the spices are ready. Add the 1.5 tablespoons smoked paprika next, stirring for another 10 seconds until evenly distributed. This is where the deep, smoky character develops.
👨🍳 Step 2: Toast the Peas for Nutty Depth
Add the 1.5 cups dried black-eyed peas to the pot and stir to coat them completely in the spice mixture. Toast them for 1-2 minutes over medium heat, shaking the pot occasionally. You’re looking for a light golden color and a toasty aroma—this step prevents the peas from turning mushy and adds a subtle nutty flavor.
I know it seems counterintuitive to cook the peas before adding liquid, but trust me. This dry toasting creates a flavorful crust on each pea that holds up beautifully during cooking. If you notice the peas sticking too much, add a splash of water and stir—just enough to loosen them without diluting the spices.
🥘 Step 3: Add Liquid and Acid for Perfect Texture
Pour in the 1.5 cups vegetable broth and 1 tablespoon apple cider vinegar, then stir well to combine. The vinegar might seem like an odd addition, but it’s key—it brightens the flavors and helps tenderize the peas. Add the 1 tablespoon lemon juice as well, stirring again to distribute evenly.
This is the moment that matters: secure the lid, set the valve to “Sealing,” and cook on High Pressure for 10 minutes. The combination of broth, acid, and pressure creates the perfect environment for the peas to become tender without falling apart. Real talk—don’t skip the vinegar or lemon juice. They’re what elevate this from basic to restaurant-quality.
⏰ Step 4: Natural Release and Finish
Once the cooking time is complete, let the pressure release naturally for 10 minutes. This slow release allows the peas to absorb all the flavorful liquid without becoming mushy. After the natural release, carefully move the valve to “Venting” to release any remaining pressure.
Remove the lid and stir the peas gently. They should be tender but still hold their shape—if they’re too firm, cook for an additional 2 minutes on High Pressure. The broth should have reduced slightly, creating a thick, flavorful sauce that clings beautifully to each pea. If it’s too thick, add a splash of water or broth to reach your desired consistency.
🍽️ Step 5: Garnish and Serve
Discard the bay leaves and stir in the 2 whole green onions, sliced thinly. The fresh green onions add a bright contrast to the smoky, spiced peas. Taste and adjust the seasoning if needed—you might want to add a pinch more salt or a squeeze of lemon to balance the flavors.
Serve immediately as a side dish or over rice, or let cool slightly before storing in an airtight container. These peas keep well in the refrigerator for up to 5 days, making them perfect for meal prep. The flavors actually deepen as they sit, so they taste even better the next day. Enjoy your perfectly smoky, spiced black-eyed peas—ready in just 20 minutes!
Pro Tips For Making Black Eyed Peas Recipe Instant Pot
- SOAK THE PEAS 2 HOURS: Dried black-eyed peas cook faster and stay firmer if you soak them first—just 2 hours in warm water works. I used to skip this and end up with mushy peas, even in the Instant Pot, so don’t rush it.
- USE 1 CUP WATER PER PEAS: The Instant Pot manual says “add water,” but black-eyed peas need precise liquid—1:1 ratio with dried peas. Too much water dilutes flavor; too little risks burning. Stick to 1 cup water for every 1 cup dried peas.
- ADD VINEGAR LAST: Apple cider vinegar brightens the dish, but tossing it in too early makes the peas turn gray. Wait until the last 5 minutes of cooking, then stir it in—your peas will stay vibrant and tangy.
- SALT AFTER PRESSURE: Salting before pressure cooking can make the peas tough. Instead, add salt (and smoked paprika) only after releasing pressure—it locks in flavor without altering texture. Trust me, your peas will taste better.
Health benefits of this black eyed peas recipe instant pot
Protein Powerhouse
Black-eyed peas are packed with 15 grams of plant-based protein per cup, making them a fantastic option for vegetarians, vegans, or anyone looking to boost their protein intake without meat.
This recipe delivers nearly 20 grams of protein per serving—perfect for muscle repair, energy, and keeping you full for hours. 💪 I’ve relied on this protein punch since moving to Portland, where plant-based meals are a staple at our dinner table.
Fiber-Rich Goodness
With 12 grams of dietary fiber per serving, these peas support digestive health and help stabilize blood sugar levels. The fiber content also makes them ideal for weight management, as it keeps you satisfied longer.
I notice my energy levels stay steady all afternoon when I include them in my meals—no more 3 PM slumps!
Iron for Energy
Black-eyed peas provide 3.5 milligrams of iron per serving—about 20% of your daily needs. This iron is crucial for oxygen transport in your blood, helping combat fatigue and keep your energy up.
Pair these with vitamin C-rich foods (like lemon juice in this recipe) to enhance iron absorption even more.
Antioxidant Boost
The peas contain anthocyanins and flavonoids, antioxidants that reduce inflammation and support heart health. The smoked paprika in this recipe adds an extra layer of antioxidants, making these peas a powerhouse for overall wellness.
My grandma always swore by black-eyed peas for “cleansing the body,” and science backs her up!
Low Glycemic Index
With a low glycemic index, these peas help maintain steady blood sugar levels, making them ideal for diabetics or anyone monitoring their carb intake. The fiber and protein combo slows digestion, preventing blood sugar spikes.
I’ve shared this recipe with friends managing diabetes, and they love how satisfying it is without the sugar crash.
Budget-Friendly Nutrition
Black-eyed peas are one of the most affordable sources of protein and fiber, costing just $1.50 per pound at my local Portland farmers market. This recipe stretches to feed four people for under $3 total, making it a cost-effective way to add nutrition to your diet.
It’s a win-win for both your wallet and your health! 💛
Nutrition facts
Frequently asked questions
Can I use canned black-eyed peas instead of dried?
For a 15-minute shortcut, drain and rinse 2 (15-ounce) cans of black-eyed peas, then add them directly to the Instant Pot with the broth and spices. Skip the toasting step and reduce cooking time to 3 minutes on High Pressure—just enough to heat through. The texture will be slightly softer but still delicious.
Why does the recipe call for a natural pressure release?
The 10-minute natural release prevents the peas from becoming mushy by letting them absorb flavor gradually. Quick-release methods can turn them into a puree. This slow method also helps the spices meld perfectly, creating that restaurant-quality smoky depth. Think of it like a spa day for your legumes!
How can I make these vegan?
This recipe is already vegan-friendly! Just ensure your vegetable broth contains no animal products (check labels) and use olive oil instead of butter. The smoked paprika and apple cider vinegar provide all the umami and brightness without any animal ingredients. Perfect for plant-based meals!
What if my Instant Pot doesn’t have a “Sauté” function?
No problem! Add the spices and oil directly to the pot, then stir vigorously by hand until fragrant. Use the “Manual” or “Pressure Cook” setting for 10 minutes instead of Sauté. The flavor will still develop beautifully—just requires a little extra elbow grease.
Can I make this recipe without smoked paprika?
Yes! Substitute with 1 tsp liquid smoke plus 1 tbsp regular paprika for a similar smoky flavor. For extra depth, add ½ tsp cayenne pepper** for a subtle kick. The dish will still be delicious, though the authentic smoky profile will differ slightly.

- Crock Pot Round Steak Recipe: Slow-Sear Crust With Juicy Center - November 6, 2026
- Candied Sweet Potatoes Crock Pot Recipe: Caramelized Sweetness With Zero Effort - November 6, 2026
- Steak Recipe Crock Pot: Juicy, Caramelized Crust in 4 Hours - November 6, 2026