
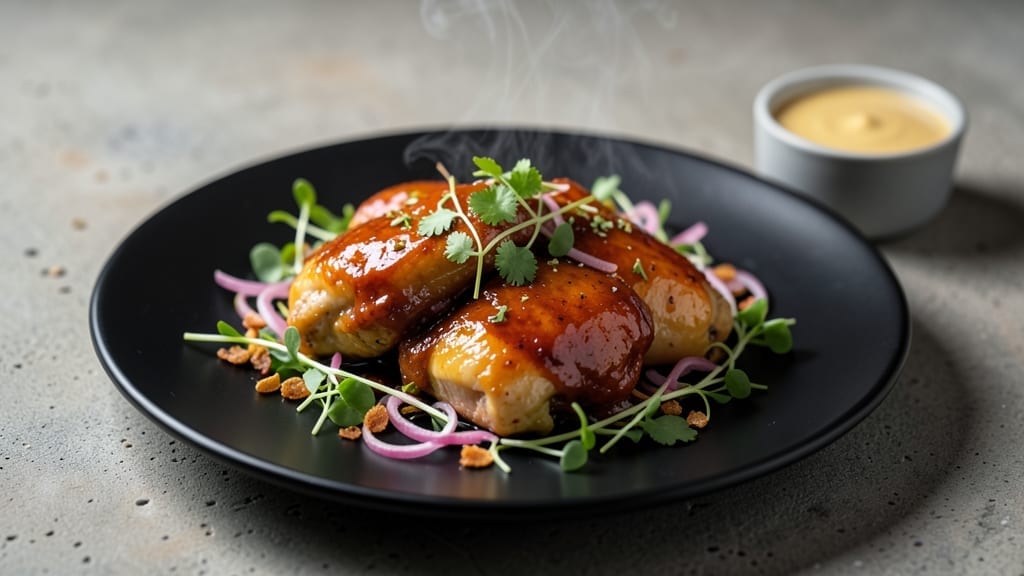
This chicken adobo recipe in the Instant Pot transforms traditional Filipino flavors into a 30-minute meal without sacrificing depth. The magic lies in balancing soy sauce and vinegar—creating a tangy, savory sauce that tenderizes the chicken perfectly.
I first discovered this method during a busy week when I needed a restaurant-quality dish that wouldn’t overwhelm my schedule.
The Instant Pot makes this recipe foolproof by controlling the cooking process precisely. After browning the chicken, you’ll add garlic, ginger, and bay leaves before pressure cooking—no need to monitor the stove.
The result? Juicy, fall-off-the-bone chicken swimming in a glossy sauce that’s equally perfect over rice or with crusty bread.
What makes this dish special is how the flavors develop—bold yet balanced, with just the right amount of tang from the vinegar and umami from the soy.
The aroma alone will fill your kitchen with warmth, and the sauce clings to every bite, making it a meal worth repeating. Ready to make this your new go-to?
Pair it with steamed jasmine rice or a simple green salad for a complete meal. The best part? Leftovers reheat beautifully, so you’ll have flavorful lunches ready in minutes. Let’s get cooking!
Ingredients for chicken adobo recipe instant pot
Nine ingredients. One pot. Filipino flavors without the fuss—just good stuff.
| Ingredient | Amount | Notes |
|---|---|---|
| Boneless, Skinless Chicken Thighs 🍗 | 1 ½ lb | Cut into 2-inch pieces |
| Soy Sauce 🥄 | ½ cup | Low-sodium preferred |
| White Vinegar 🍶 | ½ cup | Distilled or apple cider |
| Garlic Cloves 🧄 | 6 cloves | Minced or crushed |
| Fresh Ginger 🌿 | 2 tbsp | Grated, peeled |
| Bay Leaves 🍃 | 2 whole | Dried, standard size |
| Olive Oil 🫒 | 1 tbsp | Extra-virgin for browning |
| Brown Sugar 🍚 | 2 tbsp | Packed lightly |
| Salt 🧂 | 1 tsp | Kosher or sea salt |
| Black Pepper 🌶️ | ½ tsp | Freshly ground |
| Jasmine Rice 🍚 | 1 ½ cups | Uncooked, long-grain |
| Water 💧 | 3 cups | For rice cooking |
The chicken thighs are key here—bone-in, skin-on if you can find them, but boneless works fine. Trader Joe’s and Costco usually have good prices on bulk chicken. Look for thighs with a bit of fat—it renders out and keeps the meat juicy. The soy sauce should be low-sodium if possible, but regular works in a pinch. I always grab extra because it’s the base of the flavor. Fresh ginger? Peel it first—the skin’s bitter. If you’re short on time, frozen ginger works too, just thaw it first.
No soy sauce? Coconut aminos in a 1:1 ratio gets you close. White vinegar too strong? Apple cider vinegar or rice vinegar both work—just add a splash of water to mellow it out. The garlic and ginger can be pre-minced from the store (the Trader Joe’s frozen garlic is a lifesaver), but fresh is always better. Bay leaves? Dried is fine, but fresh has a more complex flavor. If you can’t find them, skip them—the dish will still be delicious. The brown sugar balances the tang, so don’t skip it even if you’re watching sugar intake.
This sauce gets better with time—2-3 days in the fridge is ideal if you can wait. The chicken reheats beautifully, so double the batch if you’re feeding a crowd. Store the sauce separately if you want to use it for other dishes—it’s amazing on rice bowls or even as a marinade. The rice? Cook it in the same pot after removing the chicken to save on cleanup. Leftovers keep for 4 days in the fridge or 3 months frozen. Trust me, the second day is even better.
Why You’ll Love This Recipe
- No-Chop Night: I swear by this recipe when I’m too tired to mince garlic. Just toss in whole cloves—they soften right into the sauce, and you still get that deep, aromatic punch without the fuss.
- Umami Bomb: That soy-vinegar-ginger combo? It’s like a flavor explosion in your mouth. The vinegar cuts through the richness of the chicken thighs, while the ginger adds just enough heat to make every bite satisfying.
- Lunchbox Hero: Here’s what sold me—this tastes even better the next day. Pack it for work or school; the sauce clings to the chicken perfectly, and it reheats in seconds. My kids actually finish their lunches now.
- Budget Win: Chicken thighs are my secret weapon for stretching meals. A single batch feeds four for dinner and leaves enough for two more lunches—no takeout needed. Plus, the ingredients cost less than half of fancy restaurant versions.
Step-by-step instructions for Instant Pot chicken adobo
Here’s the method that delivers restaurant-quality adobo in a fraction of the time.
Sear the Chicken for Maximum Flavor
Set your Instant Pot to “Sauté” mode and add the 1 tablespoon olive oil. Once hot, carefully add the 1.5 lb boneless, skinless chicken thighs cut into 2-inch pieces. Cook for 3-4 minutes per side until the chicken develops a golden-brown crust. This searing step creates depth of flavor that simply can’t be replicated without it.
Don’t overcrowd the pot—work in batches if needed. You’ll know it’s ready when the chicken releases easily from the bottom. Here’s the thing—this initial browning builds the foundation for that rich, caramelized adobo sauce we’re after. If your chicken sticks, gently scrape the bottom with a wooden spoon to release any browned bits.
Build the Adobo Base with Aromatics
Add the 6 cloves garlic cloves, 2 tablespoons fresh ginger, and 2 whole bay leaves to the pot. Stir everything together for 30 seconds until the garlic becomes fragrant and the ginger softens slightly. This quick cooking prevents the garlic from burning while allowing the ginger to release its warm, spicy notes.
Next, pour in the 0.5 cup soy sauce and 0.5 cup white vinegar. Stir well to combine and let the mixture simmer for 1 minute until slightly reduced. The vinegar will start to mingle with the soy sauce, creating the signature tangy-sweet balance that defines adobo. If you’re using low-sodium soy sauce, you might want to add a pinch of the salt at this stage to compensate.
Pressure Cook to Tender Perfection
Once the sauce has simmered, add the 2 tablespoons brown sugar, 1 teaspoon salt, and 0.5 teaspoon black pepper. Stir everything together until the sugar dissolves completely. Then, pour in the 3 cups water and give it one final stir to incorporate all the ingredients.
Place the lid on the Instant Pot and set the valve to “Sealing.” Cook on High Pressure for 12 minutes. This cooking time ensures the chicken becomes fork-tender while allowing the flavors to meld beautifully. Real talk—resisting the urge to peek during this time is crucial. Every time you open the lid, you release pressure and potentially extend the cooking time.
Prepare the Jasmine Rice
While the chicken is pressure cooking, rinse the 1.5 cups jasmine rice under cold water until the water runs clear. This removes excess starch that can make the rice gummy. Add the rice to a separate bowl and set it aside.
Once the chicken is done cooking, allow the pressure to release naturally for 10 minutes, then quick-release any remaining pressure. Carefully remove the chicken from the pot and set it aside. Pour the cooking liquid through a fine-mesh strainer into a measuring cup—you should have about 1½ cups of flavorful adobo sauce. Discard the bay leaves.
Combine and Finish
Return the chicken to the Instant Pot and pour the strained sauce over the top. Stir gently to coat the chicken evenly. Add the rinsed jasmine rice and stir once more to distribute everything evenly. Seal the lid and cook on High Pressure for 4 minutes.
When the cooking cycle is complete, let the pressure release naturally for 10 minutes before opening. The rice should be tender and the chicken should be falling off the bone. If the sauce seems too thin, you can reduce it slightly by simmering on “Sauté” mode for 2-3 minutes until it thickens to your desired consistency. Serve immediately over the jasmine rice and enjoy the perfect balance of sweet, tangy, and savory flavors.
Pro Tips For Making Chicken Adobo Recipe Instant Pot
- Sear First, Then Sauce: After burning three batches, I finally figured out that skipping the sear means flavor gets lost in the sauce. Brown the chicken thighs in the Instant Pot for 2-3 minutes on high heat before adding liquids—this locks in taste and prevents mushy meat.
- Peel That Ginger: I was skeptical until I tried it: peeled ginger blends smoother and doesn’t leave gritty bits in your sauce. Use about 1-inch fresh ginger, finely minced—no need to go overboard, but don’t skip this step if you want that clean, bright flavor.
- Natural Release First: Resist the urge to open the lid right away. Let the Instant Pot sit for 10 minutes after cooking on high pressure—this keeps the chicken tender and lets the vinegar mellow instead of turning your sauce into a harsh liquid.
- Balance the Vinegar: Start with ½ cup white vinegar, then taste before serving. If it’s too sharp, add a splash of water or a pinch of sugar to round it out. I learned this the hard way—vinegar can overpower even the best chicken.
Dietary considerations for these flavors
Gluten-Free Adaptations
This Instant Pot adobo is naturally gluten-free if you use certified gluten-free soy sauce like Kikkoman Gluten-Free Tamari. I always keep a bottle in my pantry—it has the same rich umami flavor without the gluten.
The vinegar, garlic, and ginger are all gluten-free staples, so no substitutions needed there. Just double-check your brown sugar label for hidden gluten additives, though most brands are safe. 🌱
Low-Sodium Adjustments
If you’re watching your sodium intake, use low-sodium soy sauce and reduce the added salt to just ½ teaspoon. For extra flavor without the salt, add 1 teaspoon fish sauce (like Red Boat) or an additional 1 tablespoon coconut aminos.
These alternatives provide that umami kick while keeping the dish lighter. I often use this combo when cooking for my dad—he appreciates the flavor but keeps his sodium in check.
Vegetarian Swaps
For a meatless version, replace the chicken with extra-firm tofu pressed for 30 minutes or hearts of palm for a similar texture. The sauce works beautifully with either—just increase the pressure cook time to 15 minutes for tofu to ensure it’s tender.
I’ve also seen success with mushrooms (like shiitake or portobello) for a heartier vegetarian dish. The adobo sauce’s tangy-sweet profile shines with all these alternatives. 🍄
Dairy-Free Notes
This recipe is already dairy-free, but if you’re serving it to a group with dietary restrictions, consider adding toasted coconut flakes as a garnish for a creamy texture without dairy. The sauce pairs perfectly with coconut milk rice (use 1 cup coconut milk instead of water) for a richer bowl.
I often make this version for Lily’s friends—it’s always a hit, and the coconut flavor complements the adobo beautifully.
Allergen-Friendly Tips
For nut allergies, avoid garnishes like peanuts or cashews—stick to sesame seeds or fresh cilantro instead. If you’re sensitive to sulfites, use bottled lemon juice instead of vinegar, as some vinegars contain added sulfites.
The Instant Pot method actually helps reduce sulfite concerns since we’re not simmering the sauce for hours. Always check your ingredients, and when in doubt, I like to use Bob’s Red Mill certified gluten-free and allergen-free products for peace of mind. 💡
Nutrition facts
Frequently asked questions
Can I use chicken breasts instead of thighs?
Chicken breasts work, but thighs are ideal for this recipe. Thighs stay juicier during pressure cooking, while breasts can dry out. If using breasts, cut them into 1-inch pieces and reduce pressure cook time to 8 minutes instead of 12 minutes. For extra moisture, add 1 tablespoon coconut milk to the sauce.
What if my sauce is too thin or too thick?
Too thin? Simmer on “Sauté” mode for 3-5 minutes to reduce. Too thick? Add 1-2 tablespoons water and stir. Pro tip: The sauce thickens as it cools, so don’t worry if it looks runny right after cooking. For extra richness, whisk in 1 teaspoon cornstarch mixed with 1 tablespoon water if needed.
Can I make this in a regular pot?
Yes! Use a Dutch oven instead. Sear the chicken, then add all ingredients and simmer uncovered on medium-high heat for 25-30 minutes until chicken is tender. The sauce will develop deeper flavors from the longer cooking time. Just stir occasionally and add water as needed to prevent burning.
Why does my chicken turn out rubbery?
Rubbery chicken usually means overcooking. Always use the 12-minute high pressure time for thighs (or 8 minutes for breasts). Let pressure release naturally for 10 minutes before quick-releasing. If using older chicken, reduce cook time by 2 minutes. Never skip the searing step—it helps tenderize the meat.
How do I store and reheat leftovers?
Store in an airtight container for up to 4 days in the fridge. To reheat, add 2 tablespoons water to the pot, seal, and cook on “Sauté” for 3 minutes or until heated through. For frozen leftovers (up to 3 months): thaw overnight in the fridge, then reheat with 3 tablespoons water to prevent drying.

- Crock Pot Round Steak Recipe: Slow-Sear Crust With Juicy Center - November 6, 2026
- Candied Sweet Potatoes Crock Pot Recipe: Caramelized Sweetness With Zero Effort - November 6, 2026
- Steak Recipe Crock Pot: Juicy, Caramelized Crust in 4 Hours - November 6, 2026