
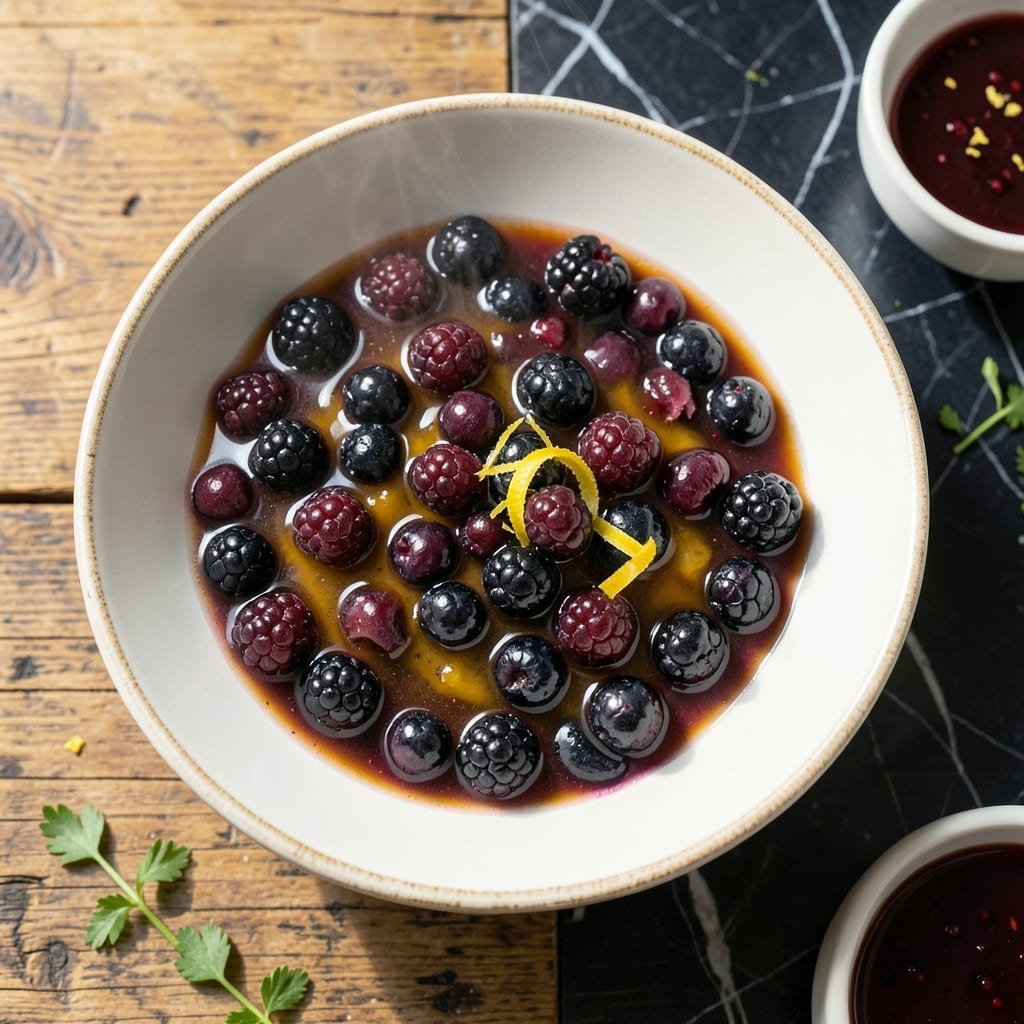
This Instant Pot method transforms fresh blackberries into a luscious, jammy dessert with minimal effort. The pressure cooker intensifies the fruit’s natural sweetness while maintaining its vibrant color and texture.
I’ve perfected this technique to create a foolproof recipe that works every time, whether you’re using fresh or frozen berries. The process takes less than 30 minutes from start to finish, with most of that time being hands-off.
The result is a versatile dessert base that can be served warm over ice cream, spooned onto pancakes, or enjoyed straight from the pot. Its concentrated flavor makes it ideal for both casual treats and special occasions.
With just a handful of ingredients and your Instant Pot, you’ll achieve restaurant-quality results that taste like summer in every bite. Here’s how to make it.
Ingredients for Blackberry Instant Pot
A handful of fresh ingredients creates this vibrant, jammy blackberry dessert.
| Ingredient | Amount | Notes |
|---|---|---|
| Fresh Blackberries 🫐 | 4 cups | Rinsed and drained |
| Granulated Sugar 🍚 | ¾ cup | Adjust to taste preference |
| Lemon Juice 🍋 | 2 tbsp | Freshly squeezed preferred |
| Vanilla Extract 🌿 | 1 tsp | Pure vanilla for best flavor |
| Cornstarch 🌾 | 2 tbsp | For thickening the mixture |
| Water 💧 | ¼ cup | For deglazing the pot |
| Unsalted Butter 🧈 | 2 tbsp | Optional, for richness |
| Salt 🧂 | ¼ tsp | Enhances the sweetness |
| Ground Cinnamon 🌶️ | ¼ tsp | Adds warmth to flavor |
| Lemon Zest 🍋 | 1 tsp | Freshly grated for brightness |
The blackberries are the star here. Fresh, plump berries yield the best texture and color, but frozen works in a pinch (no need to thaw). Look for organic or locally grown if available—they tend to be sweeter. Most grocery stores carry them year-round, but summer is peak season. If using frozen, check for added sugars or syrups and avoid those.
No fresh lemon? Bottled lemon juice works in a bind, but fresh adds that bright pop that balances the sweetness. Out of vanilla? A splash of almond extract or even a pinch of ground cardamom can add depth. Swap cornstarch for arrowroot powder or tapioca starch at the same ratio. The butter is optional—skip it for a lighter version or use coconut oil for a dairy-free twist.
This keeps 5-7 days in the fridge in an airtight container. The flavor deepens over time, so it’s even better the next day. Freeze for up to 3 months if you want to save some for later. Just thaw in the fridge overnight before using.
Why You’ll Love This Recipe
- Set and Forget: I toss everything in the Instant Pot, press a button, and walk away—no stirring, no watching the stove.
- Bursting With Flavor: The blackberries turn jammy, the vanilla and lemon juice brighten every bite, and the sugar caramelizes just enough.
- Feeds a Crowd: I double the batch for potlucks and everyone leaves asking for the recipe.
- Leftovers for Days: Honestly, I make extra—it keeps beautifully, and I spoon it over yogurt all week.
Step-by-Step Instructions for Blackberry Instant Pot Jam
This method ensures perfectly thick, glossy jam with minimal effort and maximum flavor.
Step 1: Prepare and Combine the Blackberry Mixture
Add the 4 cups Fresh Blackberries to your Instant Pot. Gently crush about half of them with a wooden spoon or potato masher to release their juices. This helps create a consistent texture and prevents large chunks in the final product.
Stir in the 0.75 cup Granulated Sugar, 2 tbsp Lemon Juice, 1 tsp Vanilla Extract, 0.25 tsp Salt, 0.25 tsp Ground Cinnamon, and 1 tsp Lemon Zest. Mix well to combine all ingredients thoroughly. The sugar will begin to dissolve as it interacts with the berry juices.
Step 2: Create the Thickening Slurry
In a small bowl, whisk together the 2 tbsp Cornstarch and 0.25 cup Water until completely smooth with no visible lumps. This slurry will thicken the jam once it cooks. Cornstarch works best when fully dissolved in cold liquid before adding to hot mixtures.
Pour the cornstarch mixture evenly over the blackberry mixture in the Instant Pot. Stir to incorporate completely, ensuring the slurry is well distributed throughout the fruit. This prevents clumping during cooking and guarantees even thickening.
Step 3: Pressure Cook the Jam
Secure the lid on your Instant Pot and set the valve to sealing. Select the high pressure setting and cook for 1 minute. While the cooking time is short, the Instant Pot will take about 10-15 minutes to come to pressure, during which the berries will begin to break down and release their juices.
Once the cooking time completes, allow for a natural pressure release for 10 minutes, then carefully quick release any remaining pressure. The natural release helps the jam set properly and prevents potential splattering from sudden pressure changes.
Step 4: Finish and Thicken the Jam
Carefully remove the lid, tilting it away from you to avoid any steam. Stir in the 2 tbsp Unsalted Butter until completely melted and incorporated. The butter adds richness and helps create a smooth, glossy finish.
Switch the Instant Pot to the sauté function on medium heat. Cook for an additional 5-7 minutes, stirring frequently, until the jam thickens to your desired consistency. You’ll notice the mixture darken slightly and the spoon will leave a clear path when dragged through the jam.
Step 5: Cool and Store the Jam
Remove the Instant Pot insert and let the jam cool at room temperature for about 20-30 minutes. As it cools, the jam will thicken further and develop its final texture. The color will deepen and become more vibrant as it sets.
Transfer the cooled jam to clean, airtight jars or containers. The jam will keep in the refrigerator for up to 3 weeks or can be processed for longer storage. Each batch makes enough to fill about two 8-ounce jars.
Pro Tips For Making Blackberry Instant Pot
- Sauté the Berries: Toss the blackberries with sugar and lemon juice, then sauté them in the Instant Pot for 3-4 minutes before pressure cooking—this jumpstarts the juices and deepens the flavor.
- Use a Slurry: Mix the cornstarch with 2 tablespoons of cold water before stirring it in, or you’ll end up with lumpy, uneven thickening that looks as bad as it tastes.
- Skip Overfilling: Never fill the Instant Pot past the halfway mark with berries, or you’ll get a messy, sticky overflow that leaves you scrubbing the ceiling.
- Add Vanilla Last: Stir in the vanilla extract after pressure cooking to preserve its aroma—boiling it dulls the flavor, and I learned that the hard way after wasting a good bottle.
Dietary Considerations for This Dish
Vegan Adaptations
This recipe is naturally vegan when you omit the 2 tbsp Unsalted Butter. I recommend substituting with coconut oil or vegan butter alternatives like Miyoko’s for the same rich mouthfeel. The berries and sugar create perfect texture without dairy.
Gluten-Free Friendly
All ingredients here are naturally gluten-free, but verify your cornstarch brand. I use Argo or Bob’s Red Mill for guaranteed gluten-free thickening. Cross-contamination is the only concern with this dish. 🌱
Sugar Reduction Tips
You can reduce the 0.75 cup Granulated Sugar to ½ cup for a less sweet jam. For sugar-free, try monk fruit sweetener blends, but note the texture may be slightly thinner. The lemon juice helps balance sweetness naturally.
Low-Carb/Keto Version
Replace sugar with erythritol or allulose at a 1:1 ratio. Use xanthan gum (½ tsp) instead of cornstarch for thickening. This creates a keto-friendly topping with 5g net carbs per serving. 💪
Allergen Considerations
This recipe is top-8 allergen free as written. For nut allergies, ensure no cross-contamination with utensils or storage. The Instant Pot liner should be dedicated to allergen-free cooking if this is a concern.
Diabetic-Friendly
Use stevia or Splenda blends for sugar replacement, but start with ⅓ cup and adjust to taste. The natural fruit sugars mean this should still be enjoyed in moderation. Pair with protein to balance blood sugar response.
Nutrition Facts
Frequently Asked Questions
Can I use frozen blackberries?
Yes! Use frozen berries without thawing. Add an extra 1-2 minutes to the pressure cooking time to account for the colder starting temperature.
Why add lemon juice?
The acidity balances the sweetness and helps activate the pectin in berries for better thickening. It also brightens the flavor and preserves color.
How do I know it’s thick enough?
When a spoon leaves a clear path on the pot’s bottom that doesn’t fill in for 2-3 seconds, it’s ready. The jam will thicken more as it cools.
What if my jam is too runny?
Return it to sauté mode and cook for 2-3 minutes longer. For a quick fix, mix 1 tsp cornstarch with water and stir in while simmering.

- 6 Oz Chocolate Chip Cookie Recipe: Perfectly Balanced Crispy Edges and Chewy Hearts - September 25, 2026
- 6-Inch Coffee Cake Recipe: Vanilla Bean Swirls and Buttery Streusel Topping - September 25, 2026
- 1 Hour Soup Recipe: Velvety Richness Without the Wait - September 25, 2026