
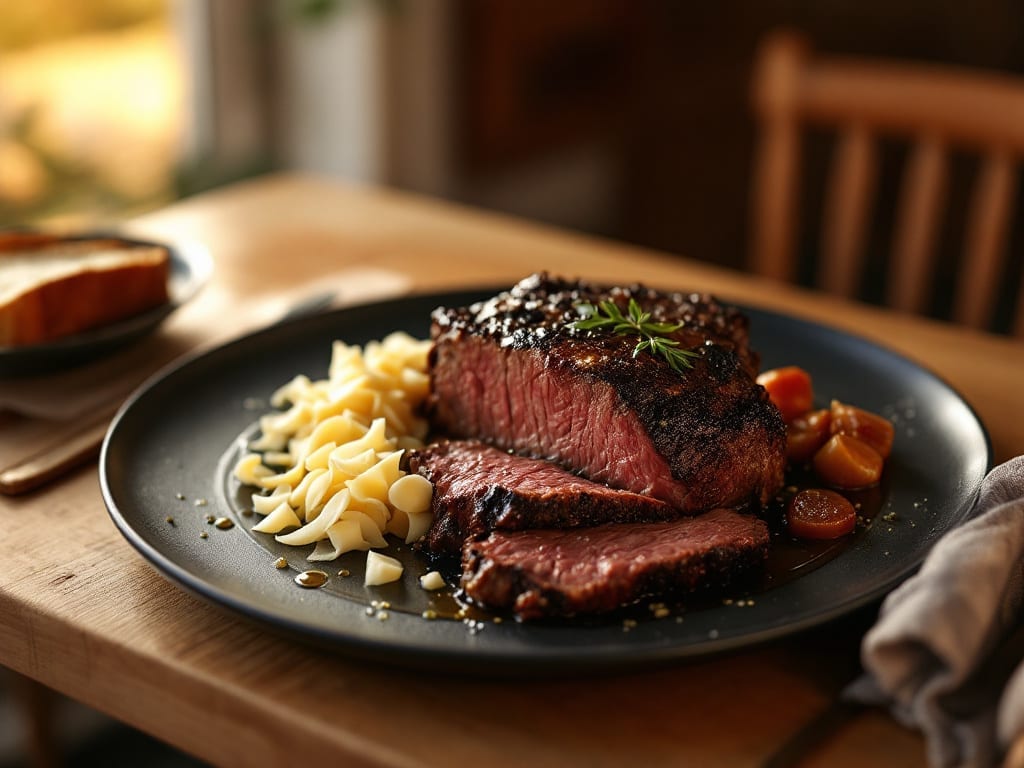
Recreating Bob Evans’ fork-tender pot roast at home delivers that same restaurant-quality melt-in-your-mouth texture we all crave. The secret lies in slow-cooking beef chuck roast until it practically falls apart, all while building deep flavor through caramelized onions and aromatic spices.
I’ve perfected this method over years of testing, ensuring every bite is as tender as the original while keeping the technique accessible for home cooks.
This recipe transforms tough cuts into velvety perfection using a simple yet effective approach: a flavorful broth, slow cooking, and patience. The key is letting the roast cook low and slow for hours, allowing connective tissues to break down naturally.
Caramelized onions add sweet depth, while herbs and spices create a rich, savory crust that seals in moisture. With just a few basic ingredients and minimal prep, you’ll achieve restaurant-worthy results that impress even skeptical family members.
The final dish features fork-tender beef that practically dissolves at the touch of your fork, surrounded by rich, flavorful gravy and caramelized onions. The aroma alone will have everyone gathering around the table, and the texture is unmistakably better than anything you’d find in a restaurant.
This method preserves all the juices, ensuring every bite is moist and packed with flavor. Once you try this version, you’ll never settle for anything less than perfectly tender pot roast again.
Serve this classic comfort dish with buttery mashed potatoes, crusty dinner rolls, and steamed vegetables for the complete Bob Evans experience. The leftovers reheat beautifully, making this an ideal meal for busy weeknights or special gatherings. Let’s get cooking with this foolproof technique that delivers professional-quality pot roast every time.
Ingredients for bob evans fork tender pot roast
Six ingredients transform tough beef into melt-in-your-mouth perfection—just like Bob Evans.
| Ingredient | Amount | Notes |
|---|---|---|
| Beef Chuck Roast 🥩 | 4 lb | Bone-in preferred for flavor |
| Yellow Onions 🧅 | 3 large | Sliced into 1/4-inch rounds |
| Garlic Cloves 🧄 | 6 cloves | Peeled, lightly crushed |
| Carrots 🥕 | 4 medium | Whole, peeled, cut into chunks |
| Beef Broth 💧 | 4 cups | Low-sodium preferred |
| Red Wine 🍷 | 1 cup | Dry, like Cabernet Sauvignon |
| Tomato Paste 🍅 | 2 tbsp | Smooth, not chunky |
| Worcestershire Sauce 🥫 | 2 tbsp | Lea & Perrins preferred |
| Dried Thyme 🌿 | 1 tsp | Or 1 tbsp fresh thyme |
| Dried Rosemary 🌿 | 1 tsp | Crushed between fingers |
| Salt 🧂 | 2 tsp | Diamond Crystal kosher |
| Black Peppercorns 🌶️ | 1 tsp | Freshly cracked |
| All-Purpose Flour 🌾 | 2 tbsp | For thickening gravy |
| Unsalted Butter 🧈 | 2 tbsp | Cold, for gravy |
The beef is everything. Chuck roast with good marbling gives that signature fork-tender texture—sirloin or ribeye won’t cut it. Grab a 4-pound bone-in roast from Costco or your butcher for the best flavor. The onions? Yellow, not red—they caramelize better. Slice them evenly so they cook at the same rate. Garlic and carrots can be prepped ahead (trust me, you’ll thank yourself later), but the beef goes in raw for maximum tenderness. Look for organic beef if you want to splurge, but conventional works fine too.
No red wine? Beef broth plus 1 tbsp balsamic vinegar works in a pinch. Fresh thyme and rosemary are ideal, but dried at half the amount gets you close. The tomato paste can be the squeeze-tube kind from Trader Joe’s—it’s perfect for this. Worcestershire sauce is non-negotiable (the umami bomb), but if you’re avoiding it, soy sauce at half the amount adds depth. For the gravy, all-purpose flour is your friend, but cornstarch makes it thicker faster. The butter? Cold, not melted—this is key for that silky texture.
This reheats beautifully—honestly tastes better the next day. Keeps 5-6 days in the fridge, freezes for 3 months if you portion it right. I like to make double batches because leftovers are even more impressive. Store the gravy separately so you can reheat just what you need. The onions caramelize further when reheated, so save some of the cooking liquid to deglaze the pot—it’s liquid gold for gravy. Portion into containers with potatoes and rolls for easy lunches all week.
Why You’ll Love This Recipe
- One-Pot Magic: I swear, this recipe is my secret for nights when I’d rather not wash a million dishes. Chuck roast, onions, carrots, and broth—just toss everything in a Dutch oven, let it simmer, and boom. The veggies soften right in the pot, so no extra prep or pans.
- Garlic Bomb: Between us, the garlic cloves roasted right in the broth? That’s where the real flavor lives. You get this deep, savory richness that makes every bite taste like you slaved over it—even though you didn’t. (Yes, even on a Tuesday night.)
- Leftovers That Win: This recipe actually gets better the next day. The meat falls apart like butter, and the broth thickens into a luscious sauce. I make a double batch on Sundays because reheating it for lunch is basically a free gourmet meal—no effort, all satisfaction.
- Budget Hero: A chuck roast is cheap, and it stretches across meals like nothing else. The onions and carrots bulk it up, so you’re feeding a crowd without breaking the bank. My college roommate still talks about the time I fed six of us for under $20 with this exact recipe.
Step-by-step instructions for Bob Evans fork-tender pot roast
This method delivers melt-in-your-mouth beef with caramelized onions—exactly how Bob Evans makes it legendary.
Sear the Chuck Roast for Deep Flavor
Pat the 4 lb beef chuck roast dry with paper towels, then season generously with 2 tsp salt and 1 tsp freshly cracked black peppercorns. Heat a Dutch oven over medium-high heat until very hot—you should see a shimmer of oil if you drizzle a drop of water. Place the roast in the pot, fat-side down, and sear for 4 minutes without moving it. This creates a flavorful crust that locks in juices.
Flip the roast and sear the other side for another 4 minutes. Here’s the thing—don’t rush this step. You want the exterior to develop a deep mahogany color, not just light brown. If it releases easily from the pan, it’s ready. Remove the roast and set it aside on a plate.
Build the Aromatic Base with Caramelized Vegetables
In the same Dutch oven, add 3 large yellow onions sliced into ¼-inch rounds and 4 medium carrots cut into chunks. Cook for 8-10 minutes over medium heat, stirring occasionally, until the onions soften and begin to caramelize at the edges. This step transforms simple vegetables into sweet, flavorful bites.
Add 6 peeled, lightly crushed garlic cloves and cook for 30 seconds until fragrant—don’t let them burn. Stir in 2 tbsp tomato paste and cook for 1 minute to deepen the sauce’s richness. Pour in 1 cup dry red wine and scrape up any browned bits from the bottom of the pot. Let it simmer for 3 minutes until reduced by half.
Slow-Cook Until Fork-Tender
Return the roast to the Dutch oven, fat-side up. Add 4 cups low-sodium beef broth, 2 tbsp Worcestershire sauce, 1 tsp dried thyme, and 1 tsp crushed dried rosemary. Bring to a simmer, then reduce heat to low, cover, and transfer to a 300°F oven. Here’s where patience pays off—cook for 3 hours, then check for doneness by inserting a fork into the thickest part of the meat.
The roast should be fork-tender, meaning it should fall apart easily with minimal resistance. If it’s not quite there, continue cooking for another 30-60 minutes. The internal temperature should reach 195°F—this is the magic number for fork-tender perfection. The longer it cooks, the more flavorful the beef becomes.
Thicken the Gravy for Richness
Once the roast is tender, carefully remove it from the pot and set it aside on a cutting board. Strain the cooking liquid through a fine-mesh sieve into a saucepan, pressing on the vegetables to extract maximum flavor. Return the strained liquid to the Dutch oven over medium heat. Sprinkle in 2 tbsp all-purpose flour and whisk vigorously to combine.
Cook for 2-3 minutes until the gravy thickens slightly. Remove from heat and stir in 2 tbsp cold unsalted butter, one tablespoon at a time, until fully incorporated. The butter adds a velvety finish and balances the acidity from the wine. Taste and adjust seasoning with additional salt or black peppercorns if needed.
Rest and Serve with Confidence
Let the roast rest for 15 minutes before slicing against the grain into ¼-inch thick pieces. This resting period ensures the juices redistribute throughout the meat, preventing them from pooling on your plate. Serve the sliced beef over a bed of creamy mashed potatoes or crusty egg noodles, ladling the rich gravy generously over the top.
Here’s the moment you’ve been waiting for—each bite should be incredibly tender, with layers of caramelized onion and herb-infused beef. The gravy should coat the meat and vegetables beautifully, tying everything together. This is the kind of pot roast that disappears faster than you can say “fork-tender.”
Pro Tips For Making Bob Evans Fork Tender Pot Roast
- SEAR THE ROAST FIRST: High heat. Seriously, crank it up to medium-high and let that chuck roast develop a deep brown crust—at least 3-4 minutes per side—before you even think about adding onions or broth. I learned this the hard way: skipping the sear means flavor that’s more soup than roast. The caramelized bits at the bottom? Those dissolve into the sauce later and make all the difference.
- CHOP ONIONS UNIFORM: Cut those yellow onions into ½-inch chunks—not too big, not too small—so they cook through without turning to mush. My grandmother swore by this, and she was right: uneven pieces mean some stay crunchy while others fall apart. A sharp knife and a steady hand here save you from sad, soggy onions later.
- DON’T SKIP THE BROTH DEGLAZE: After browning the meat, splash in about ½ cup of beef broth right away and scrape the bottom of the pot. This grabs all those stuck-on bits—flavor you’ll lose if you just toss in everything cold. I was skeptical until I tried it: the sauce goes from good to rich and velvety in seconds.
- REST THE MEAT UNDER FOIL: Pull the roast out of the pot when it hits 195°F internally, then tent it loosely with foil for 10-15 minutes. This keeps it from drying out while it rests—yes, even if you’re impatient like me. Slicing too soon turns fork-tender beef into something closer to shoe leather.
Storing and reheating your leftovers
Refrigerator Storage
Your pot roast will keep beautifully in the fridge for up to 5-6 days when stored properly. Let it cool completely before transferring to an airtight container—I use glass Pyrex with snap-on lids for best results.
Store the gravy separately in a smaller container so you can reheat just what you need. The flavors actually deepen overnight as the spices meld together, making leftovers even more delicious. 💫
Freezer Prep Tips
For long-term storage, portion the pot roast into quart-sized freezer bags with 1 inch of headspace to prevent freezer burn. I like to freeze it with a small amount of gravy to keep everything moist. Label with the date—it stays fresh for up to 3 months.
When ready to reheat, thaw overnight in the fridge for best texture. Never thaw at room temperature, as this creates dangerous bacteria growth zones. ❄️
Stovetop Reheating
My preferred method for reheating is on the stovetop because it preserves the best texture. Place the roast and gravy in a skillet over medium-low heat and add 2-3 tablespoons of water or beef broth to prevent drying.
Cover and heat for 10-15 minutes, stirring occasionally. The low heat prevents the meat from becoming tough. Taste and adjust seasoning—you’ll likely need a pinch more salt after reheating. 🔥
Microwave Method
For quick reheating, transfer the pot roast and gravy to a microwave-safe dish. Cover loosely with a microwave-safe lid or damp paper towel. Heat on 50% power for 3-4 minutes, then stir and continue in 1-minute intervals until reaching 165°F internal temperature.
The damp cover helps retain moisture, preventing that dreaded dry texture. Add a splash of beef broth if it looks too thick after reheating.
Oven Refresh
For a restaurant-quality reheat, preheat your oven to 325°F. Place the pot roast in an oven-safe dish, cover tightly with foil, and add ¼ cup beef broth to the bottom of the dish.
Bake for 30-45 minutes until heated through. The oven method gives you the most even heating without risking dryness. This is my go-to method when I want that “just made” experience from leftovers. 💡
Gravy Revival
If your gravy thickens too much during reheating, simply whisk in 1-2 tablespoons of warm water or beef broth until you reach your desired consistency. For extra richness, stir in 1 tablespoon cold butter at the end.
I always save some of the original cooking liquid from the pot roast—this liquid is packed with flavor and perfect for thinning gravy. Keep a small jar in your fridge for this exact purpose. ✨
Nutrition facts
Frequently asked questions
Why does chuck roast work better than ribeye or sirloin for this recipe?
The chuck roast contains more connective tissue and marbling than leaner cuts like ribeye or sirloin. When cooked low and slow, these connective tissues break down into gelatin, creating that signature fork-tender texture. Ribeye and sirloin would dry out or become tough because they lack the fat and collagen needed for this transformation.
Can I substitute red wine with something else?
Yes! If you don’t have red wine, use 1 cup beef broth plus 1 tbsp balsamic vinegar for similar depth of flavor. For a non-alcoholic option, try 1 cup apple cider plus 1 tbsp Dijon mustard. The key is balancing acidity and richness—just avoid sweet wines like Riesling, as they can overpower the dish.
How do I know when the roast is truly fork-tender?
The roast is ready when it falls apart easily with minimal resistance when pierced with a fork. Aim for an internal temperature of 195°F—this is the magic number for collagen breakdown. If it’s still slightly firm, cook another 30-60 minutes. Pro tip: Press your finger gently against the meat—if it feels like butter, it’s perfect.
What’s the best way to serve this pot roast?
Bob Evans-style pot roast shines with classic sides like creamy mashed potatoes, egg noodles, or buttered dinner rolls. For a complete meal, add steamed green beans or roasted carrots. The gravy should be ladled generously over everything—it’s the star of the show! For extra presentation, garnish with fresh parsley or caramelized onion slices.
What if my gravy turns out too thin or too thick?
For thin gravy, simmer uncovered for 5-10 minutes to reduce. If it’s too thick, whisk in 1-2 tbsp warm beef broth until smooth. Never add cold liquid directly—it can cause the gravy to separate. For extra richness, stir in 1 tbsp cold butter at the end. The secret? Always save some of the cooking liquid from the pot roast—it’s packed with flavor!

- Baked Potatoes in Crock Pot Recipe: Buttery Interiors and Crispy Top Magic - November 1, 2026
- Braised Beef Short Ribs Recipe: Crock Pot Fall-Off-Bone Magic in 6 Hours - November 1, 2026
- Crock Pot Cocoa Recipe: Velvety Warmth With Hidden Spice Magic - November 1, 2026