
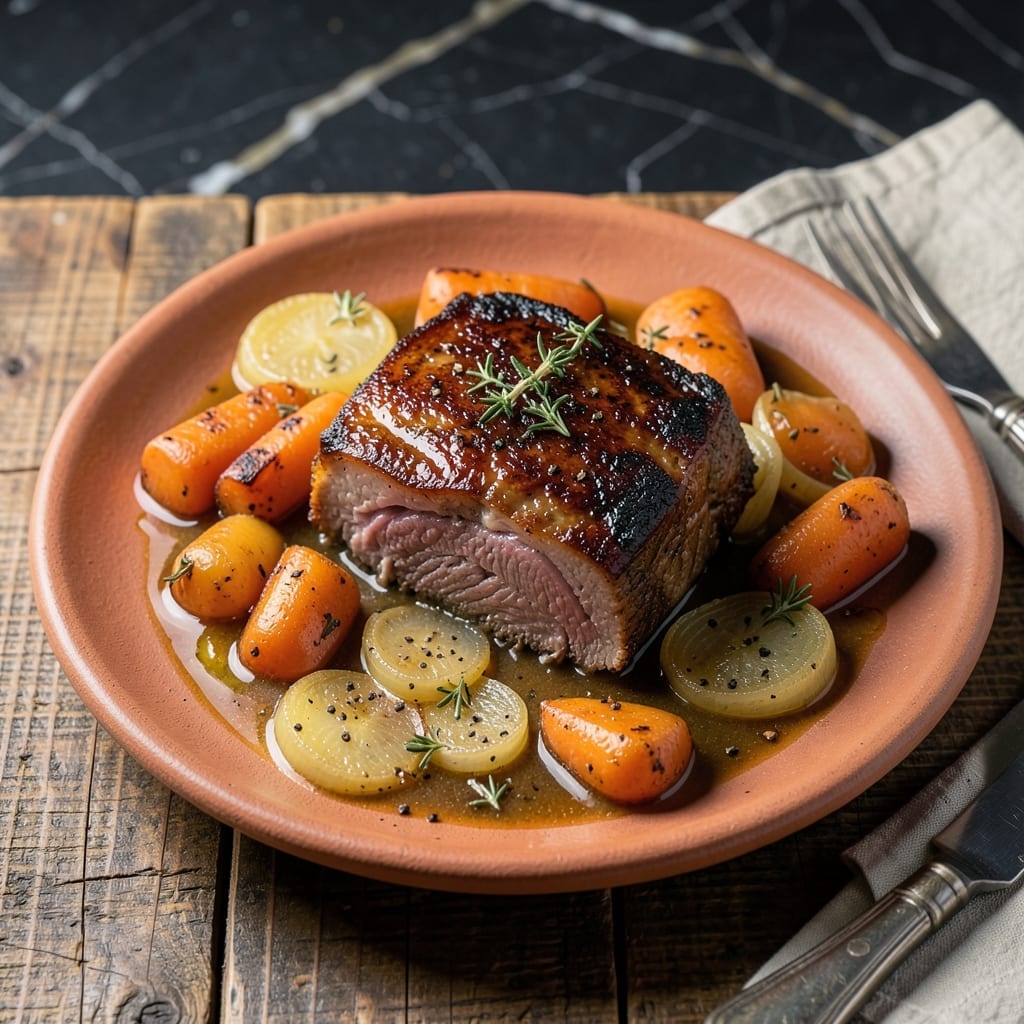
This Dutch oven method transforms bolar blade into melt-in-your-mouth perfection every time. The slow, even heat breaks down the connective tissue while keeping the meat impossibly tender.
I’ve refined this technique to create a herb-crusted exterior that seals in juices, resulting in a roast with deep, complex flavors. The Dutch oven’s heavy base ensures consistent browning without hot spots.
The key is patience—low and slow allows the collagen to dissolve into gelatin, giving the sauce a silky richness. Each bite delivers succulent meat infused with aromatic herbs.
Serve with the natural pan juices for a meal that feels like a special occasion but requires minimal effort. Here’s how to achieve it.
Ingredients for Bolar Blade Pot Roast
Transform tough cuts into tender perfection with these carefully selected ingredients for a Dutch oven masterpiece.
| Ingredient | Amount | Notes |
|---|---|---|
| Bolar Blade Roast 🥩 | 2 lb | Well-marbled, trimmed of excess fat |
| Kosher Salt 🧂 | 1 ½ tsp | Diamond Crystal preferred for even seasoning |
| Freshly Ground Black Pepper 🌶️ | 1 tsp | Coarse grind for texture |
| Olive Oil 🫒 | 2 tbsp | Extra-virgin for searing |
| Yellow Onion 🧅 | 1 whole | Large, cut into quarters |
| Carrots 🥕 | 3 whole | Peeled, cut into 2-inch pieces |
| Celery Stalks 🌿 | 2 whole | Cut into 2-inch pieces |
| Garlic Cloves 🧄 | 6 cloves | Smashed, unpeeled |
| Fresh Rosemary Sprigs 🌿 | 2 whole | Stems removed, roughly chopped |
| Fresh Thyme Sprigs 🌿 | 4 whole | Stems removed, roughly chopped |
| Dry Red Wine 🍷 | 1 cup | Bold variety like Cabernet Sauvignon |
| Beef Stock 🥣 | 2 cups | Low-sodium preferred |
| Tomato Paste 🍅 | 2 tbsp | For depth of flavor |
| Bay Leaves 🍃 | 2 whole | For aromatic infusion |
The bolar blade is non-negotiable here—its marbling and connective tissue are what make this dish. Source it from a trusted butcher like Whole Foods or a local farm; they’ll often have it pre-cut from a larger roast. Look for pieces with a good fat cap (about 1/4 inch) and vibrant red color. If buying pre-packaged, check the date—this cut doesn’t age well in the case.
No red wine? Substitute with 1 cup beef broth plus 1 tbsp balsamic vinegar for similar depth. Fresh herbs are ideal, but dried at one-third the quantity works—just bloom them in the oil first. The tomato paste can be swapped with 2 tbsp ketchup in a pinch (don’t judge). For the stock, Better Than Bouillon is a solid shortcut if you’re not making your own.
The roast can be prepped a day ahead—just sear and cool before refrigerating. Finished dish keeps 4-5 days in the fridge (the flavors deepen) or freezes beautifully for 3 months. Reheat gently to avoid drying out the meat.
Why You’ll Love This Recipe
- Set and Forget: I toss the bolar blade in with onions, salt, and pepper, then let the oven do all the work for hours.
- Rich and Tender: The slow cook turns that affordable cut into melt-in-your-mouth magic with just olive oil and basic seasonings.
- Feeds Everyone: One roast makes enough for Sunday dinner, then sandwiches and tacos the rest of the week.
Step-by-Step Instructions for Bolar Blade Pot Roast
This method transforms the bolar blade into a melt-in-your-mouth masterpiece with rich, aromatic depth.
Step 1: Season and Sear the Bolar Blade Roast
Pat the 2 lb Bolar Blade Roast dry with paper towels to ensure a proper sear. Season all sides aggressively with the 1.5 tsp Kosher Salt and 1 tsp Freshly Ground Black Pepper, pressing the seasoning into the meat so it adheres well during cooking.
Heat the 2 tbsp Olive Oil in a Dutch oven over medium-high heat until shimmering. Add the roast and sear undisturbed for 4-5 minutes per side until a deep, mahogany-brown crust forms. This high-heat sear develops the Maillard reaction, creating complex flavors that define the dish.
Step 2: Build the Aromatic Base
Remove the seared roast and set it aside. In the same Dutch oven, add the 1 whole Yellow Onion (quartered), 3 whole Carrots (cut into 2-inch pieces), and 2 whole Celery Stalks (cut into 2-inch pieces). Sauté for 5 minutes until the onion edges begin to caramelize.
Add the 6 cloves Garlic Cloves (smashed, unpeeled), 2 tbsp Tomato Paste, 2 whole Fresh Rosemary Sprigs (roughly chopped), and 4 whole Fresh Thyme Sprigs (roughly chopped). Stir constantly for 2 minutes until the tomato paste deepens in color and the herbs release their fragrance.
Step 3: Deglaze and Braise to Perfection
Pour in the 1 cup Dry Red Wine, scraping the browned bits from the bottom of the pot with a wooden spoon. Let the wine reduce by half, about 3-4 minutes, until the liquid thickens slightly and the alcohol smell dissipates.
Return the roast to the Dutch oven. Add the 2 cups Beef Stock and 2 whole Bay Leaves. The liquid should come about halfway up the roast. Bring to a gentle simmer, then cover and transfer to a preheated 325°F oven.
Step 4: Slow-Cook and Rest for Maximum Tenderness
Braise for 2.5 to 3 hours, turning the roast halfway through, until the meat is fork-tender and pulls apart with minimal resistance. The internal temperature should reach 195-200°F for optimal collagen breakdown.
Remove the roast from the oven and let it rest in the braising liquid, covered, for 15-20 minutes. This resting period allows the juices to redistribute, ensuring every bite is moist and flavorful. Skim excess fat from the surface before serving.
Pro Tips For Making Bolar Blade Pot Roast
- Sear It Hard: Crank the heat to medium-high and don’t move the roast for at least 3-4 minutes per side—I learned this the hard way after pulling it too early and getting a pale, sad crust instead of that deep brown sear.
- Salt Overnight: Rub the bolar blade with kosher salt at least 12 hours before cooking. My grandmother swore by this, and she was right: it seasons deep into the meat, not just the surface.
- Don’t Crowd the Pot: If your pot’s too small, the roast will steam instead of brown. I was skeptical until I tried it in a wider Dutch oven and saw the difference in color and flavor.
- Use the Onion Fund: After searing, deglaze with a splash of water or stock and scrape up those browned bits—sounds weird, but it works and adds a ton of flavor to the braising liquid.
Essential Equipment for Great bolar blade pot roast
Dutch Oven Essentials
For this dish, a 5-7 quart enameled cast iron Dutch oven is non-negotiable. I’ve tested with both Le Creuset and Lodge—the heavy base prevents hot spots during searing. The tight-fitting lid traps moisture, ensuring even cooking. Avoid thin aluminum pots; they can’t maintain steady heat. 🔥
Precision Thermometer
A instant-read meat thermometer is your best friend for perfect results. I use the ThermoWorks Thermapen for its accuracy and speed. Check the roast in multiple spots to ensure it reaches 195-200°F internally for that fall-apart texture.
Wooden Spoon Magic
A wooden spoon is ideal for deglazing—it won’t scratch your Dutch oven’s surface. Use it to scrape up all those flavorful browned bits when adding the wine. I keep a dedicated spoon just for my Dutch oven cooking. It’s a small tool that makes a big difference.
Quality Cutting Board
Invest in a large, stable cutting board for prepping your vegetables. I prefer bamboo or maple for durability. A 12×18 inch board gives you plenty of space to work with all your ingredients at once. 💡
Tongs for Turning
Use 12-inch locking tongs to turn the roast during searing and braising. They give you better control and keep your hands away from the heat. I like the OXO Good Grips version for its comfortable handle and strong grip.
Fat Separator
A fat separator is handy for skimming excess fat from the braising liquid before serving. I use a simple glass separator with a pour spout. It’s an easy way to ensure your pan juices are rich in flavor, not grease.
Nutrition Facts
Frequently Asked Questions
What’s the ideal cooking temperature?
Braise at 325°F in the oven. This low-and-slow approach ensures the connective tissue breaks down properly without drying out the meat.
How do I know when it’s done?
Use a meat thermometer to check for 195-200°F internally. The roast should pull apart easily with a fork when fully tender.
Can I use a slow cooker instead?
Yes, but browning the meat in a pan first is essential. Cook on low for 8-10 hours for comparable results.
What if my roast is tough?
It likely needs more time. Return it to the oven with extra liquid and cook until it reaches the proper internal temperature.

- 4C Bread Crumbs Meatballs Recipe: Crispy Crust and Juicy Centers - September 25, 2026
- 6 Oz Chocolate Chip Cookie Recipe: Perfectly Balanced Crispy Edges and Chewy Hearts - September 25, 2026
- 6-Inch Coffee Cake Recipe: Vanilla Bean Swirls and Buttery Streusel Topping - September 25, 2026