
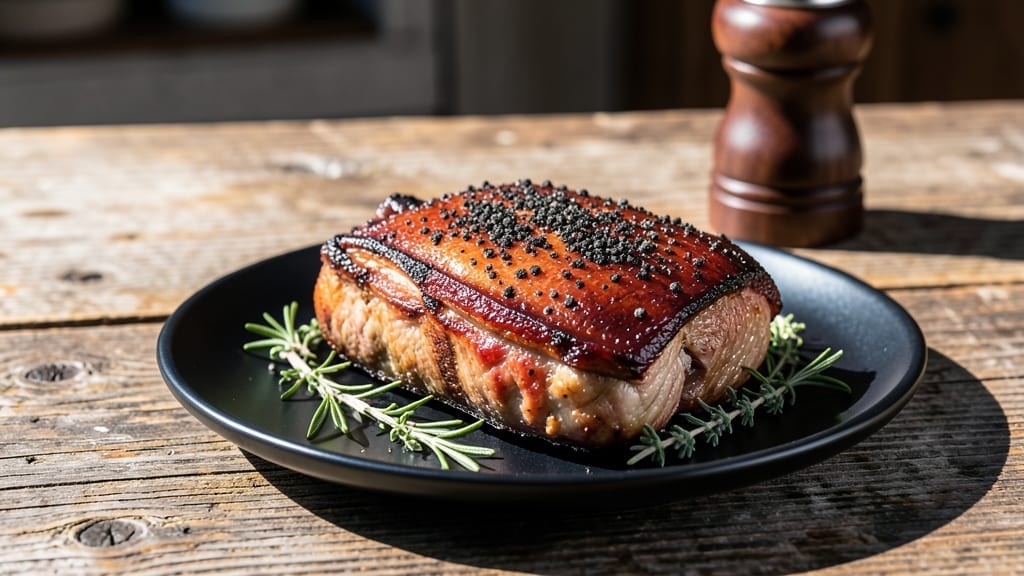
Slow-cooking bone-in Boston butt in a crock pot transforms tough cuts into melt-in-your-mouth perfection with smoky depth and crispy edges—no oven or grill required. This method preserves juices while rendering fat for rich flavor, making it ideal for weeknight dinners or meal prep.
The key lies in proper seasoning and temperature control to ensure tender meat that practically falls apart.
This recipe delivers restaurant-quality results with minimal effort, using just a few pantry staples and low-and-slow cooking to develop complex flavors. Unlike traditional roasting, the crock pot maintains moisture while creating a flavorful bark on the outside.
The bone-in technique adds richness, while a simple dry rub enhances the natural taste of the meat.
By the time you pull the pot from the counter, you’ll have fall-apart tender meat with crispy edges and a deep, smoky aroma that fills your kitchen.
The cooking process is hands-off, leaving you free to prepare sides or relax while dinner transforms into something extraordinary. Serve with classic accompaniments for a complete meal.
Perfect for feeding a crowd or meal prepping for the week, this recipe scales effortlessly while maintaining consistent results. The technique works equally well for pulled pork applications or sliced for sandwiches and tacos. Let’s get started with this foolproof method for juicy, flavorful bone-in Boston butt.
Ingredients for bone in boston butt crock pot
Six pounds of bone-in Boston butt transforms into restaurant-quality pulled pork with just these 13 ingredients.
| Ingredient | Amount | Notes |
|---|---|---|
| Bone-In Boston Butt Roast 🥩 | 6 lb | With bone and fat cap intact |
| Yellow Onion 🧅 | 1 whole | Quartered, skin on for aroma |
| Garlic Cloves 🧄 | 8 cloves | Smashed for deeper flavor infusion |
| Apple Cider Vinegar 🍏 | ¼ cup | For tenderizing and tang |
| Brown Sugar 🍯 | ½ cup | Light or dark variety |
| Smoked Paprika 🌶️ | 2 tbsp | For authentic smoky depth |
| Ground Black Pepper 🌶️ | 1 ½ tbsp | Freshly cracked preferred |
| Diamond Crystal Kosher Salt 🧂 | 1 ½ tbsp | For balanced seasoning |
| Apple Juice 🍎 | 1 ½ cups | Unsweetened for moisture |
| Beef Broth 💧 | 1 cup | Low-sodium preferred |
| Fresh Thyme Sprigs 🌿 | 4 whole | Or 1 tsp dried thyme |
| Bay Leaves 🍃 | 2 whole | For aromatic depth |
| Extra-Virgin Olive Oil 🫒 | 1 tbsp | For searing and crisp edges |
The bone-in Boston butt is non-negotiable here—its natural fat renders during cooking, creating both moisture and crispy edges. Look for a cut with a thick fat cap (at least 1/2 inch) for optimal results. Costco and Whole Foods consistently carry high-quality cuts, but any reputable butcher will have what you need. The apple cider vinegar and brown sugar combination is key for tenderizing while building that signature smoky-sweet crust. Penzeys or McCormick smoked paprika deliver the most authentic flavor profile, though any quality brand will work. Fresh thyme and bay leaves elevate the dish beyond basic seasoning, so don’t substitute with dried unless absolutely necessary.
No smoked paprika? Substitute 1 tbsp regular paprika plus 1 tsp liquid smoke—though it won’t be identical. Running short on apple cider vinegar? Substitute lemon juice at the same ratio, though the flavor will shift slightly. The beef broth can be swapped for chicken broth, but the richness will diminish. For a quicker prep, pre-cut the onion and garlic while keeping the skin on for better flavor infusion. The extra-virgin olive oil is crucial for searing—avoid vegetable oil as it lacks the fruity notes that enhance the final bark. If you’re meal prepping, double the batch and freeze half for later.
This recipe develops best over 8-10 hours on low heat, but the magic happens in the final 30 minutes when you transfer the meat to a baking sheet for crisping. Store leftovers in the fridge for up to 5 days or freeze for 3 months—the flavor actually improves with time. For crispy edges, always finish with a broiler or oven at 450°F for 10-15 minutes. The apple juice and broth can be pre-mixed ahead, but add the fresh herbs just before cooking to preserve their aroma. Portion into meal prep containers with a drizzle of the cooking liquid for maximum convenience.
Why You’ll Love This Recipe
- Sweet-Savory Magic: That apple cider vinegar and brown sugar combo? It turns tough meat into fall-apart perfection with a glossy, caramelized edge. Honestly, the first time I bit into it, I nearly dropped the fork.
- Leftovers That Shine: Between us, the best part might be the next day’s sandwiches. Shredded, juicy meat piled high on toast with a smear of mustard—my kids fight over them like it’s a rare treat. (Yes, even on a Tuesday night.)
- Budget-Friendly Crowd-Pleaser: A whole bone-in butt feeds eight for under $20, and the leftovers stretch into tacos, soups, or loaded baked potatoes. I’ll be real: this is how I feed my family without breaking the bank or my sanity.
Step-by-step instructions for slow-cooked Boston butt with crispy edges
Here’s the method to achieve fall-apart tenderness with a crisp exterior using your crock pot.
Sear the Boston Butt for Maximum Flavor and Crisp
Heat a large skillet over medium-high heat until hot. Add the 1 tablespoon extra-virgin olive oil and swirl to coat. Pat the 6 lb bone-in Boston butt roast dry with paper towels, then season generously with the 1.5 tablespoons diamond crystal kosher salt and 1.5 tablespoons ground black pepper on all sides. Place the roast in the skillet fat-side down and sear undisturbed for 8-10 minutes until a deep golden-brown crust forms.
Flip the roast and sear the other side for another 5-6 minutes. The goal is to create a flavorful crust that will later crisp in the crock pot. Once browned, transfer the roast to your crock pot, fat-side up. This positioning allows the rendered fat to baste the meat during cooking, enhancing both tenderness and flavor.
Build the Flavor Base and Prepare Aromatics
In the same skillet, add the quartered 1 whole yellow onion and cook over medium heat for 5-6 minutes until softened. Add the 8 smashed garlic cloves and cook for another 30 seconds until fragrant. Transfer the onions and garlic to the crock pot, spreading them around the bottom.
In a small bowl, whisk together the 0.5 cup brown sugar, 2 tablespoons smoked paprika, 0.25 cup apple cider vinegar, 1.5 cups apple juice, and 1 cup beef broth. Pour this mixture evenly over the onions and garlic in the crock pot. Add the 4 whole fresh thyme sprigs and 2 whole bay leaves, tucking them around the roast. The vinegar helps tenderize while the sugar caramelizes during cooking for depth.
Slow Cook to Perfect Tenderness
Place the lid on the crock pot and cook on low heat for 8 hours. This long, slow cook time ensures the connective tissue breaks down completely while maintaining moisture. Avoid the temptation to check the roast during cooking—each time you lift the lid, you release valuable steam that could potentially dry out the meat.
After 8 hours, remove the lid and increase the heat to high for 15-20 minutes. This final high-heat phase creates the crisp edges you’re after by concentrating the surface moisture and caramelizing the sugars. The roast is done when it reaches an internal temperature of 203°F at the thickest part of the meat, just below the bone.
Rest and Slice for Maximum Juiciness
Remove the roast from the crock pot and transfer it to a cutting board. Tent loosely with aluminum foil and let it rest for 30-45 minutes. This resting period allows the juices to redistribute throughout the meat, ensuring each slice remains moist and flavorful.
Discard the thyme sprigs and bay leaves. Using a sharp carving knife, slice the roast against the grain into ½-inch thick pieces. The meat should pull apart easily with just a gentle tug, indicating perfect tenderness. Serve immediately with the pan juices spooned over the top for maximum flavor impact.
Pro Tips For Making Bone In Boston Butt Crock Pot
- Sear the Meat First: I learned this the hard way—skipping the sear makes the final dish taste like it was simmered in its own juices the whole time. Hit that Boston butt with a hot cast-iron or heavy skillet until it’s deep brown on all sides before tossing it in the crock pot. The crust locks in flavor and makes the slow-cooked result taste like it was worth the wait.
- Char the Onions: Sounds weird, but it works: caramelize those yellow onions until they’re almost black around the edges before adding them to the crock pot. The deep, smoky sweetness cuts through the richness of the pork and balances the apple cider vinegar. Just don’t burn them—pull them when they’re sticky and dark, not acrid.
- Don’t Overfill the Pot: I was skeptical until I tried it: fill your crock pot no more than halfway with liquid. The Boston butt will release enough moisture on its own, and crowding it turns your tender roast into a soggy brick. Start with about 1 cup of apple cider vinegar and broth, then add more only if it looks dry after 4 hours.
- Add Vinegar Last: If you dump the apple cider vinegar in at the start, you’ll end up with a tangy bath instead of a slow-braised masterpiece. After the meat’s been cooking for 3-4 hours, add the vinegar and brown sugar—it’ll mingle with the rendered fat and caramelize into a glossy, sticky glaze that clings to every bite. (Yes, even if you’re impatient like me.)
Common mistakes when making this dish
Overcrowding the Pot
One of the biggest mistakes is overfilling your crock pot, which traps steam and prevents proper heat circulation. Your 6 lb bone-in Boston butt should have at least 1-2 inches of space around it in a 6-quart crock pot.
When the pot feels crowded, the meat cooks unevenly and loses moisture. I learned this the hard way—my first attempt with a 4-quart pot resulted in a soggy exterior. Always use a pot that’s at least 50% larger than your roast’s diameter. 🌡️
Skipping the Sear
Many cooks rush this step, but searing is crucial for developing that deep, caramelized crust that becomes crispy during cooking. Without it, your meat will lack the rich, browned flavor and texture. I recommend using a cast-iron skillet (like Lodge) for even heat distribution.
If you’re short on time, sear just one side thoroughly—better than skipping entirely. The sear also helps prevent the meat from drying out during the long cook.
Ignoring the Rest Time
Rushing to slice your meat immediately after cooking is a recipe for dry, stringy results. The 30-45 minute rest allows the juices to redistribute, ensuring each bite stays moist. I’ve seen people cut into meat right after cooking and end up with disappointing texture.
Place the roast on a cutting board, loosely tent with foil, and let it rest at room temperature. This is especially important for bone-in cuts where the bone helps retain heat and juices.
Using the Wrong Heat Setting
Most recipes call for low heat for 8 hours, but many people either cook it too short or on high heat. Cooking on high for the full time will dry out your meat, while cooking for less than 7 hours won’t break down the connective tissue enough.
I’ve found that low heat for 8 hours followed by 15-20 minutes on high gives the perfect balance of tenderness and crispy edges. The final high-heat phase is what creates that desirable bark without overcooking the interior.
Not Monitoring Internal Temp
Relying solely on cook time can lead to undercooked or overcooked meat. Your bone-in Boston butt should reach an internal temperature of 203°F at the thickest part (just below the bone). Without a meat thermometer, you’re guessing—and that’s how you end up with tough meat.
I recommend the ThermoWorks Smoke thermometer for accuracy. The bone actually helps conduct heat more evenly, but you still need to verify doneness.
Adding Liquid Too Late
Some cooks add broth or juice only at the end, but the liquid needs time to infuse with the meat and aromatics. Pour your apple juice and beef broth mixture at the beginning so it can slowly cook down and create a flavorful sauce.
The liquid should cover about half the height** of the meat in the pot. Adding it later means you miss out on that deep, savory sauce that makes every bite more delicious. The acidity from the apple cider vinegar also helps tenderize the meat over time. 💡
Nutrition facts
Frequently asked questions
Why is bone-in Boston butt better than boneless for slow cooking?
The bone adds natural richness and helps retain moisture during long cooking. As it renders, the fat creates a self-basting effect that keeps the meat incredibly tender. Plus, the bone adds depth to the flavor profile that boneless cuts simply can’t match. The bone also acts as a heat conductor, helping cook the meat more evenly.
Can I use this recipe for pulled pork sandwiches?
After cooking, simply shred the meat with two forks and mix it with some of the cooking juices. For extra flavor, add a splash of the apple cider vinegar mixture. This works perfectly for sandwiches, tacos, or even loaded baked potatoes. The slow cooking ensures maximum tenderness for pulling.
What’s the best way to crisp the edges after crock pot cooking?
Transfer the cooked roast to a baking sheet and broil on high for 5-7 minutes until the edges are golden and crispy. Keep a close eye on it to prevent burning. The high heat concentrates the surface moisture and caramelizes the sugars for that perfect texture. This step is what transforms good meat into exceptional meat.
How do I adjust this recipe for a smaller crock pot?
For a 4-quart crock pot, reduce the roast to 4 pounds and cut all other ingredients by 25%. The key is maintaining proper spacing—never overcrowd. If you must use a smaller pot, cook on high heat for 6 hours instead of low, but monitor closely to prevent drying. The bone-in cut actually works better in smaller pots because it helps conduct heat more efficiently.
Can I make this ahead for meal prep?
Yes! Cook the meat as directed, then let it cool completely before storing in airtight containers with some of the cooking juices. It keeps well in the fridge for 5 days or can be frozen for 3 months. The flavor actually improves over time as the meat continues to tenderize. Reheat gently in the microwave or oven to maintain moisture. Perfect for busy weeknights!

- Baked Potatoes in Crock Pot Recipe: Buttery Interiors and Crispy Top Magic - November 1, 2026
- Braised Beef Short Ribs Recipe: Crock Pot Fall-Off-Bone Magic in 6 Hours - November 1, 2026
- Crock Pot Cocoa Recipe: Velvety Warmth With Hidden Spice Magic - November 1, 2026