
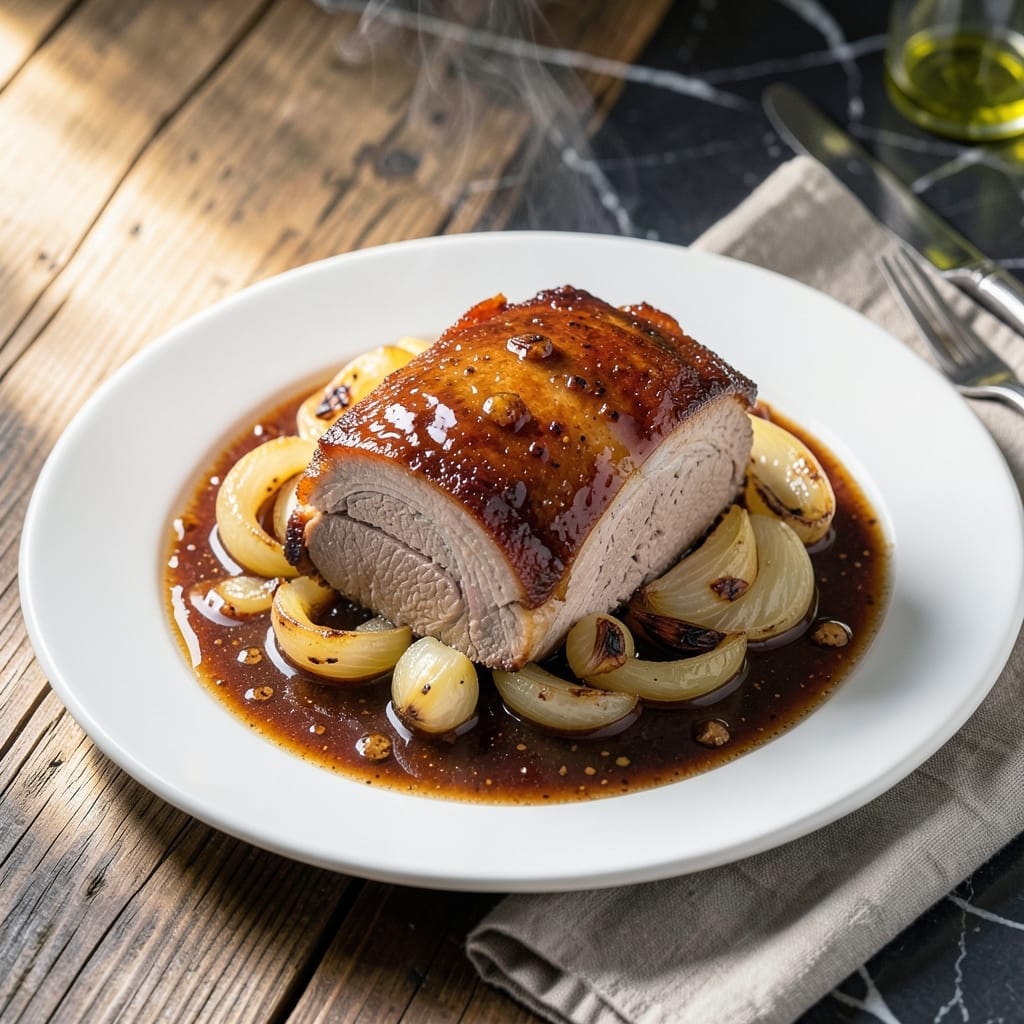
This crock pot method transforms a simple Boston pork roast into fall-apart tender perfection with almost no effort. The slow cooker works its magic over several hours, breaking down the meat into succulent pulls that require nothing more than a fork to shred.
I’ve refined this approach to ensure the pork emerges juicy every time, with a rich, savory depth that comes from a carefully balanced blend of seasonings. The hands-off nature means you can prep it in the morning and return to a meal ready to serve.
What you’ll get is meat so tender it melts in your mouth, infused with the flavors of garlic, onion, and herbs. It’s ideal for sandwiches, tacos, or served alongside classic sides like mashed potatoes or roasted vegetables.
Set it, forget it, and let the crock pot do the work. Dinner will be waiting when you are.
Ingredients for Boston Pork Roast Crock Pot
Pantry staples and a pork roast make this hands-off meal come together effortlessly.
| Ingredient | Amount | Notes |
|---|---|---|
| Boston Pork Roast 🥩 | 3 lb | Bone-in or boneless |
| Yellow Onion 🧅 | 1 whole | Large, quartered |
| Garlic Cloves 🧄 | 6 cloves | Peeled, smashed |
| Chicken Broth 🍲 | 1 cup | Low-sodium preferred |
| Apple Cider Vinegar 🍏 | 2 tbsp | Balances richness |
| Brown Sugar 🍚 | 2 tbsp | Light or dark |
| Dried Thyme 🌿 | 1 tsp | Or 1 tbsp fresh |
| Dried Rosemary 🌿 | 1 tsp | Crushed between fingers |
| Bay Leaves 🍃 | 2 whole | Remove before serving |
| Salt 🧂 | 1 tsp | Kosher or sea salt |
| Black Pepper 🌶️ | ½ tsp | Freshly ground |
| Olive Oil 🫒 | 1 tbsp | For searing pork |
The pork roast is the star—look for a bone-in Boston butt at Costco or your butcher (about 3 lbs feeds four generously). Boneless works too, but bone-in adds more flavor to the broth. Check for good marbling (those white fat streaks), which keeps the meat juicy as it cooks low and slow. Most grocery stores carry this cut under ‘pork shoulder’ too.
No chicken broth? Water with a bouillon cube does the trick. Swap apple cider vinegar for white vinegar or lemon juice—just use half the amount since they’re stronger. Brown sugar can be honey or maple syrup (add a splash more liquid to balance). Fresh herbs? Use triple the amount of dried, but tie them in cheesecloth for easy removal.
Leftovers keep beautifully—shredded pork stays moist for 4-5 days in the fridge. Freeze in portions for 3 months (perfect for quick tacos later). The cooking liquid makes killer gravy—just skim off the fat first (worth the extra minute).
Why You’ll Love This Recipe
- Set and Forget: I dump everything in the crock pot before work and come home to fall-apart tender pork.
- Garlic-Apple Depth: The garlic cloves and apple cider vinegar create this rich, tangy flavor that soaks into every bite.
- Feeds the Crew: One roast plus broth makes enough for sandwiches, tacos, and a proper Sunday dinner.
- Stretches the Budget: A Boston pork roast is cheap, and the slow cooker turns it into something special. Honestly, my wallet and my family both win.
Step-by-Step Instructions for Boston Pork Roast Crock Pot
Here’s how I achieve fall-apart tender results with minimal hands-on time.
Step 1: Sear the Pork for Maximum Flavor
Heat the 1 tbsp Olive Oil in a large skillet over medium-high heat until it shimmers. Pat the 3 lb Boston Pork Roast dry with paper towels, then season all over with the 1 tsp Salt and 0.5 tsp Black Pepper.
Sear the pork on all sides for 2-3 minutes per side until deep golden brown. This step builds a flavorful crust that will translate into richer taste in the final dish. Don’t rush—you want that beautiful color on every surface.
Step 2: Layer Aromatics in the Slow Cooker
Place the 1 whole Yellow Onion (quartered) and 6 cloves Garlic Cloves (smashed) in the bottom of your crock pot. These will infuse the cooking liquid with sweet, pungent flavor as the pork cooks low and slow.
Pour in the 1 cup Chicken Broth, then add the 2 tbsp Apple Cider Vinegar, 2 tbsp Brown Sugar, 1 tsp Dried Thyme, 1 tsp Dried Rosemary, and 2 whole Bay Leaves. The vinegar balances the richness while the sugar helps create that beautiful caramelized exterior.
Step 3: Cook Low and Slow to Tender Perfection
Place the seared pork roast on top of the aromatics in the crock pot. Cover and cook on low heat for 8-10 hours or on high heat for 5-6 hours. The long cooking time transforms the tough cuts into buttery tenderness.
You’ll know it’s ready when the pork shreds easily with a fork and reaches an internal temperature of 195-200°F. Resist the urge to lift the lid during cooking—every time you do, you add 20-30 minutes to your cook time.
Step 4: Shred and Serve with Cooking Juices
Remove the 2 whole Bay Leaves and discard. Transfer the pork to a cutting board and shred it using two forks. The meat should pull apart with almost no resistance—that’s how you know you’ve achieved that promised tenderness.
Return the shredded pork to the crock pot and toss it in the cooking juices. Let it sit for 10-15 minutes to soak up all that flavor. The liquid should be rich and slightly reduced, perfect for serving over the pork or as a light sauce. Serve immediately while hot.
Pro Tips For Making Boston Pork Roast Crock Pot
- Sear the Pork: I learned this the hard way—skipping the sear leaves the roast pale and flavorless. A quick 2-3 minutes per side in a hot pan with a little oil makes a real difference in the final dish.
- Slice the Onions: Sounds weird, but it works: thinly slice the yellow onion instead of chopping it. It melts into the broth better and gives you a sweeter, more integrated flavor in every bite.
- Skip the Overfill: Resist the urge to add extra liquid—stick to the 1-2 cups of chicken broth the recipe calls for. Too much and your pork will steam instead of braise, leaving it tough instead of tender.
- Use Fresh Garlic: After burning three batches with powdered garlic, I finally figured out fresh cloves are non-negotiable here. They hold up better during the long cook and give a brighter, more complex flavor.
Health Benefits of boston pork roast crock pot
Protein Powerhouse
This dish delivers a massive 45 grams of protein per serving from the pork, supporting muscle repair and growth. Protein is essential for maintaining healthy tissues and keeping you full longer. I notice I stay satisfied for hours after eating this. 💪
Rich in B Vitamins
The pork provides excellent amounts of vitamin B12, B6, and niacin, which help your body convert food into energy and support brain function. A 3-ounce serving covers about 30% of your daily B12 needs.
Iron Boost
Pork is a great source of heme iron, the type your body absorbs most easily. This helps prevent fatigue and supports healthy blood cells. The 3 lb roast provides about 15% of your daily iron per serving, making it a smart choice for energy levels.
Low-Carb Friendly
With minimal added sugars (2 tbsp brown sugar for the entire roast), this dish fits well into low-carb diets. The natural fats in pork shoulder provide sustained energy without spiking blood sugar. Perfect for keto or other low-carb lifestyles.
Collagen Benefits
Slow cooking breaks down collagen in the pork into gelatin, which supports joint health and skin elasticity. The 8-10 hour cook time maximizes this benefit, giving you tender meat packed with natural nutrients.
Minimal Additives
This recipe uses whole-food ingredients with no preservatives. The simple spice blend (thyme, rosemary, bay leaves) adds flavor without artificial chemicals. I appreciate knowing exactly what’s in my meal. 🌟
Nutrition Facts
Frequently Asked Questions
Do I need to sear the pork first?
Searing is highly recommended for the best flavor. It creates a caramelized crust that enhances the final dish. Skip this step only if you’re short on time, but expect less depth in taste.
Can I use a different cut of pork?
Pork shoulder or picnic roast work well as substitutes. Avoid lean cuts like tenderloin—they’ll dry out during the long cook time. Stick with fatty, tough cuts for the best results.
How do I know when it’s done?
The pork is ready when it shreds easily with a fork. For foolproof results, use a meat thermometer—it should read 195-200°F internally. Don’t rely on time alone.
Can I cook this on high for less time?
Yes, but texture suffers slightly. High heat for 5-6 hours works in a pinch, though low and slow (8-10 hours) yields the most tender, juicy results.

- 6 Oz Chocolate Chip Cookie Recipe: Perfectly Balanced Crispy Edges and Chewy Hearts - September 25, 2026
- 6-Inch Coffee Cake Recipe: Vanilla Bean Swirls and Buttery Streusel Topping - September 25, 2026
- 1 Hour Soup Recipe: Velvety Richness Without the Wait - September 25, 2026