
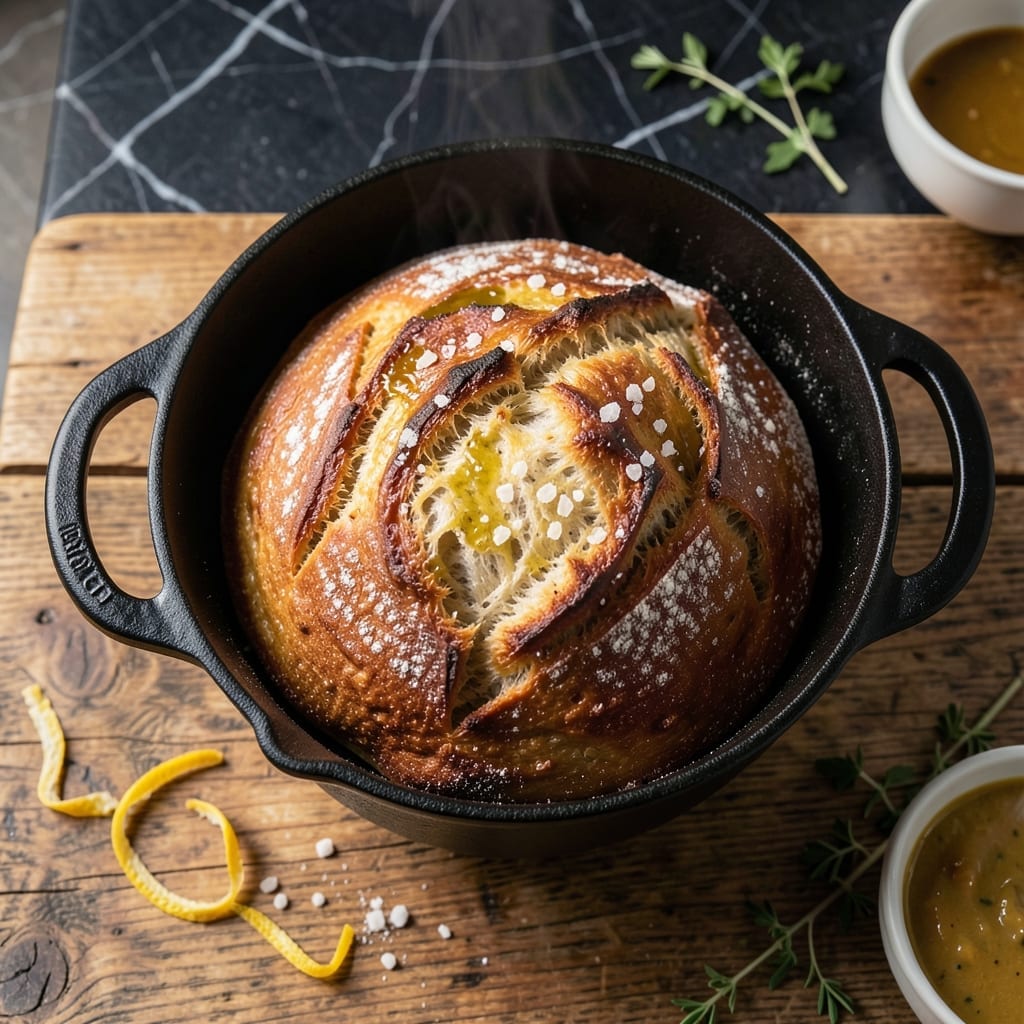
There’s something magical about pulling a golden loaf from a Dutch oven, its crust crackling with promise. This method transforms simple dough into artisanal bread with minimal effort.
The heavy pot traps steam, creating a crusty exterior while keeping the interior tender and airy. No fancy equipment or years of practice required—just a pot, an oven, and a little patience.
You’ll achieve bakery-quality results at home, with a deep golden crust and a soft, open crumb. The process is straightforward, but the outcome feels like a triumph every time.
Perfect for beginners or seasoned bakers looking for a foolproof method. Here’s how to make it happen.
Ingredients for Bread Baked in a Pot
Simple flour, yeast, water, and patience transform into artisanal bread with golden crust.
| Ingredient | Amount | Notes |
|---|---|---|
| Bread Flour 🌾 | 3 ½ cups | High-protein for chewy texture |
| Active Dry Yeast 🍞 | 2 ¼ tsp | Instant yeast works too |
| Warm Water 💧 | 1 ½ cups | 110°F, not hotter |
| Kosher Salt 🧂 | 2 tsp | Diamond Crystal preferred |
| Granulated Sugar 🧈 | 1 tsp | Feeds the yeast |
| Olive Oil 🫒 | 2 tbsp | For bowl lubrication |
| All-Purpose Flour 🌾 | ½ cup | For dusting surface |
| Cornmeal 🌽 | 2 tbsp | For pot dusting |
| Ice Cubes ❄️ | 4 pieces | For steam creation |
| Unsalted Butter 🧈 | 1 tbsp | Optional for crust |
The flour is everything here. King Arthur Bread Flour is my go-to for its consistent high protein content, which gives that chewy, bakery-style crumb. Yeast needs to be fresh—check the expiration date. Warm water should feel like a baby’s bath (around 110°F), any hotter and you’ll kill the yeast. I buy my yeast in bulk from Costco and store it in the freezer.
No bread flour? All-purpose plus 1 tbsp vital wheat gluten per cup gets you close. Instant yeast can replace active dry at the same ratio—just skip the proofing step. Sugar can be swapped with honey or maple syrup at the same amount. If your Dutch oven is small, halve the recipe and bake in two batches.
The dough rests overnight in the fridge (up to 48 hours), which develops flavor. Baked loaves keep at room temp for 2 days, wrapped tightly. Slice and freeze for up to 3 months. Always let the pot cool completely before cleaning.
Why You’ll Love This Recipe
- One Pot Wonder: I just mix flour, yeast, water, salt, and sugar, dump it in a pot, and let the oven do the work.
- Crusty Perfection: That golden, crackly crust with a soft, airy center? Pure satisfaction.
- Meals All Week: It’s my go-to for sandwiches, toast, or even croutons for salads.
- Budget Friendly: A few pantry staples and I’ve got fresh bread for days without spending much.
Step-by-Step Instructions for Bread Baked in a Pot
Master the technique of Dutch oven baking for artisanal results with a crisp crust.
Step 1: Activate the Yeast and Mix the Dough
In a large mixing bowl, whisk the 1.5 cups warm water with the 1 tsp granulated sugar until dissolved. Sprinkle the 2.25 tsp active dry yeast over the surface and let it sit for 5-10 minutes until the mixture becomes foamy and fragrant.
Add the 3.5 cups bread flour, 2 tsp kosher salt, and 2 tbsp olive oil. Stir with a wooden spoon until a shaggy dough forms. The dough will be sticky but should pull away from the sides of the bowl. This hydration level ensures a chewy interior.
Step 2: Knead and First Rise
Turn the dough onto a surface lightly dusted with the 0.5 cup all-purpose flour. Knead for 8-10 minutes until smooth and elastic. The dough should spring back slowly when pressed with a finger, indicating proper gluten development.
Lightly oil the mixing bowl with some of the 2 tbsp olive oil, place the dough inside, and turn to coat. Cover with a damp towel and let rise in a warm place for 1-2 hours or until doubled in volume. The dough should look puffy with visible air pockets.
Step 3: Shape and Second Rise
Punch down the risen dough to release air, then shape it into a round loaf. Place the dough on a sheet of parchment paper and let it rise again for 30-45 minutes while you preheat your oven to 450°F with a Dutch oven inside.
The second rise allows the dough to relax and expand slightly before baking. The parchment paper makes it easier to transfer the dough into the hot Dutch oven without deflating it.
Step 4: Bake with Steam
Carefully remove the preheated Dutch oven from the oven. Dust the bottom with the 2 tbsp cornmeal to prevent sticking, then transfer the dough and parchment into the pot. Add the 4 pieces ice cubes around the dough for steam.
Cover with the lid and bake for 30 minutes. Then remove the lid and bake for an additional 15-20 minutes until the bread is deep golden brown and sounds hollow when tapped on the bottom. The steam from the ice cubes creates a crisp, glossy crust.
Step 5: Finish and Cool
Optional: For extra richness, brush the top with the 1 tbsp unsalted butter immediately after removing the bread from the oven. Transfer the bread to a wire rack and let it cool for at least 1 hour before slicing.
Cooling is crucial—it allows the crumb structure to set fully. The bread should have a thick, crackly crust and an open, airy interior. Slice with a serrated knife for clean cuts without compressing the loaf.
Pro Tips For Making Bread Baked In A Pot
- Preheat the Pot: Get your Dutch oven screaming hot for at least 20 minutes at 475°F before adding the dough—I learned this the hard way after pulling out pale, undercooked loaves.
- Use Room Temp Water: Aim for 105-110°F for your water, or it’ll either kill the yeast or leave it sluggish. My grandmother swore by a wrist test: it should feel warm but not hot.
- Don’t Overflour: Resist the urge to dump extra flour when shaping; just enough to prevent sticking keeps the crust from turning into a brick.
- Score the Dough: A quick slash with a razor before baking lets the bread expand properly—skip it and you’ll get a lopsided loaf that cracks where it wants.
Best Sauces and Condiments for This bread baked in a pot
Classic Herb Butter
Mix ½ cup softened unsalted butter with 1 tbsp fresh rosemary and 1 minced garlic clove. This compound butter melts beautifully over warm slices, adding rich herbal notes that complement the crust perfectly.
Balsamic Glaze
Drizzle with reduced balsamic vinegar (simmer ½ cup until syrupy). The sweet-tart contrast enhances the bread’s nutty flavor. I use Colavita balsamic for consistent quality. 💛
Honey Cinnamon Spread
Combine ¼ cup honey with ½ tsp cinnamon and a pinch of salt. Ideal for breakfast slices—the warmth of the bread makes the spread run slightly, infusing every bite.
Olive Oil Dip
Whisk ½ cup extra-virgin olive oil with 1 tsp flaky sea salt and black pepper. Perfect for tearing chunks of bread. I prefer California Olive Ranch for its fruity finish.
Spicy Harissa
Stir 2 tbsp harissa paste with 1 tbsp olive oil for a North African kick. The heat cuts through the bread’s richness, adding a smoky depth. 🌶️
Garlic Aioli
Blend ½ cup mayo with 2 garlic cloves and 1 tbsp lemon juice. This creamy, tangy spread pairs wonderfully with the crisp crust for dipping or sandwiches.
Nutrition Facts
Frequently Asked Questions
Why use a Dutch oven for baking bread?
The heavy pot traps steam, which creates a crispy crust while keeping the interior soft. It mimics professional bread ovens at home.
How do I know when the bread is done?
Look for a deep golden brown color and a hollow sound when tapped on the bottom. The internal temperature should reach 205-210°F.
Can I use all-purpose flour instead of bread flour?
Yes, but add 1 tbsp vital wheat gluten per cup to boost protein content. This helps achieve a chewier texture similar to bread flour.
What if my dough doesn’t rise?
Check your yeast expiration date and water temperature—it should be 110°F. If the environment is too cold, place the bowl in a warm spot.

- 6 Oz Chocolate Chip Cookie Recipe: Perfectly Balanced Crispy Edges and Chewy Hearts - September 25, 2026
- 6-Inch Coffee Cake Recipe: Vanilla Bean Swirls and Buttery Streusel Topping - September 25, 2026
- 1 Hour Soup Recipe: Velvety Richness Without the Wait - September 25, 2026